Behind the Camera- and In Front of the Camera: Making my online needle felting workshop

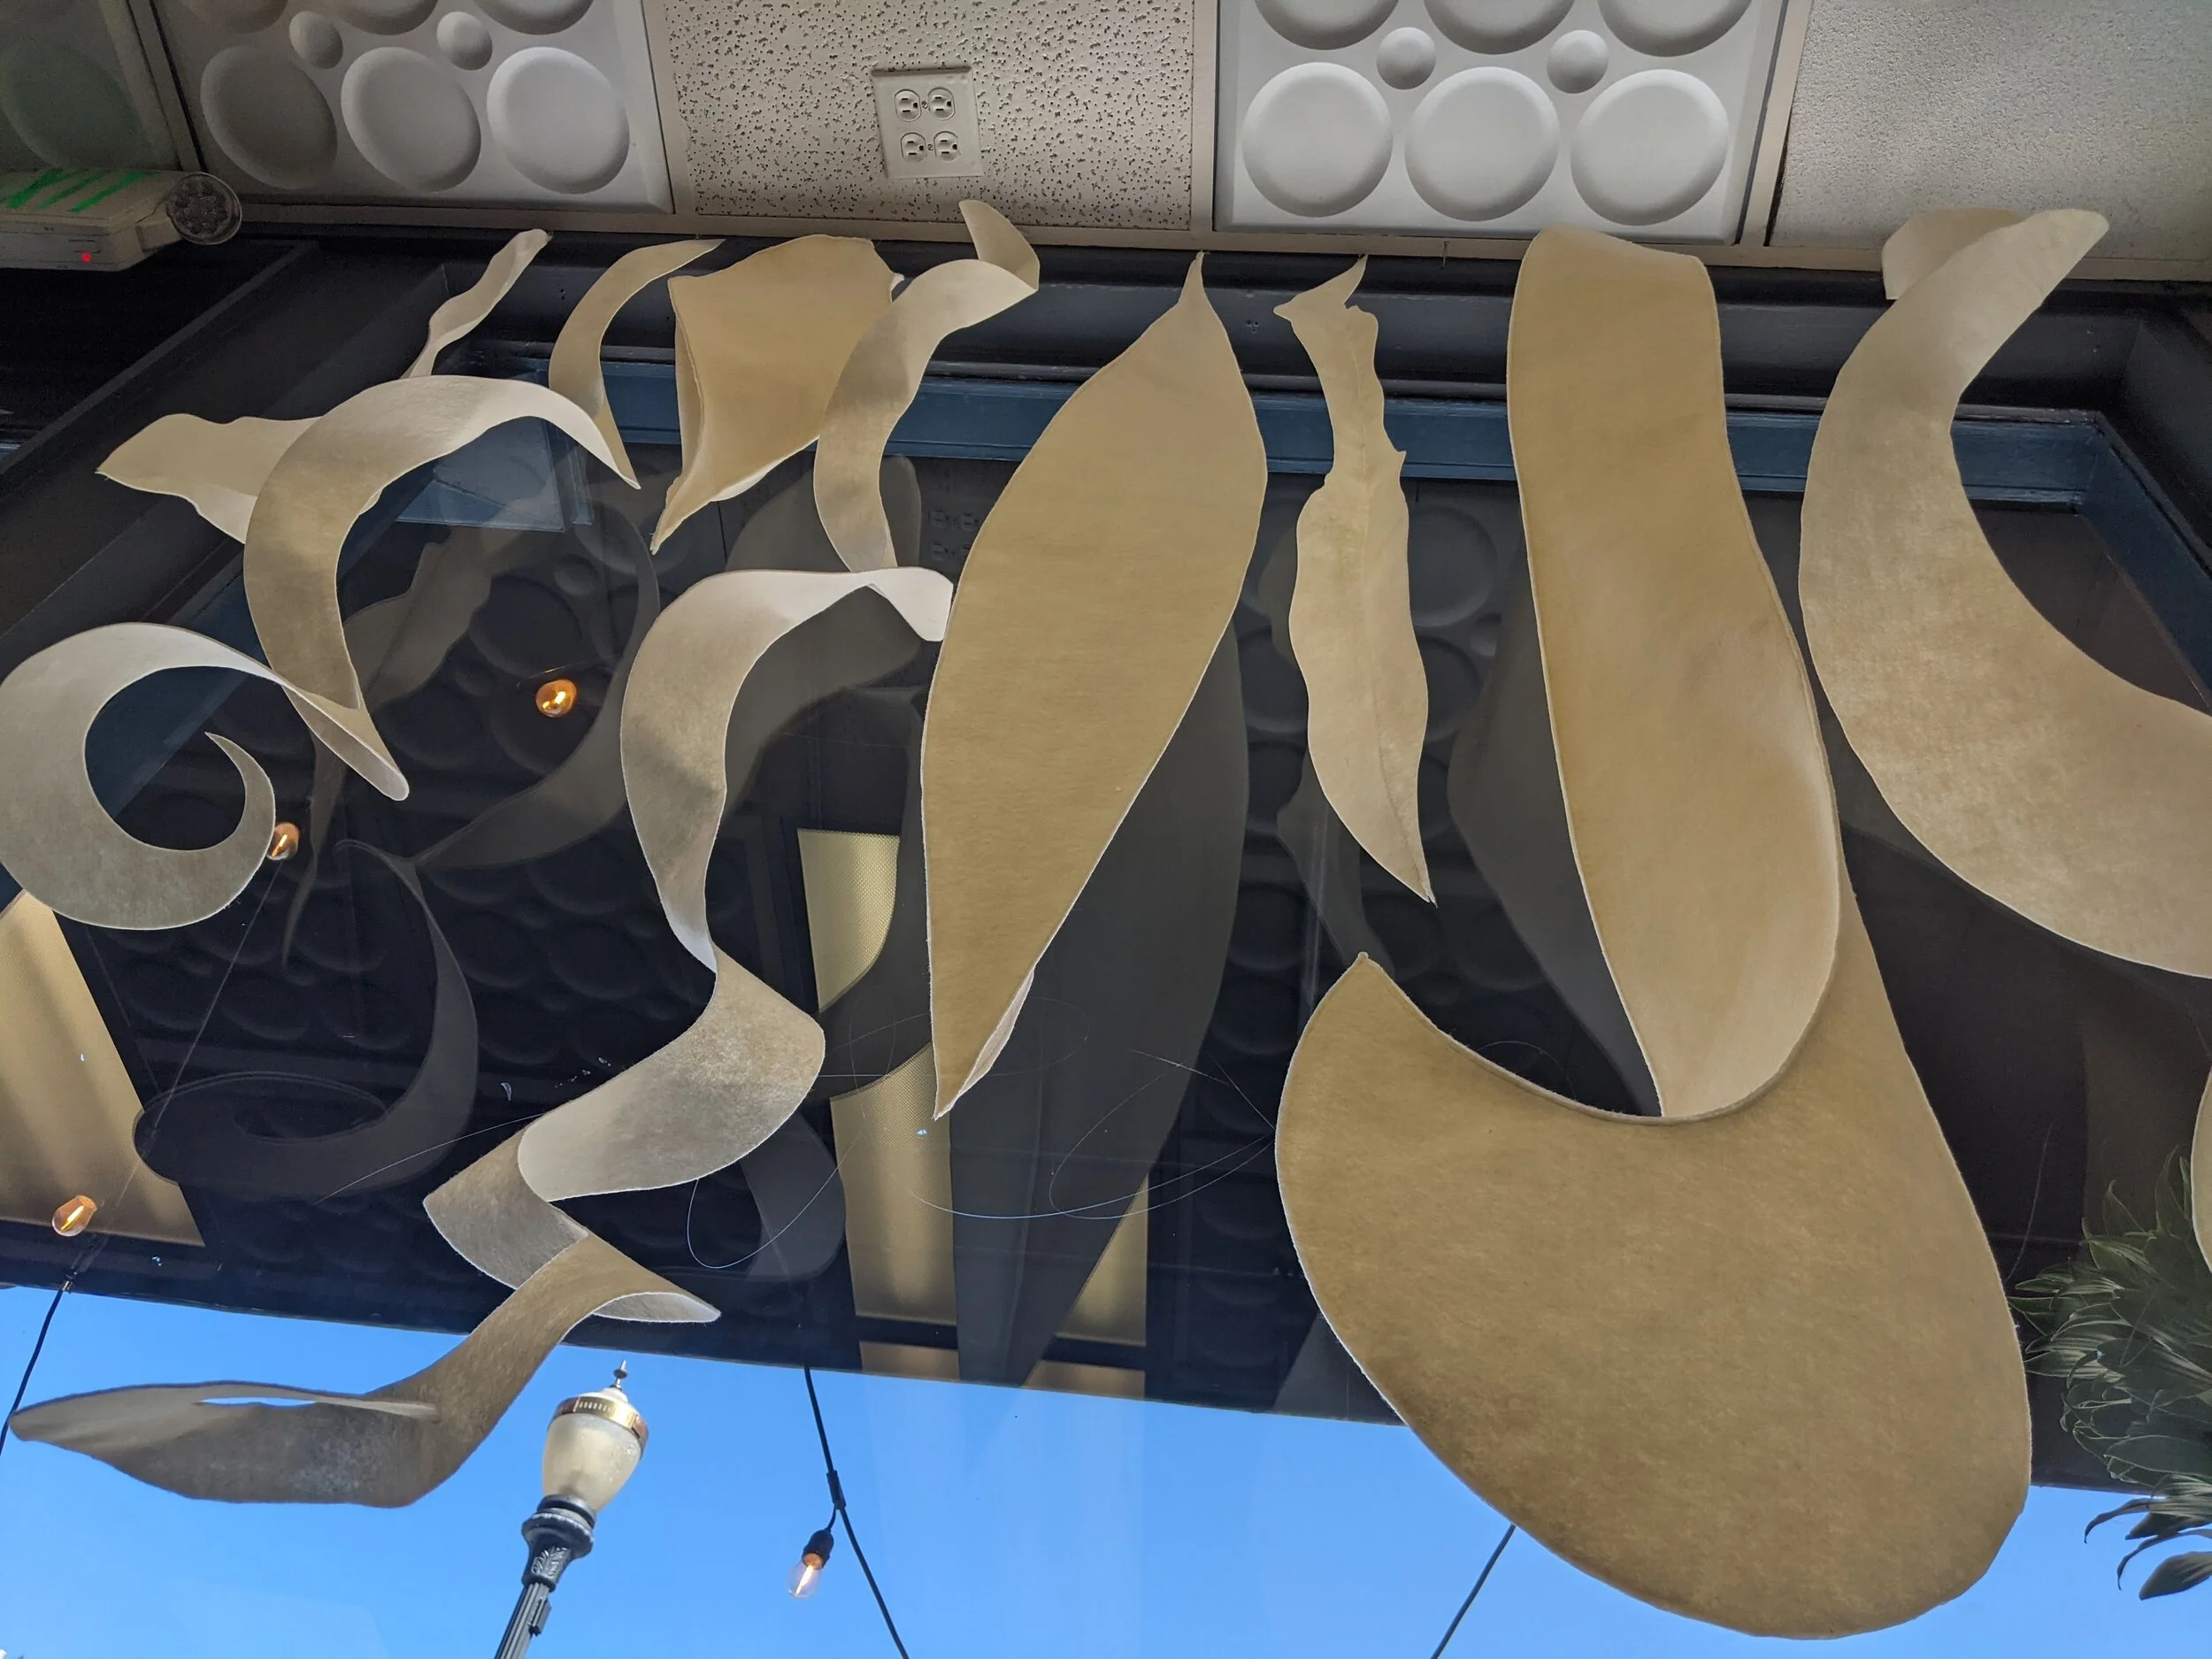
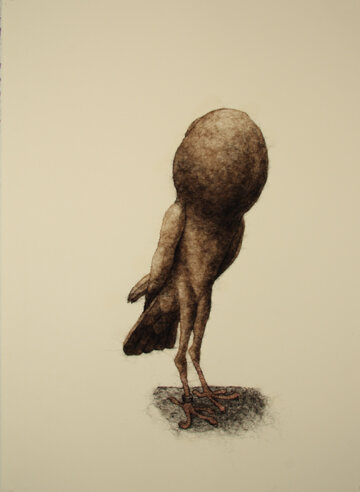
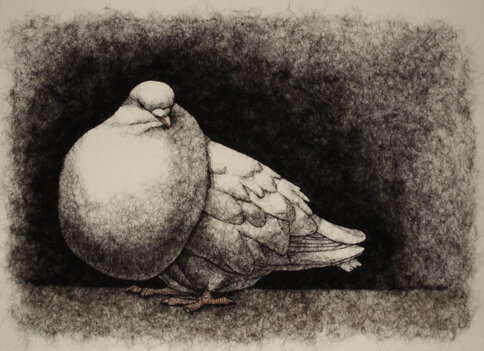
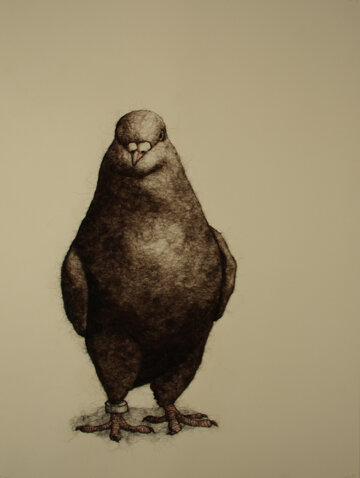
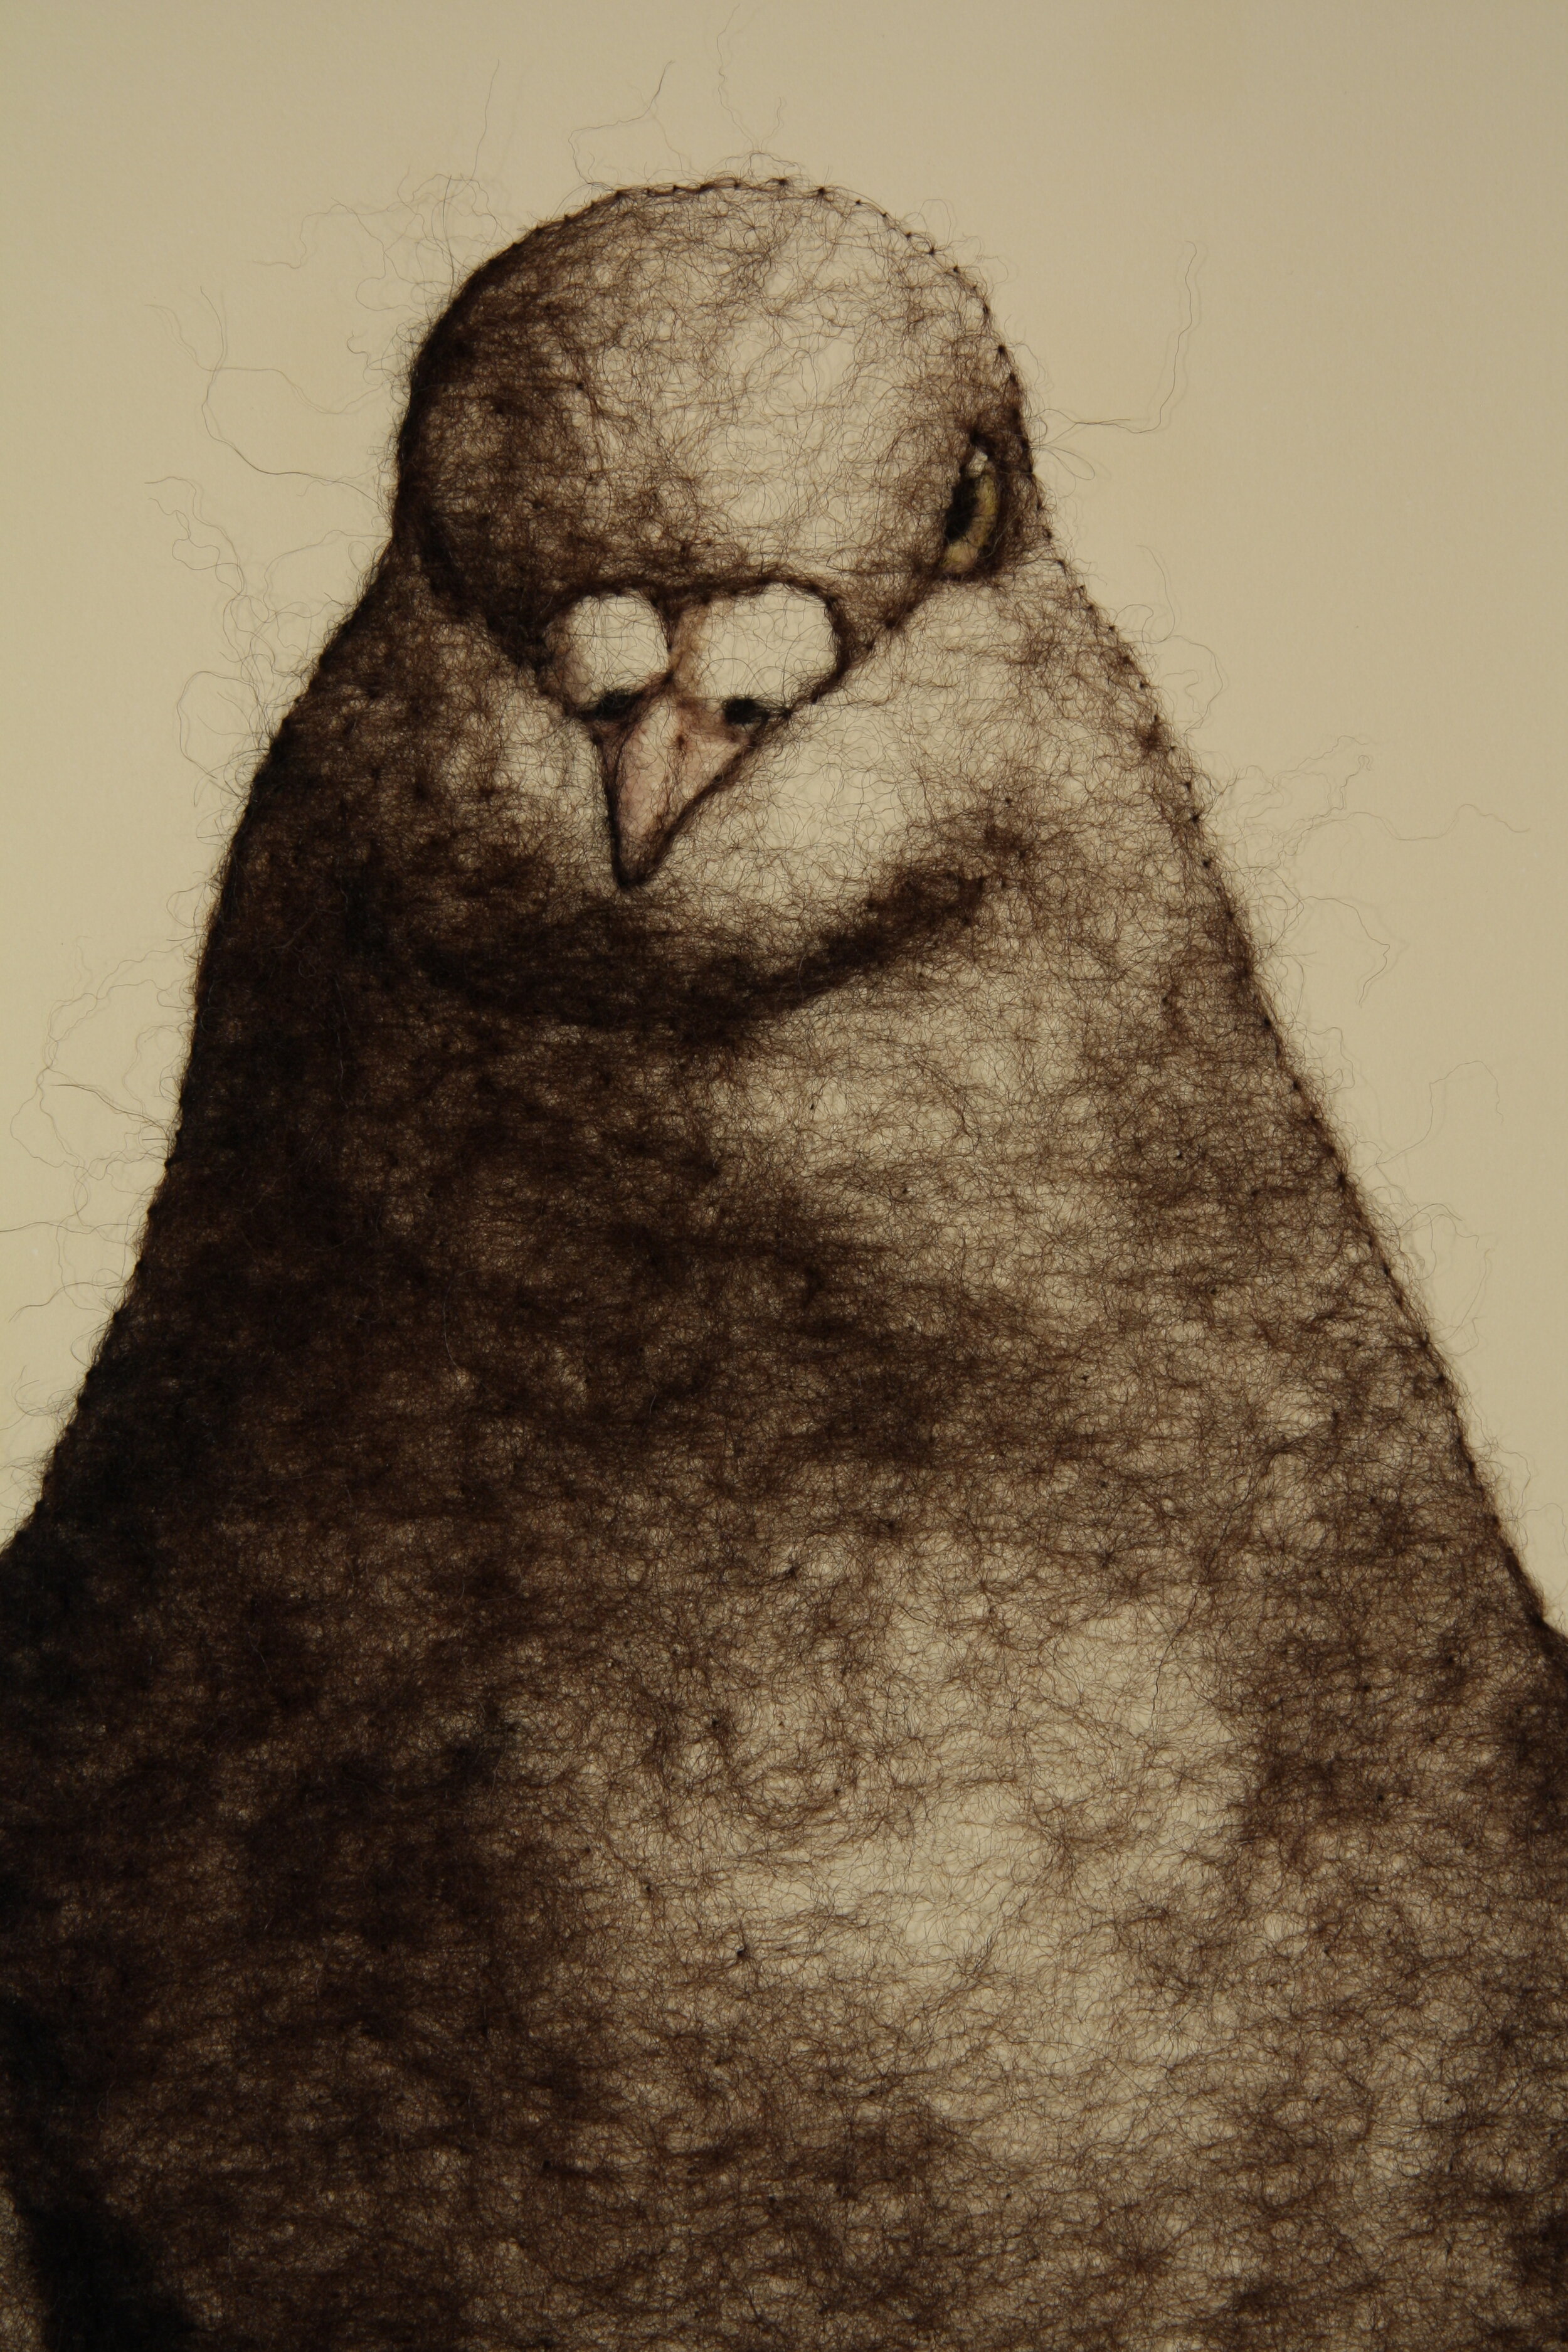
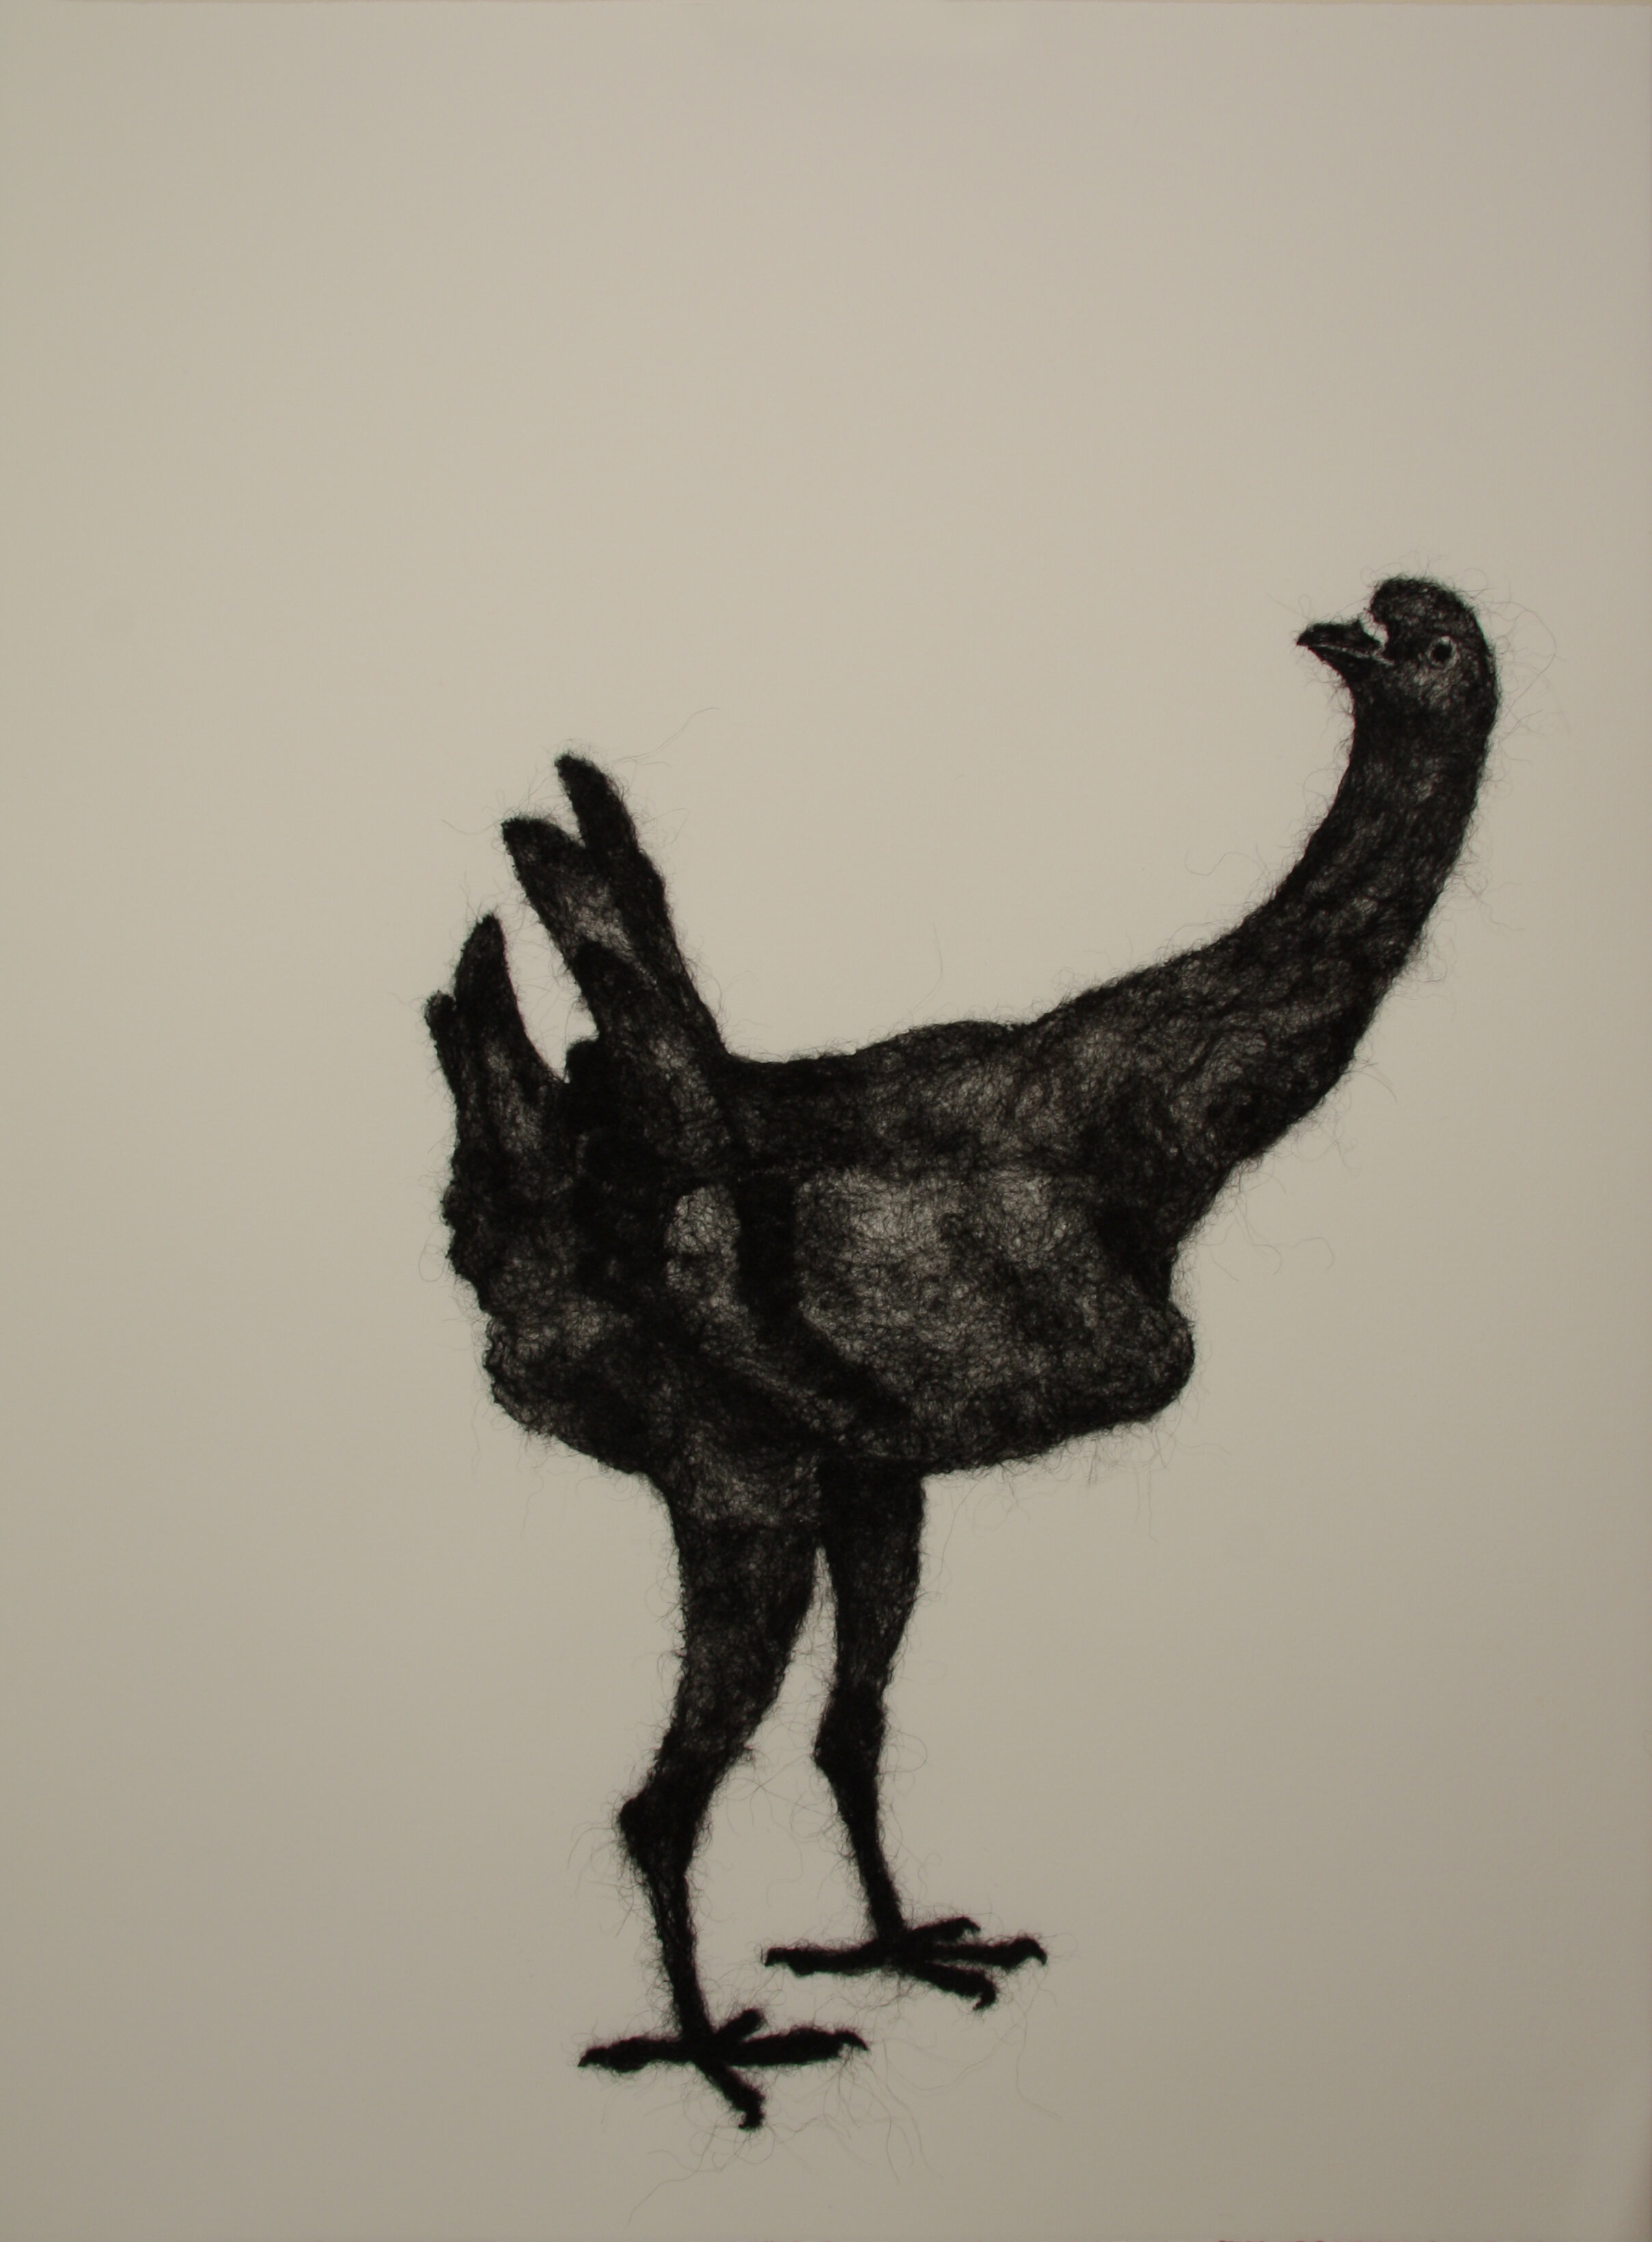
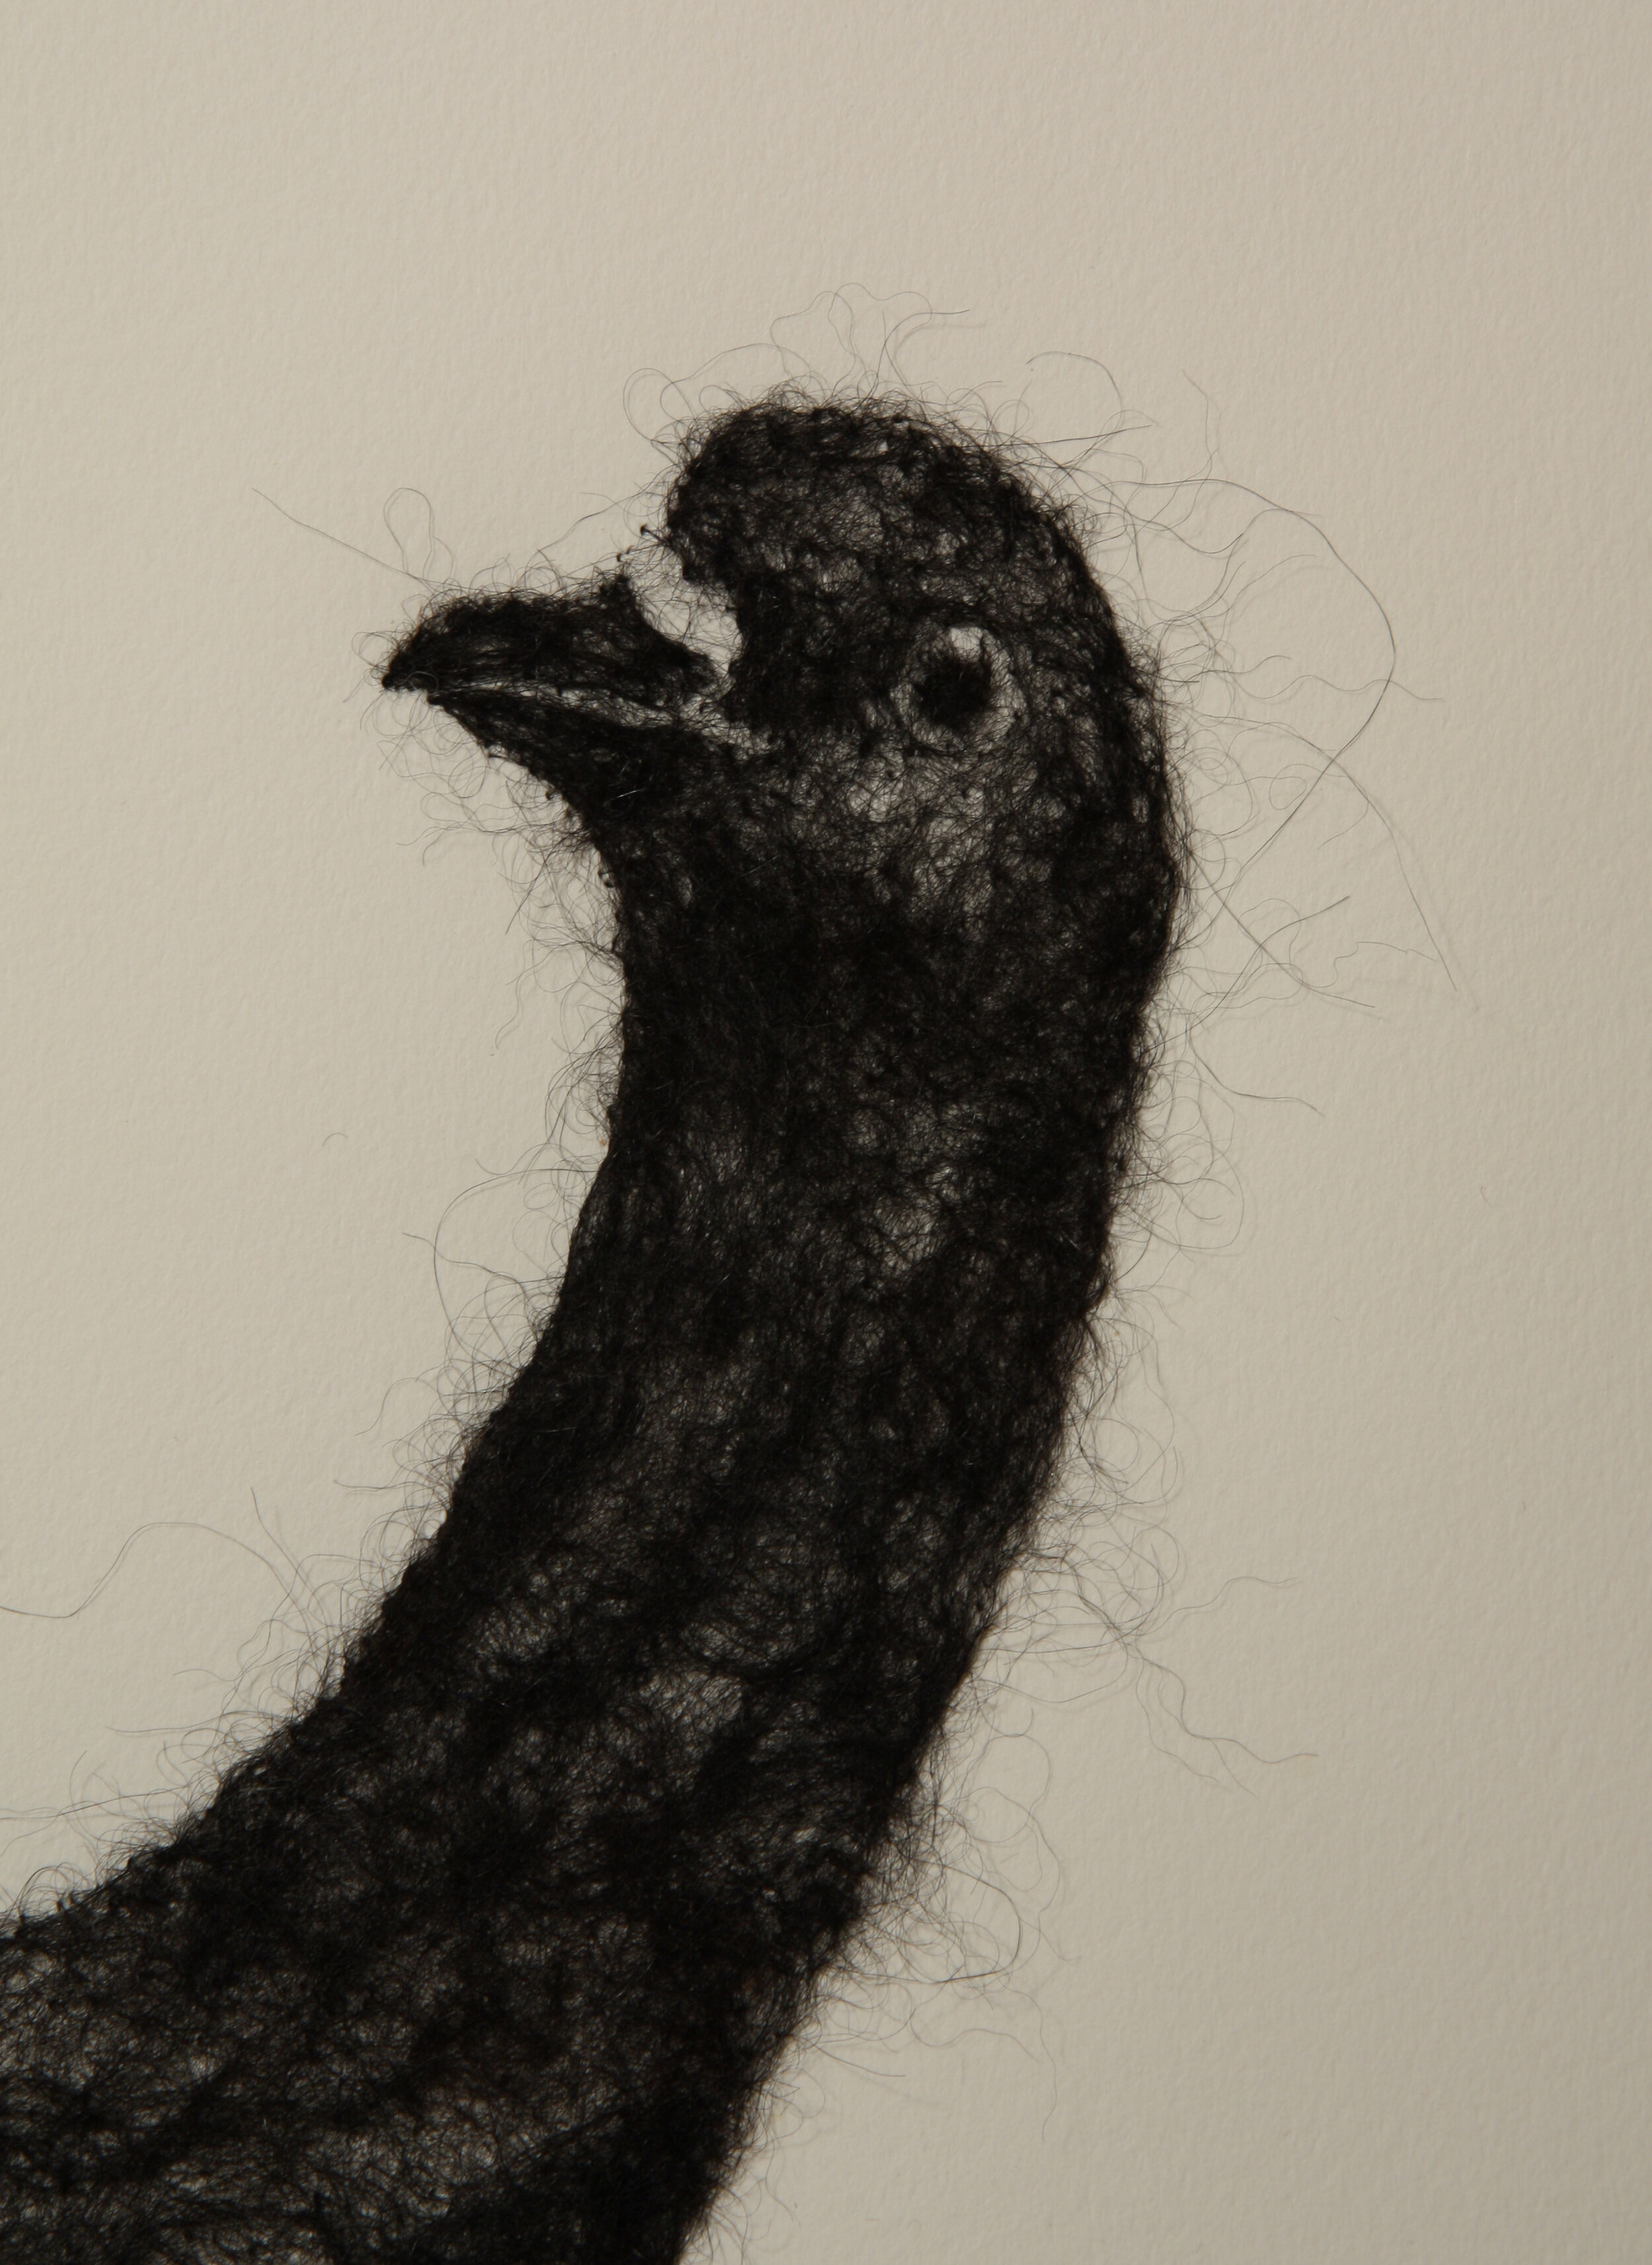
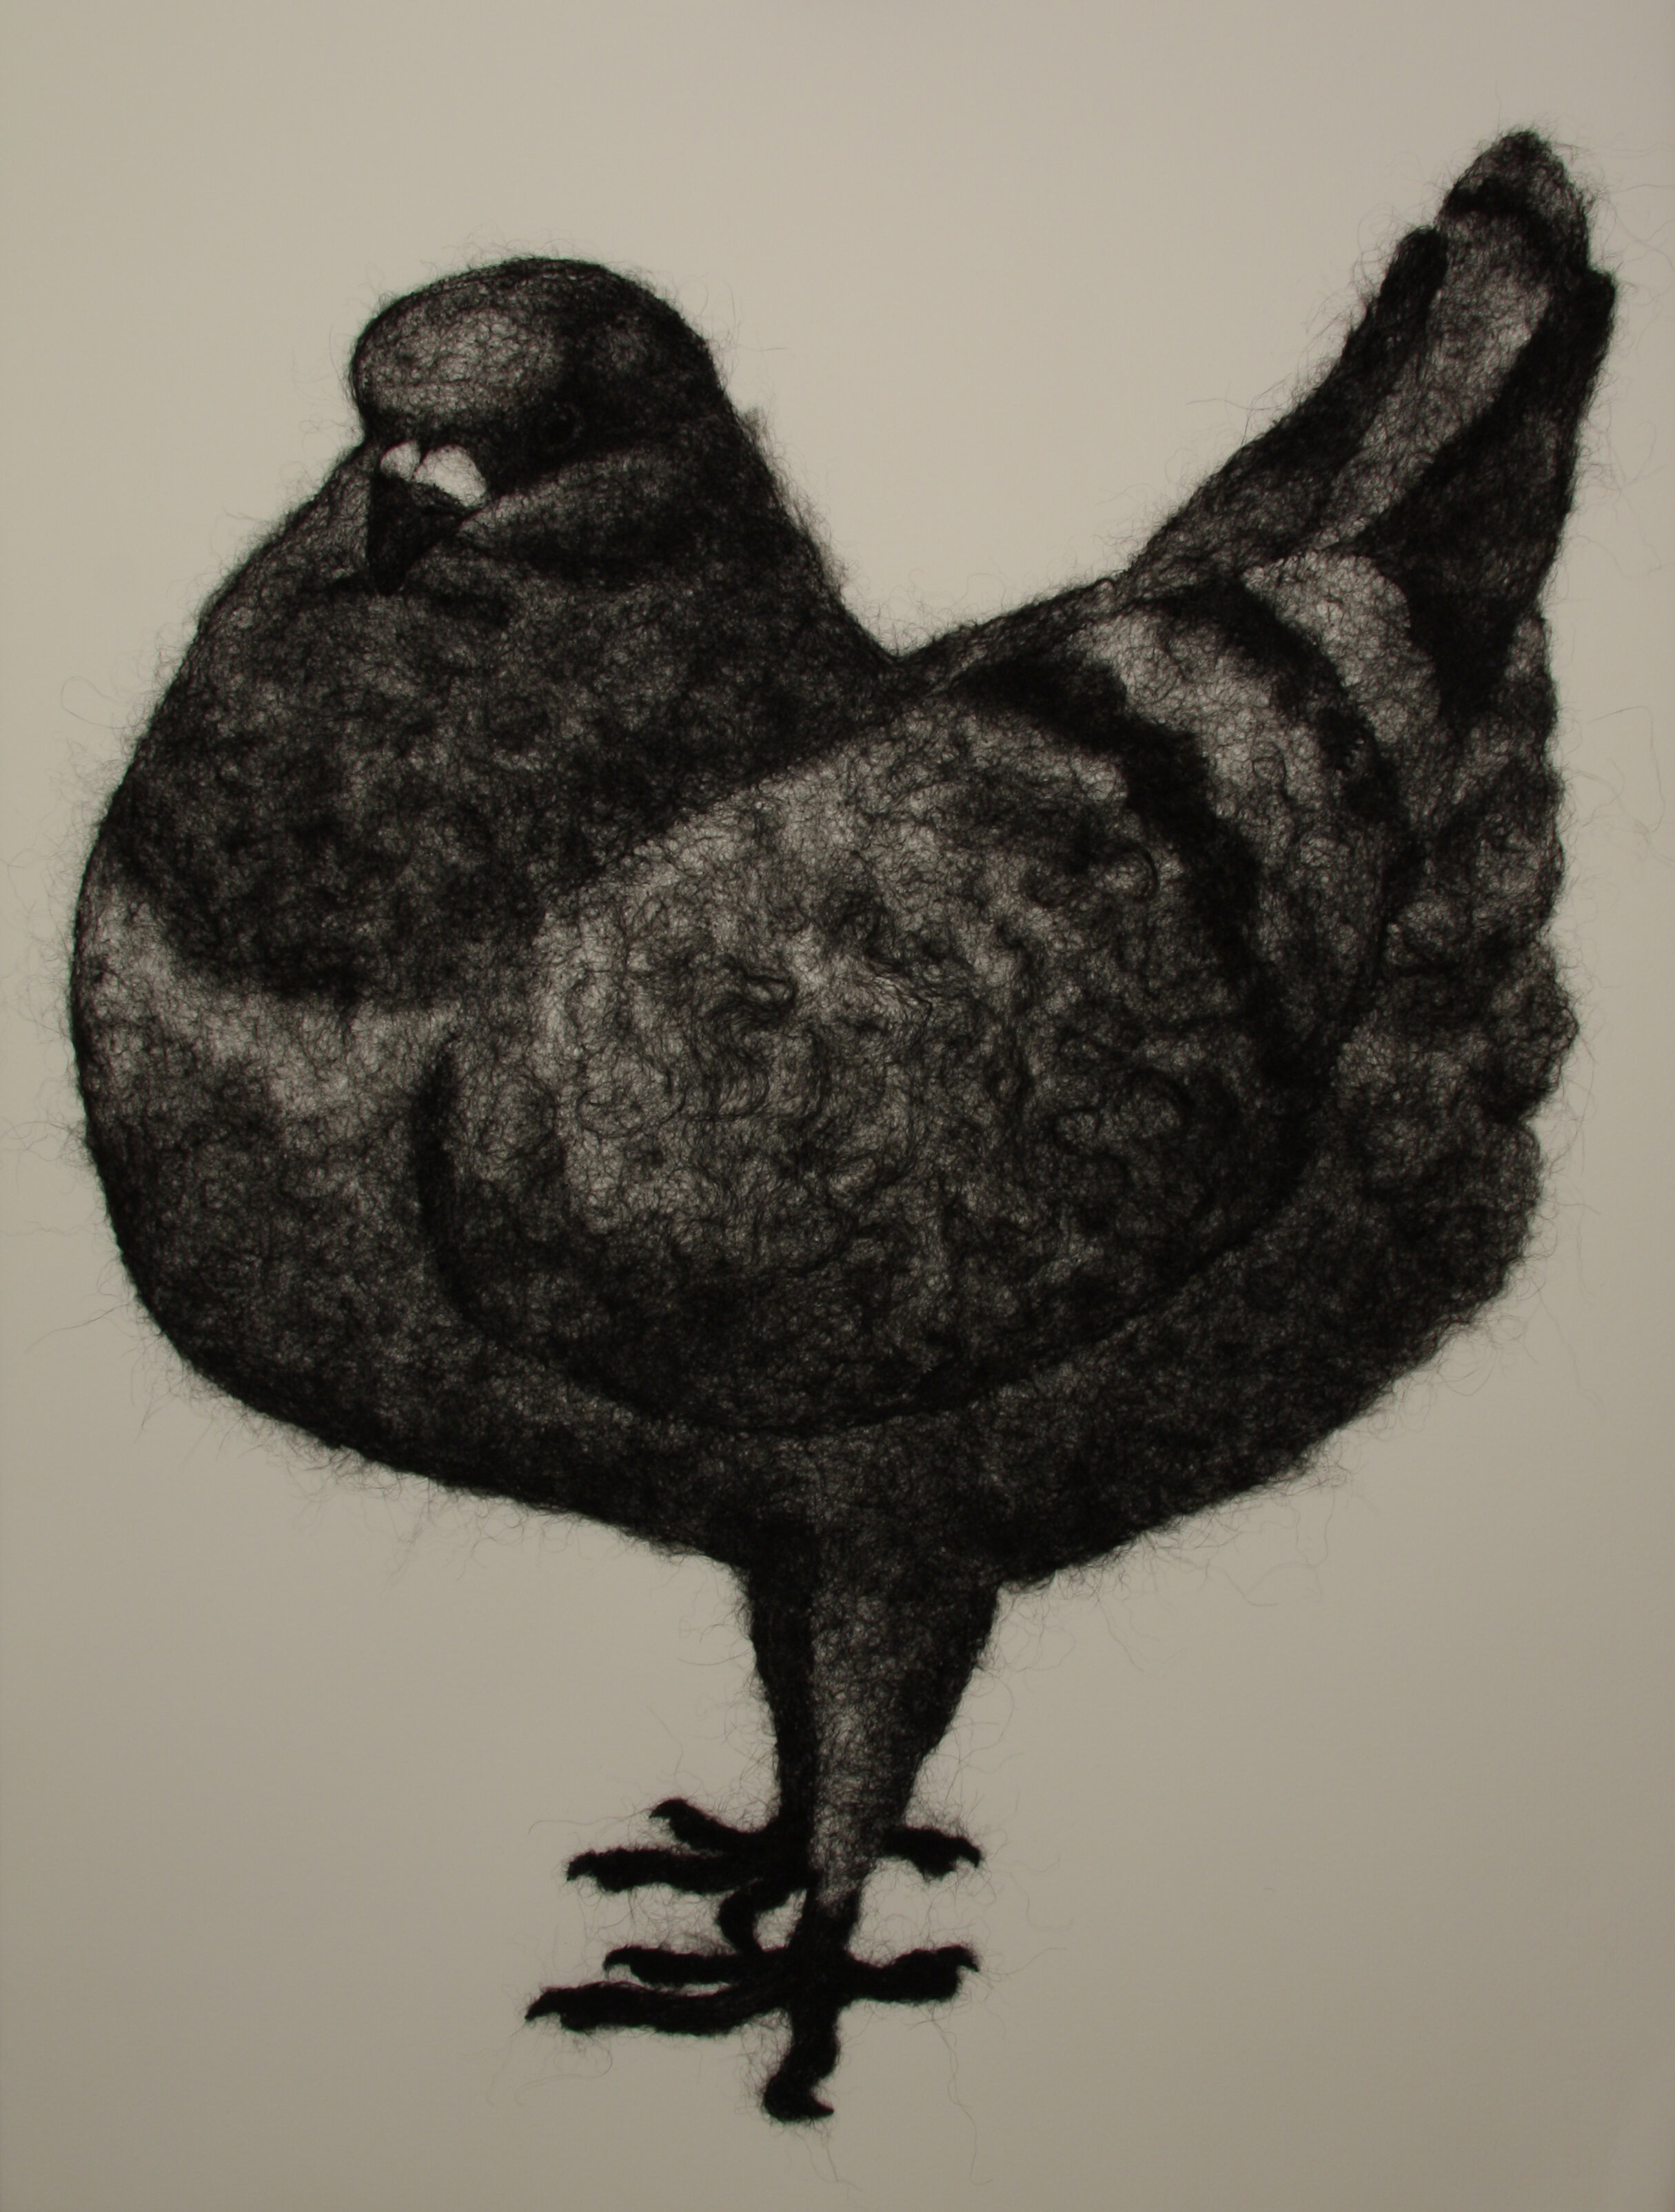
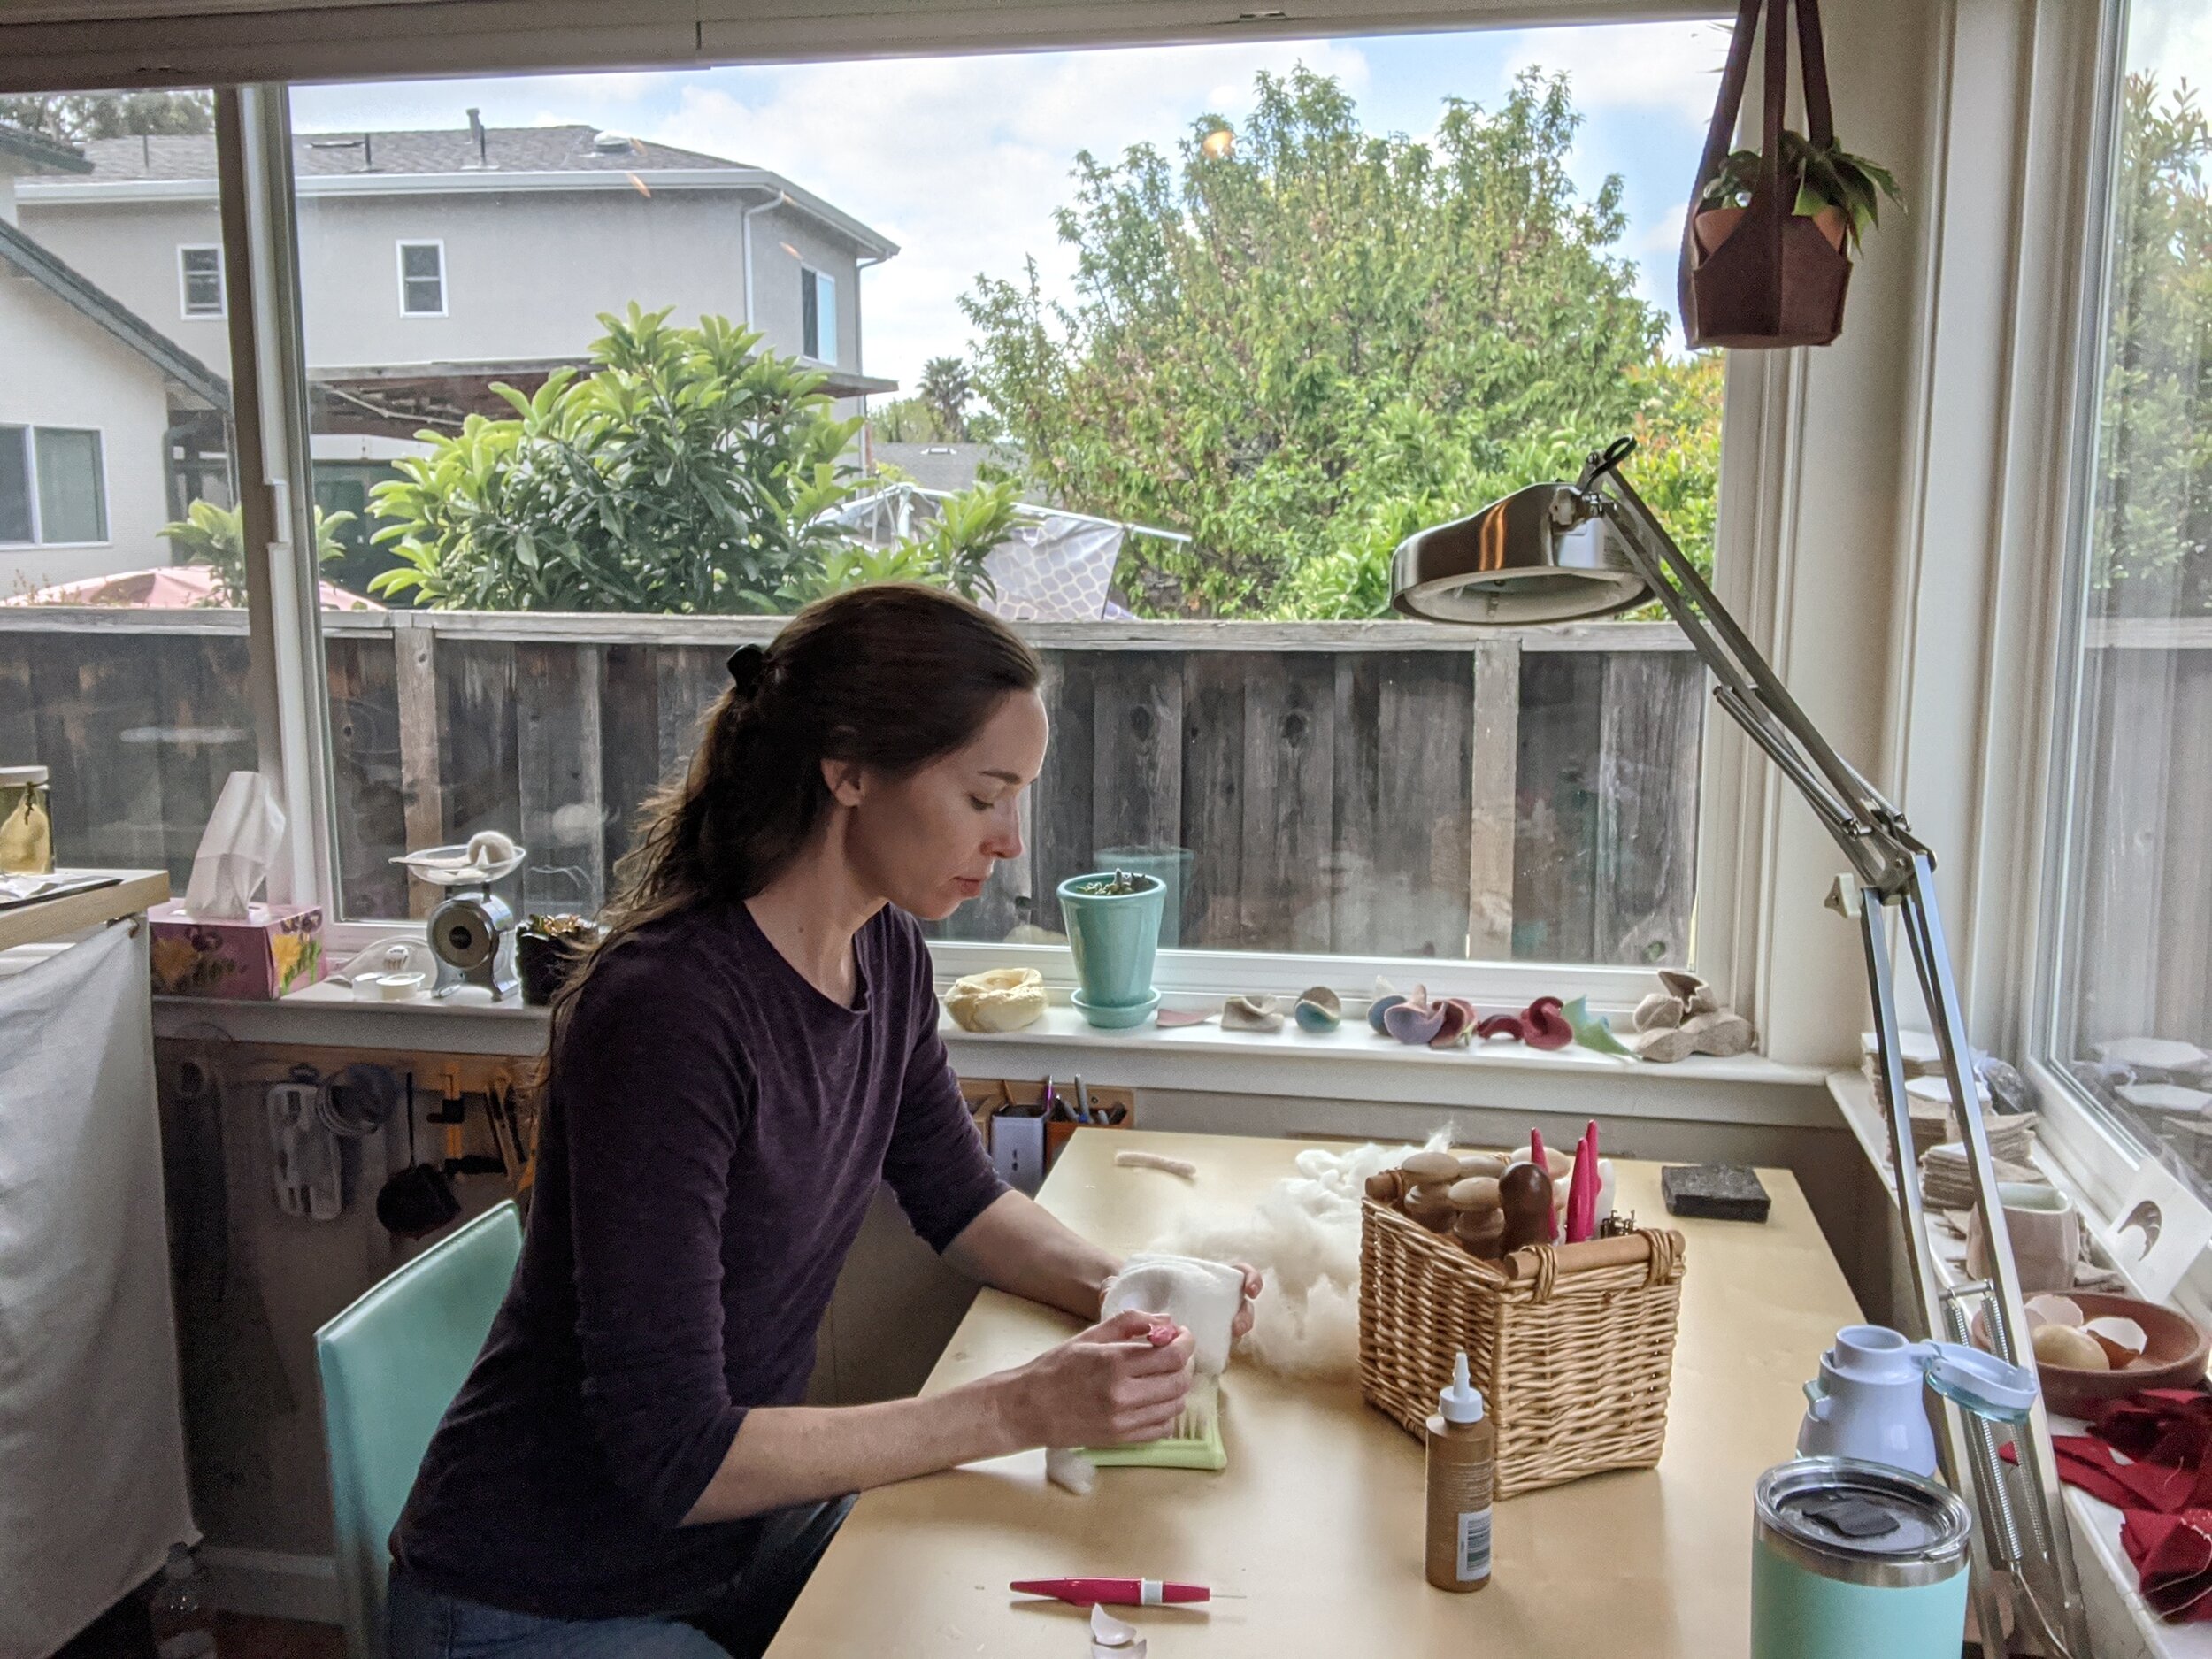
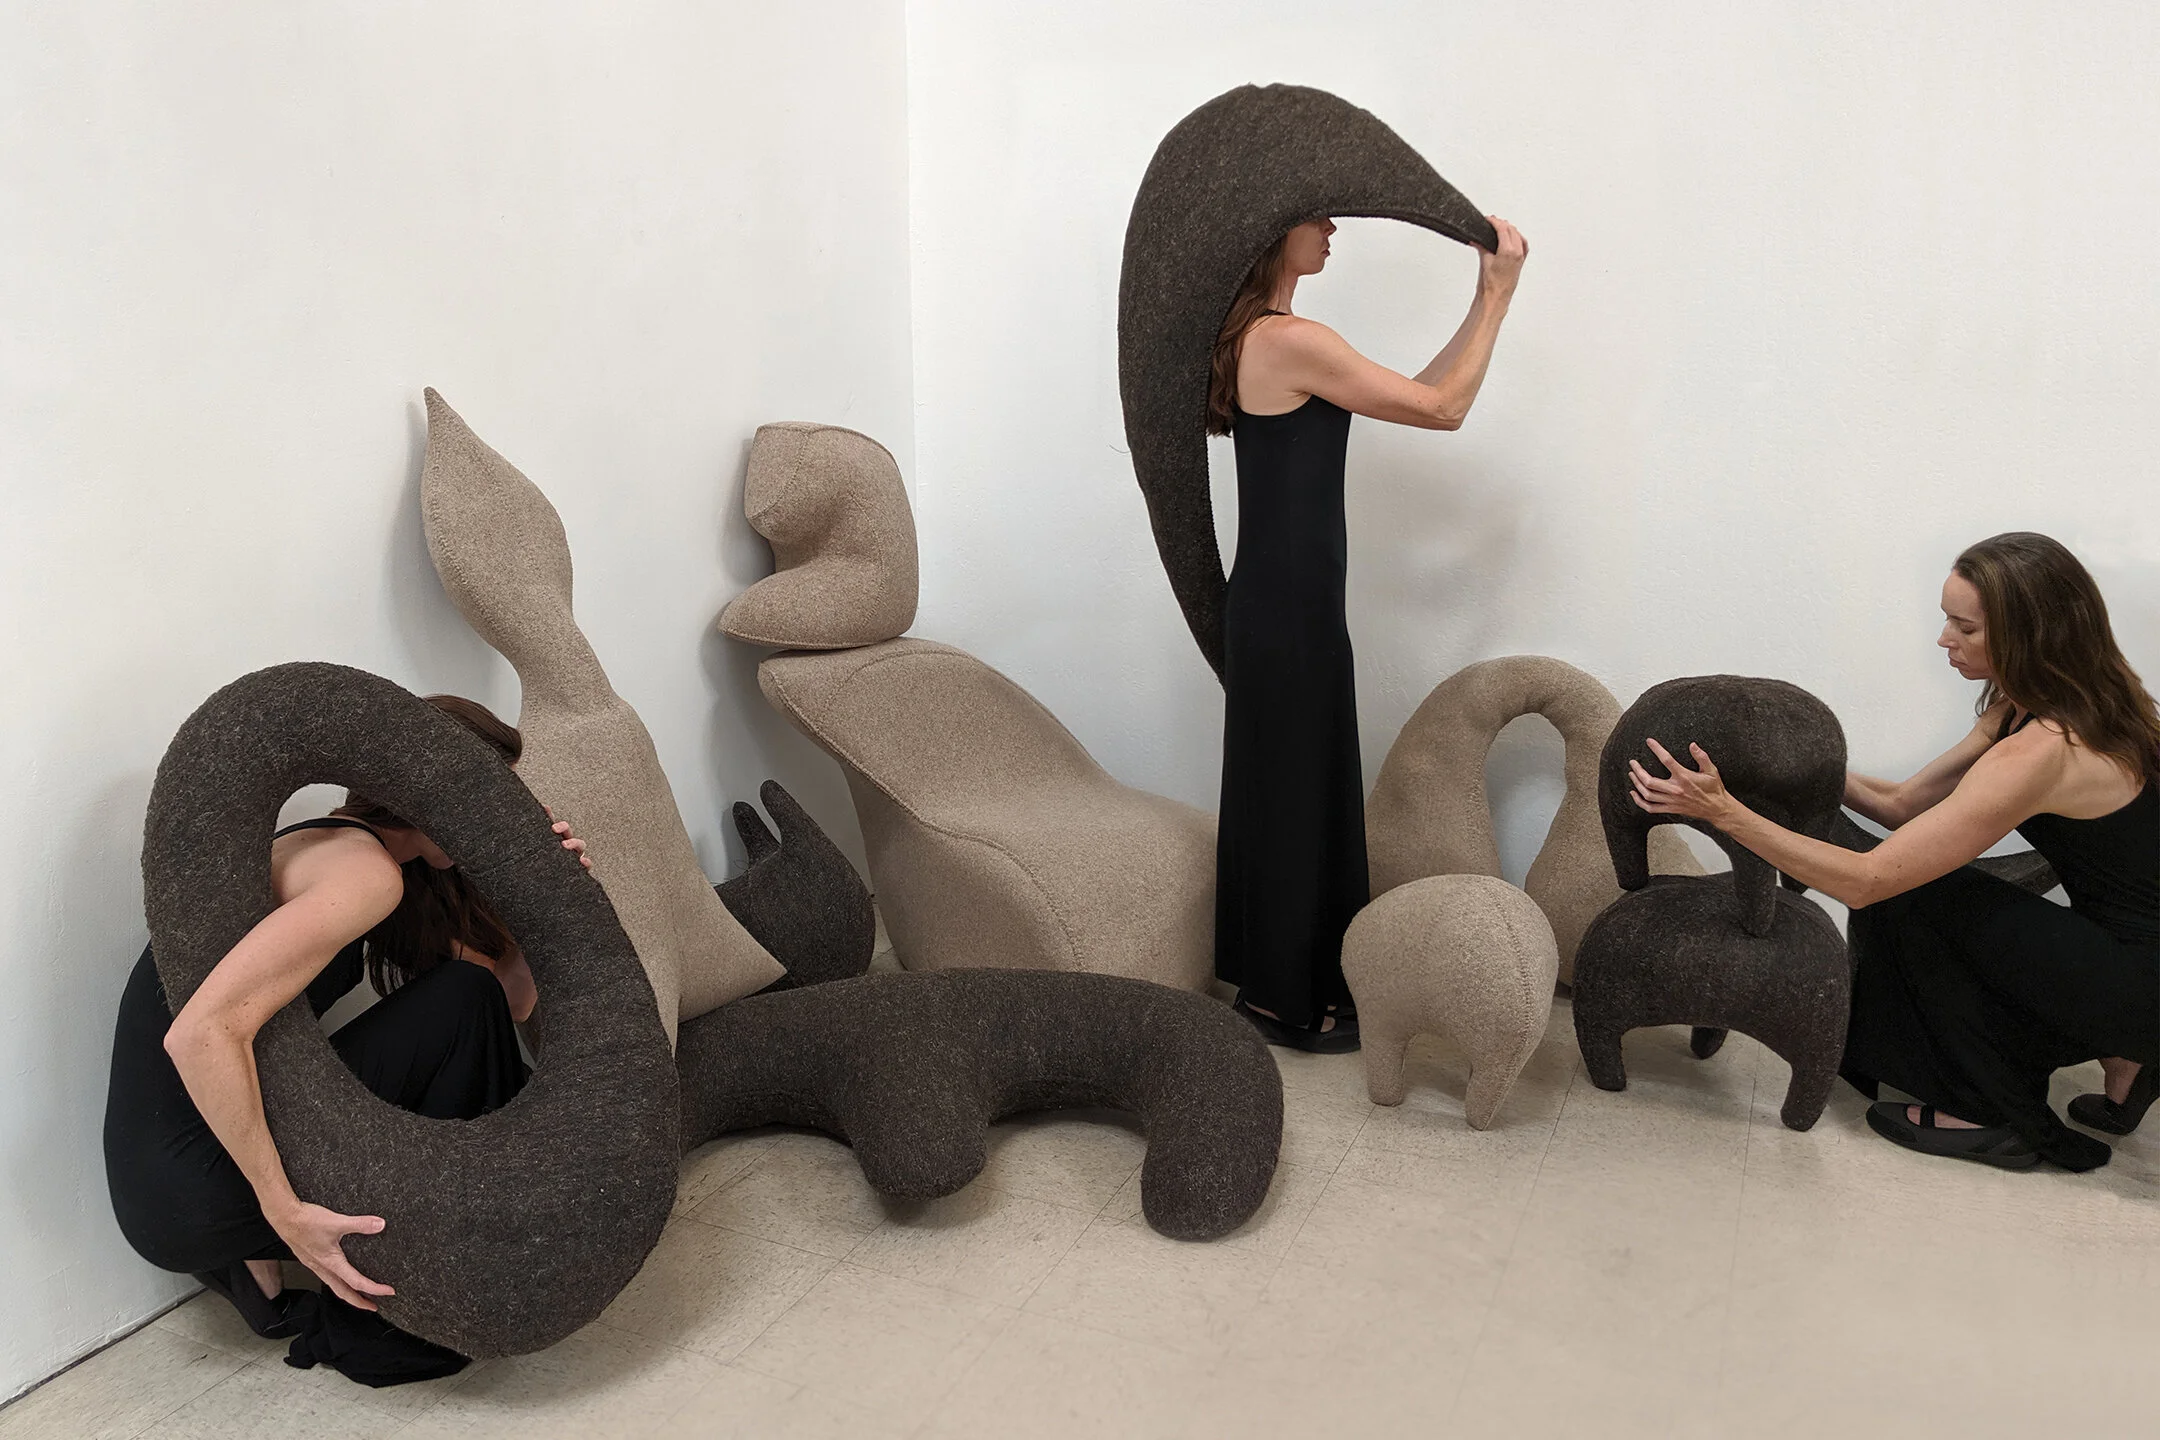
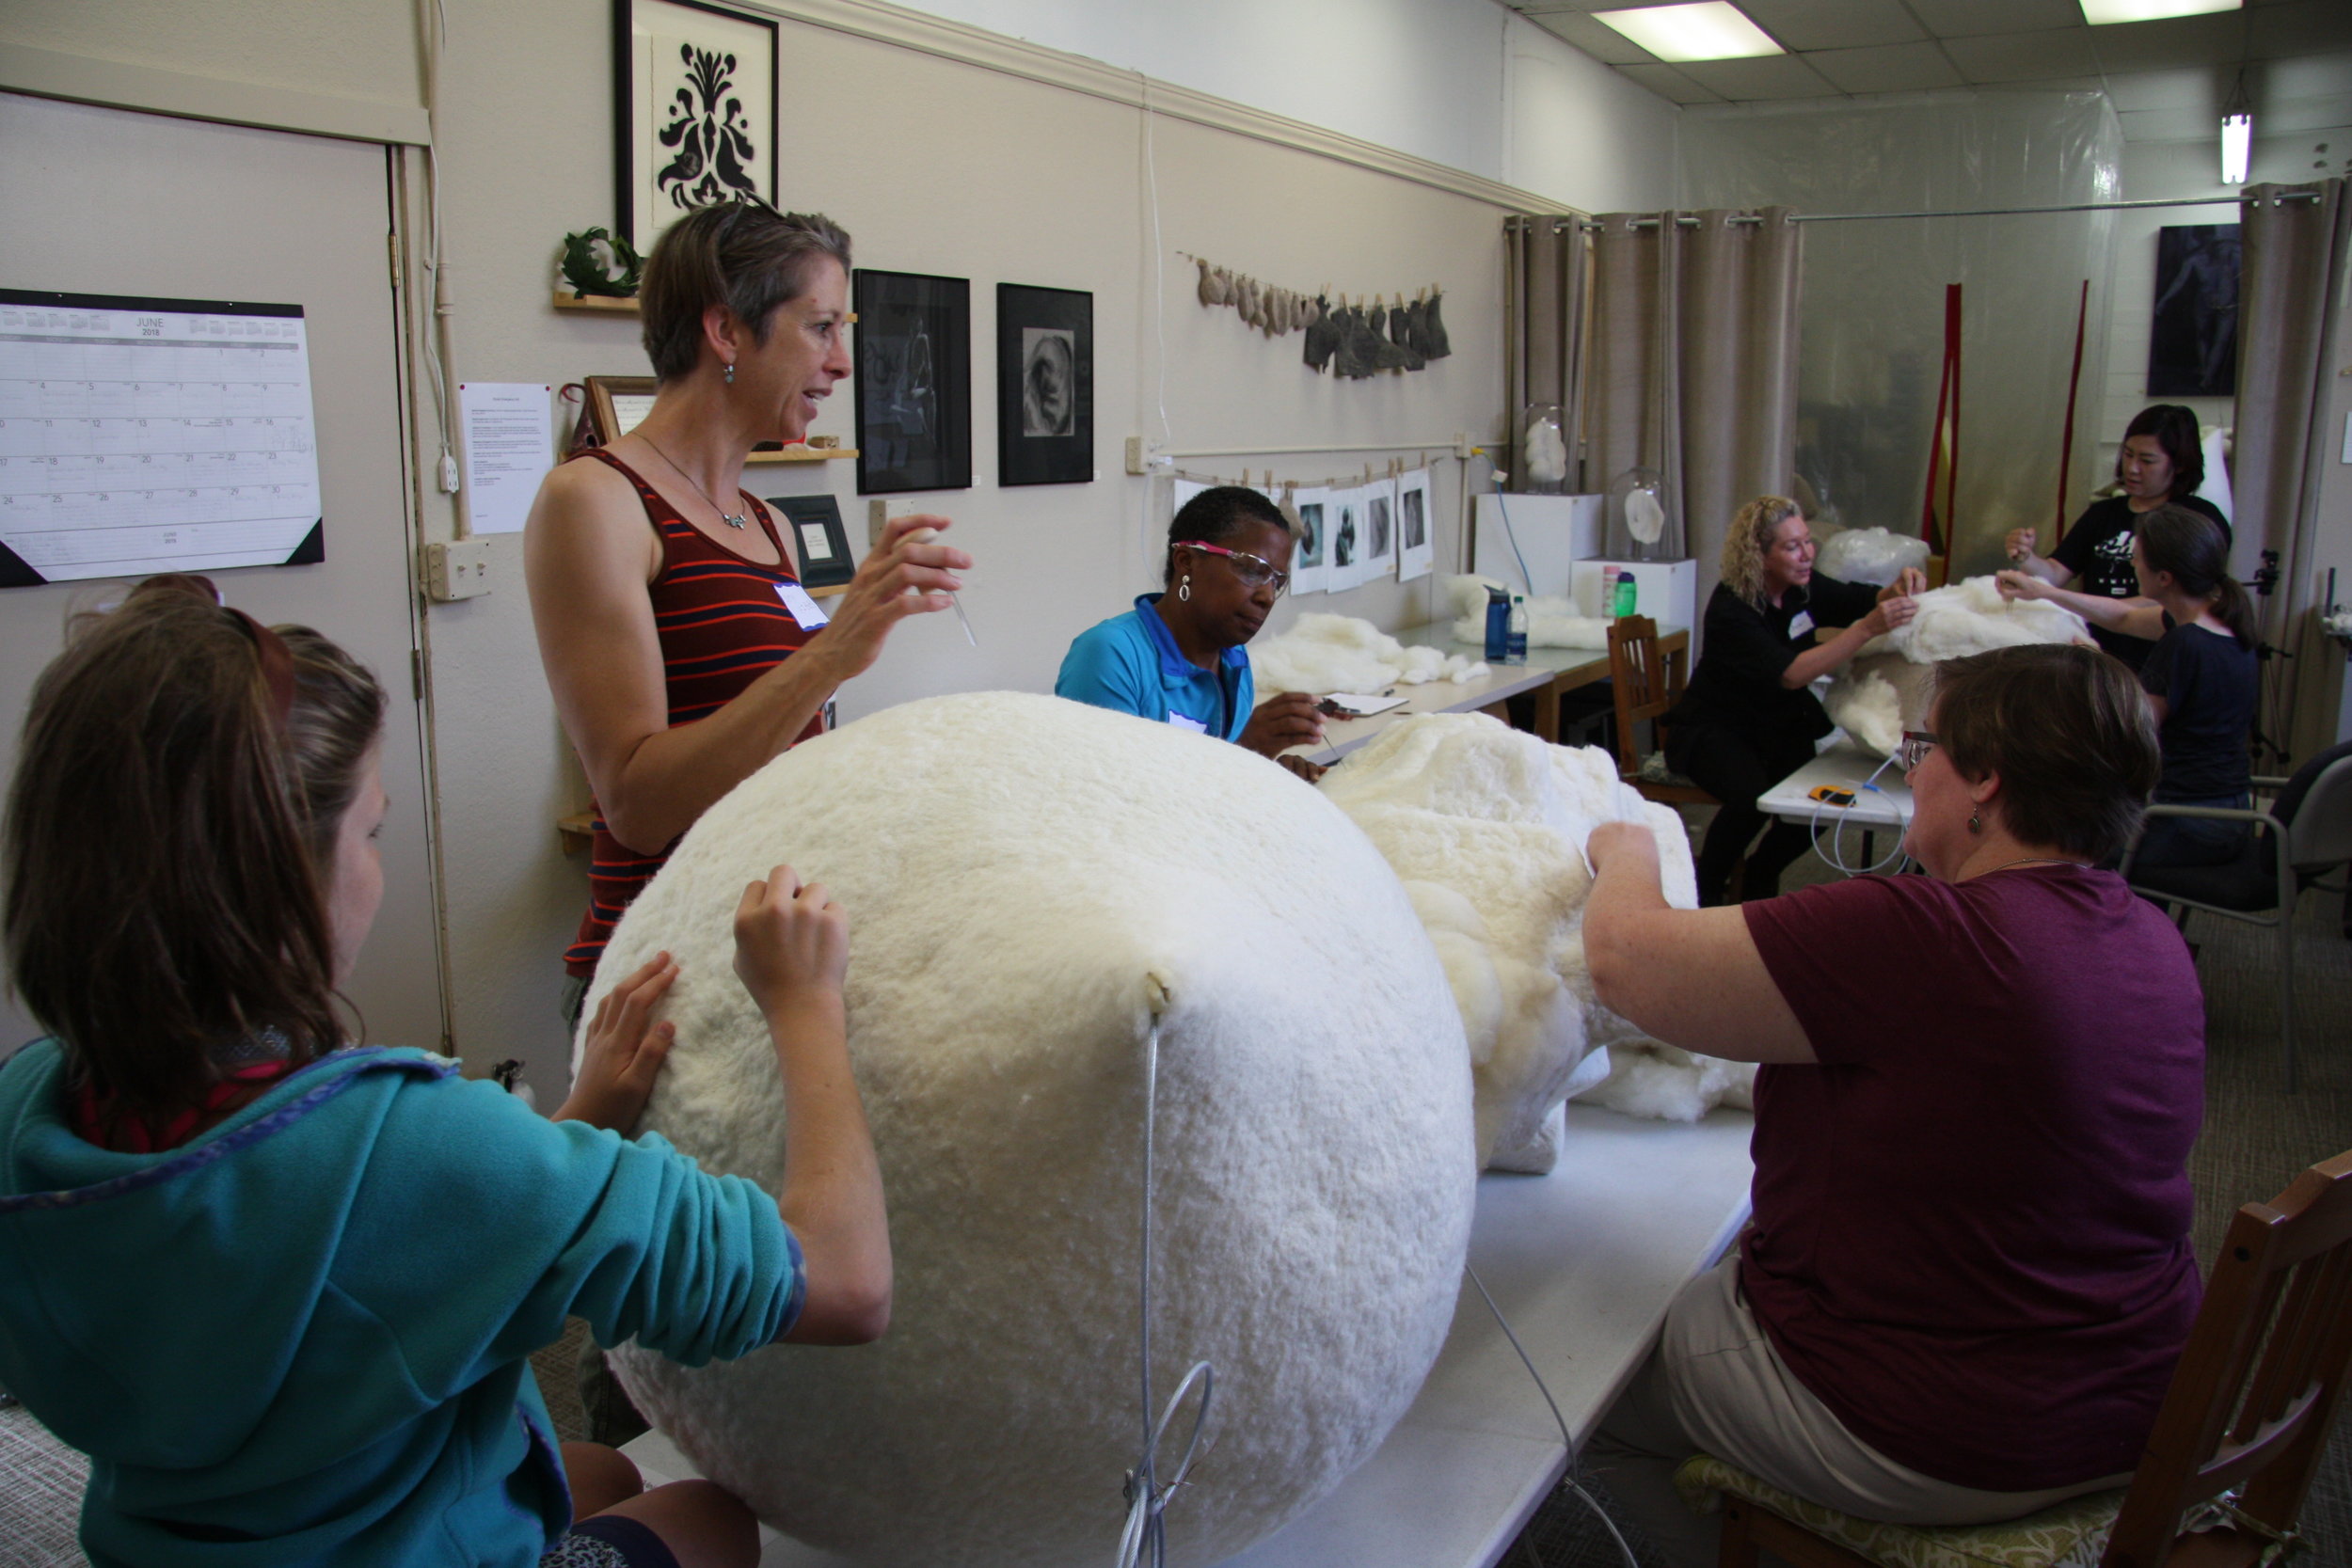
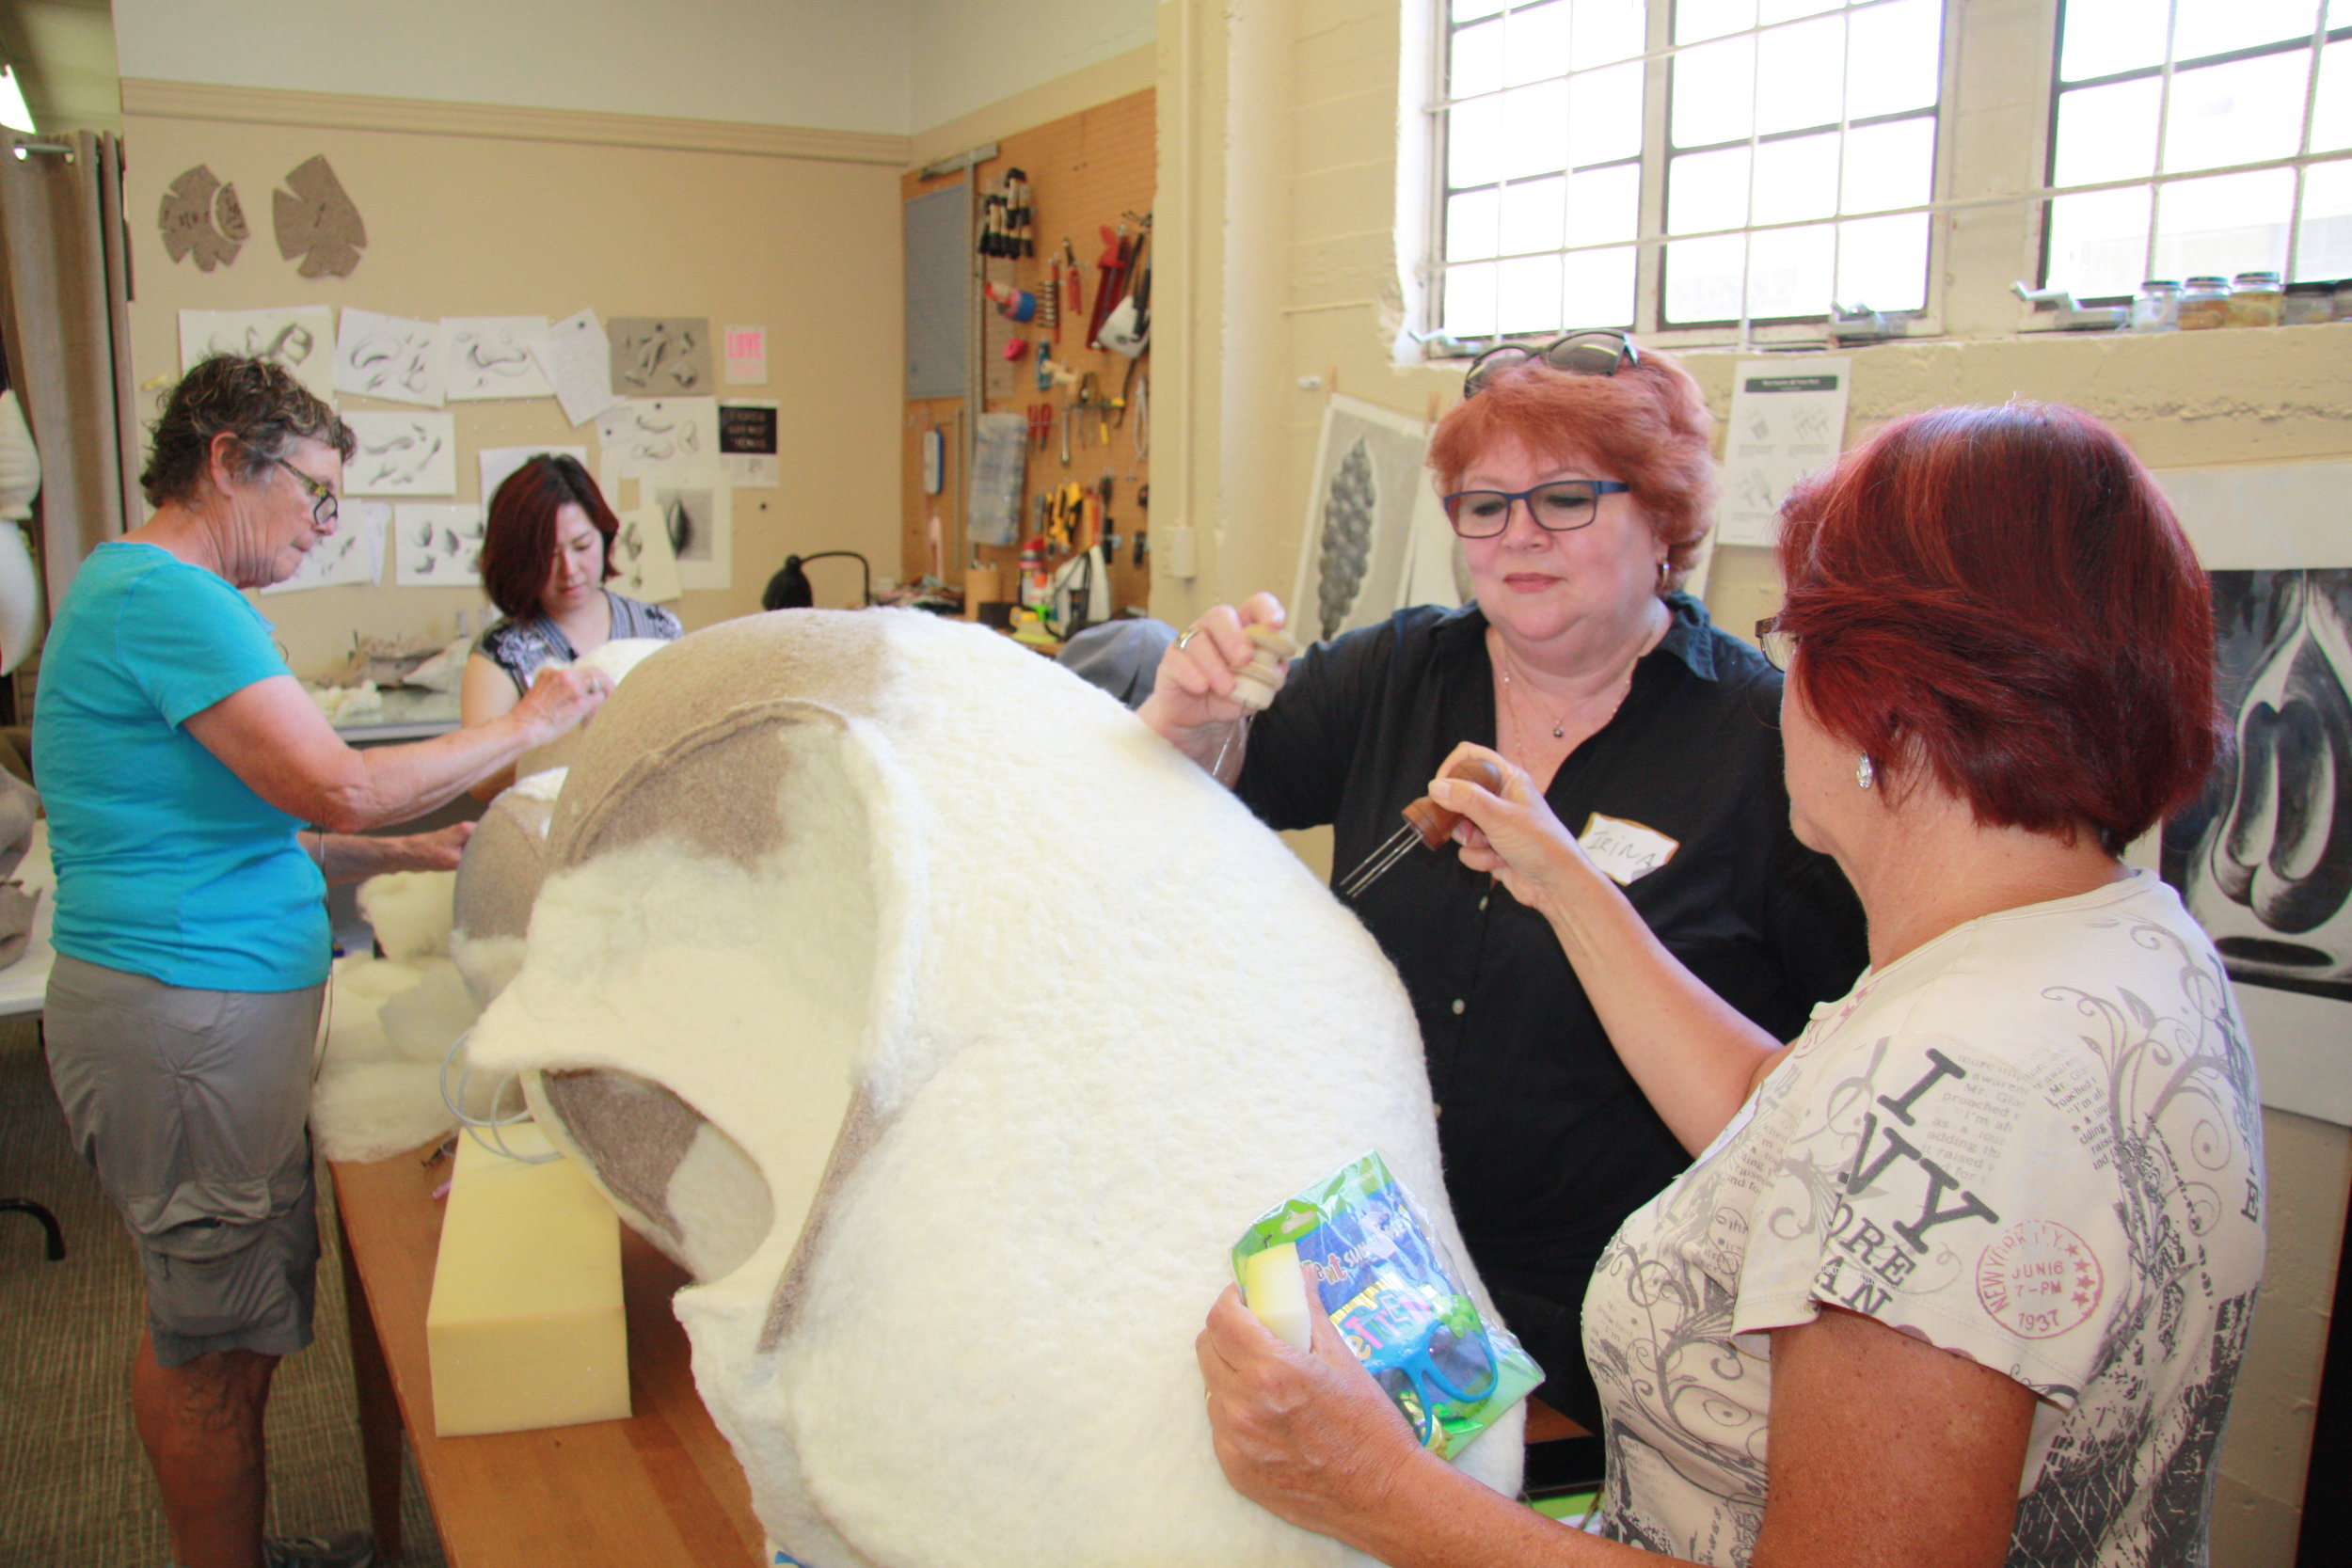
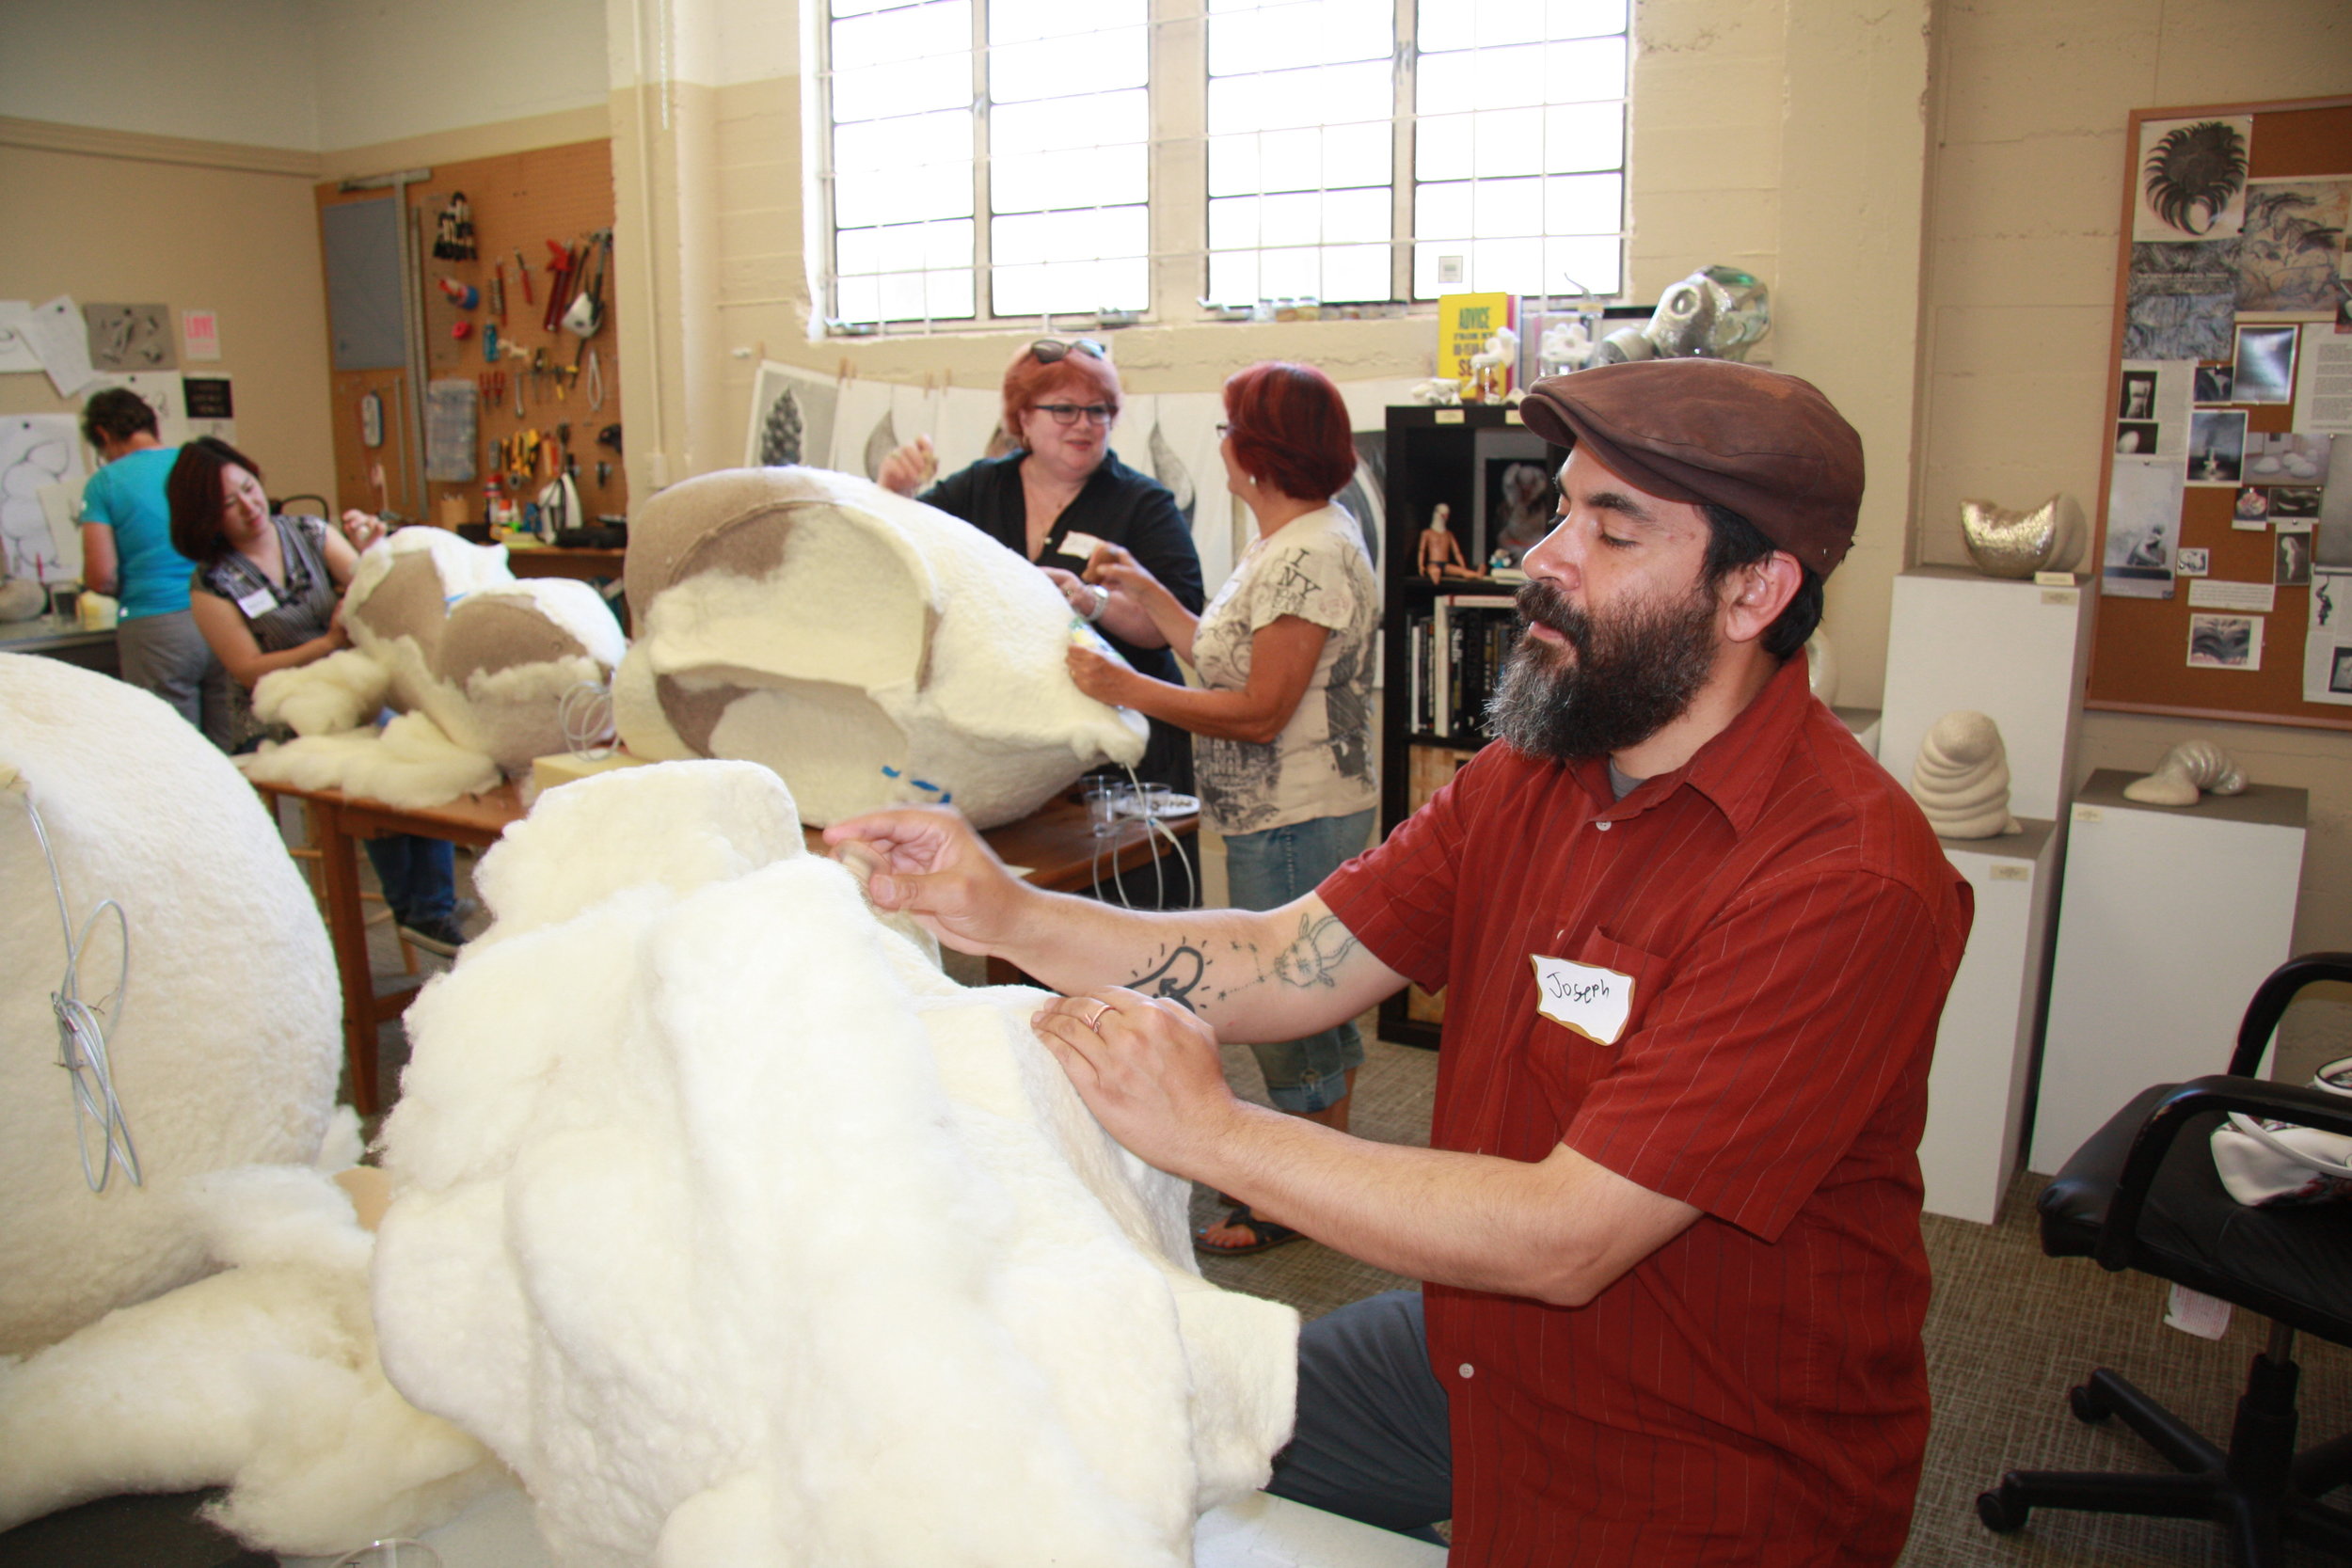
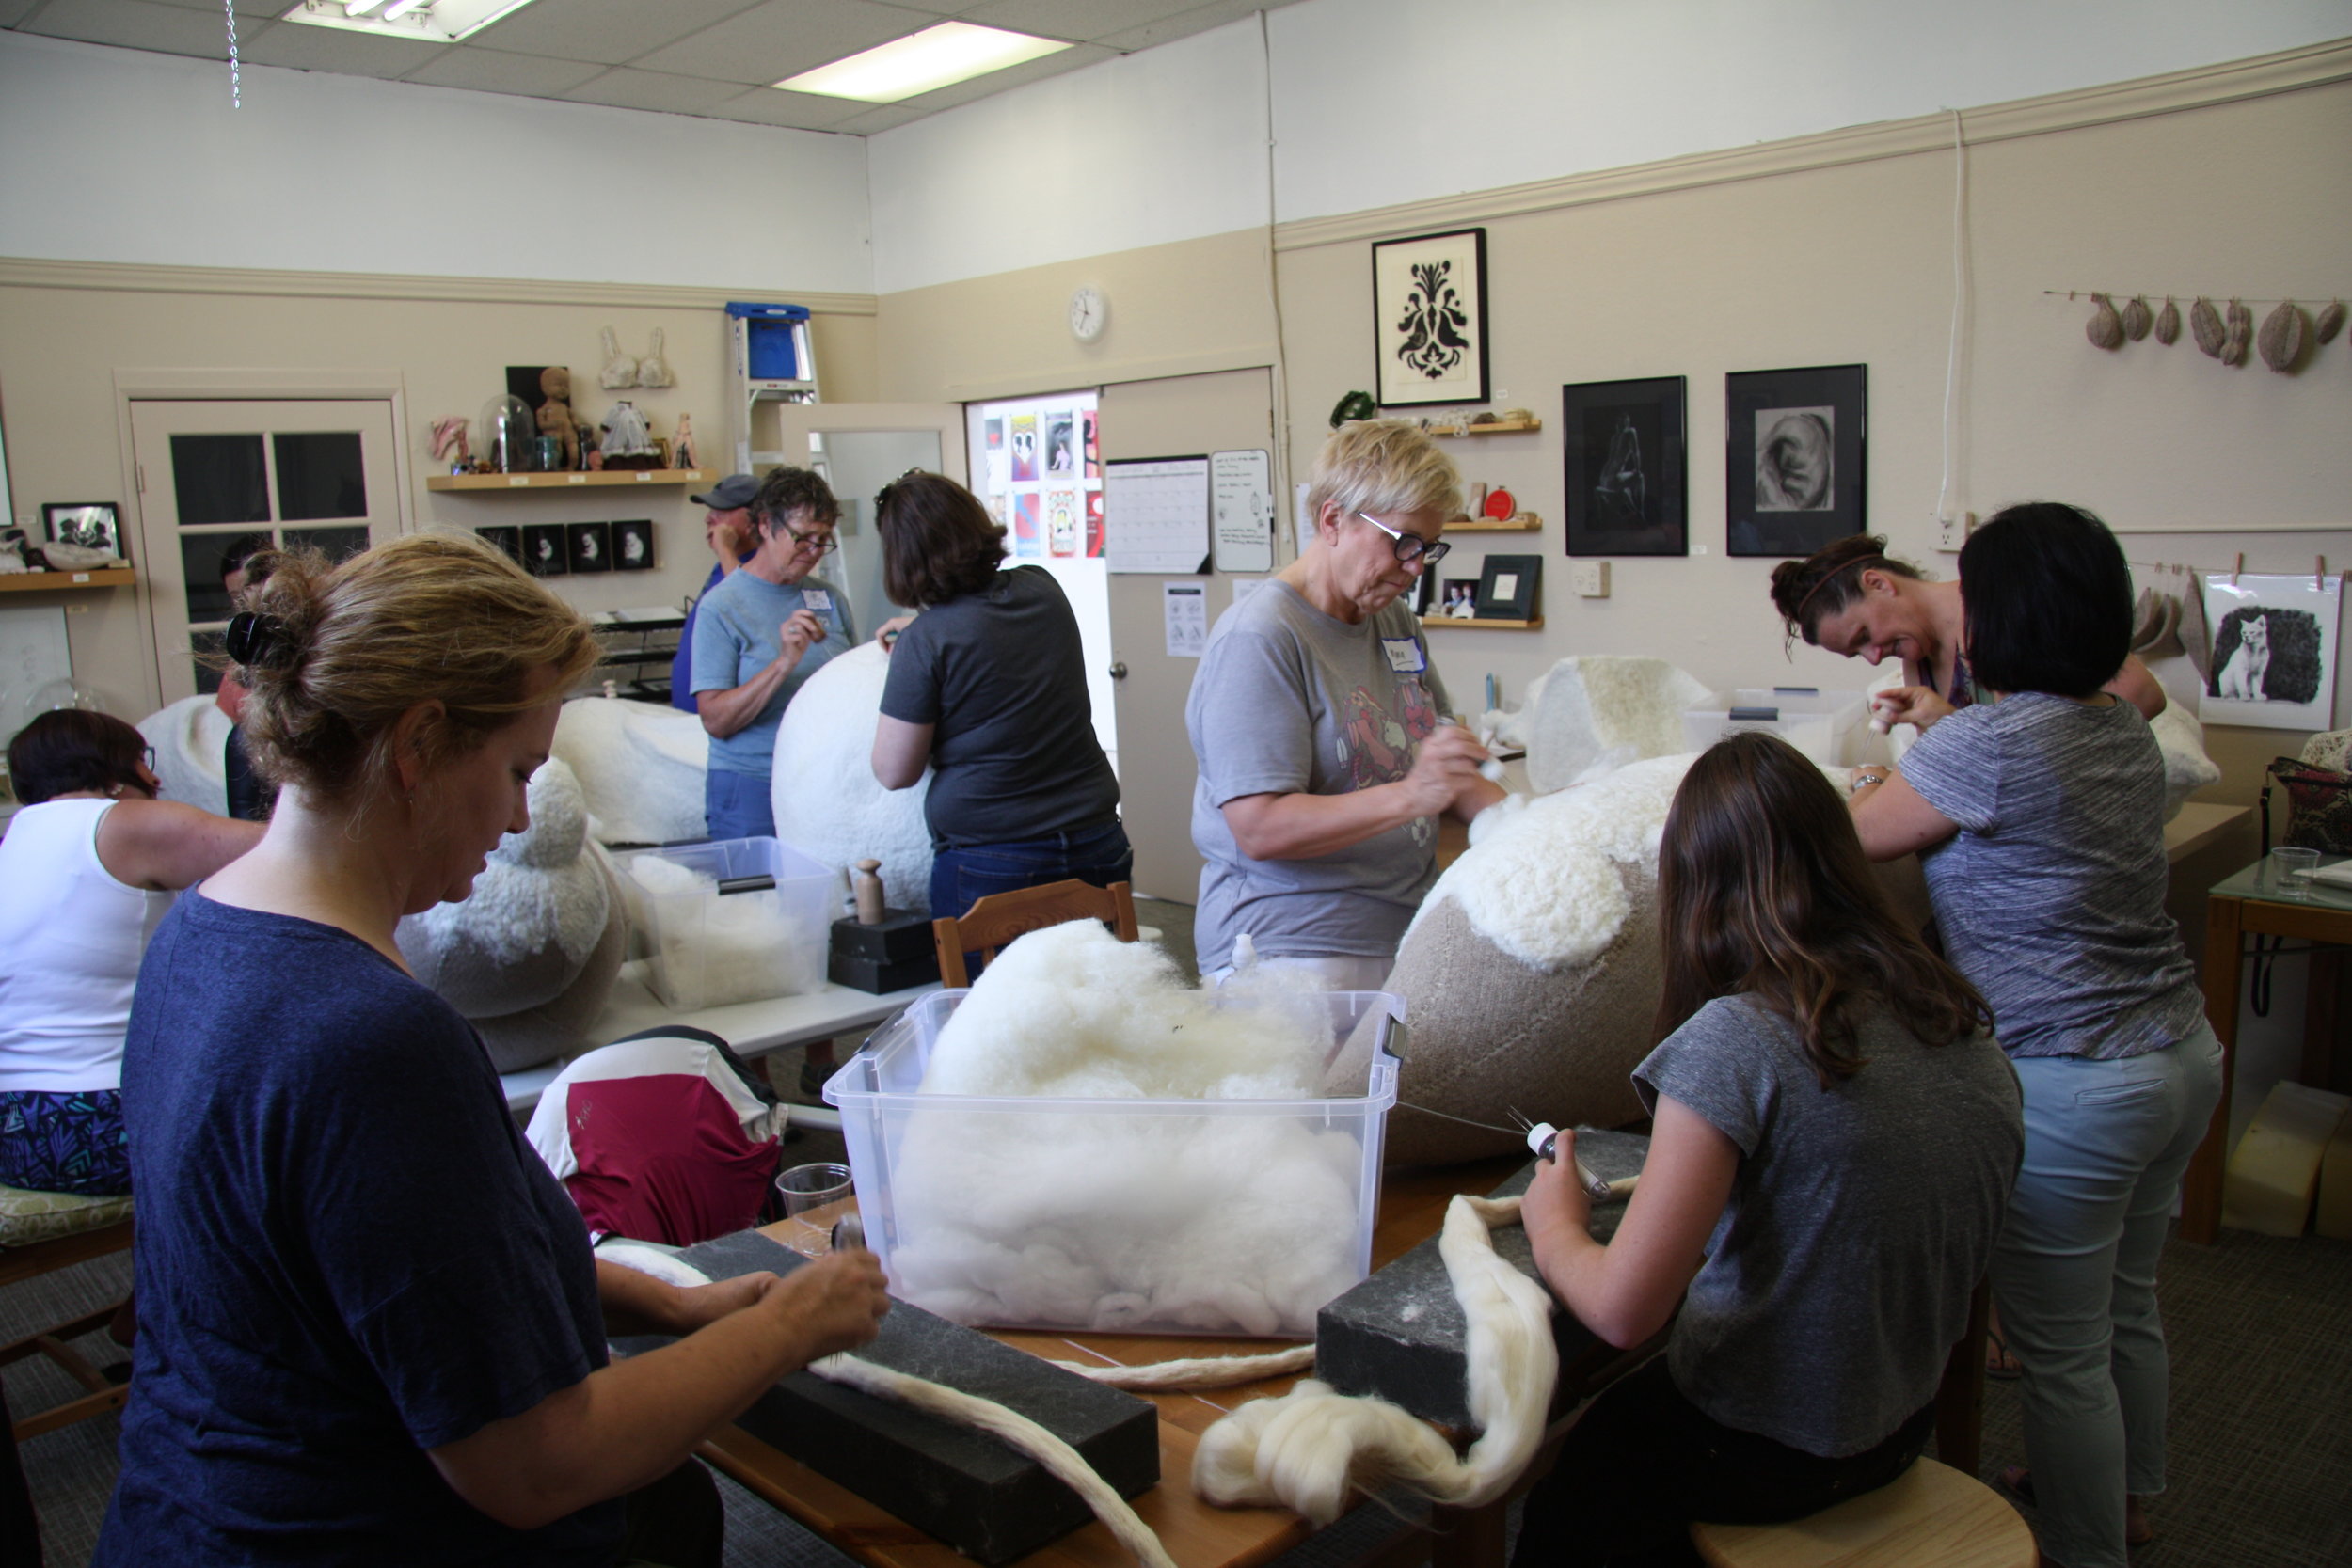
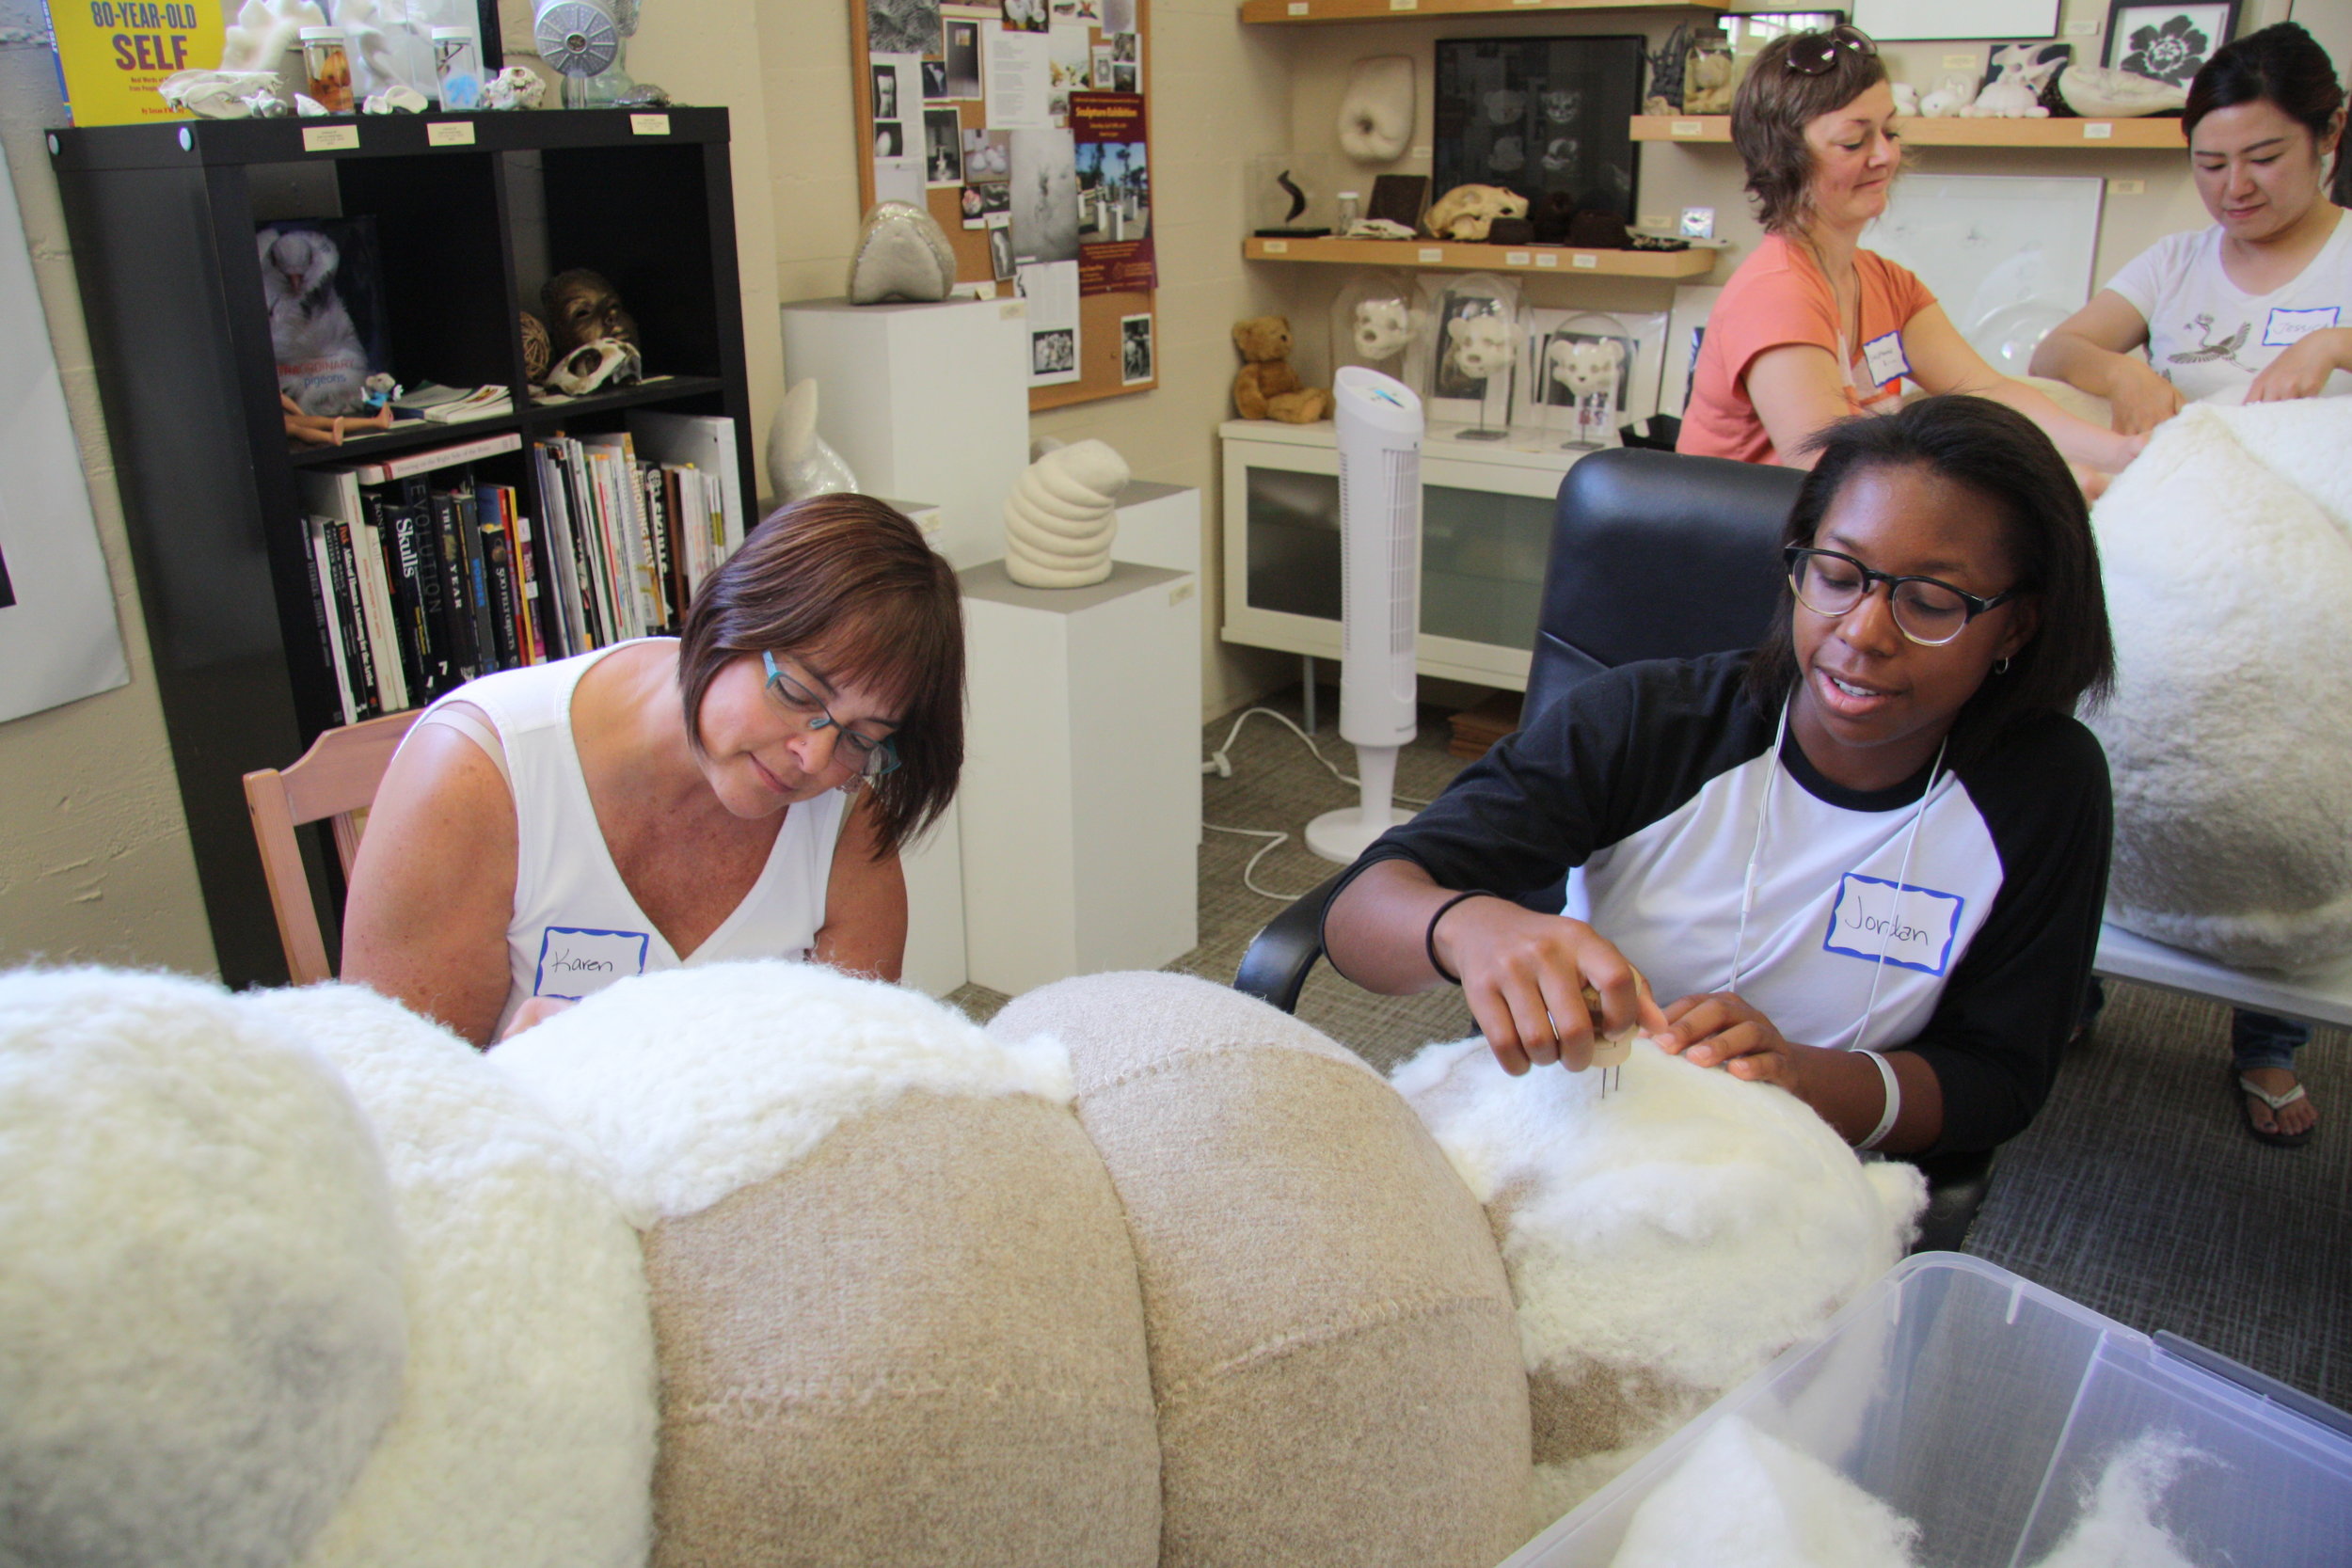
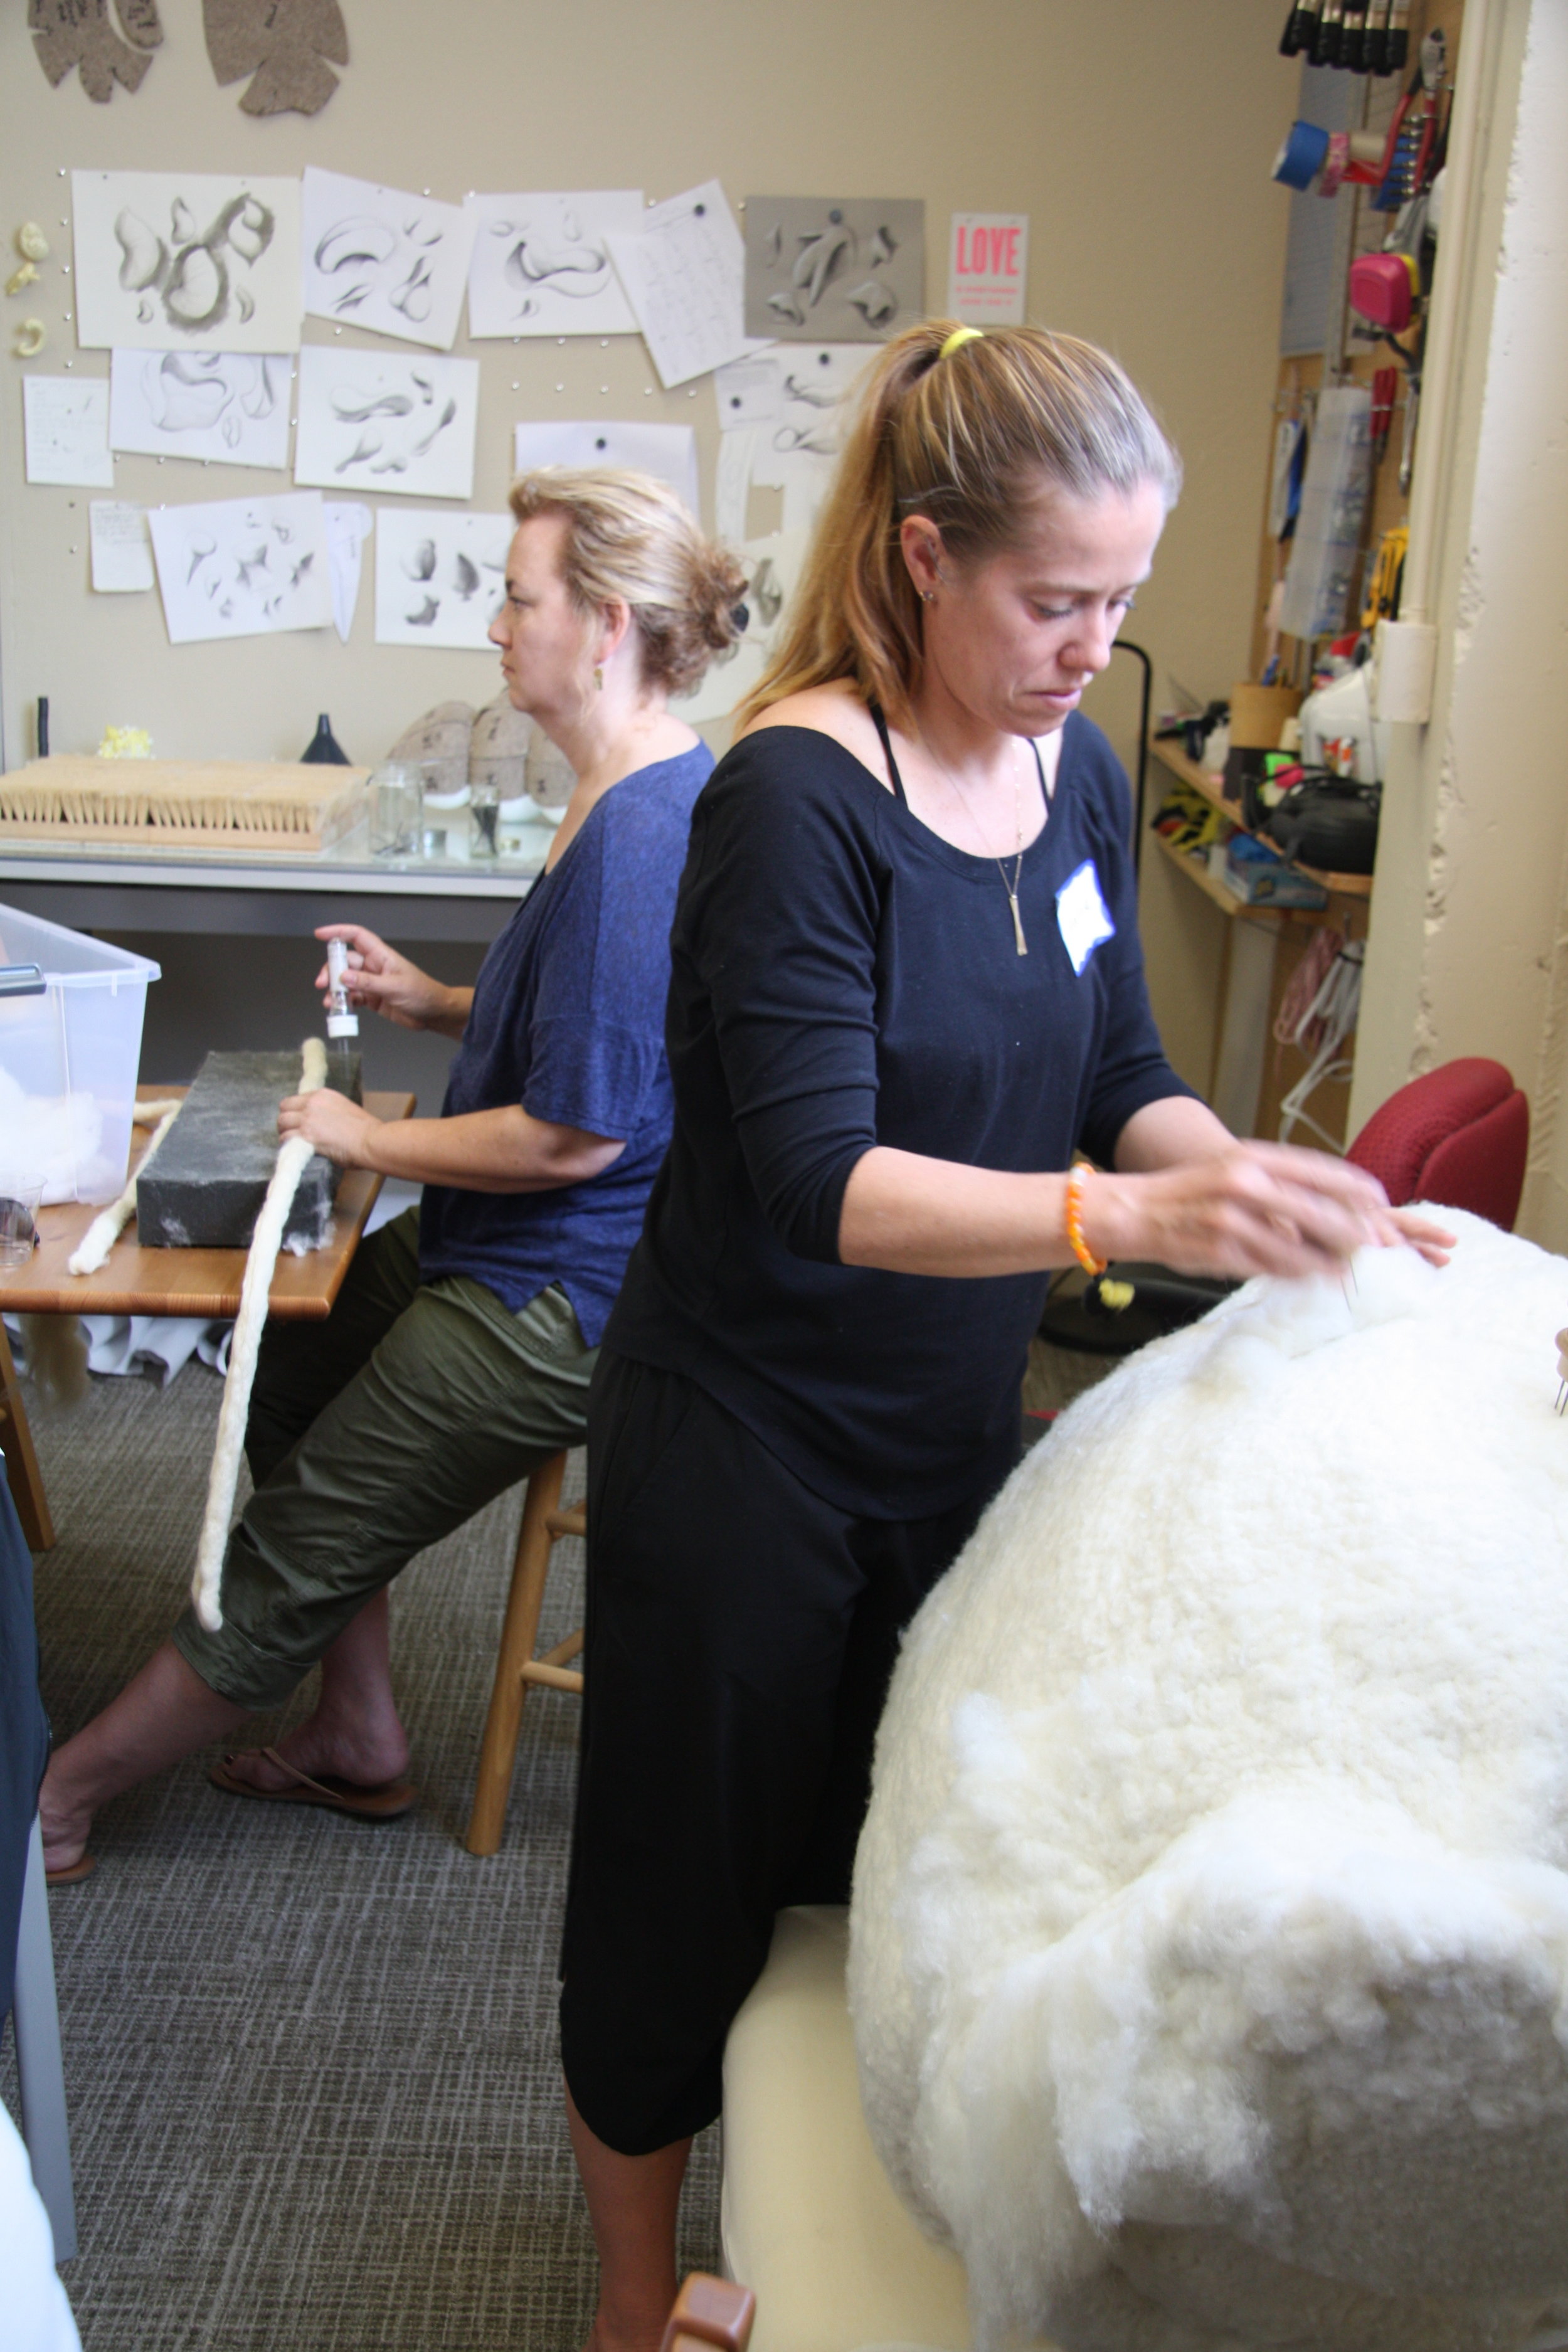
The bulk of my creative energy these days is going into a project that has been on my mind since the pandemic began canceling live events: an online version of my sculptural needle felting workshop. In a normal year I teach live workshops at two or three different venues, often for a weekend or a week, with occasional one-day workshops thrown in. I love teaching— the energy and enthusiasm I feel for this weird art form is echoed by my students, and we tend to have a great time together. I’m always learning more too— my students ask questions that make me think differently about what I’m doing, why, and how to communicate most effectively. I continue to find that phrasing things several different ways as I talk and demonstrate is a good way to effectively reach the whole group, since we all have different learning styles and metaphors that resonate.

So, if I love it so much, why don’t I teach more often? A lot of it comes down to time. My workshops are often week-long stints at somewhat distant venues (Penland, Arrowmont, California Sculptors Symposium) that require travel and a chunk of time away from home. It’s challenging to manage a good work/life balance with kids, husband, dog, and home when I’m totally absent for a week at a time. I’m a homebody and really love my regular life, so I do one or two week-long stints.

But that means I teach only two or three dozen students in person each year, give or take. I end up filling my workshops with attendees from all over, which is good, but then there are big waiting lists of students who don’t get to work with me. I also know that travel, time, lodging, and funds make it difficult for a lot of people to get away for a week of art camp for grown-ups.

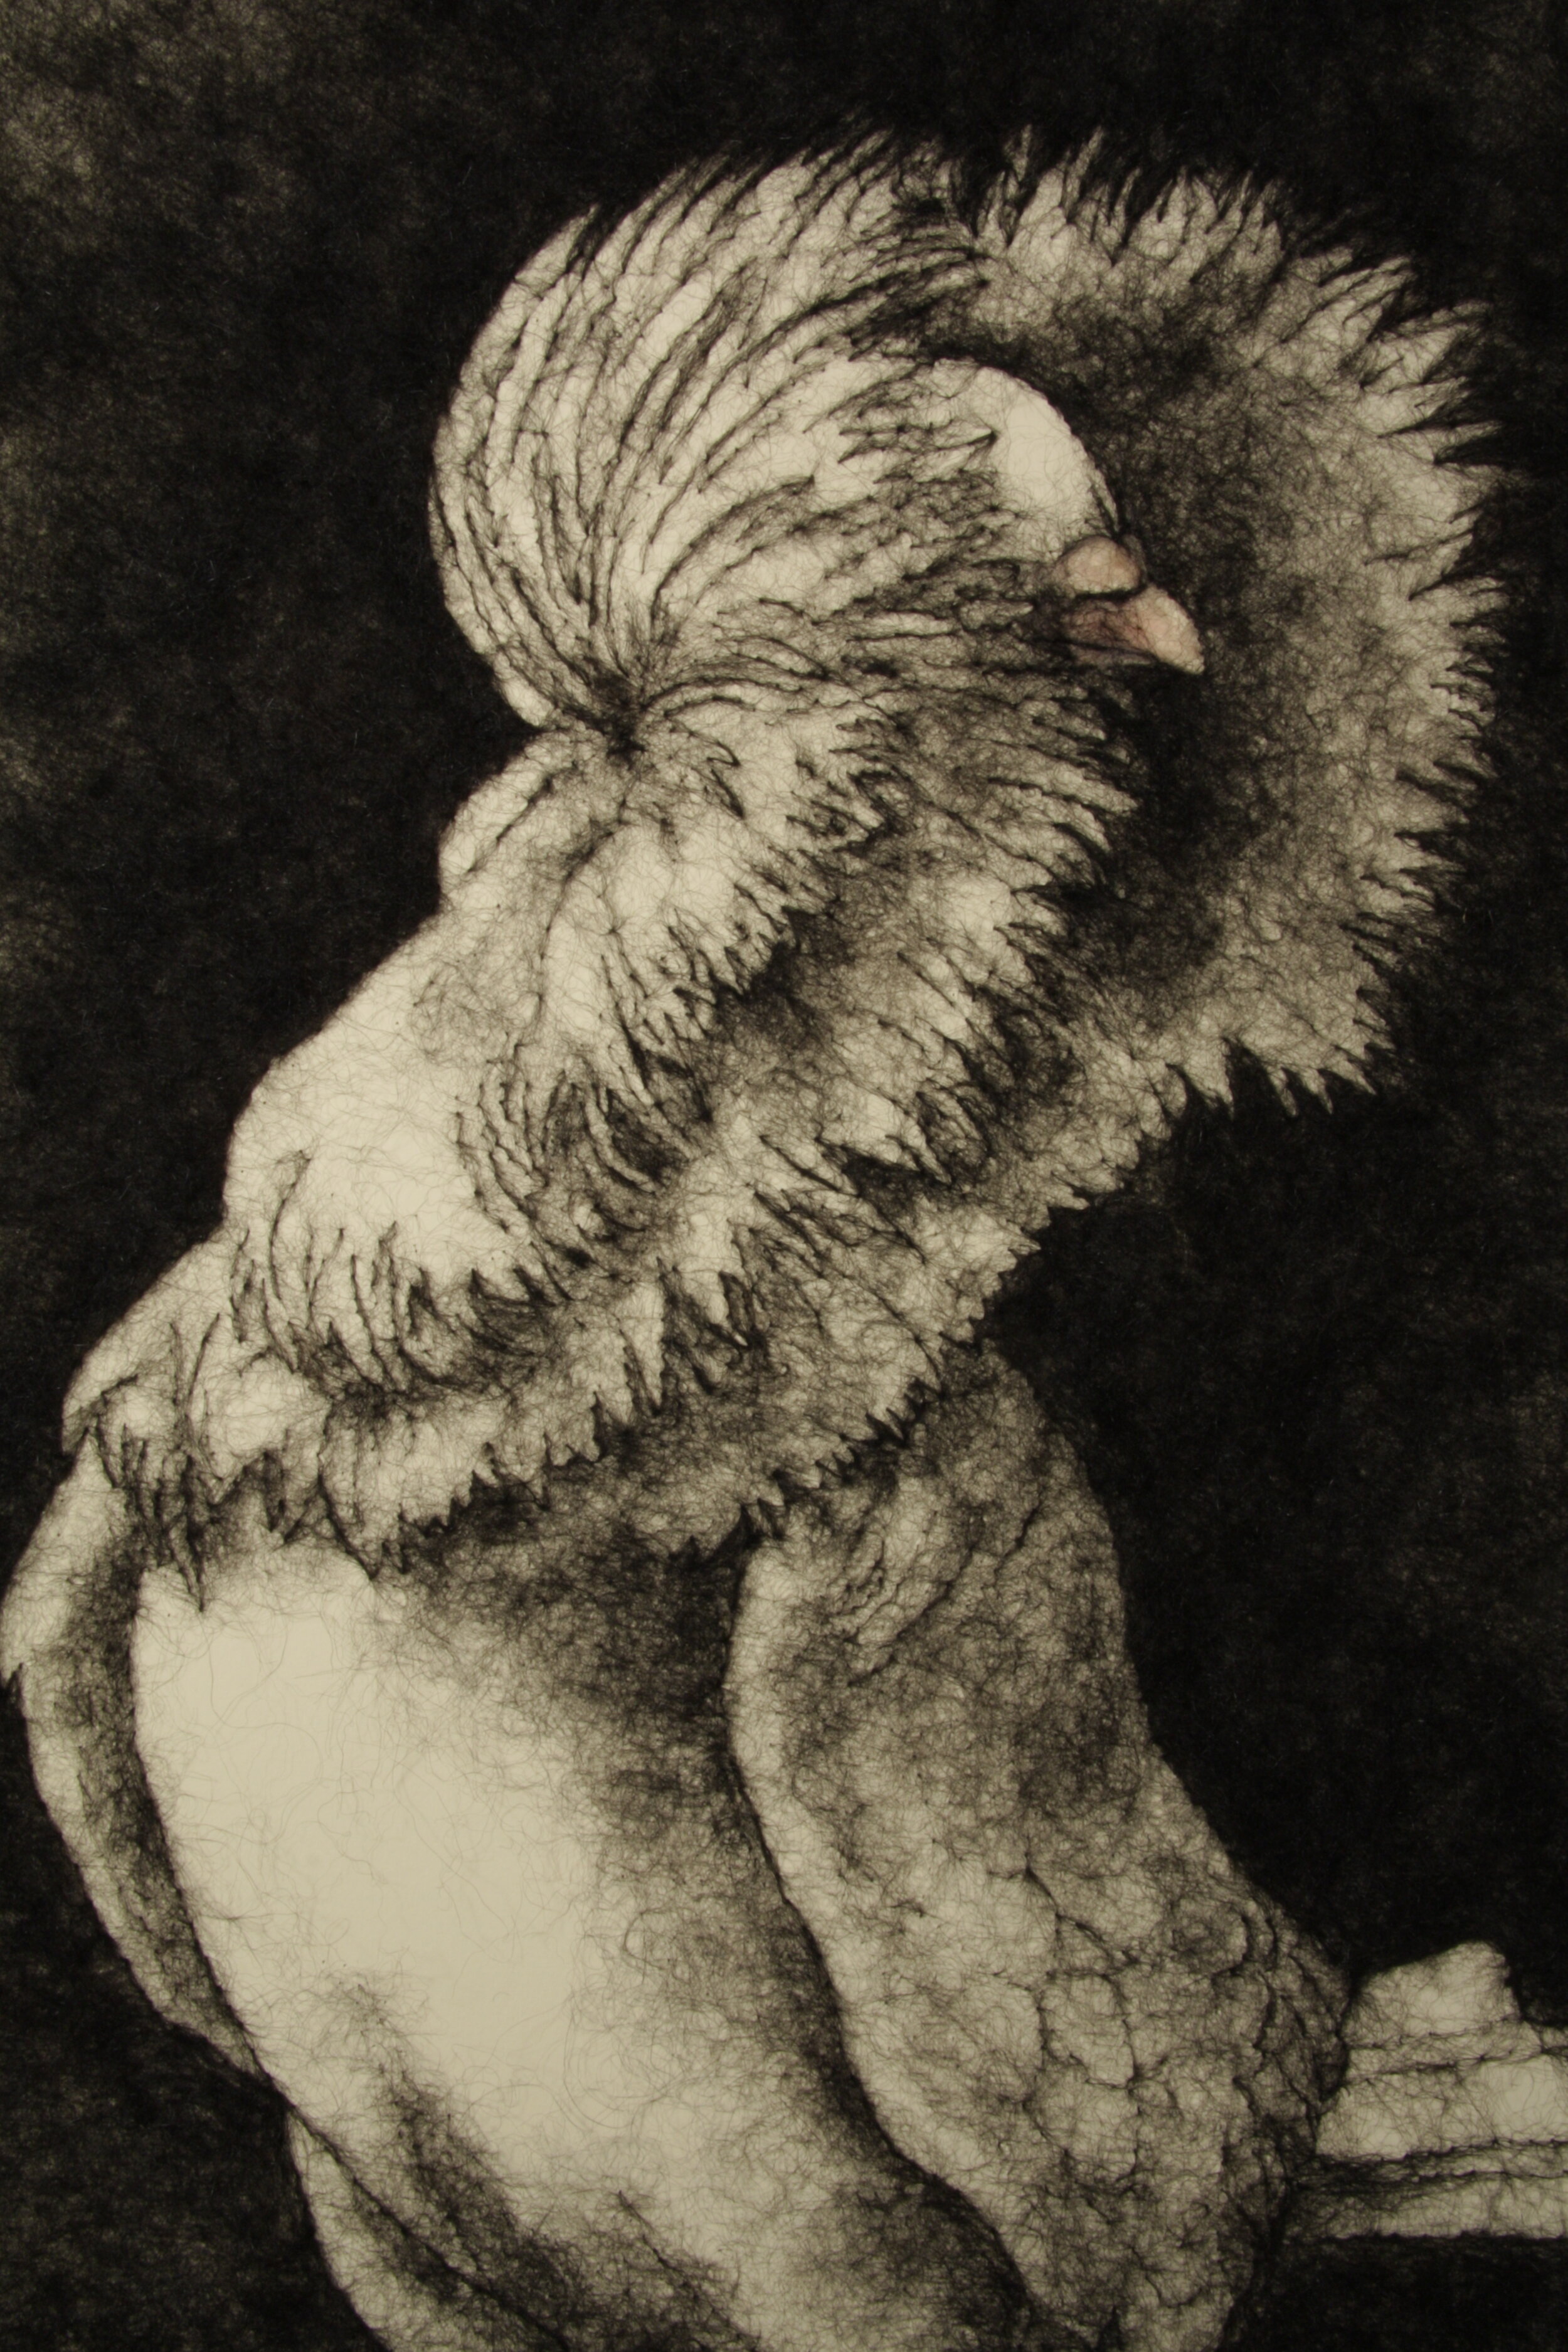
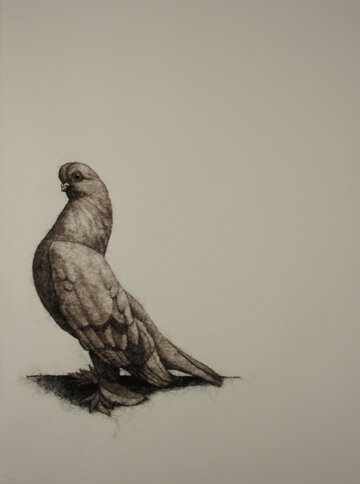
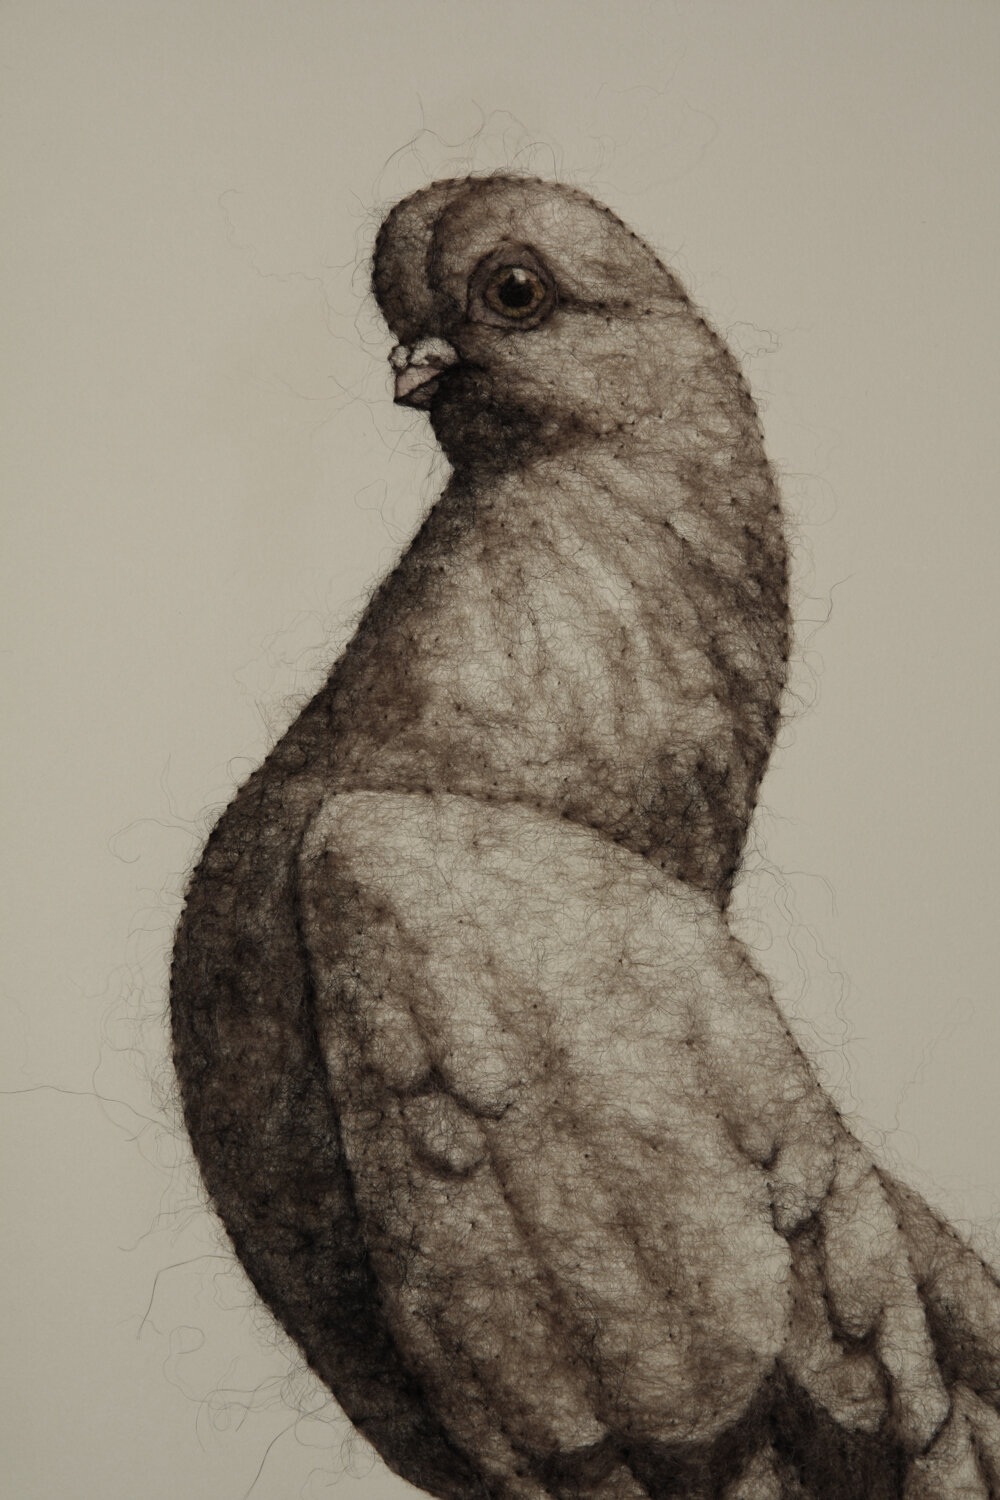
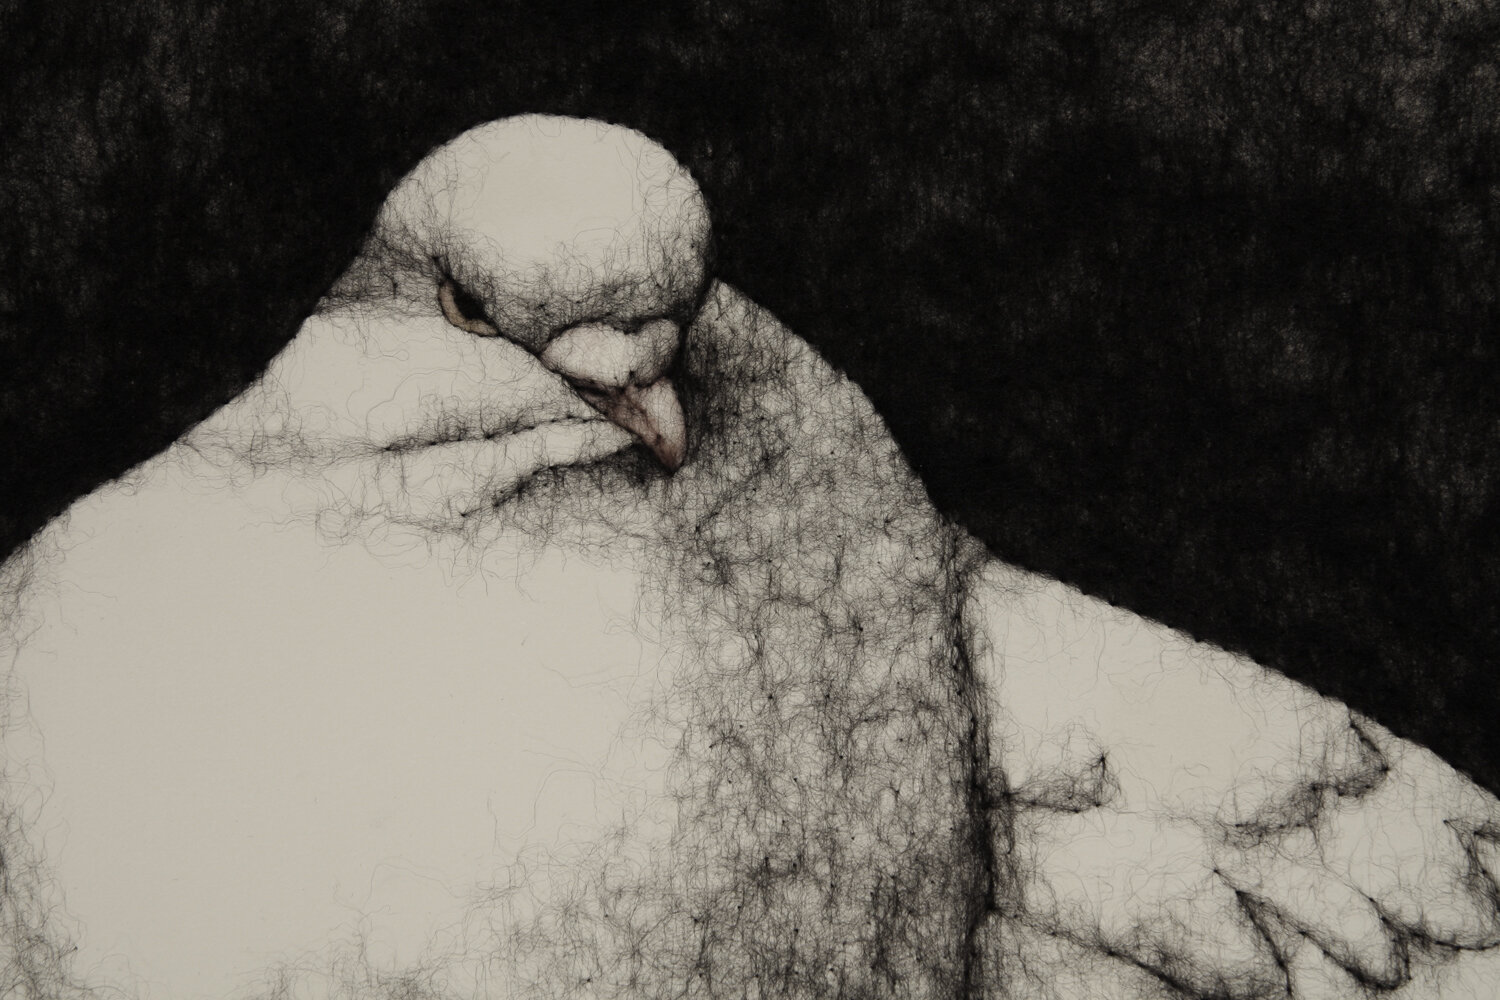
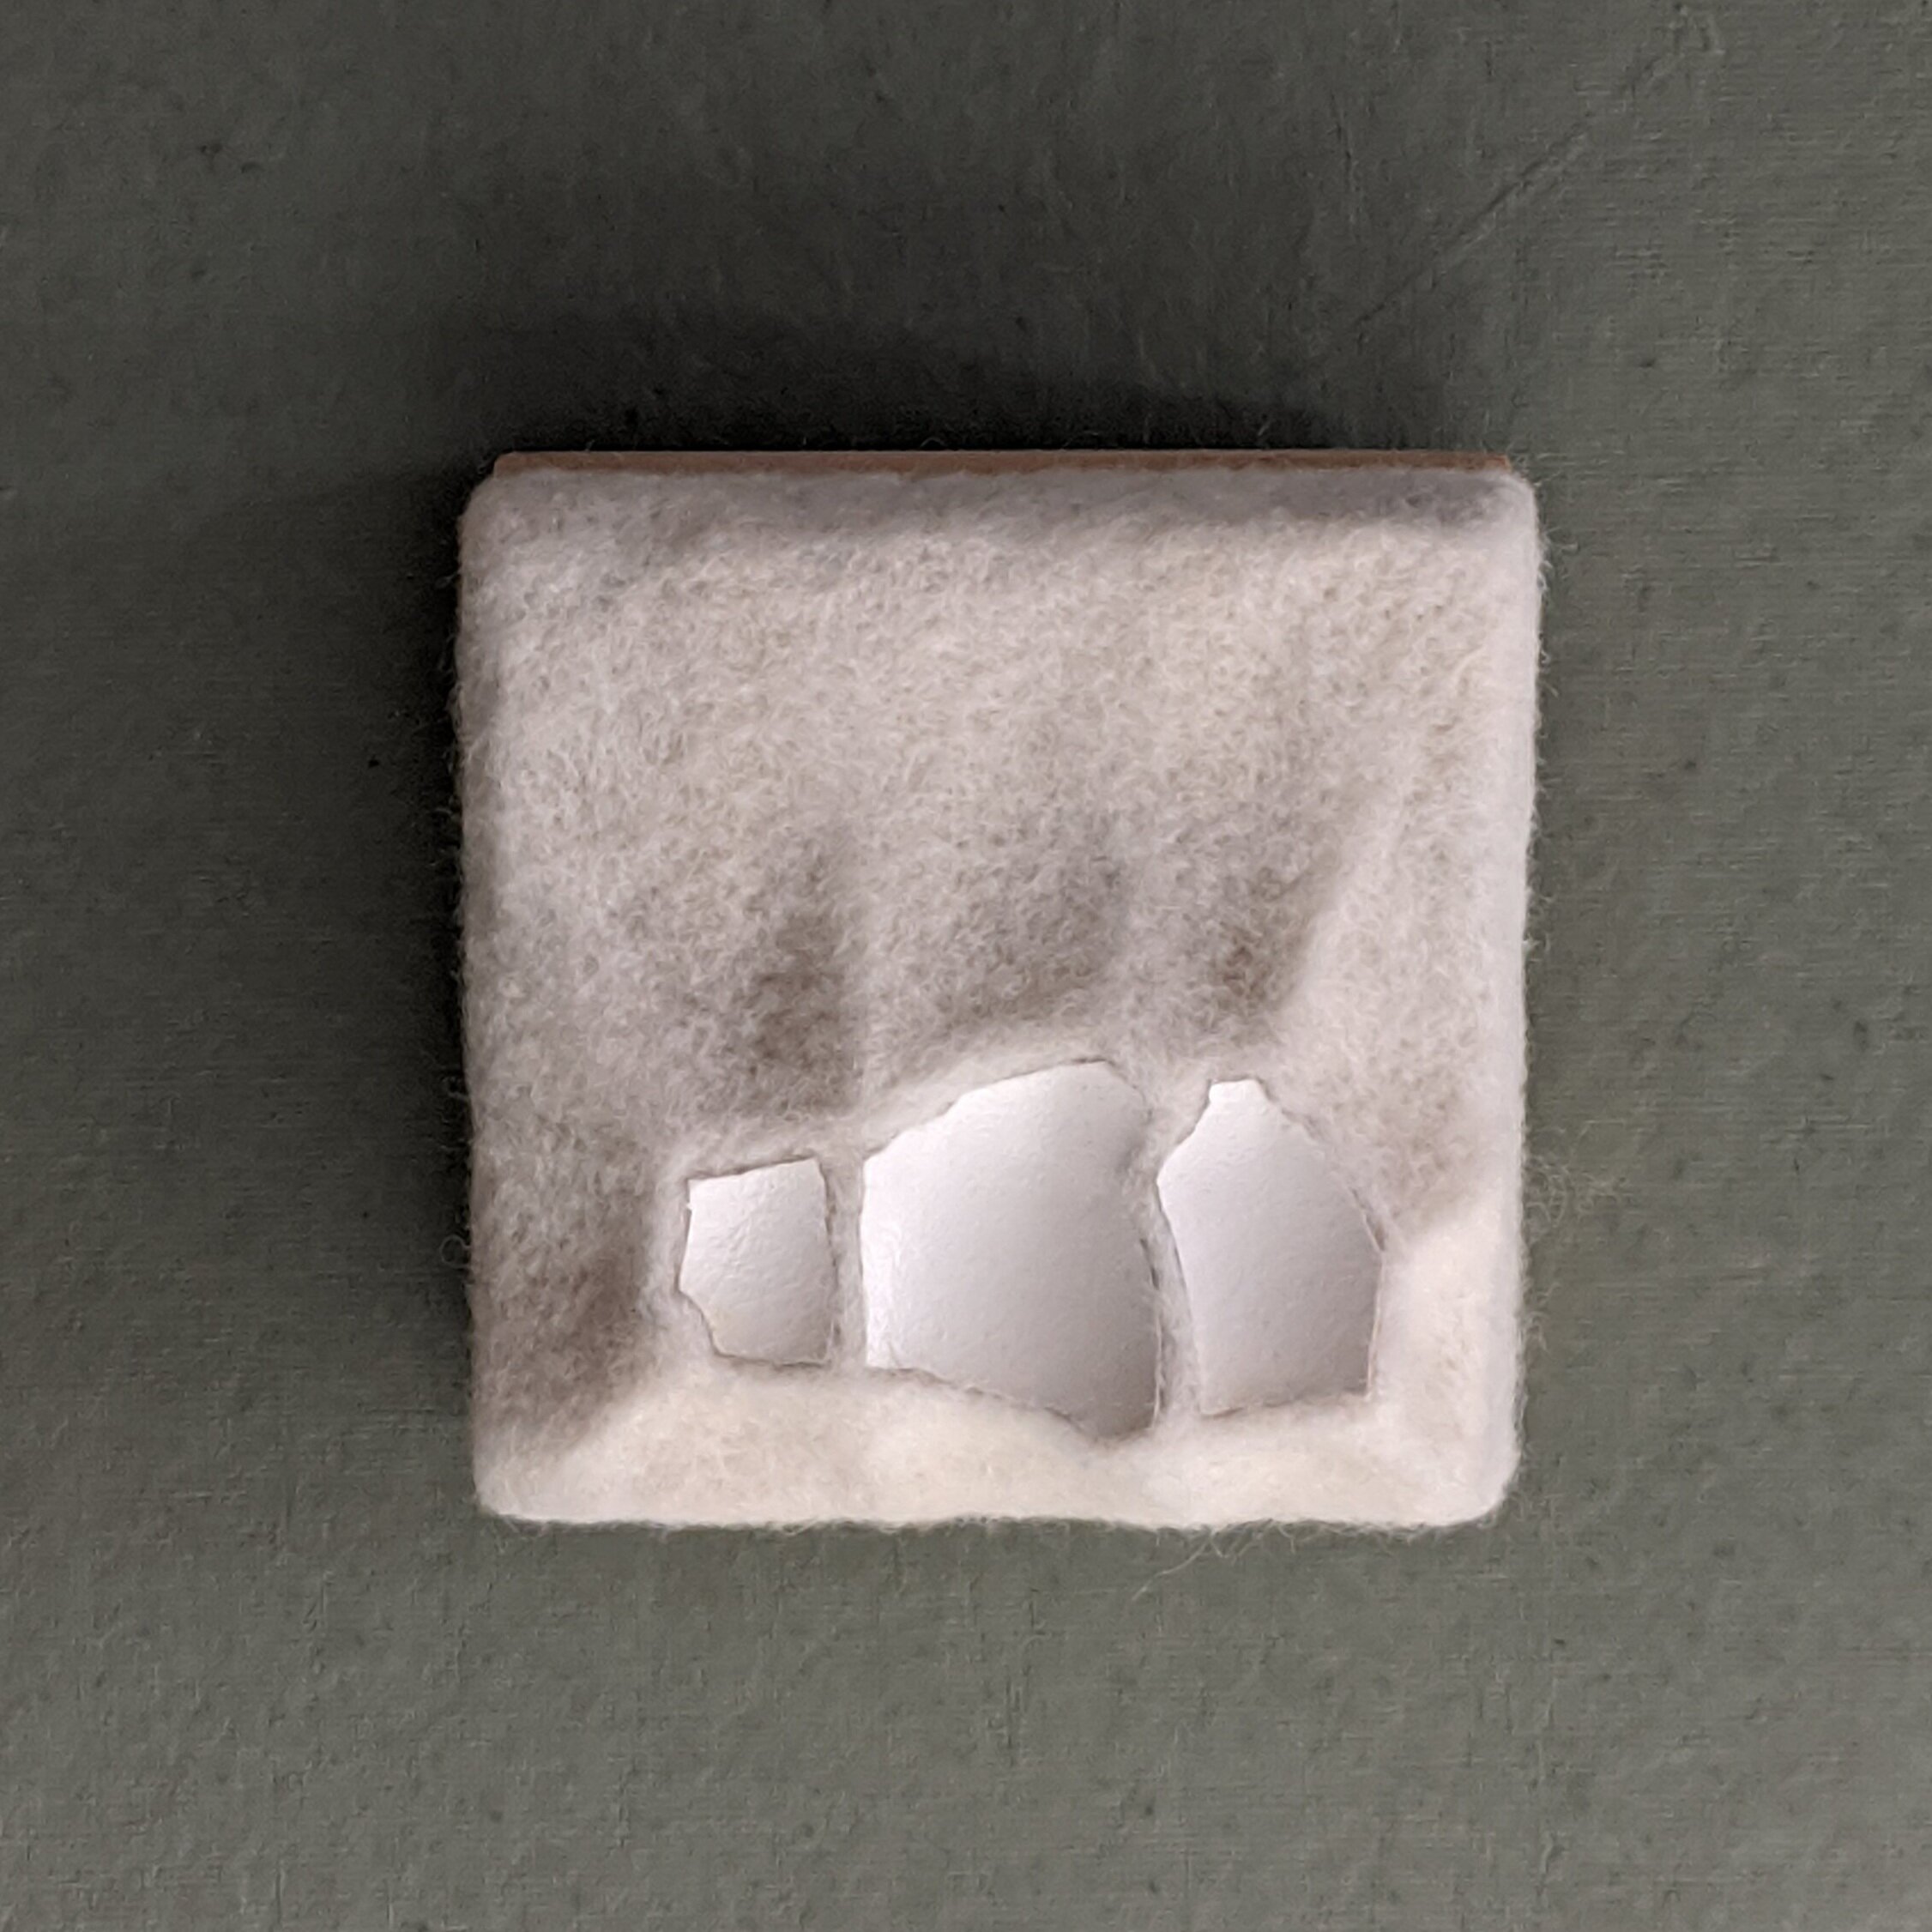
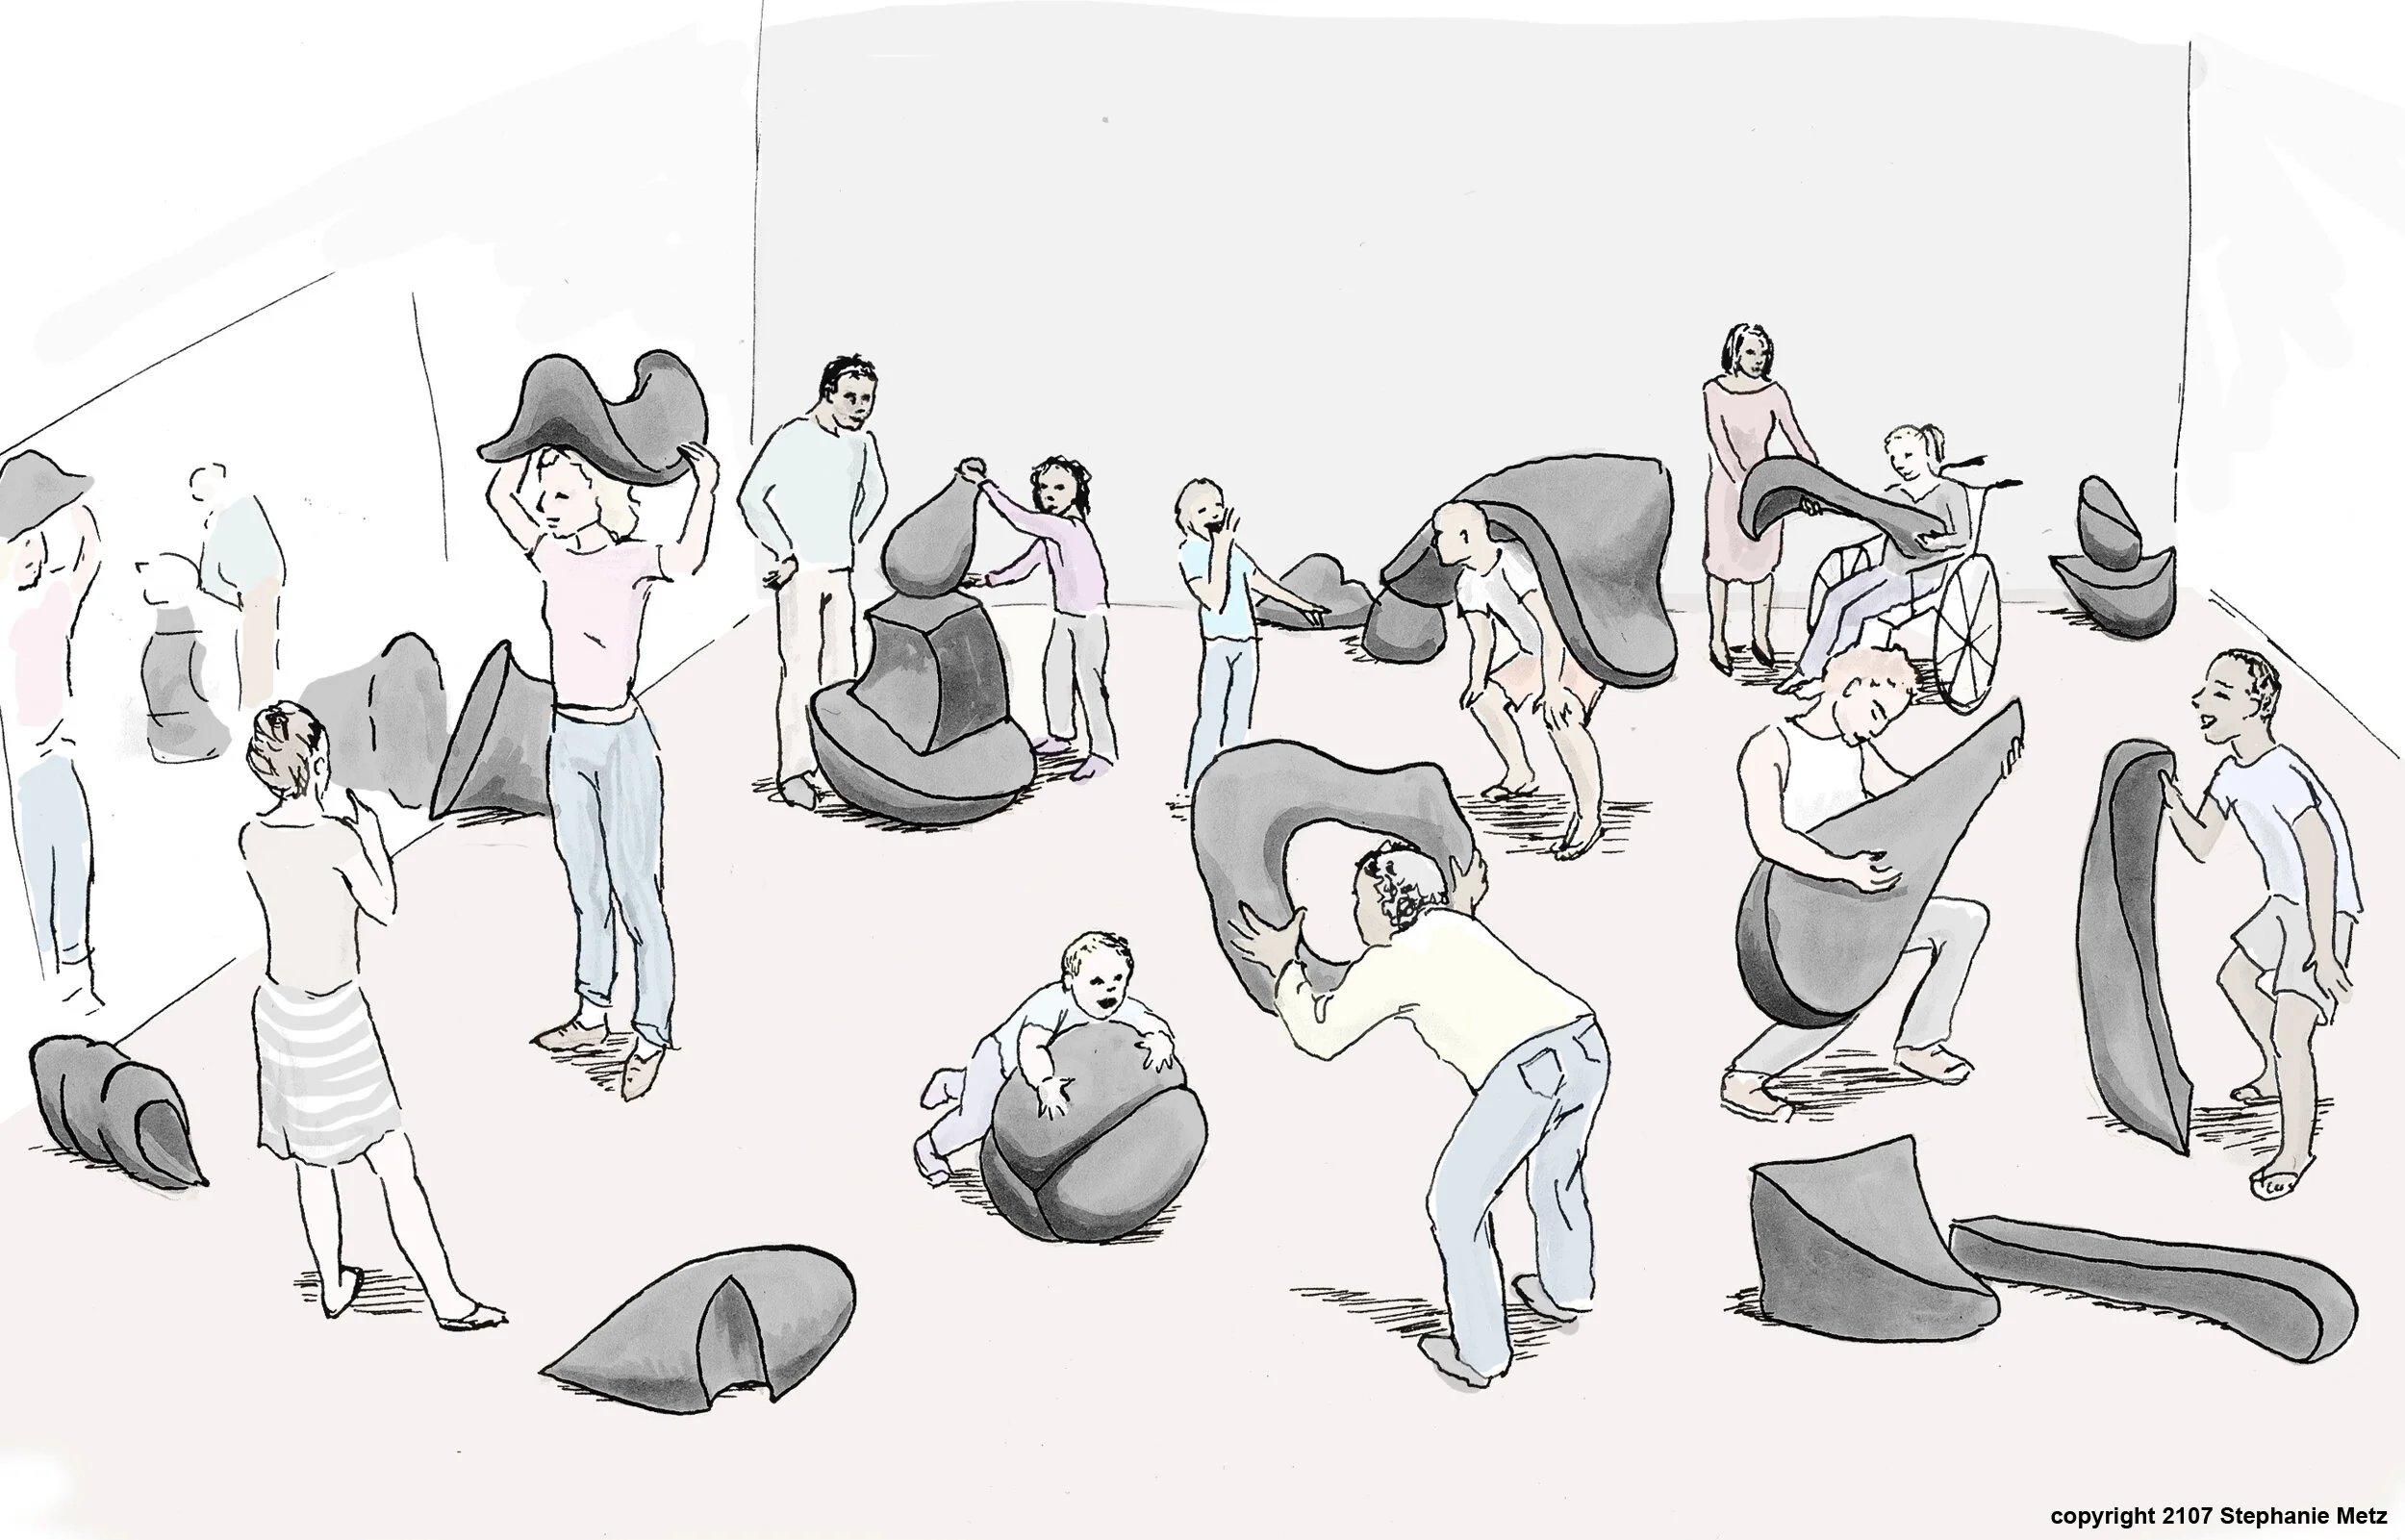
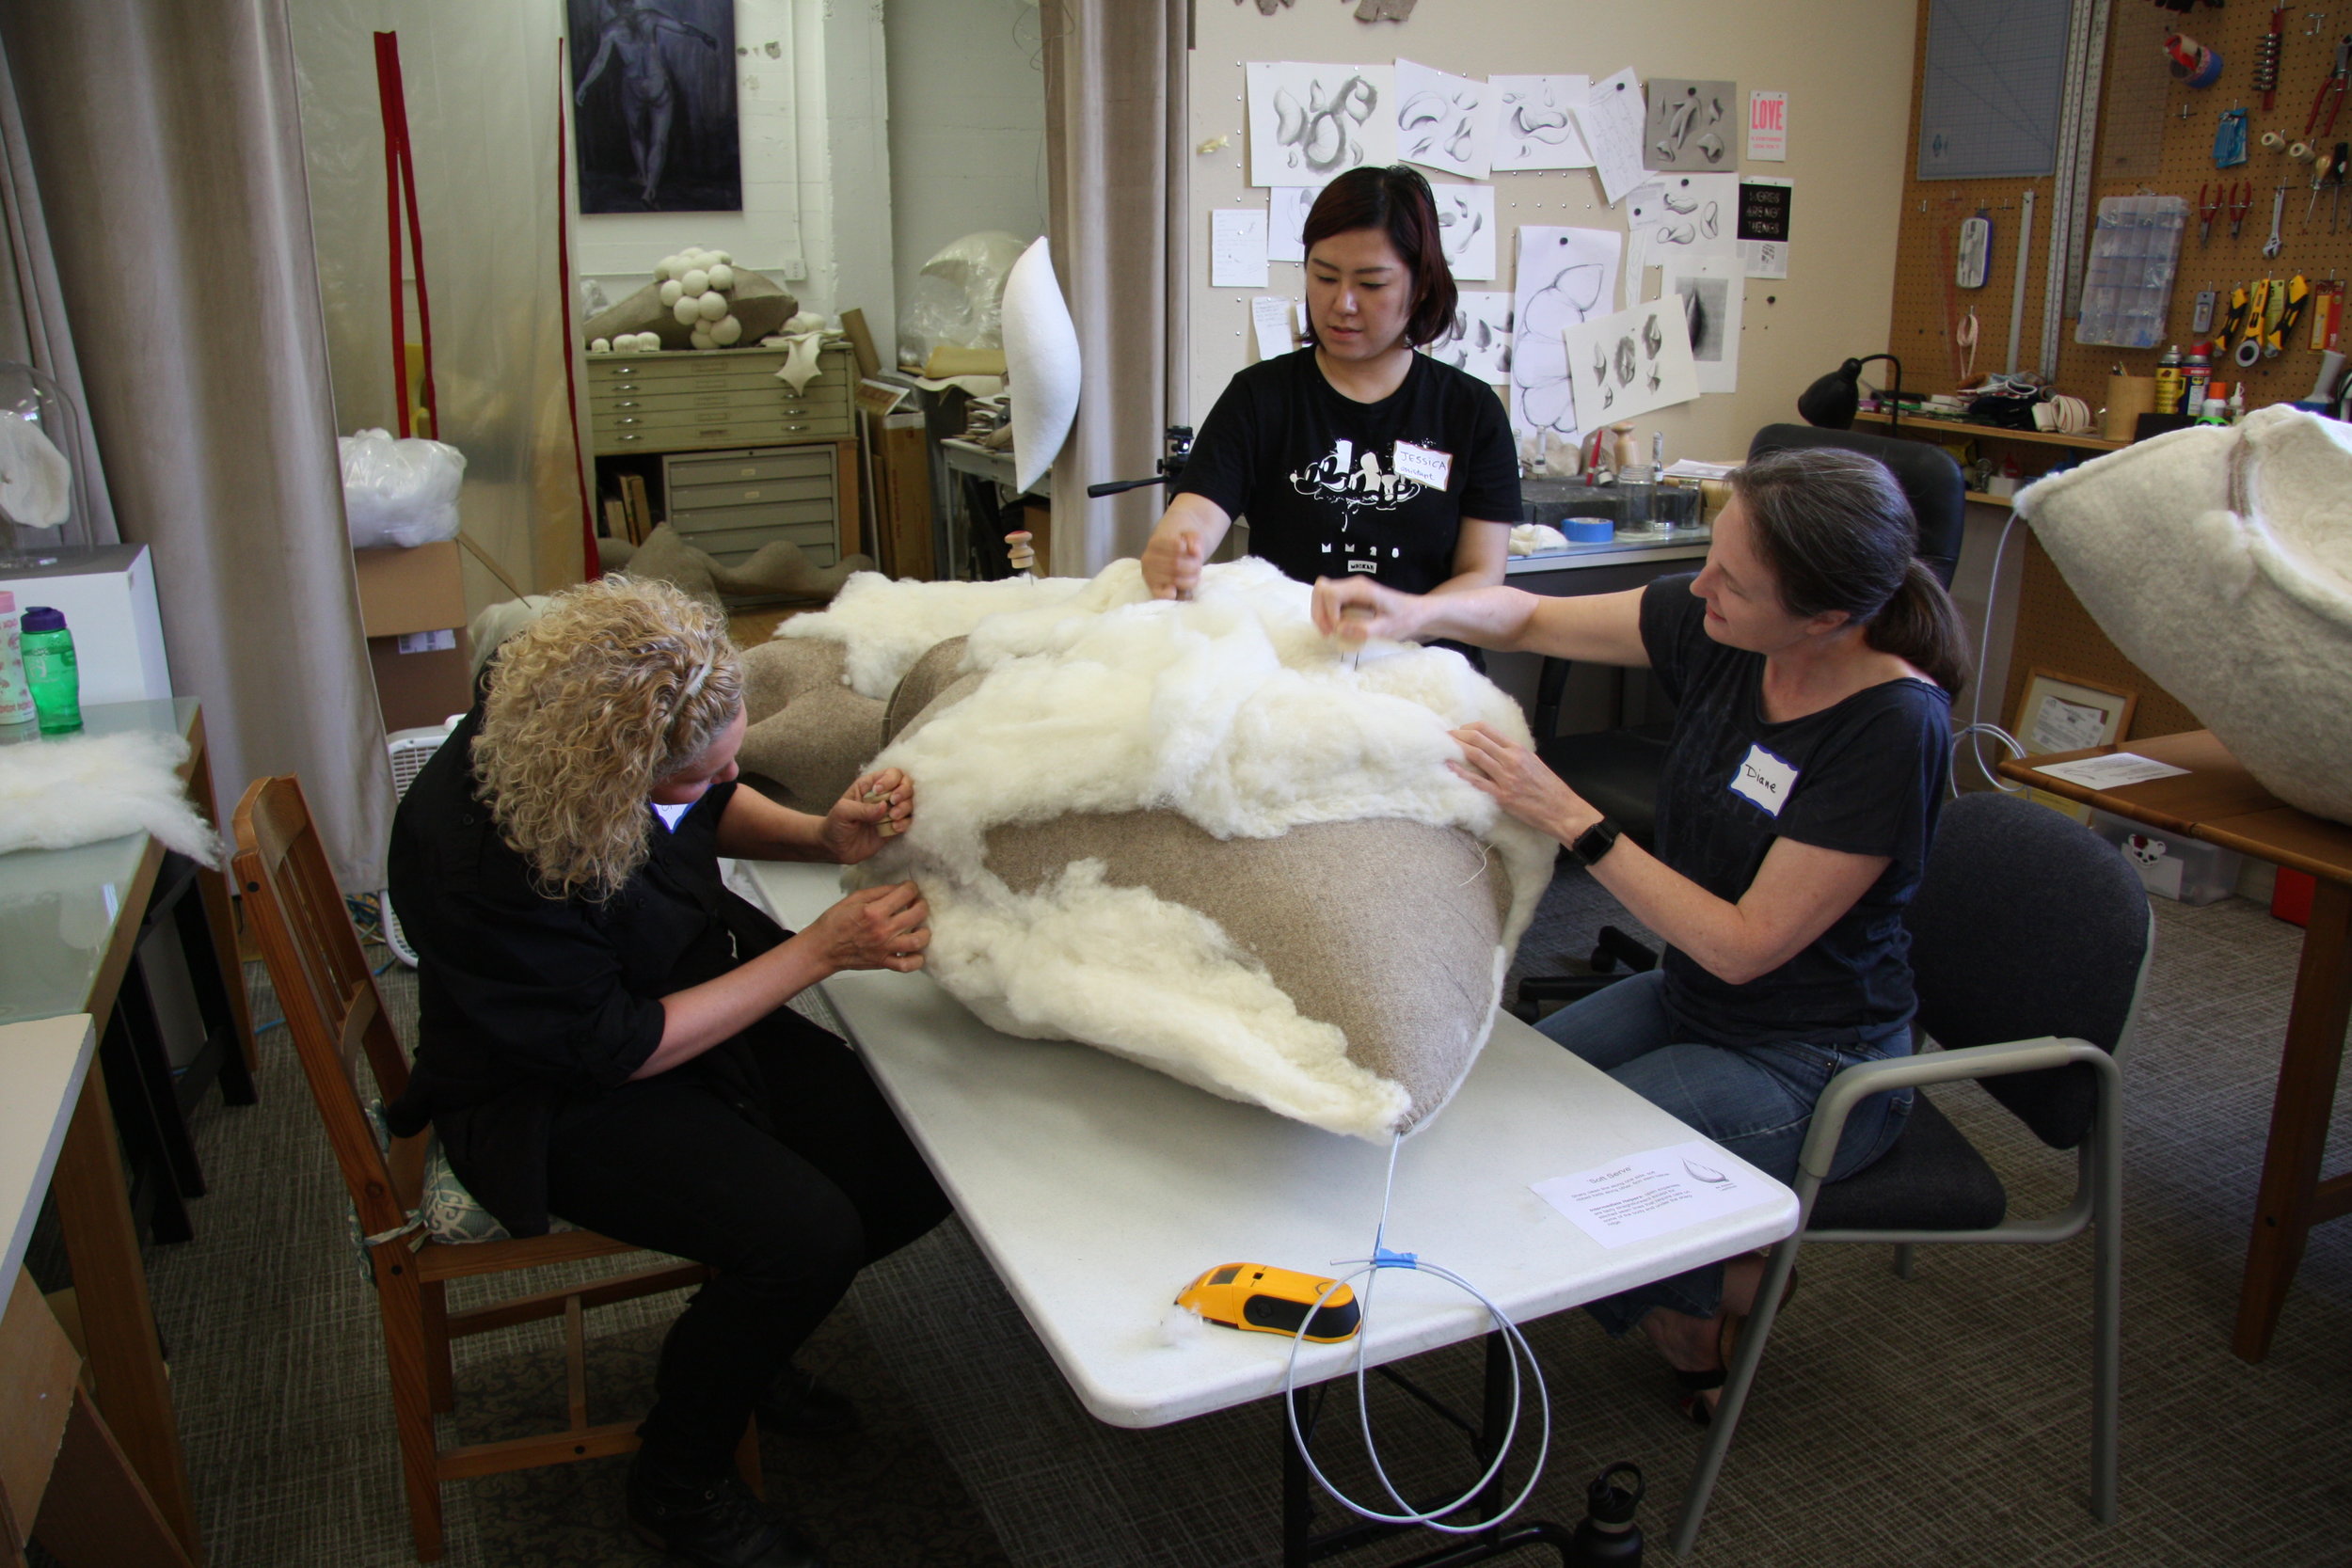
I receive lots of emails from people who find me one way or another and want to start needle felting— but they don’t know where to begin. Or I hear from needle felters who want to know how I get the clean edges and smooth finishes on my work— and there’s only so much you can describe in words. Early in the pandemic I sent out a survey to my mailing list to ask those who might want to learn from me about what topics they’d like to learn about. I heard from beginner, intermediate, and advanced needle felters. Many were looking for more open-ended courses about varied techniques as opposed to the kind of course where you follow along to make a specific project. Many wanted to learn about making more abstract forms instead of cute small animals. Some wanted to learn about armatures and building over other materials, or integrating mixed media. Many want to learn about getting smooth finishes and building forms.

When I teach a live in-person workshop I welcome people at all levels of experience— because I think there’s a lot to learn from the way any individual artist creates her work, especially if she is good at explaining the choices and decisions and techniques she’s using. Over the years I’ve done a lot of troubleshooting and problem-solving with students to figure out what the common difficulties, frustrations, and stumbling blocks can be when it comes to sculptural needle felting. But that was my big hang-up for a long time— I’m so used to working with students one-on-one within the live workshop format, and I think that’s a really valuable aspect to teaching. I couldn’t figure out how to deal with that— because as good as I’ve gotten with Zoom, it’s still so, so hard to connect about a tangible thing when we’re not physically together. The thought of peering through my screen to try to describe how a student could turn their piece over that way and use just a single needle in that section and come at it from that angle, no, just a little closer to where that thin part joins the thick part… that seems exhausting.

So I didn’t do anything about it. For a year.

And then I realized that I still have a ton to offer when it comes to needle felting, and it doesn’t have to be all or nothing. In fact I started plotting out a class that is turning out to be a lot closer to ‘all.’ As so often happens when I get started on something exciting, it grows and develops beyond what I dreamed.

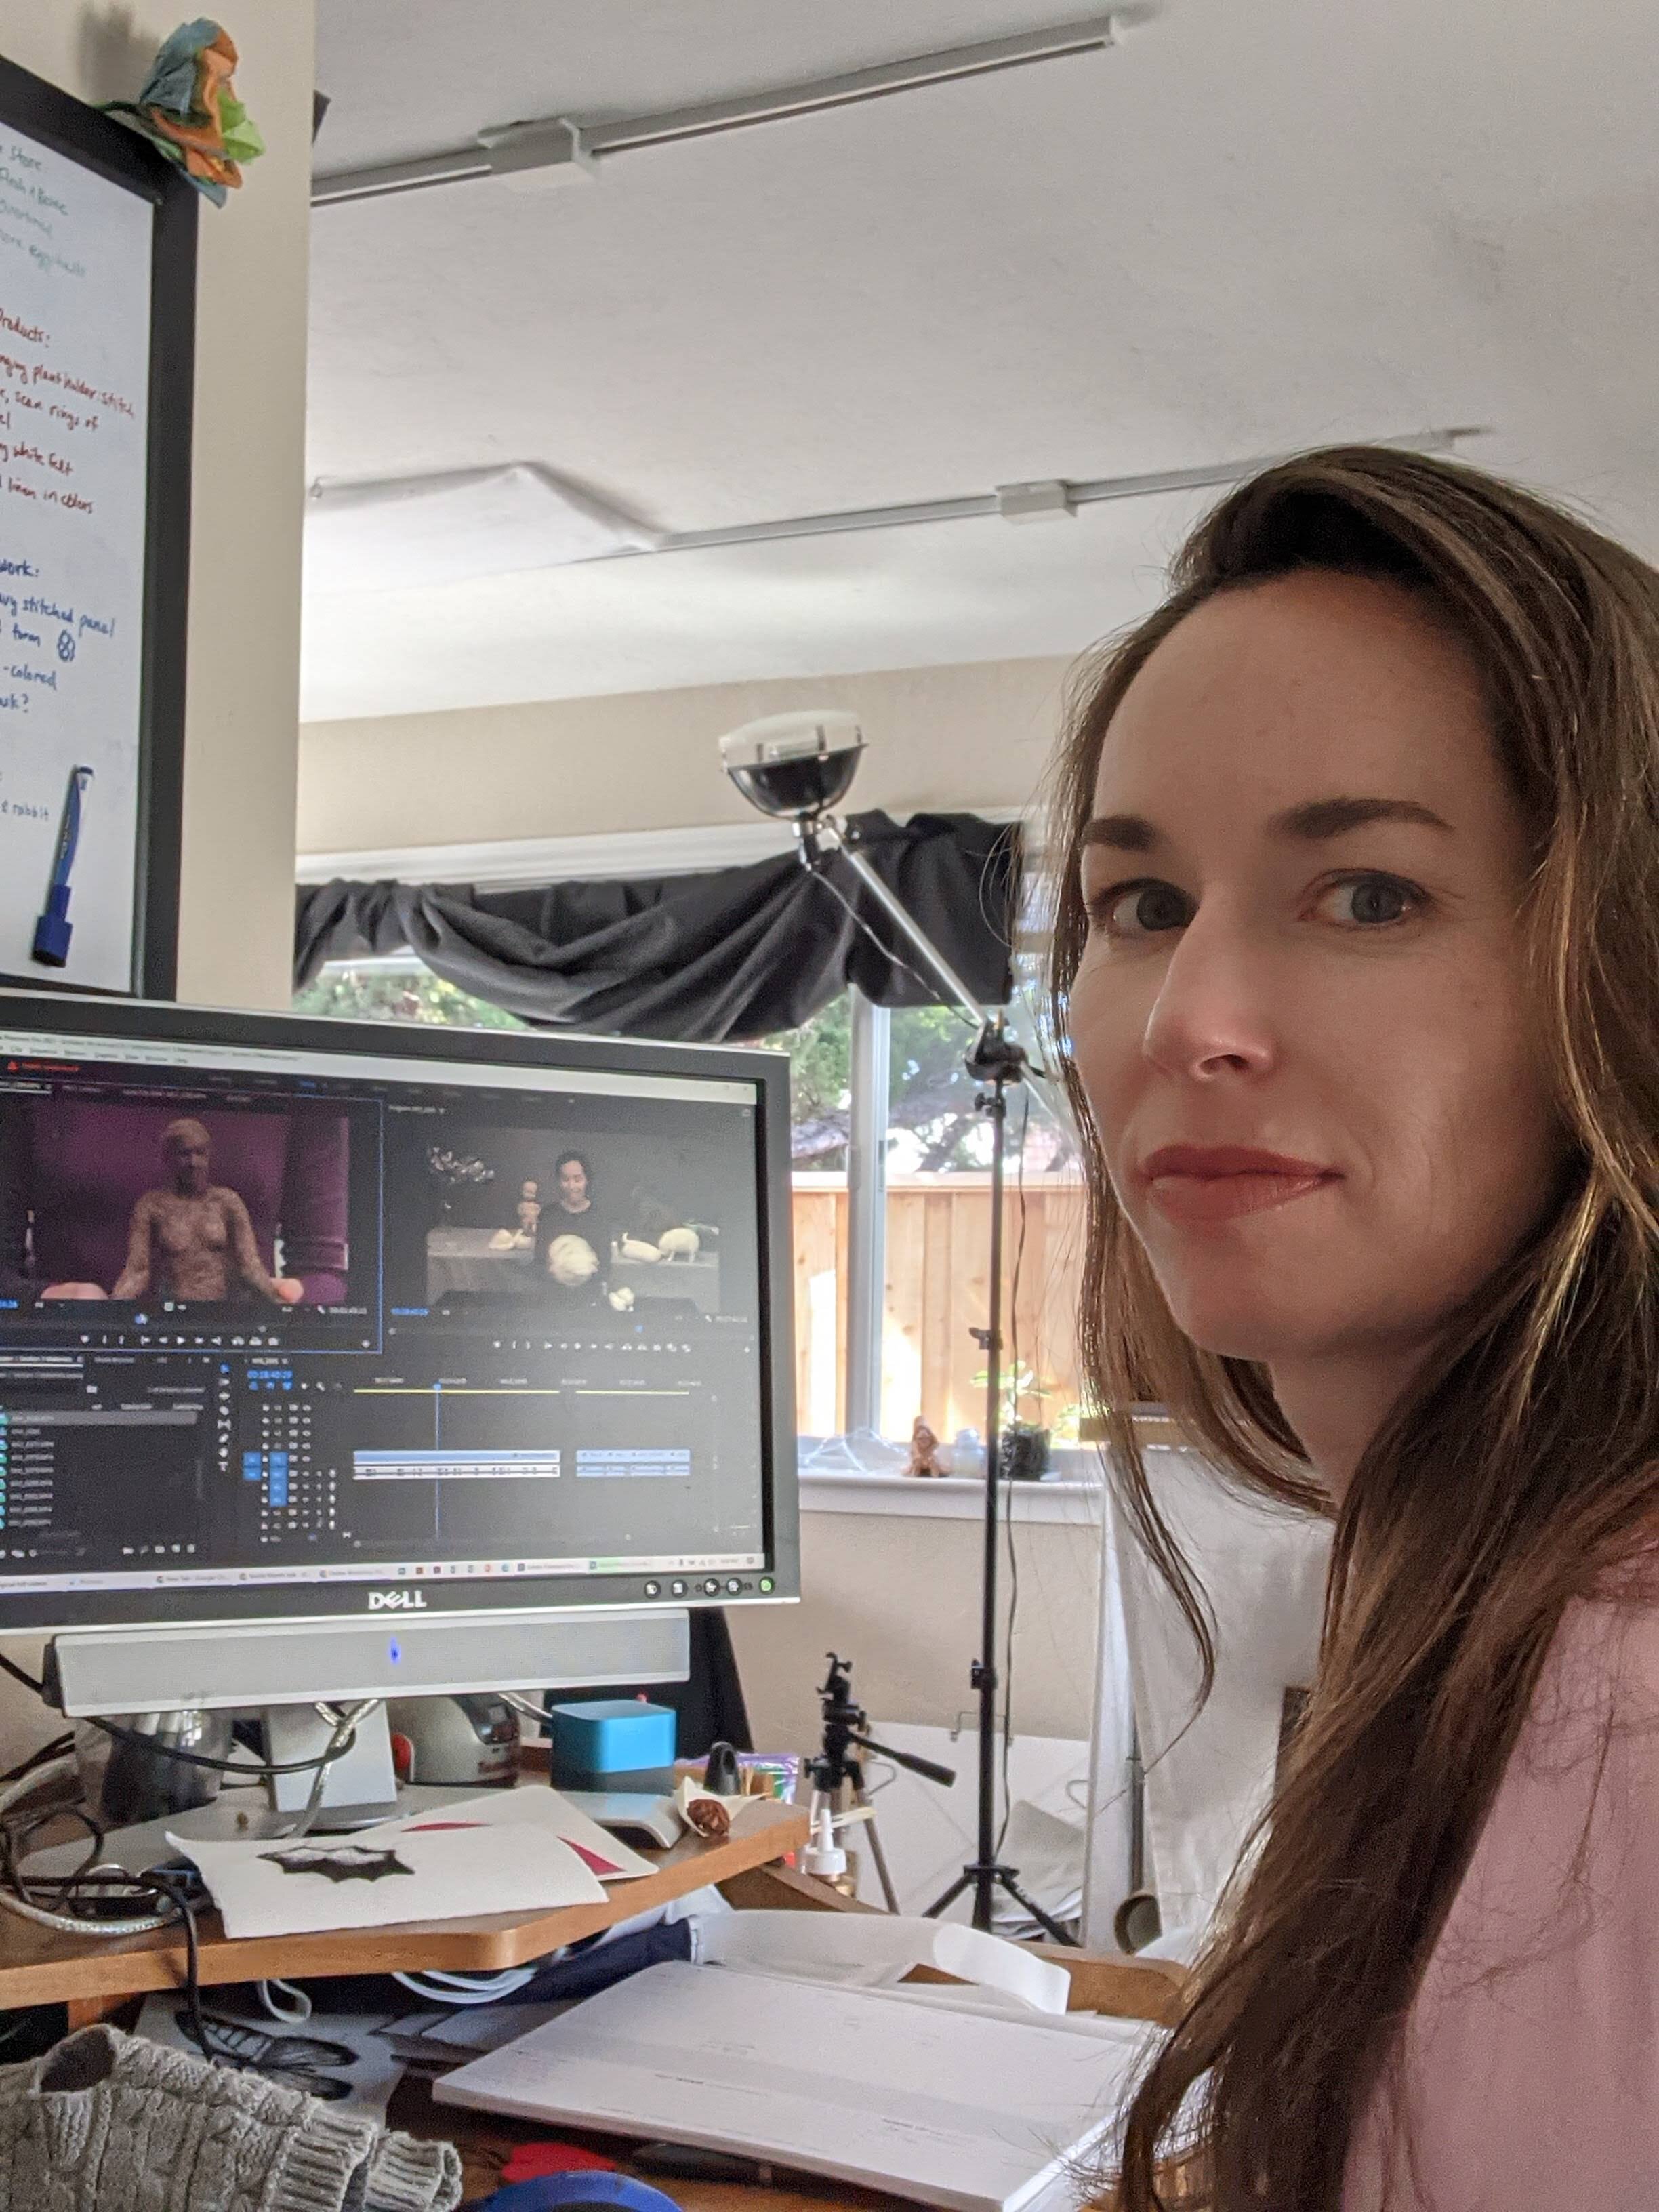
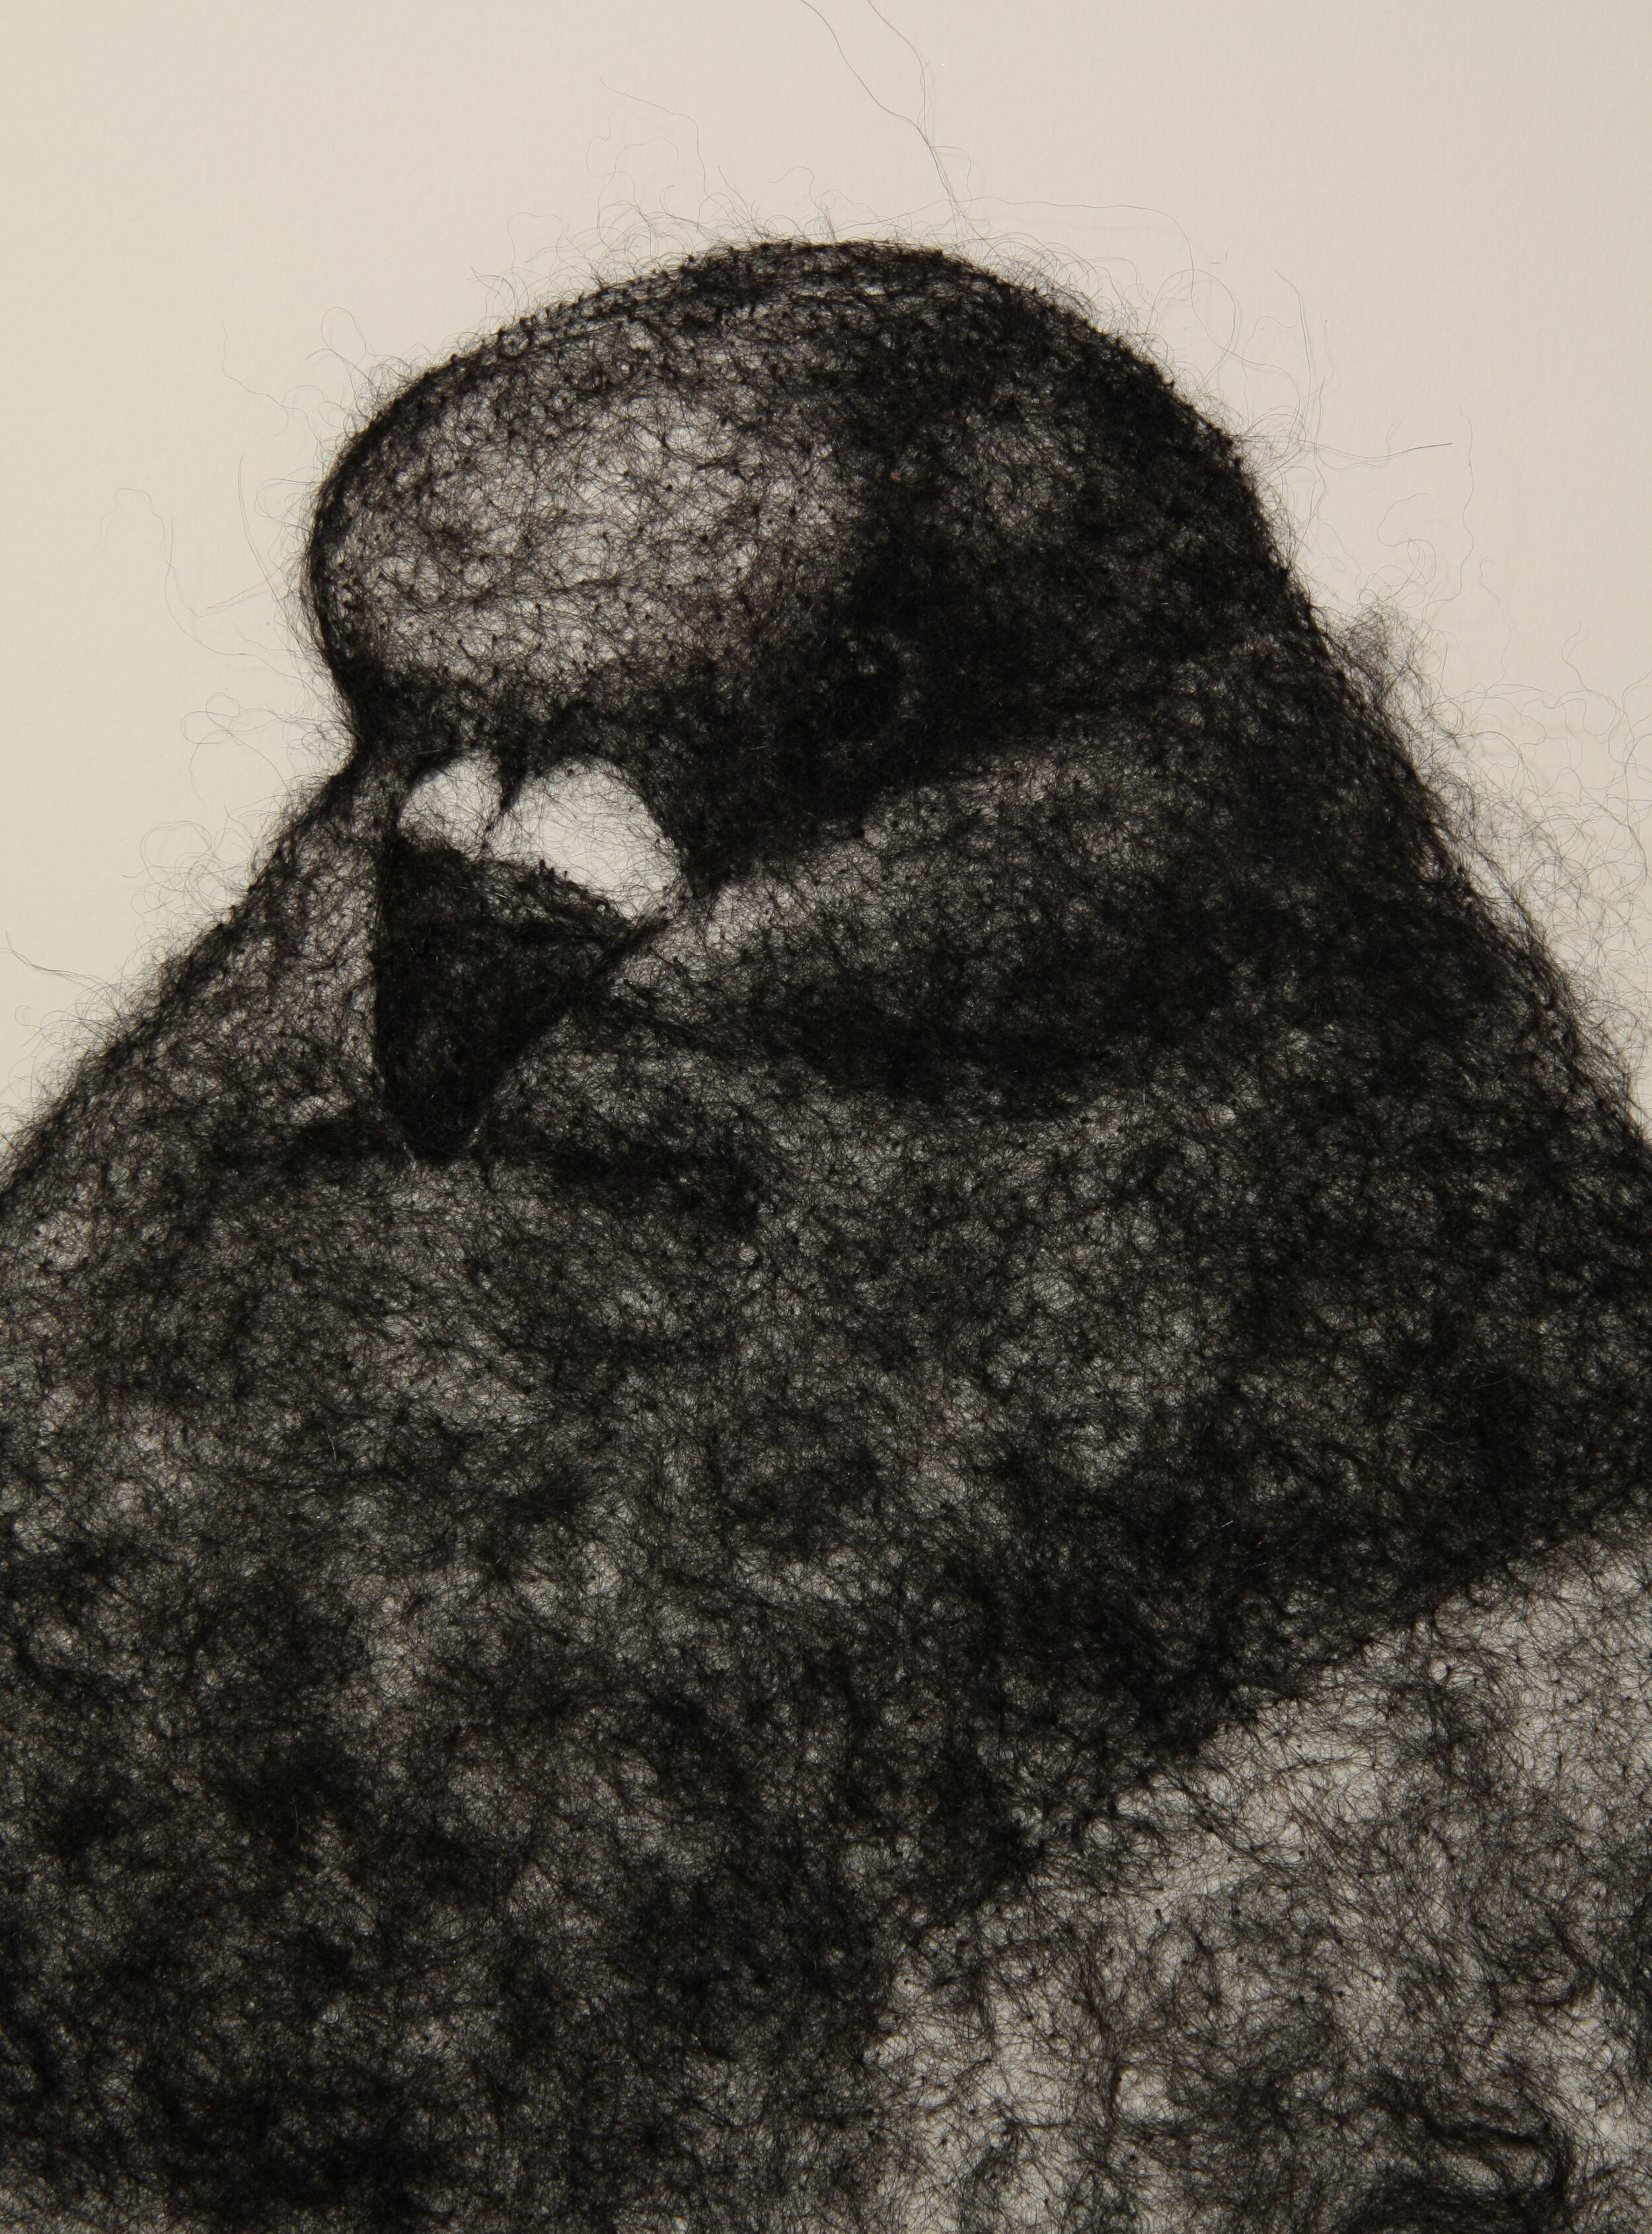
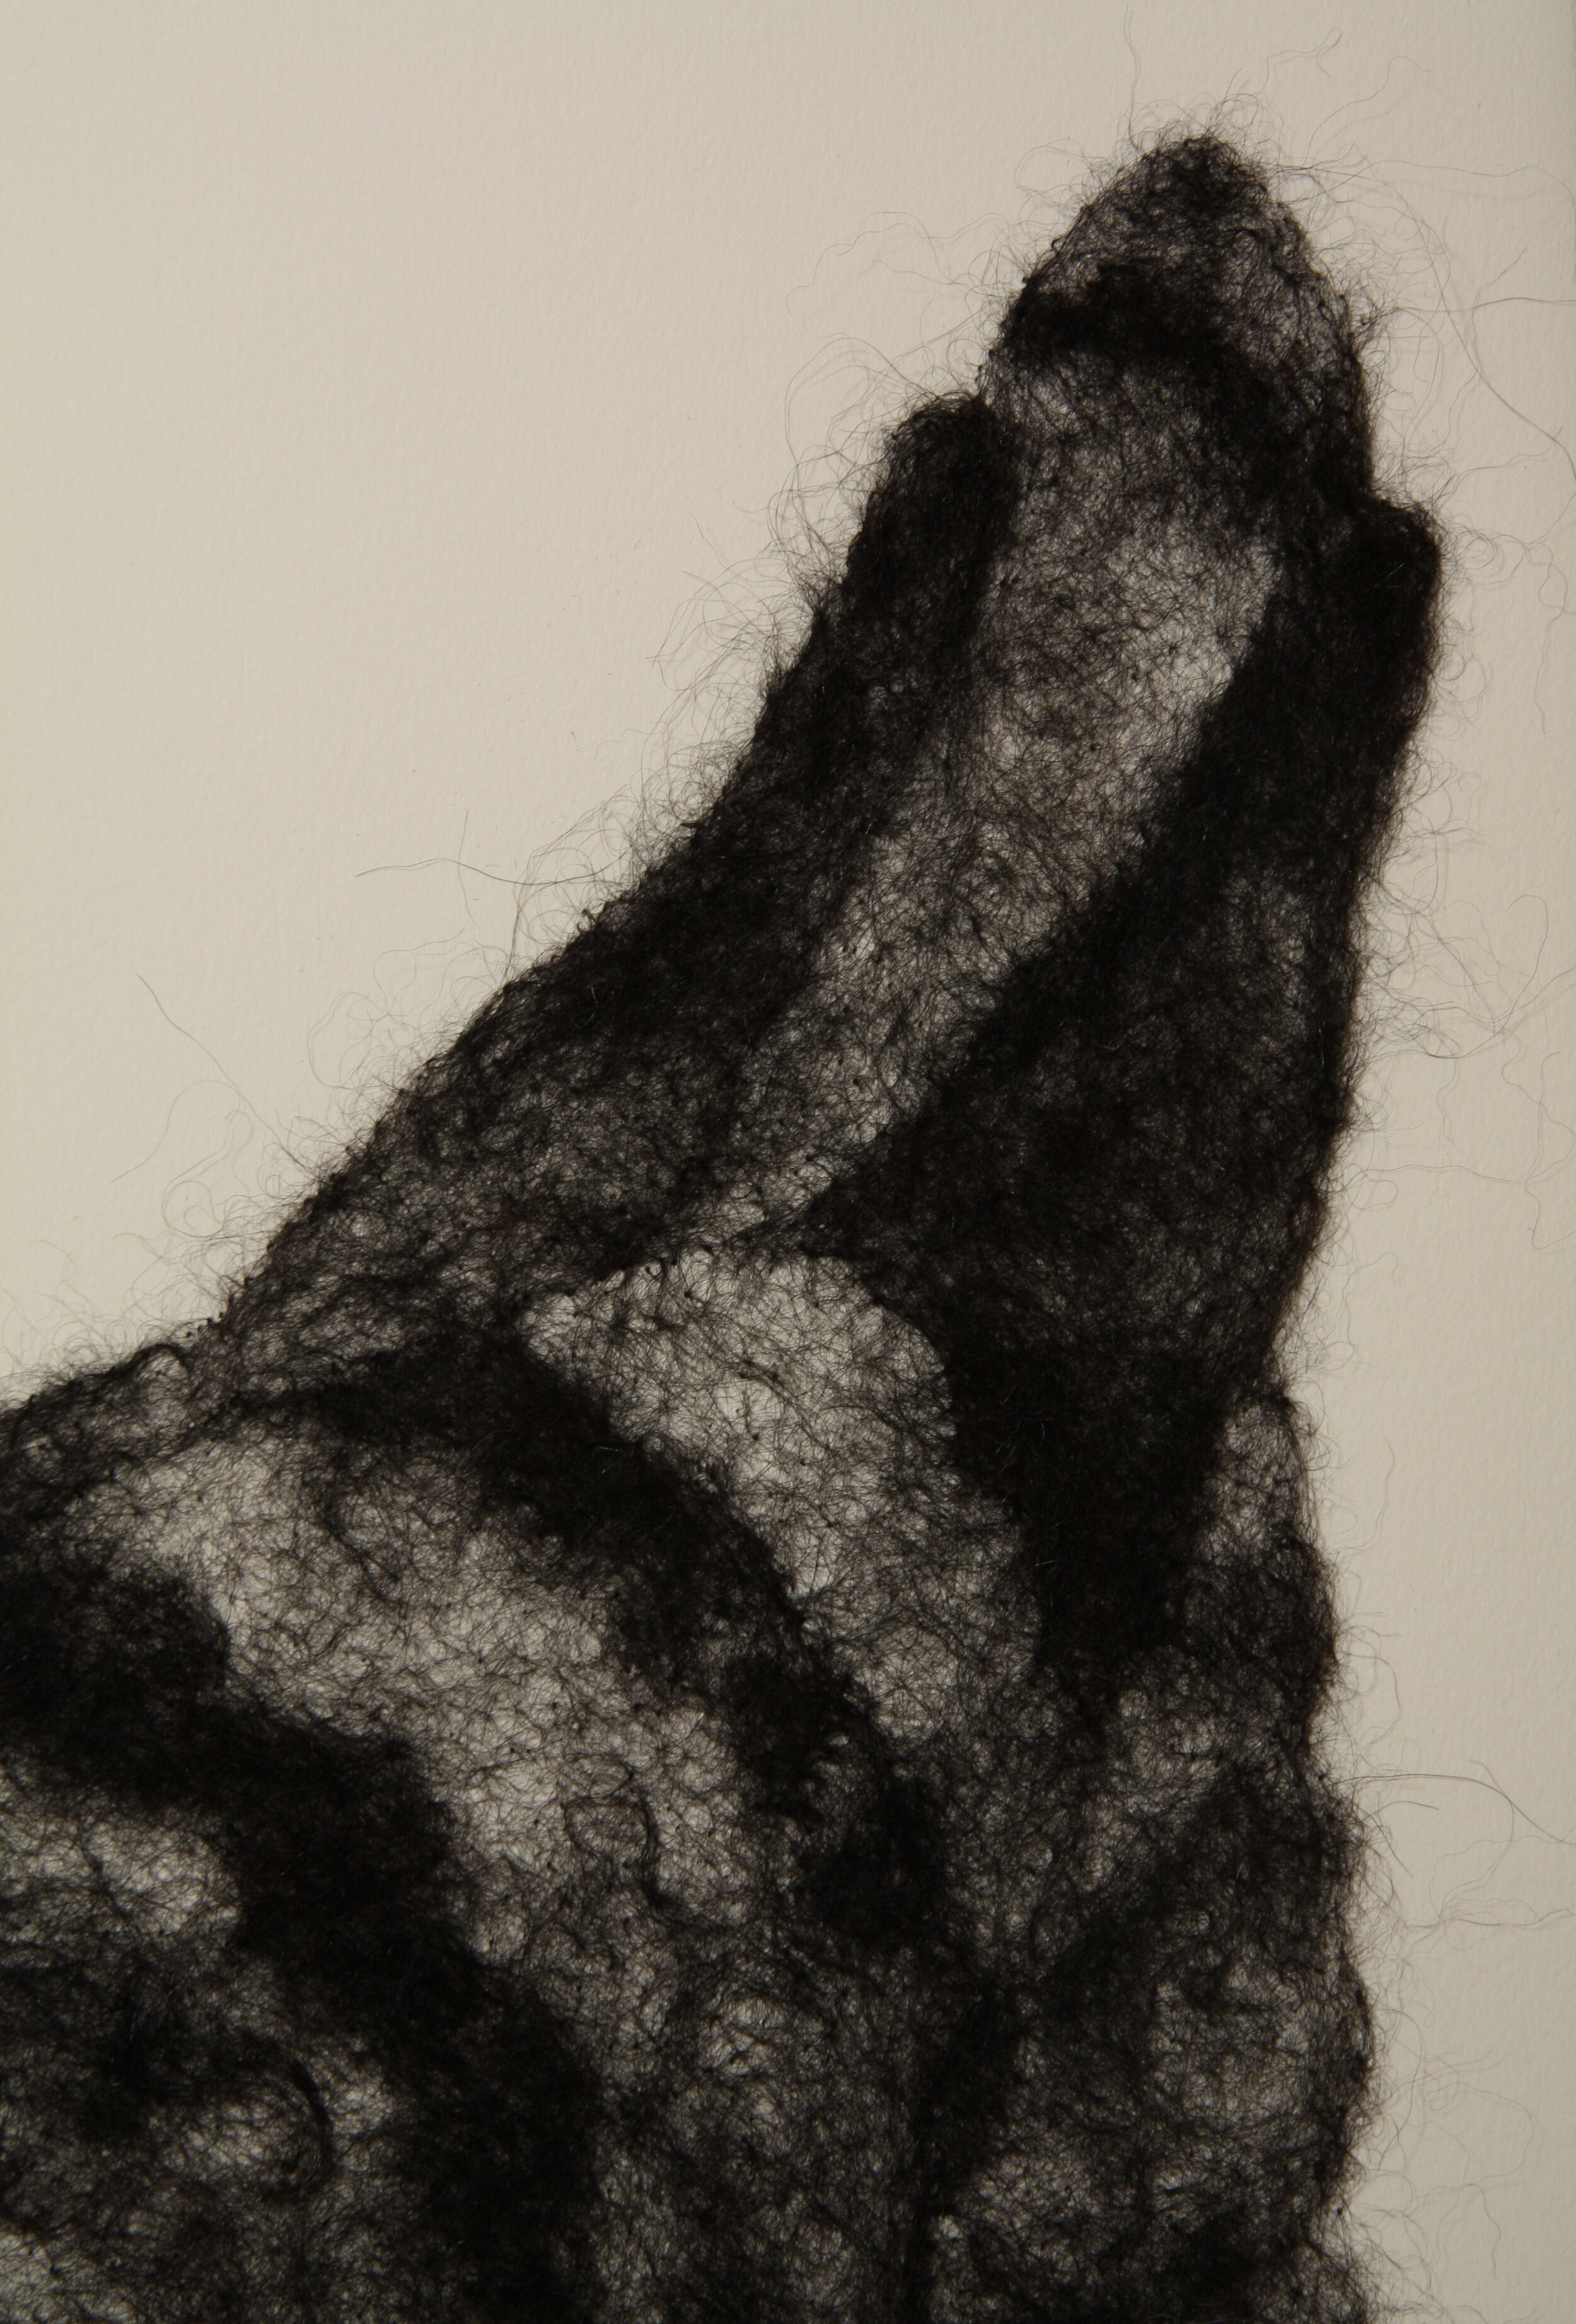
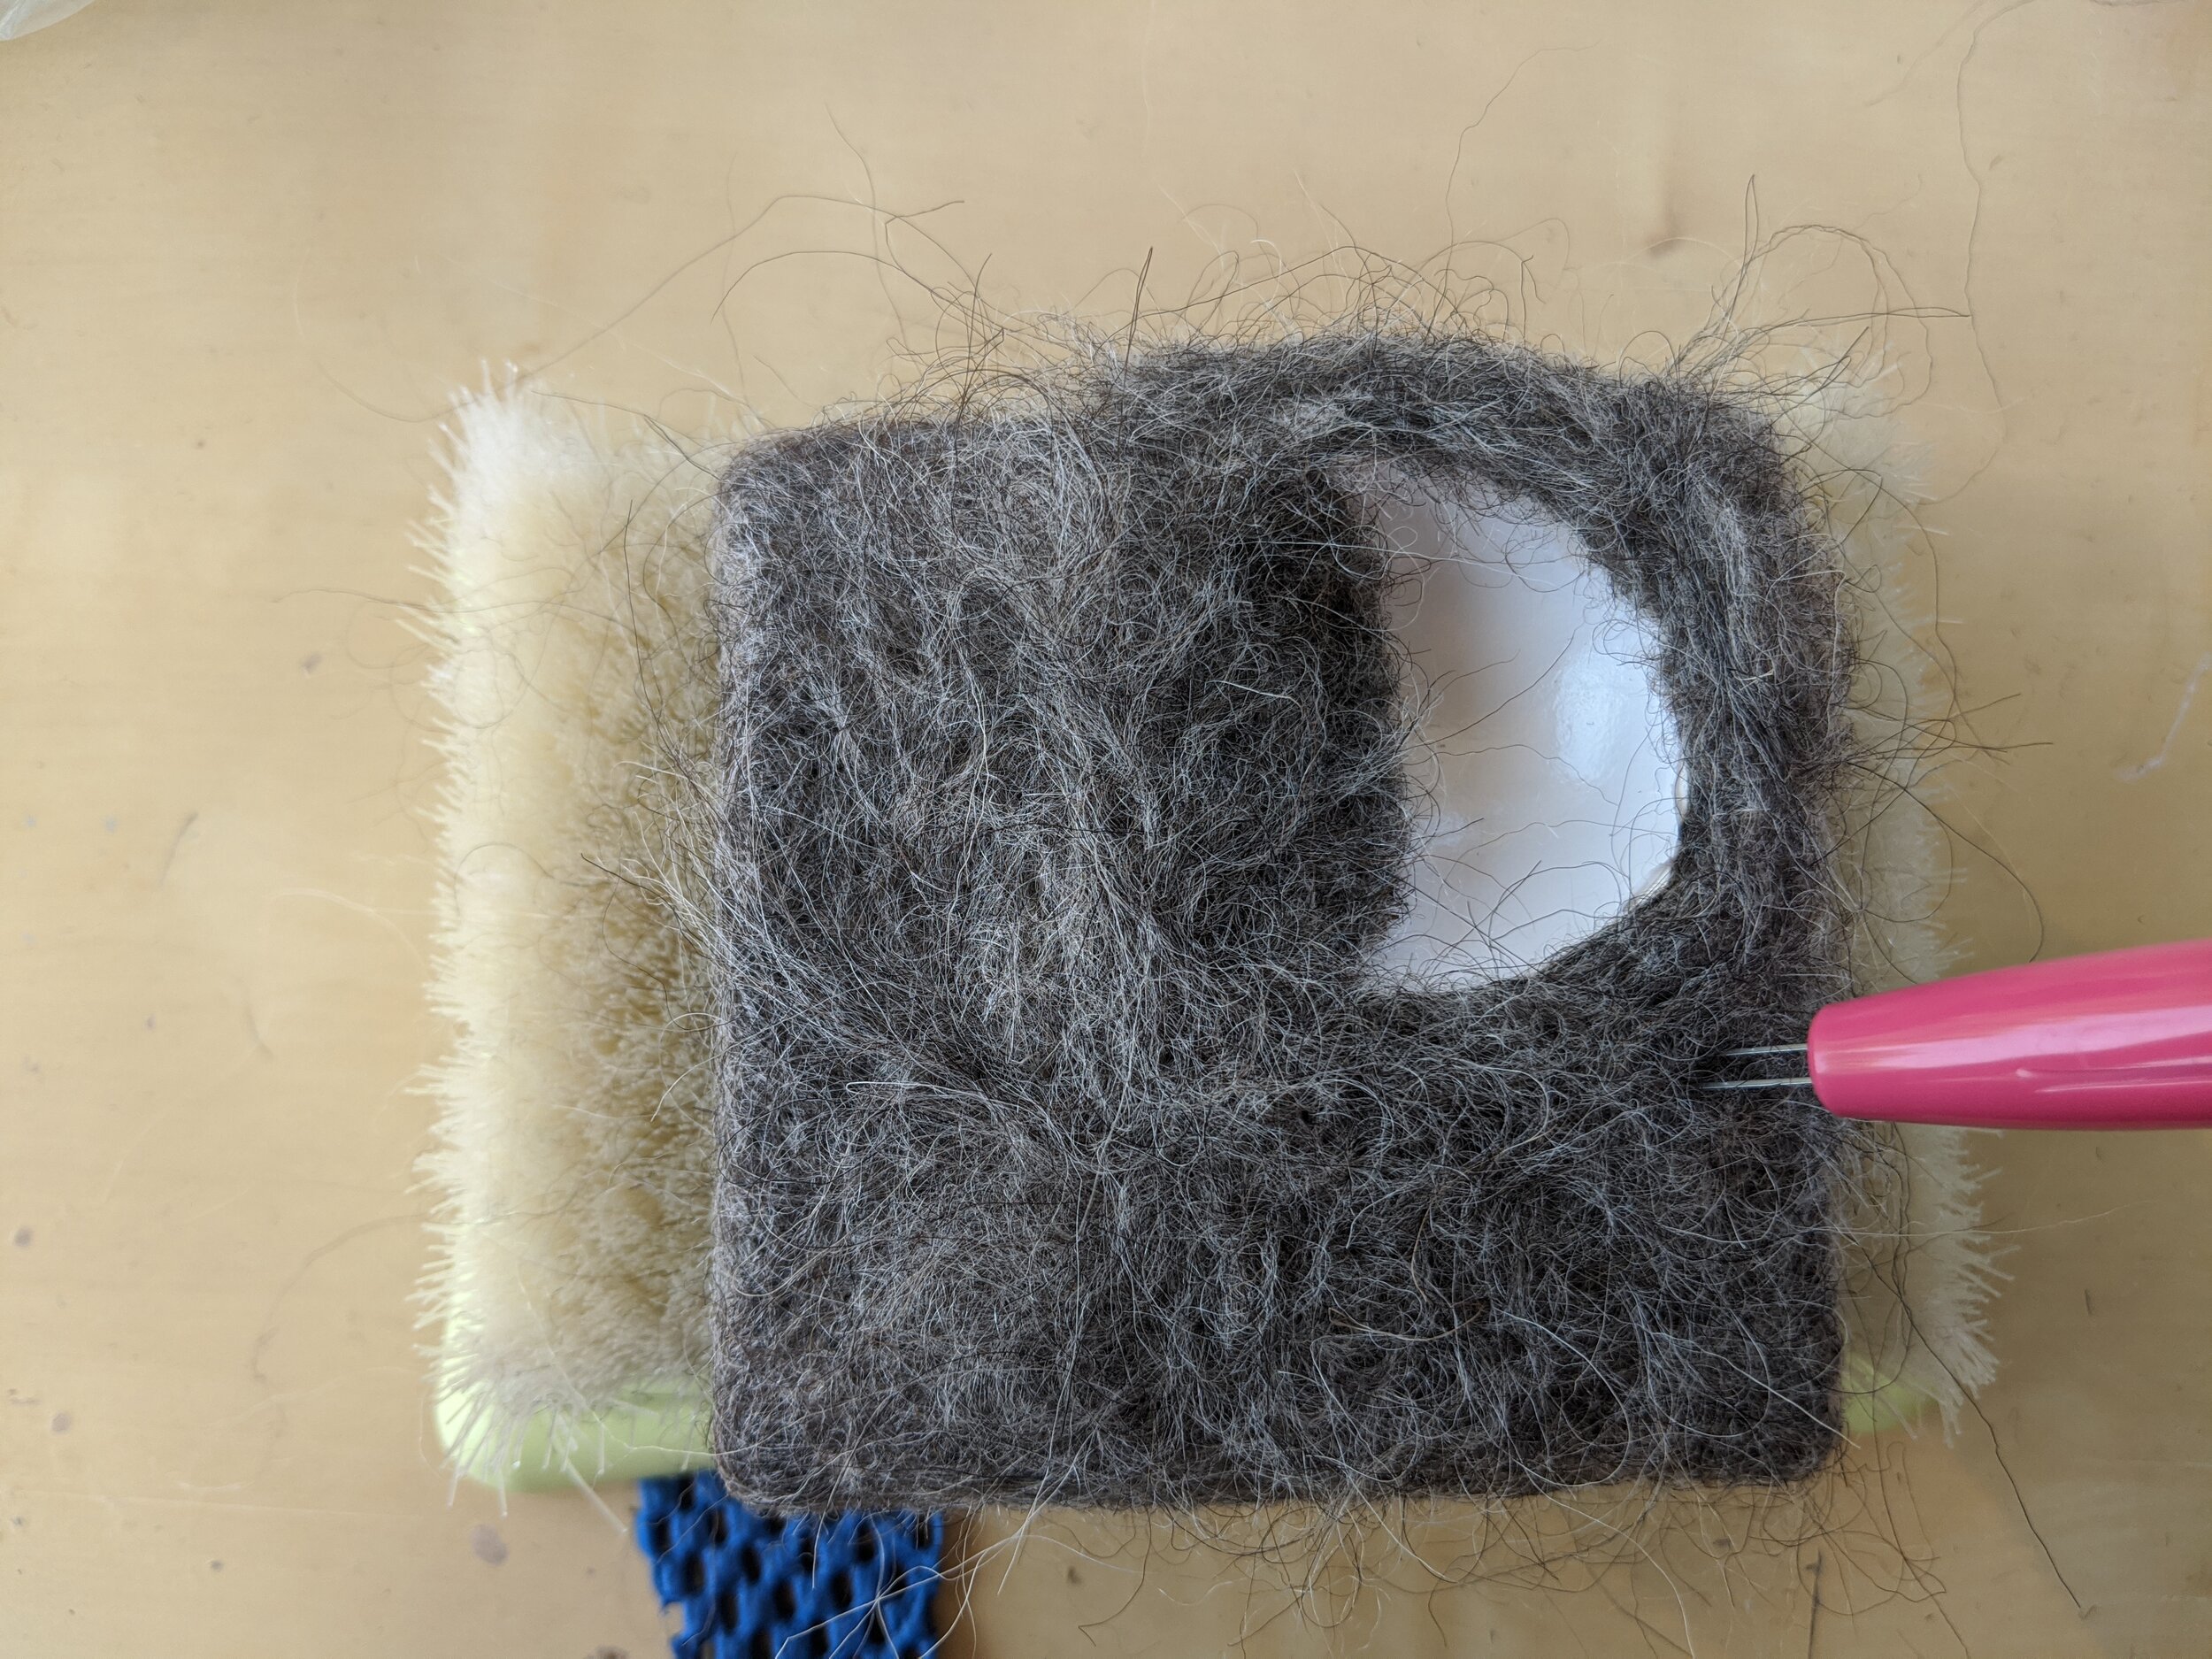
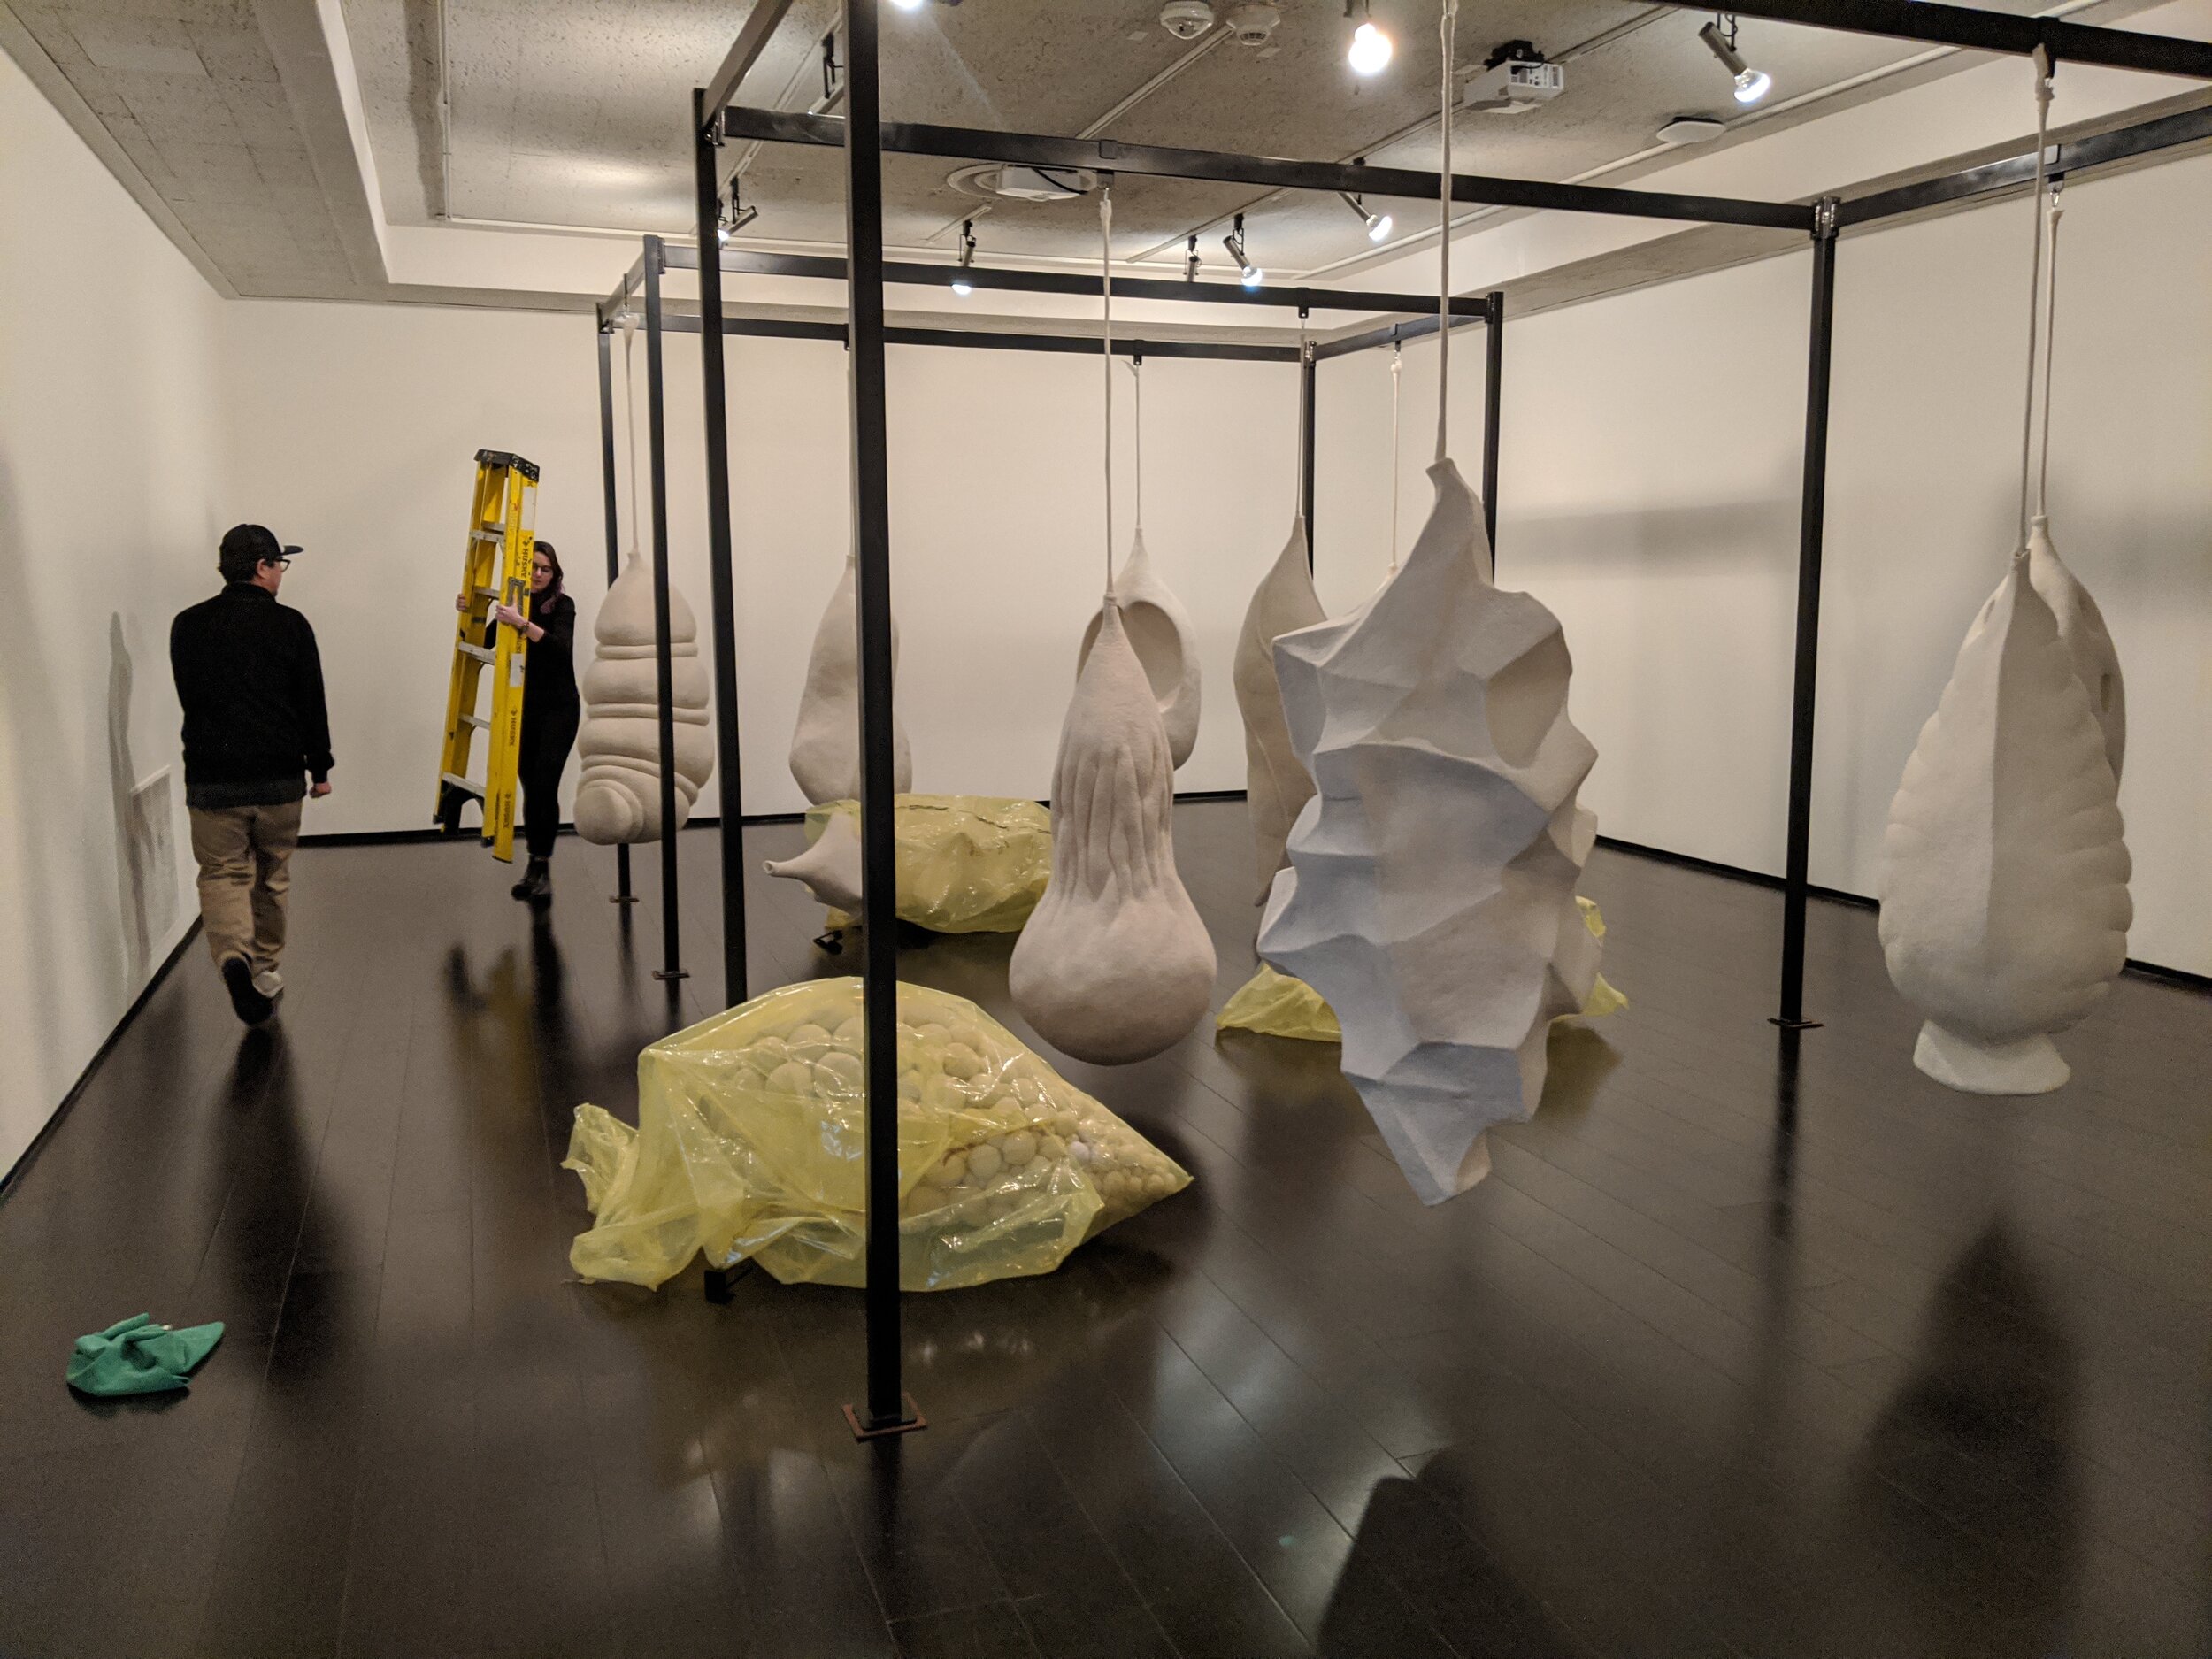
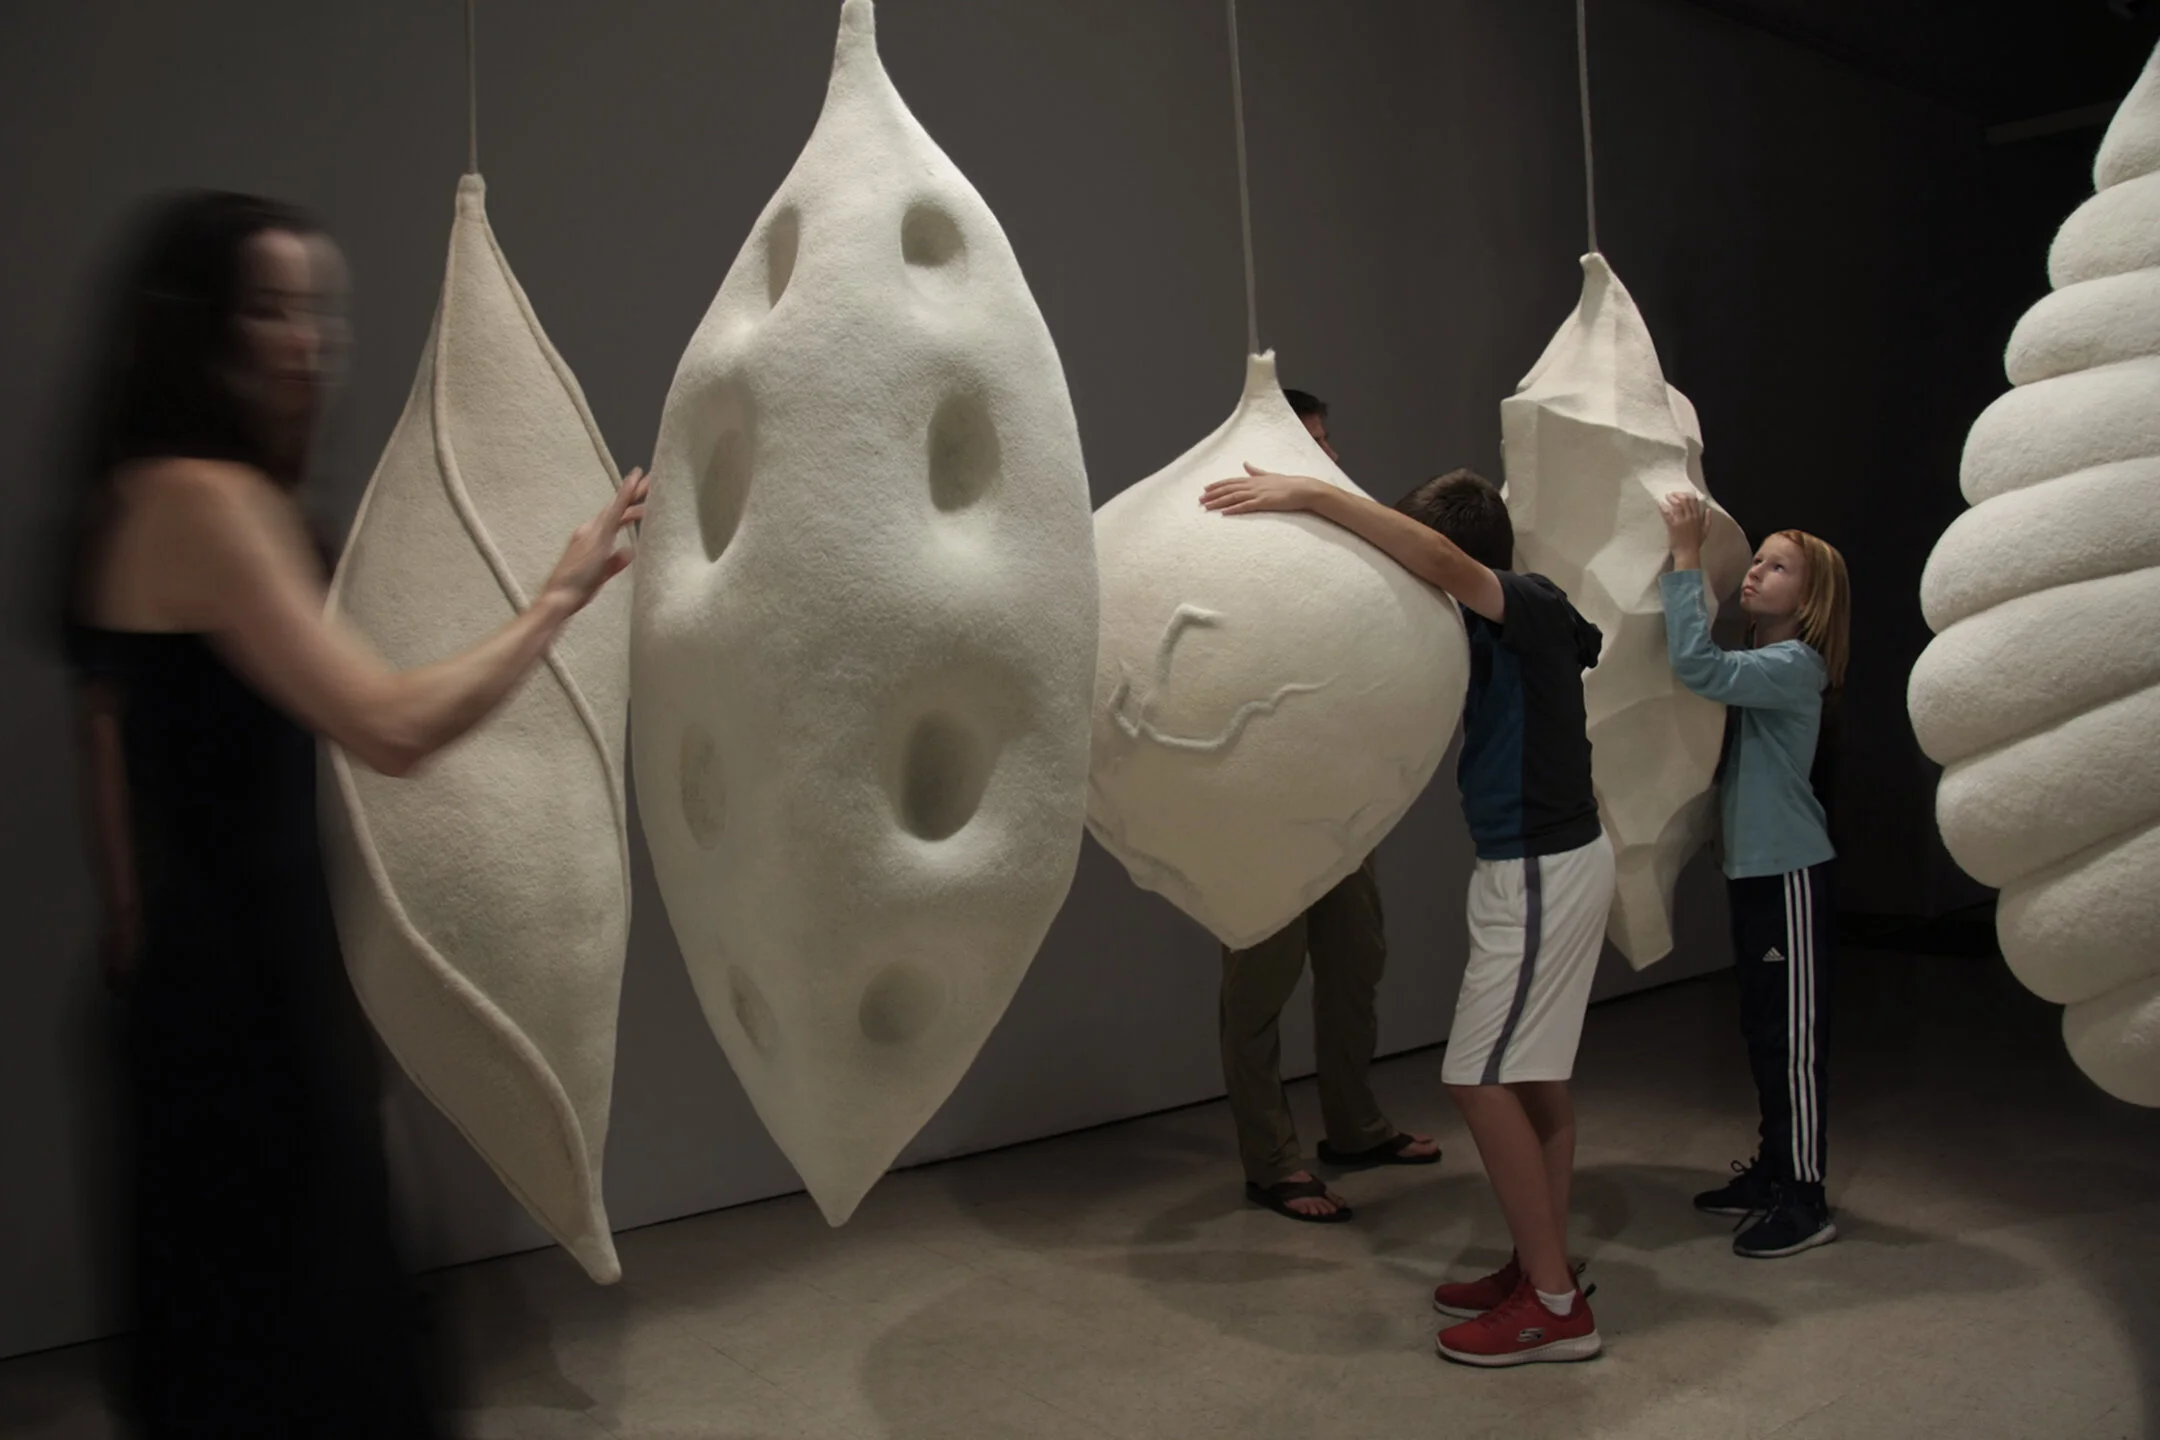
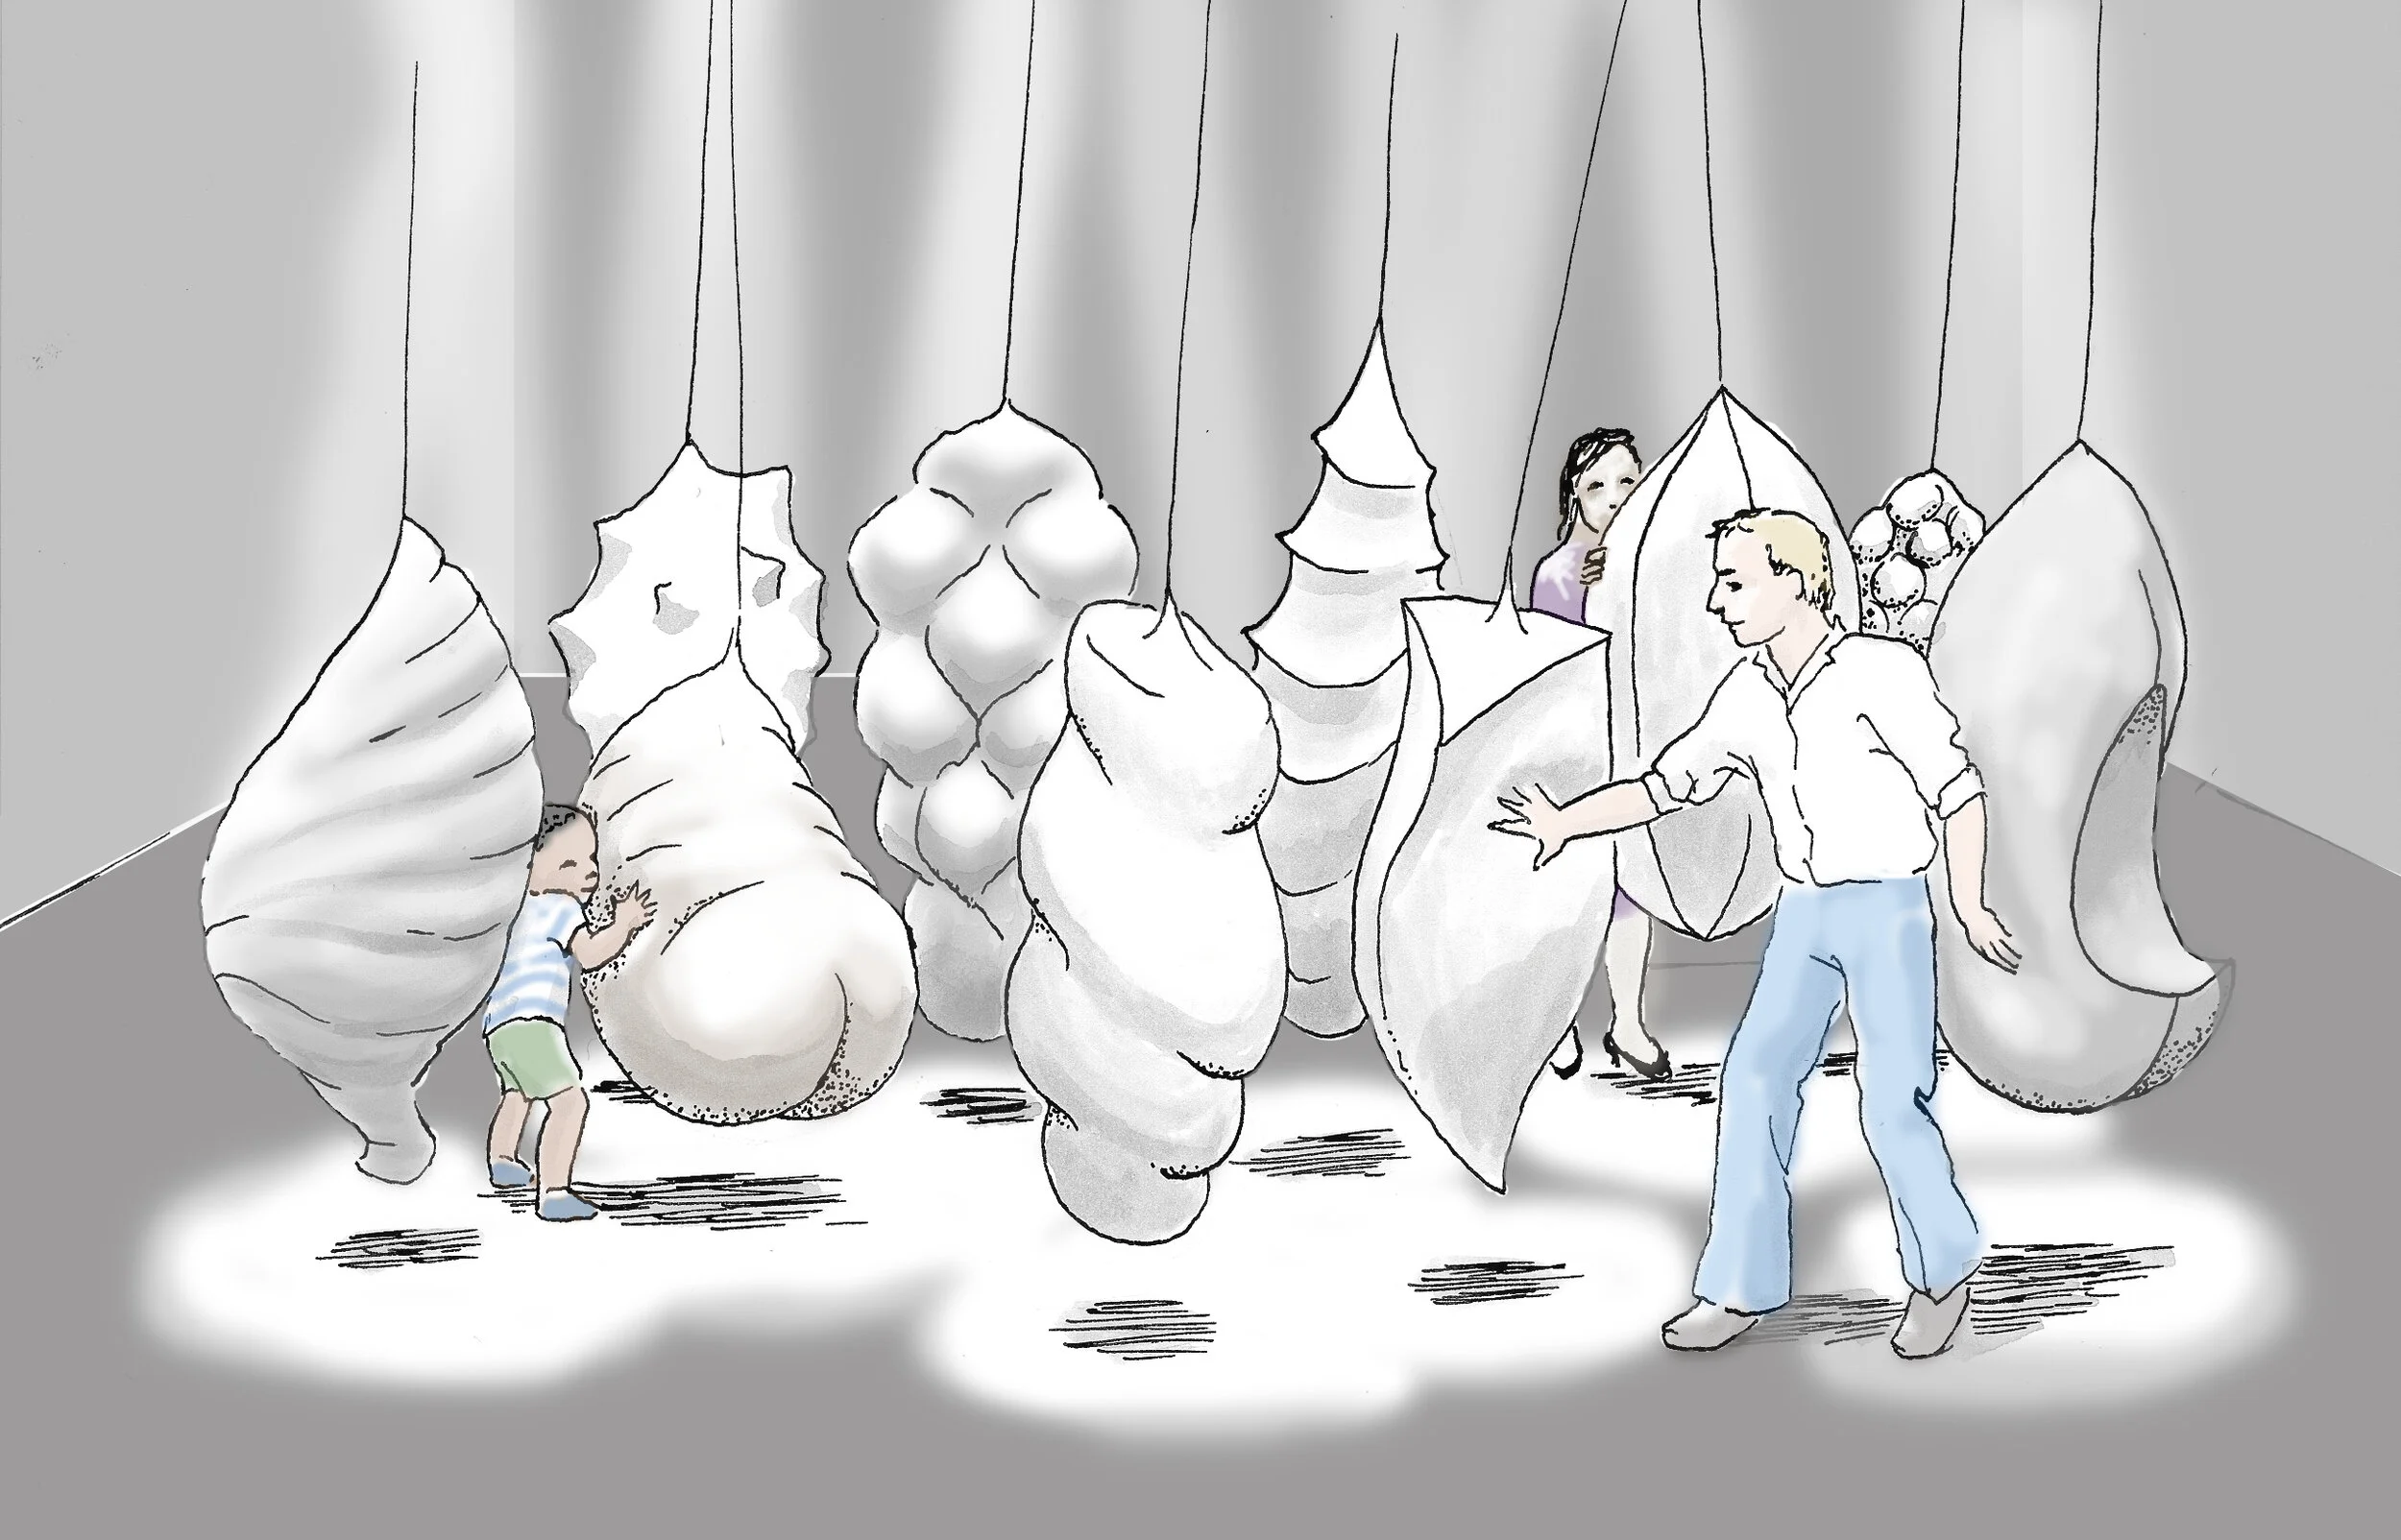
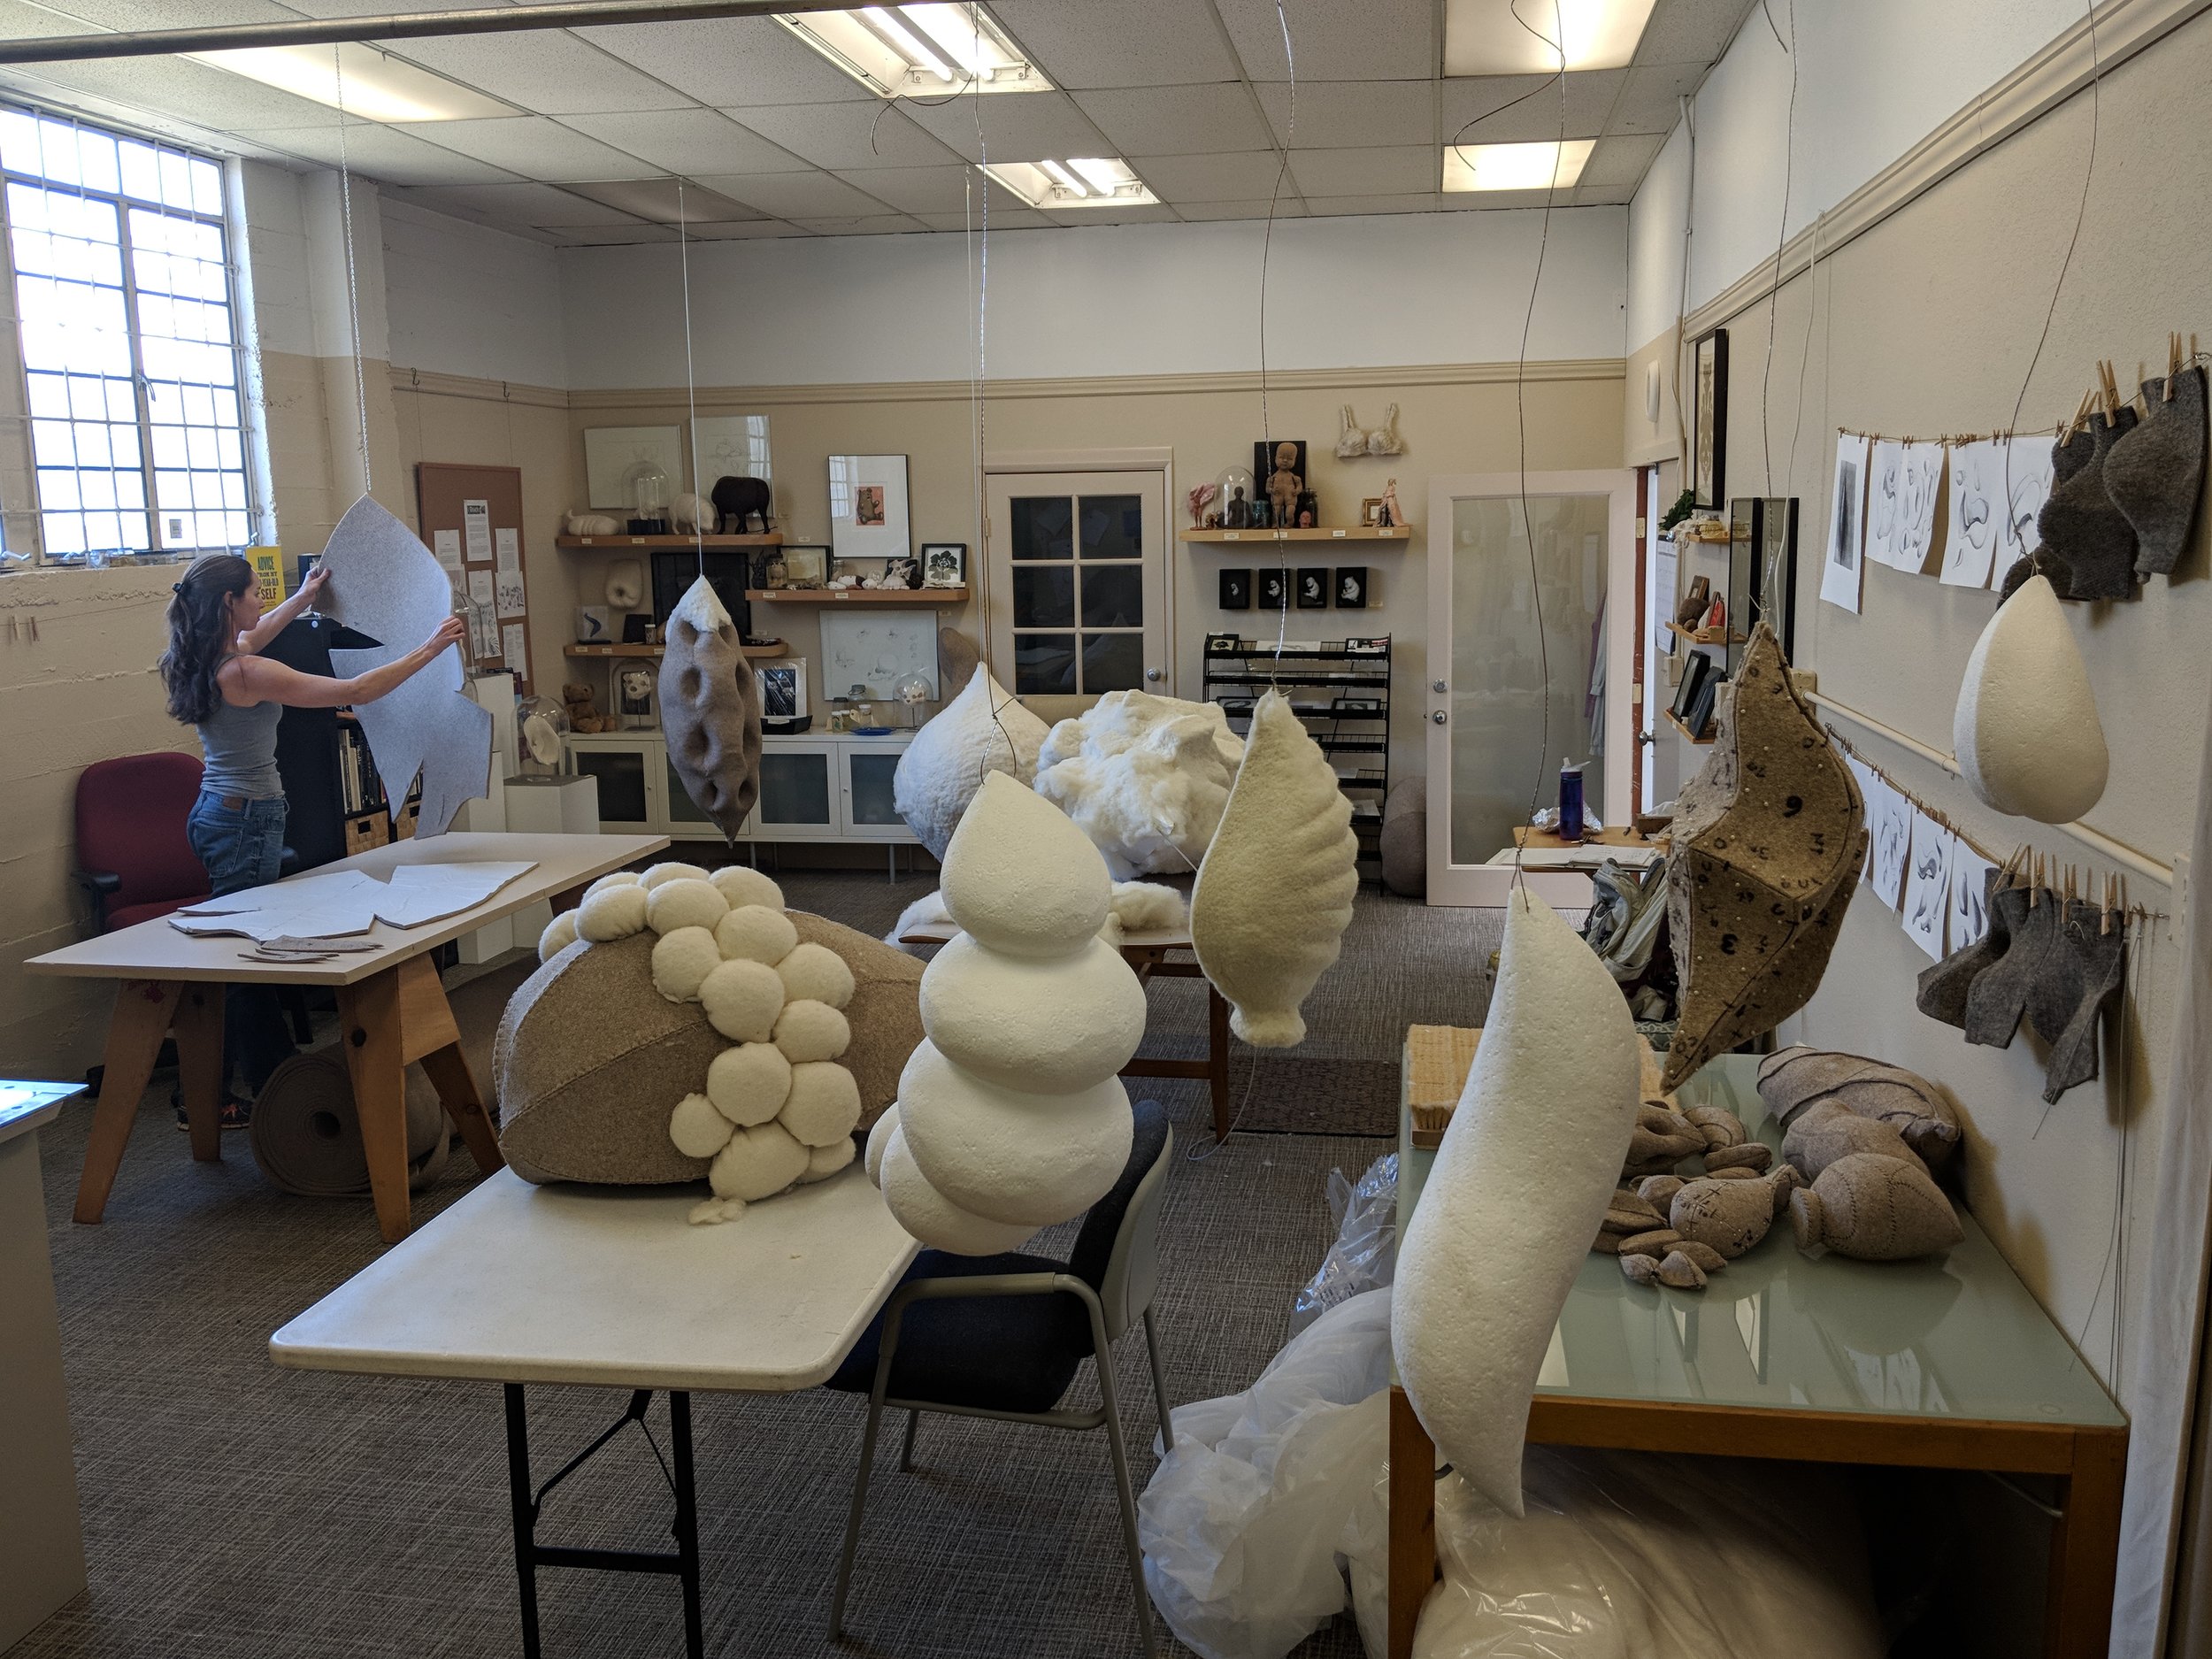
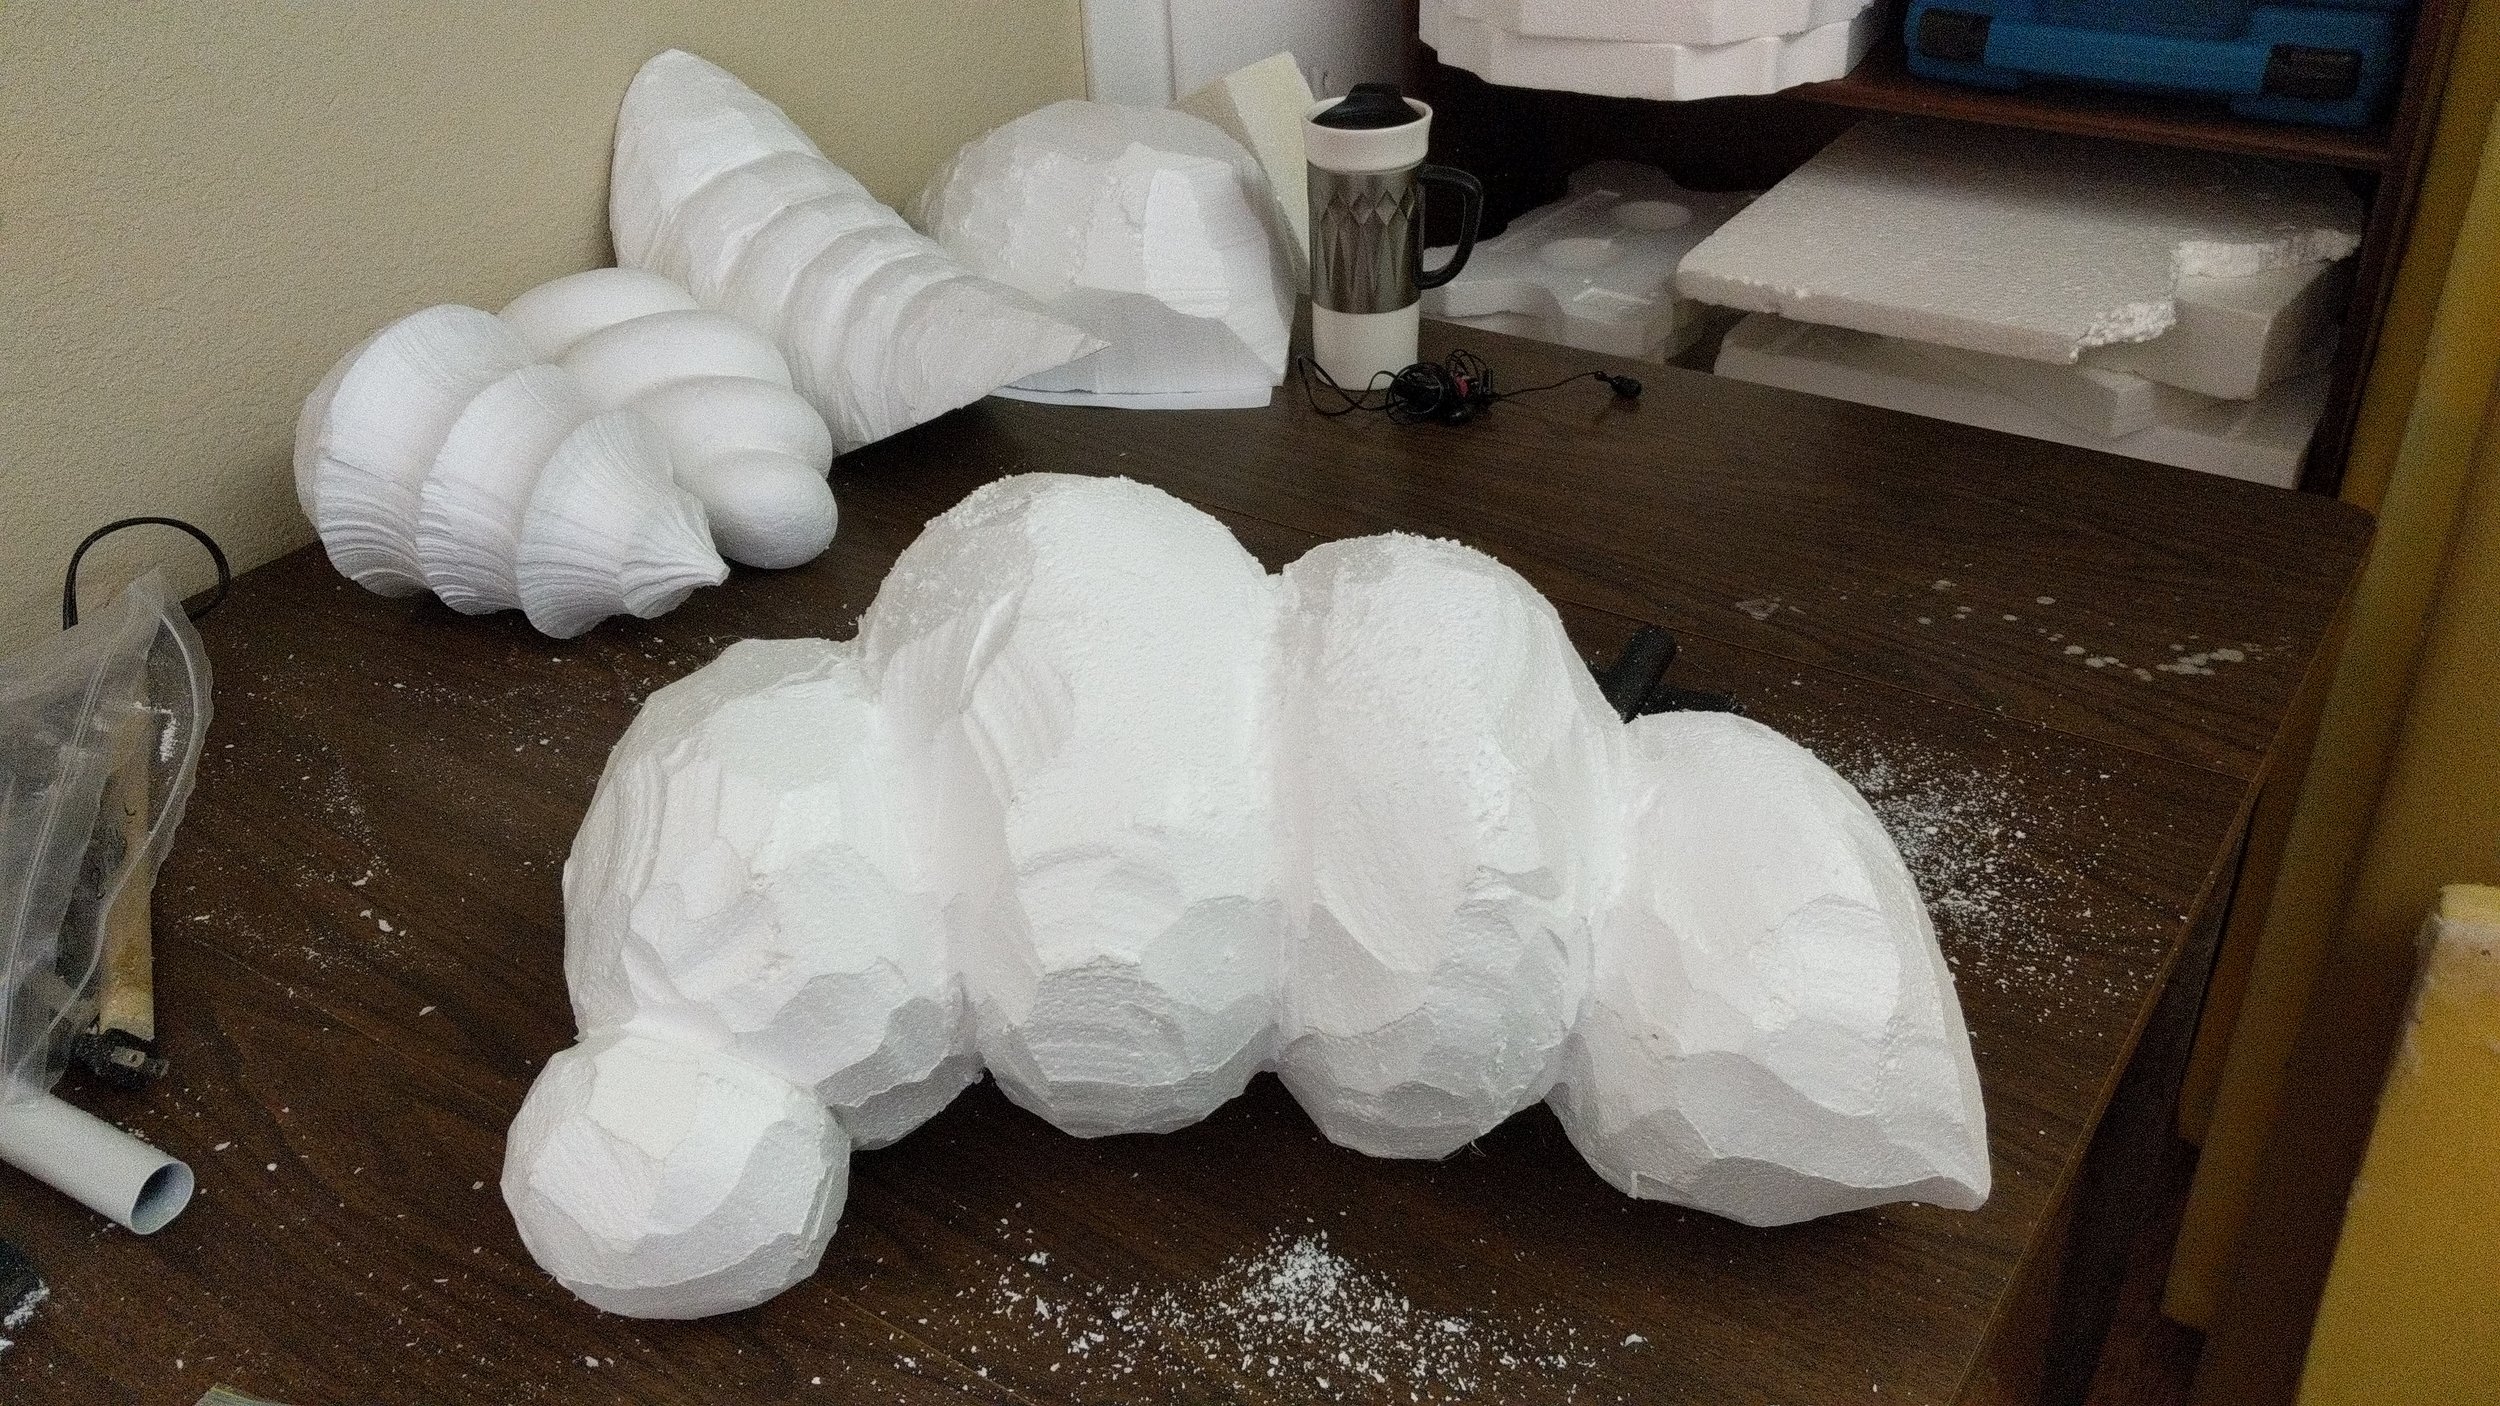
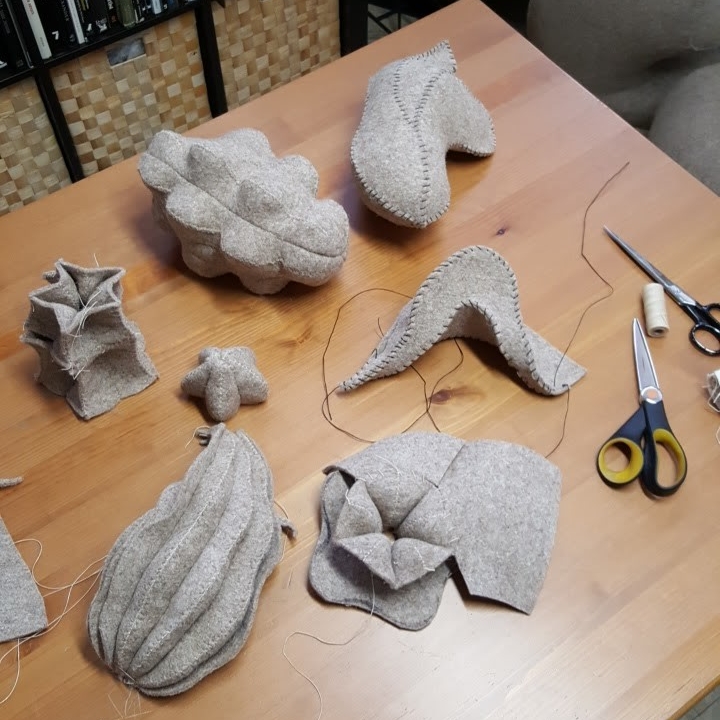
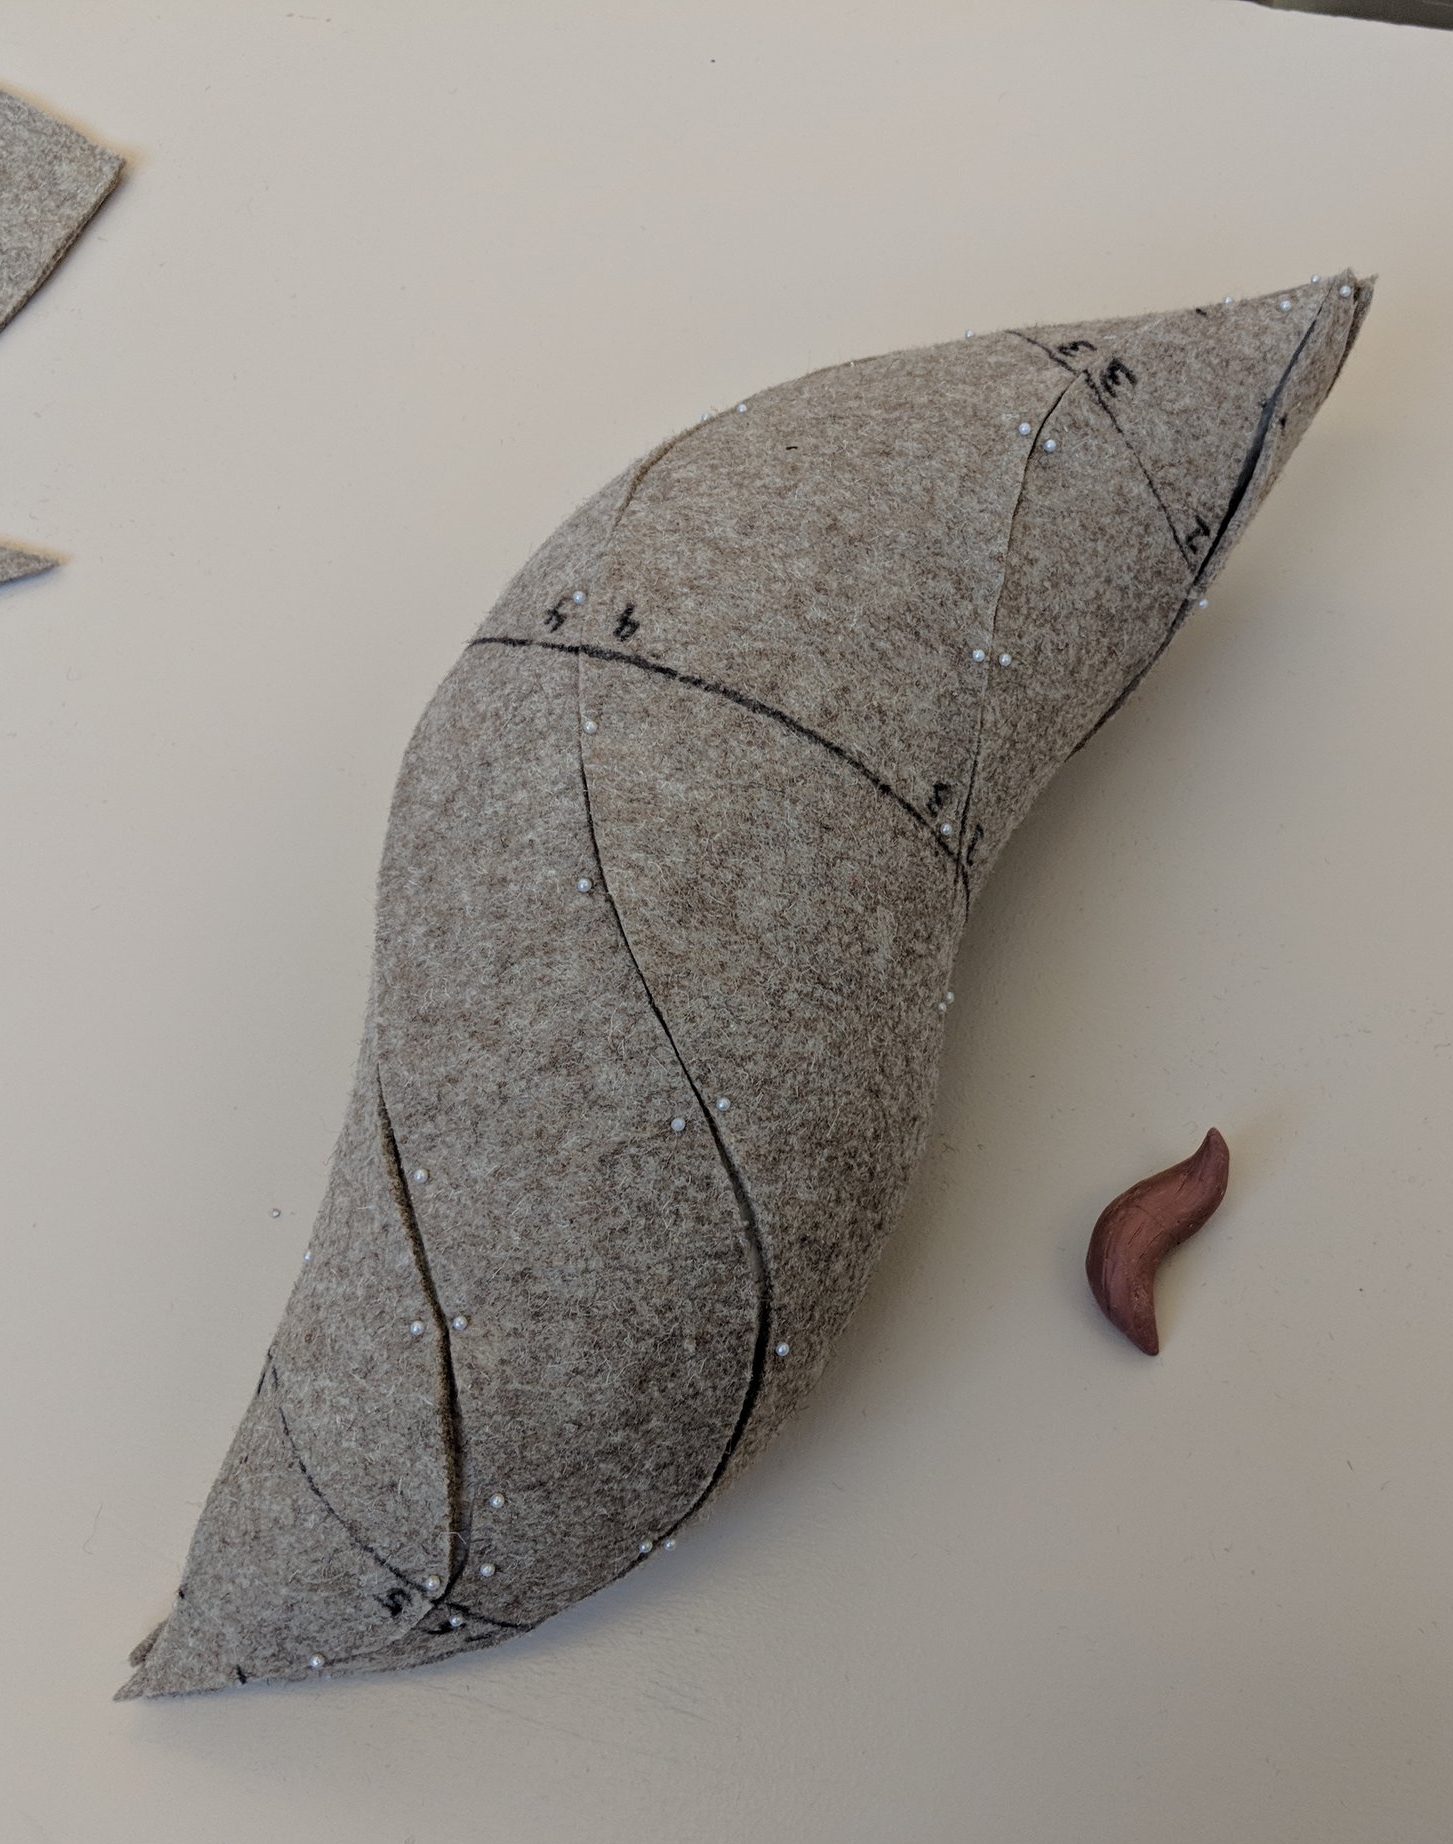
I decided to make a video-based class rather than an interactive Zoom class so I could present information in a structured way with multiple camera angles to best communicate the concepts— and students could pause, rewind, and re-watch as needed. I decided to use a combination of real-time felting with time-lapse portions so students would get a real sense of the time and work that goes in to building up and shaping felt from loose, fluffy wool— but also the satisfaction (and hope) of seeing results as they develop. I decided to build in troubleshooting to address common challenges that crop up. And at first I planned to have a class all about techniques and concepts rather than following along with specific projects. That changed as I realized that follow-along projects could really illustrate those techniques and concepts, AND be a more approachable way for beginning students to engage. So there are some cute little animals mixed in with abstract forms as separate projects within the class— and those who want to use them can, or they can be ignored. The class won’t be all things to all people, because that is truly impossible. But it will take students from the basics of form building through breaking down sculpture into its component parts, dealing with details, getting clean angles and ridges, making vessels, joining parts together, getting smooth finishes, adding color and mixed media, and an introduction to working with support in the form of armatures— building over other materials and inserting wire support.

After a lot of research I plan to release the class through Teachable, an online learning platform that offers what I want for a good user experience.

This is big. I’ve been filming and editing for four months, and I anticipate that the finished product will be ready in mid summer. I’ll have more updates and a firm date for its launch soon.

I’m really excited to share this and I can’t wait to get your feedback!

Editing workshop April 2021.jpg


Window Display: Artists on the Alameda

I was invited to create a window display as part of the Safely Social SJ project 'Artists on the Alameda,' pairing businesses along The Alameda in downtown San Jose with local artists to shine a light on both. After some onsite research and brainstorming (the turnaround time was incredibly short) I made some concept drawings for Brixton Hue Salon & Style Studio that presented my idea for suspended sculptures based on stylized, dimensional locks of hair.

It was a new kind of project for me to design for a brand and a location in order to incorporate the style of the business and yet maintain my own aesthetic. With an enthusiastic go-ahead from Lori and Stu at Brixton Hue I jumped right into making the eighteen pieces. In a signature ‘me’ move, I decided to try a new technique under deadline: stiffening and then machine-stitching craft felt to get the effect of light-diffusing, sculptural forms that would hold their shape and still move in the slight breeze from the doorway.

This was another patterning challenge, although I tried to keep it simple. I’ve learned a lot about the ways one can cut, shape, and join flat materials to create different shapes in space. The biggest difficulty came from the necessity to add several rounds of fabric stiffener sufficient to give the pieces the body and movement I wanted— which necessitated them drying in a timely fashion as well, always a difficulty in a cold studio with little air circulation. Fans were my friend. When stitched together some of the pieces needed to be softened and then re-stiffened while held in particular ways, with the aid of a hair dryer— which seemed appropriate given the destination of the installation.

I’m well pleased with the result, although I am well aware that the word ‘Hue’ is in the title of the salon and yet my pieces are (as usual) white. I choose to see it as the potential for color, which again seems fitting.

Those pesky reflective glass windows make it hard to photograph (although I did my best, below). Now these pieces hang in my studio!

Documentary as Therapy: making a movie about creating touchable, interactive sculpture in a time of no touching

After the early closure of my InTouch exhibit due to campus-wide COVID-19 precautions and County Shelter in Place Orders I was at a loss. What was meant to be a six-month-long exhibition was closed after 8 weeks— after over two years of work, truly countless hours, and the help of community members. At first there was some hope that the Artist Talk would still happen in April, or that the show could reopen before its planned closure in June… but this pandemic and its effects continue. After feeling pretty down and stuck for a while, I started putting together some footage of the show… and that made a real difference.

I had been taking photos and recording video throughout the making process, and when I started reviewing, organizing, and editing together the footage it reminded me of how much good came of the process, not just the exhibition results. I love making. I love the problem-solving of using a new material, or using an old material in a new way. I love the hands-on labor of making something tangible. I learned through InTouch that I love having people help and collaborate. InTouch was a daunting and exciting challenge, and reviewing all that went into it made me proud.

I am very grateful that I was able to take photos and videos of the finished show while it was on view, and I’m also grateful to the many friends who generously shared their footage for my use. What started off as a small project grew into a 40-minute-long video documenting the whole project, from the idea through making to the finished work. I tried to make it as short as possible while still communicating what I considered essential. I also edited together virtual walk-throughs of the two galleries of work, with my son Alex as a helpful model.

I put a lot of hours into editing, had to learn (or in some cases re-learn) software, and upgrade my poor little computer’s memory— but the making of the documentary was therapeutic. It was so good to be reminded of all the positives that came of InTouch, and continue to come of it.

If you’d like to see the results, you can visit my YouTube channel (youtube.com/c/StephanieMetzSculpture) to see the Artist Talk (offered as one long video or in 3 parts) as well as the two video tours through the Hanging Pods and the Holdables to get a visual sense of the experience.

Enjoy, and share it if you like it!

Pandemic Adjustments: studio life at home during quarantine

Well, these are strange times. I’ve been Sheltering in Place with my family in my San Jose home for about six weeks, which seems as unbelievable as the rest of this. We all have our stories of what this pandemic has meant to us-- we all have our losses and grief and struggles with the unknown and making the best of things- or not. Here’s my brief log for posterity.

I started out scoffing at the thought of this ‘Novel Coronavirus’ really being a big deal, I thought the concept and phrasing of ‘Social Distancing’ was overkill. But then the news kept trickling in and I started to really understand what we would be up against. In some ways it’s all so simple: soap works REALLY well when you use it right ,and getting a visual sense of how and why quarantining and ‘flattening the curve’ works was helpful. I got fully on board with the spirit of social distancing-- the idea that it is an act of caring for the vulnerable in our communities. 

And then Santa Clara University closed its campus, and my exhibition at the campus’ de Saisset Museum was shuttered for the time being. Yes, that exhibition I’d worked on for the past 2.5 years that focused on audiences connecting through the shared experience of touching and handling art in a public setting. That was a blow. Understandable in the context, but a huge disappointment. 

And then my kids’ schools shut down, and the next week we learned that we would be required to shelter in place starting the next day (March 17). So I rushed off to my downtown studio to pick up supplies and works-in-progress and tools, and figured I’d just work from home for a couple of weeks. 

I had a few large stitched ‘Holdable’ sculptures to finish for delivery to an exhibition at Root Division in San Francisco the following week. That was cancelled. When I dropped off that work in SF I was going to pick up a piece from a collector to borrow for a show at the San Jose Museum of Quilts and Textiles. That was postponed, as were the presentations I was set to give to students at Los Gatos schools. I still needed to order tools for the workshop I’d teach at the California Sculpture Symposium in mid April. That was cancelled. My August teaching gig at Penland School of Arts and Crafts in North Carolina was cancelled. My Artist Talk at the de Saisset Museum and several tours I was going to lead were cancelled with the news that the campus would not re-open before the end of the exhibition. Along with everyone else, my personal life plans were being gutted by the pandemic. 

I grudgingly made masks - a day-long activity- and worked with my kids to sort out their school-from-home reality. I have to give huge kudos to teachers-- they had to scramble to make an already challenging job work in hard circumstances. We’re lucky enough to have the access to technology that allows our kids’ teachers to meet with them and post assignments via computers. ‘Classroom management,’ the wrangling of kids to simply be able to teach, seems infinitely more difficult via a Zoom meeting.  I’m grateful that my kids are generally on board with this whole thing-- we’ve had some yelling fights, don’t get me wrong, but for the most part they’re adapting well to having me help administer their learning. My boys are in 4th and 7th grade, so there’s a lot more independence built in, and I’m negotiating when to step in and when to leave things up to them. 

And the whole time I’ve also been making things in my studio at home. 

I have a room at the back of the house that we fixed up as a studio when we moved here four years ago-- it has table and counter space, some storage, big windows, and track lighting. And it had been a little cluttered and unused since I usually spend my studio time and energy at my big downtown Alameda Artworks space, necessary for the huge multiple pieces I was making for InTouch. I’ve taken some time to clean, tidy, and reorganize my home studio, and even built a tool hanger along one wall once it really sunk it that I’d be here for a while. It really is a nice space, and the afternoon light through the windows is particularly appreciated.

The biggest change in my studio practice has been that I’ve turned away from large-scale, public works for now. I had thought InTouch would be the launching point for a move in that direction because I really loved engaging my community in both the making and experiencing phases. Now not only does there seem to be a big damper on my efforts to find subsequent venues for InTouch, but it also seems unlikely that people will be willing and eager to touch things in public again soon. Don’t get me wrong, I trust that in general we’ll go back to what’s familiar and feels necessary, and I’d argue that the human urge to experience things through touch falls under that. But I have put big/public/touchable plans on the shelf for now. 


I’ve turned instead back towards smaller, more intimate works using the materials and supplies I have on hand here at my home studio, which includes an embarrassingly large amount of colored wool-- embarrassing since I rarely even use non-naturally-colored wool in my work. We’ll see where this goes. I’ll write about what I’m working on in the next post, but suffice to say I’m keeping myself sane and rather happy by setting myself creative problem-solving challenges. It helps me keep the stress at bay and feels productive and meaningful. Which is enough, right now.

Finally OUT of the Studio: InTouch fiber sculpture is being touched by museum visitors!

It’s real! It’s alive! InTouch is now open to visitors at the de Saisset Museum, and it’s a hit!

Last Thursday the opening reception was packed with friends, loved ones, and also total strangers who came out to see the debut of my human-scaled touchable sculpture. It didn’t take much convincing to get people to touch. It was just as I had hoped and pictured— the mysterious but approachable forms seemed to draw visitors in, and not just kids— although they were the first to dive in. And the photos are pretty great:

Installation... transporting, placing, and hanging touchable sculptures at the museum

I’ve been installing the work with the fantastic team at the de Saisset Museum. It’s hard to believe the show is nearly up and ready after all this time and work. I have been so pleased that the installation has gone really smoothly. Hanging, placing, and lighting over 70 pieces of art seems like a daunting task, but most of the preparation was done beforehand and not much was left to figure out onsite.

It all started with bagging up and labeling all the work that has been filling my studio and then Tetris-ing up a truck for the short drive to Santa Clara University, just down The Alameda/El Camino from my studio. Three of us were able to get it all packed in about forty minutes, then we had even more helpers at the museum to unload. The trickiest parts of the installation had to do with the ‘support’ items: the steel hanging structure in Gallery 2 for the Hanging Pods and the plexiglass mirrors mounted in Gallery 1 for the Holdables. Luckily that went well too: Chuck Splady and his team from Splady Studios in Oakland fabricated, delivered, and installed the steel structures without a hitch. Chris Sicat, the museum’s Exhibitions Coordinator, has the experience, specialized tools, patience, and cool head to handle just about anything, and he got the big plexiglass mirrors mounted on the wall with help from his team. We all got to unwrap the sculptures onsite, which felt a little like Christmas even though I happened to already know what was inside. It felt great to see them in the big, beautiful galleries. More photos of the finished installation next week, unless you’re able to come by and see/photograph it for yourself starting with this Thursday’s Opening Reception!

Photo time! Documenting artwork for marketing before the show is exhibited

I’d promised myself I’d write in this space more often… but since what I’ve been doing instead is MAKING THE WORK, I’m not going to be too hard on myself.

Here we are, 11 weeks away from starting to install the show. I have a few final details to finish on two of the white felted Hanging Pods, and then I can dedicate more studio time to stitching up some more industrial felt Holdables. In the meantime I needed to take some photos for postcard announcements. In case you missed it, that means I needed photos of the exhibition before the exhibition was actually in place in the museum. What to do, you ask? Cropping and Photoshop and the hallway outside my studio provided the answers.

I spent several very long evenings suspending Hanging Pods from the rafters to mimic their spacing and lighting as it will be in the museum; I had to take the photos at night to have darkness in order to control the light. Happily I am quite comfortable scrambling up and down ladders, as that was a necessary part of adjusting art and light. And again I’m glad my sculpture isn’t terribly heavy. Once I had the pieces configured so that they’d work well in the viewfinder of the camera with good lighting it was time for my models. Since this artwork is all about visitors interacting I had to recruit my usual laborers: my husband, kids, and myself. Note: ice cream can be a good form of payment. I took a ton of photos so I’d have a few to ultimately choose from. A week later I did the same with the stitched industrial felt Holdables. For some of the finished photos I layered multiple images of myself with the sculpture to give a sense of how audiences may interact, since I’m clearly a chicken about asking other (non-related) humans to help me at weird hours. Those Photoshop skills really helped.

Below I present a comparison to show how my original concept drawings have finally come to life!

'Cat in the Sun' Wool Drawing: a video showing how I complete a drawing made by poking wool through paper

I’ve been working on some small side projects in service to the crowdfunding campaign I’m getting ready to launch. This will be my first such campaign, and I’ve been doing a lot of research on best practices. Often people use crowdfunding to launch new products, so your pledge is a pre-order of that product. I’m seeking funding to finish my InTouch public art exhibition (to pay for the steel hanging structure for the Hanging Pods, and paying studio assistants and studio rent) so I’m offering small thank you gifts. The tricky part is making sure that fulfilling those pledge gifts doesn’t take too much time and energy away from the big project they are meant to make possible.

My solution is to offer cards and prints made from scans of my wool drawings, as well as some experiential thank yous— more on that later. Below is a video of one of the drawings I’m having made into an archival 9x12-inch print. I’m calling it ‘Cat in the Sun’. I only recently learned about ‘ASMR’, and think this may fit right in.

Progress Photos! Documenting the latest wool sculpture, touchable art, and catalog

I’ve been busy over the winter: pushing ever onward with surface finishes on the white wool-covered ‘Hanging Pods’, designing and stitching industrial felt ‘Holdable’ sculptures, hosting an Open Studio event, carving the last of the twelve Hanging Pods, planning the fabrication of the metal structure that will suspend the hanging sculptures, and working on some of the smaller-scale, more sellable work: wool drawings and a unicorn fetal specimen. Click on each image below for a bit more of an explanation.

Funding: how I'm raising money to make my touchable, interactive art installation

This past summer brought a ton of progress thanks to all the help I had from paid studio assistants and volunteers. It was a big leap forward for my studio practice to have others assist in fabricating my sculpture-- a leap that required me to get my head around the idea of not doing everything myself, and to up my funding game so that I could afford to make it happen.

One ingredient that made a lot of this possible was an Audience Engagement Grant from SV Creates, a Silicon Valley nonprofit that seeks to raise the value and visibility of the creative sector and increase access to arts and creativity. My InTouch project worked out to be a good fit with their goal to support special projects that strategically broaden or deepen connections and relationships with audiences. With InTouch I’m trying to create connections between people through my unique form of touchable art-- both in the making phase and when it is ultimately on display. But, of course, that takes money-- there are definitely costs associated with creating big museum shows-- go figure!

No one ever wants to talk about funding, and there are so many complicated and unhealthy beliefs out there about artmaking and money. You know, the idea of the Starving Artist who lives off passion (and lovers/handouts), the "I'll benevolently trade your original art/writing/music for 'Exposure' because we don't actually pay for content" racket, and so many 'pay to play' gallery situations both online and brick-and-mortar. Plus, there's the sense that if you do sell your work you’re ‘selling out’. Well, I’m going to go out on a limb and guess that most people realize that materials, tools, and workspace cost money. So, how am I funding this whole thing?

To make InTouch happen, I’ve been raising funds in several ways. Grants are just a piece of the puzzle. There are very few grants available for individual artists, and they are extremely competitive. Most of my support so far has come from individual donors and sales of my artwork. Over the past two years I’ve put over 200 hours into raising half of the budget for this project; I’m looking for some help to raise the remaining $25K so I can be working in the studio as much as I need. Would you or someone in your network be great at connecting this project with individuals, companies, and foundations that would love to support it? I’m all ears…

Helpers Helping: inviting community volunteers into my art studio to help me make touchable fiber sculpture

As the summer draws to a close I am taking a moment to reflect on the progress of my InTouch project. This summer was a busy one for me that included many successful new ventures: the help of studio assistants, hosting volunteer ‘Felting Parties’, and the receipt of a grant! (more on that in the next post). All three contributed to measurable progress on creating the InTouch project.

First of all, if you’ll remember I began with creating the Hanging Pod forms for one of the two gallery spaces. These abstract organically-inspired forms will be hung from a steel structure in the gallery space, allowing visitors to walk among them and feel their surfaces, textures, weight, and ‘squishiness’. Fabrication of the human-sized pieces is a big undertaking: it includes:

  • making small models in order to create 2D patterns

  • laying thin felt over the models to figure out where to demarcate separate pattern pieces

  • digitally tracing and enlarging the patterns

  • cutting out the scaled-up patterns in thick felt

  • hand-stitching the pattern pieces together

  • inserting a cable anchor and stuffing

  • covering the industrial felt forms with white wool, and

  • adding detail and finish through needle felting.

My plan calls for twelve Hanging Pods. Yes, that is a lot of work. Yes, there exist digital programs to create patterns and print them out. No, I do not have the time, funding or desire to sit in front of a computer to learn how to create 3D forms and make their digital patterns-- I learn by hands-on making. I am a sculptor, not a programmer. Moving on.

At the end of May I had five of the Hanging Pods started and partially covered with wool; now, at the end of August, I have eleven of the twelve Hanging Pods stitched, with five of them covered with wool and almost ready for details and another five in the detail finishing phase. In case it doesn’t communicate through my description, that is a FANTASTIC amount of progress. I’m incredibly pleased, and I know that I have a lot of people to thank for that: assistants and volunteers.

Starting in June I hired two studio assistants to help with fabrication: Jordan, a student on summer break from Santa Clara University, was my main full-time helper, and Jessica, a mom from my kids’ school, provided some extra assistance as well. Their tasks included cutting out paper and then thick felt patterns, hand stitching industrial felt pattern pieces together, helping me stuff, wrestle, and sew the forms closed, covering industrial felt with wool, learning and applying some finishing techniques, and managing volunteer events. They also helped me talk through and solve some of the fabrication issues as they arose. Part of the effectiveness of paying people to be in my studio for solid hours every week was that I had to be prepared and use their time and mine efficiently and productively, and commit to a very regular schedule-- which necessitated finding summer camp options for my kids so I could make as much progress as possible. As usual, having outside deadlines always helps me. And having employees helped me even more. As someone who generally prefers to work alone, I had been a little nervous about what it would be like to have someone else in my space all summer… but it proved to be lovely. Jordan and I in particular had a lot of time to talk about life and art, and I think we both enjoyed hearing each others’ perspectives.

Jordan and Jessica helping stuff a stitched sculpture.

Sometimes it takes three to close and stitch a densely packed form.


This summer I also tried out another new approach in the studio: holding ‘Felting Parties’ at which volunteers came to my studio to help physically contribute to the making of the work by covering the stitched industrial felt forms with white wool. I trained volunteers in the techniques of needle felting the various pieces and provided them with information on the visual and physical goals I had in mind for each sculpture. Variations in armature (the underlying forms to coat: either stitched industrial felt stuffed with various lightweight filler, or foam rubber, or styrofoam) affected how one would poke at the wool or use more or fewer felting needles in the tools.

I was unsure how Felting Parties would play out-- quickly training and then arming an unknown quantity of newbies with sharp tools to work on my sculpture? But I needn’t have worried. Just like my workshops, felting parties attracted kindred spirits aplenty: enthusiastic helpers who just clicked with each other and the spirit of connection that characterizes this project. I can’t frankly remember where the idea for Felting Parties came from-- all I know is that this project would be impossible without all that help. Over the summer I held seven felting parties, and hosted a total of 38 individual participants, several of whom were repeat attendees. Some had a bit of experience, a few had a lot, but most were totally new to the process. Some were already friends from various parts of my life, others were relatively new friends, or recent visitors to my Open Studios, or people from my mailing list whom I’d previously never met in person. They were a pleasure to work with, every one. We had fantastic conversations about on a huge range of topics, a lot of laughter, and great results. .

Open to the Public: Open Studio events and felting parties

This weekend (May 19th & 20th, 2018) brings another episode of Silicon Valley Open Studios, an event that welcomes the public into artist's workspaces to see what we do and how we do it. I have to admit that I love to do these events, despite how absolutely drained they leave me at the end of the weekend. That's because I really am excited about what I do (and I talk about it all day, thus the exhaustion), and it's fun to get the reactions my sculpture and process receive. 

This time around I'll have several of my human-sized industrial felt pod-like forms that I'm starting to cover in white wool. Visitors will have the opportunity to help me poke the wool and attach it to the forms... and if they like that, sign up to join me at a felting party this summer. I hope you can make it-- things are shaping up!

IMG_20180509_152433.jpg

Foam: It's Complicated- using styrofoam in sculpture with a conscience

I've completed another video about my process, this time focused on carving Styrofoam: how I do it, and how I deal with the mess. I have to admit I cringe a bit to even be using the stuff-- it's so fakey and bad for the environment and, well, seems so cheapo and lame to use for 'real' sculpture, and as someone who works with fiber I already have an uphill battle on legitimacy of materials in some circles. But, like wool itself, Styrofoam, or 'expanded polystyrene' to use the general and descriptive term, has qualities that just work perfectly for my aims. It is easy and quick to carve, can accept needles poking into it without breaking them, and is extremely lightweight while being somewhat rigid. I make myself feel better about the environmental impact by only using previously used foam, and I keep and use the chunks and bits I carve and sand off to fill other pieces. 

So, hierarchy of noble materials be damned! Use what works for getting your sculpture made. Here's a link to the carving foam video.

A carved model, ready for sanding.

A carved model, ready for sanding.

Giving It Away: why I share my process and techniques

I've gotten some good feedback about the 'patterning' video I posted, along with some questions about how I actually carve Styrofoam (and deal with the resulting mess). I love learning about how other artists do things, so I'm putting together a video addressing that topic as well. But, you may ask, aren't you afraid of giving away your secrets? Well, maybe you're not asking that-- carving Styrofoam doesn't seem like a deep dark mystery. I do get that question a lot about my techniques for felting. In fact when I was just starting out teaching workshops I got that question a lot because the process seemed so novel. 'Aren't you giving away the milk? No one will buy the cow!' If I reveal my process, will I eliminate any market for my teaching and my finished artworks? My answer is a firm no, for a few reasons:

1) I want to work and live in a spirit of openness and generosity. Needle felting is like painting in oil is like throwing pots is like forging metal: a set of techniques and knowledge that you can use to make things. Closely guarding such information seems petty and exhausting. I've benefitted from the generosity of a free exchange of knowlege and techniques among my art community, and I like contributing to it. It would be exhausting and downright depressing to always worry that I've revealed too much and will presently be overtaken by a wave of competitors. I do what I do, you do what you do. Got a cool tip to share? Me, too! Sharing is what makes a community. 

2) It's pretty dang hard to actually copy what I do. In handmade work the hand of the artist really does come through, and someone else trying to duplicate something I've made will necessarily make it look and be different. That's particularly true in the material and subject matter I deal with, which take a lot of time and practice. In any case, copying from existing objects and the works of the masters has long been a way for artists to learn (yeah, yeah, that's some ego on me, 'The Felt Master', but you know what I mean). We all stand on the shoulders of giants, and we each come through life with our own set of experiences and outlook that inform what we contribute to the world in general and our area of expertise.

3) I'm always moving on from what I used to be doing. I learn as I go and take great pleasure in coming up with new questions, answers, and ideas. I'm not particularly interested in revisiting the same thing over and over, which is another way of saying that I feel like I'm on the leading edge of my own practice. My material for the foreseeable future continues to be fiber-based as far as I can tell because I still have a lot of unanswered questions and experiments to follow in various directions. My subject matter and the forms my sculptures take have had some unifying elements that will likely continue one way or another. What I'm saying is I embrace my own artistic change and growth and I'm forging my own path, so I don't feel threatened. It's as simple and complicated as that.

So, expect more behind-the-scenes. And if you have questions, ask me! 

Early prototypes of organic/geometric forms for potential InTouch pieces.

Early prototypes of organic/geometric forms for potential InTouch pieces.

Explaining Myself... how I create patterns for 3D shapes using felt and styrofoam

As an artist I've always been intrigued to learn HOW other people make and do things, so of course I assume there are others like me out there. As I create this new body of work for my InTouch project I'm trying a lot of new processes (or at least scaling up and increasing quantities of known processes) and I want to share some behind-the-scenes parts of that so people can better understand what I'm doing, and perhaps why. To that end I decided to film some short bits here and there to explain what I'm doing, and this marks the first installment. This first video shows a little about the way I am figuring out patterns: starting with a model so I can determine the flat shapes that go together to cover that model in a 'skin'. If you want to see past videos and sign up to get notifications about new ones as I create them, go to my YouTube channel: http://www.youtube.com/c/StephanieMetzSculpture 

The felt pattern I created over an enlarged foam model; the small clay form on the right was a guide for carving the foam. Note the marks across the pieces so I can realign them later. 

The felt pattern I created over an enlarged foam model; the small clay form on the right was a guide for carving the foam. Note the marks across the pieces so I can realign them later. 

The flattened-out pattern pieces once they have been removed from the foam model.

The flattened-out pattern pieces once they have been removed from the foam model.

Getting Down to Work: my process of patterning, cutting, and stitching felt for large-scale sculpture

Now that my space is set up enough I'm finally getting some work done on my InTouch project. I've made a lot of tiny test pieces to work out the pattern pieces for the most basic forms, and I've been learning along the way that human error makes for some interesting effects. As much as I draw and test and print out and trace and cut patterns, there's still a lot of variability that comes from, ya know, being a human as I stitch. 


Reexamining small models I made to figure out plans for larger pieces. The twisted piece I'm holding didn't start out that way-- the twist came about from the directionality as I sewed the pattern pieces together. But I like it, so I'm going to recr…

Reexamining small models I made to figure out plans for larger pieces. The twisted piece I'm holding didn't start out that way-- the twist came about from the directionality as I sewed the pattern pieces together. But I like it, so I'm going to recreate the effect in the full-size version.

After ironing the freezer-paper pattern onto 3/8" thick wool,I cut out each piece. Yes, my studio is very cold in the winter.

After ironing the freezer-paper pattern onto 3/8" thick wool,I cut out each piece. Yes, my studio is very cold in the winter.

To go from idea to large-scale piece, I start by making a small felt pattern and stitch it together, trimming, changing, and restitching until I like it. Then I take it apart, trace the felt pattern onto paper, and scan the drawings. Then I digitall…

To go from idea to large-scale piece, I start by making a small felt pattern and stitch it together, trimming, changing, and restitching until I like it. Then I take it apart, trace the felt pattern onto paper, and scan the drawings. Then I digitally trace over the pattern using Adobe Illustrator, scale it up, and print it out. I use the light table to trace the pattern onto freezer paper, which will adhere temporarily to felt when I iron it on. 

Stitching together the large pieces. The bumps you see will actually end up as indentations in the sculpture.

Stitching together the large pieces. The bumps you see will actually end up as indentations in the sculpture.

Corraling Styrofoam: creating a dedicated space in an art studio for messy work

Settling in to my studio has been a gradual process as I prepare the space for the tasks I have planned. I happen to hate cleaning things up, but I love a tidy environment to work in-- so I focus on prevention and try to put systems in place to deal with messes ahead of time. To that end, I knew I would be carving some styrofoam models for larger pieces (don't worry, I'm recycling through repurposing) and want to contain the tiny static-infused bits as much as possible, so I took a note from some home remodeling we did and enclosed a corner of the studio in heavy plastic specifically to work with styrofoam. I still have to vacuum up all the bits when I'm done for the session, but the zippered door and taped-down-to-the-floor plastic walls help me keep the bits from traveling all over. I wear coveralls to work with styrofoam and have to use the shop vac on myself when I'm done, too. But I'm reclaiming the bits to use inside finished stitched pieces, so there's very little waste, and patting myself on the back makes it easier to deal with the cringey mess of EPS.

Dedicated foam-friendly workspace...

Dedicated foam-friendly workspace...

Laying out plastic on the blessedly large floor in order to stick on the zipper door kit-- basically two long zippers with sticky sides you can apply to the plastic, then cut in the center.

Laying out plastic on the blessedly large floor in order to stick on the zipper door kit-- basically two long zippers with sticky sides you can apply to the plastic, then cut in the center.

A view towards the styrofoam carving area in the back left.

A view towards the styrofoam carving area in the back left.