Teaching Stephanie Metz 6/30/22 Teaching Stephanie Metz 6/30/22 Sculptural Needle Felting Kits: Materials, tools, and color to get you started Read More Teaching, Process Stephanie Metz 3/8/22 Teaching, Process Stephanie Metz 3/8/22 Why Do My Felting Needles Keep Breaking? Read More Process, Teaching Stephanie Metz 1/26/22 Process, Teaching Stephanie Metz 1/26/22 Needle Felting: The ONE Thing Nobody Teaches about needle placement Read More Teaching Stephanie Metz 5/13/21 Teaching Stephanie Metz 5/13/21 Behind the Camera- and In Front of the Camera: Making my online needle felting workshop Read More Latest Posts Featured February 23, 2026 Overbred again February 23, 2026 February 23, 2026 February 23, 2026 Touch…with permission February 23, 2026 February 23, 2026 October 23, 2025 Plaster + Felt =? October 23, 2025 October 23, 2025 February 16, 2025 In the Glow: Behind the Scenes February 16, 2025 February 16, 2025 February 6, 2025 Professional Practices for Artists: The Gift of Attention and Time February 6, 2025 February 6, 2025 September 24, 2024 Touching the Art in Arizona September 24, 2024 September 24, 2024 September 24, 2024 In the Glow: Trial by Fire... er, Thread September 24, 2024 September 24, 2024 March 31, 2024 On Grief and Artmaking March 31, 2024 March 31, 2024 January 5, 2024 Words About Sculpture About Touch [Why I Keep Re-Writing My Artist Statement] January 5, 2024 January 5, 2024 October 29, 2023 Feeling The Glow of a New Project October 29, 2023 October 29, 2023 June 4, 2023 Simply Complex: Why the Simplest Marks Can Take The Longest Time June 4, 2023 June 4, 2023 May 10, 2023 Why Visit An Artist's Studio? For The Little Things That Are Also The Big Things... May 10, 2023 May 10, 2023 April 28, 2023 Carving Stone at Sculpture Camp: Paradise Among My People April 28, 2023 April 28, 2023 April 5, 2023 The Color Pink: Breaking My Own Rules of Making April 5, 2023 April 5, 2023 February 26, 2023 Why Wool Drawings Part 1: What's In It For The Artist? February 26, 2023 February 26, 2023 February 26, 2023 Why Wool Drawings Part 2: What's In It For The Viewer? February 26, 2023 February 26, 2023 February 9, 2023 Inspiration, Process Answering Questions About Creativity: Being a Sentient Sponge February 9, 2023 Inspiration, Process February 9, 2023 Inspiration, Process January 23, 2023 Objects of Intrigue: Starting A New Group of Wool Drawings January 23, 2023 January 23, 2023 July 26, 2022 Events, Inspiration, InTouch The Person Behind the Art: Summer Travel & Inspiration July 26, 2022 Events, Inspiration, InTouch July 26, 2022 Events, Inspiration, InTouch June 30, 2022 Teaching Sculptural Needle Felting Kits: Materials, tools, and color to get you started June 30, 2022 Teaching June 30, 2022 Teaching June 29, 2022 Wall Sculptures Stitched Industrial Felt Fiber Wall Art: The End of the Grey Curve Composition Series June 29, 2022 Wall Sculptures June 29, 2022 Wall Sculptures March 8, 2022 Teaching, Process Why Do My Felting Needles Keep Breaking? March 8, 2022 Teaching, Process March 8, 2022 Teaching, Process March 4, 2022 Inspiration Refilling the Well... the 2022 Yuma Symposium recap March 4, 2022 Inspiration March 4, 2022 Inspiration January 26, 2022 Process, Teaching Needle Felting: The ONE Thing Nobody Teaches about needle placement January 26, 2022 Process, Teaching January 26, 2022 Process, Teaching January 24, 2022 Process Felting Needles: What Are They and How Do They Work? Explanations with photos and illustrations. January 24, 2022 Process January 24, 2022 Process December 3, 2021 Wool Drawings Hallway Art Musings: Evolution of paintings, drawings, and wool drawings through paper December 3, 2021 Wool Drawings December 3, 2021 Wool Drawings September 19, 2021 Wall Sculptures What does it MEAN? Stitched Industrial Felt Wall Sculptures September 19, 2021 Wall Sculptures September 19, 2021 Wall Sculptures May 13, 2021 Teaching Behind the Camera- and In Front of the Camera: Making my online needle felting workshop May 13, 2021 Teaching May 13, 2021 Teaching March 17, 2021 Exhibitions Window Display: Artists on the Alameda March 17, 2021 Exhibitions March 17, 2021 Exhibitions October 7, 2020 wool drawings Weird Birds/ Wool Drawings October 7, 2020 wool drawings October 7, 2020 wool drawings
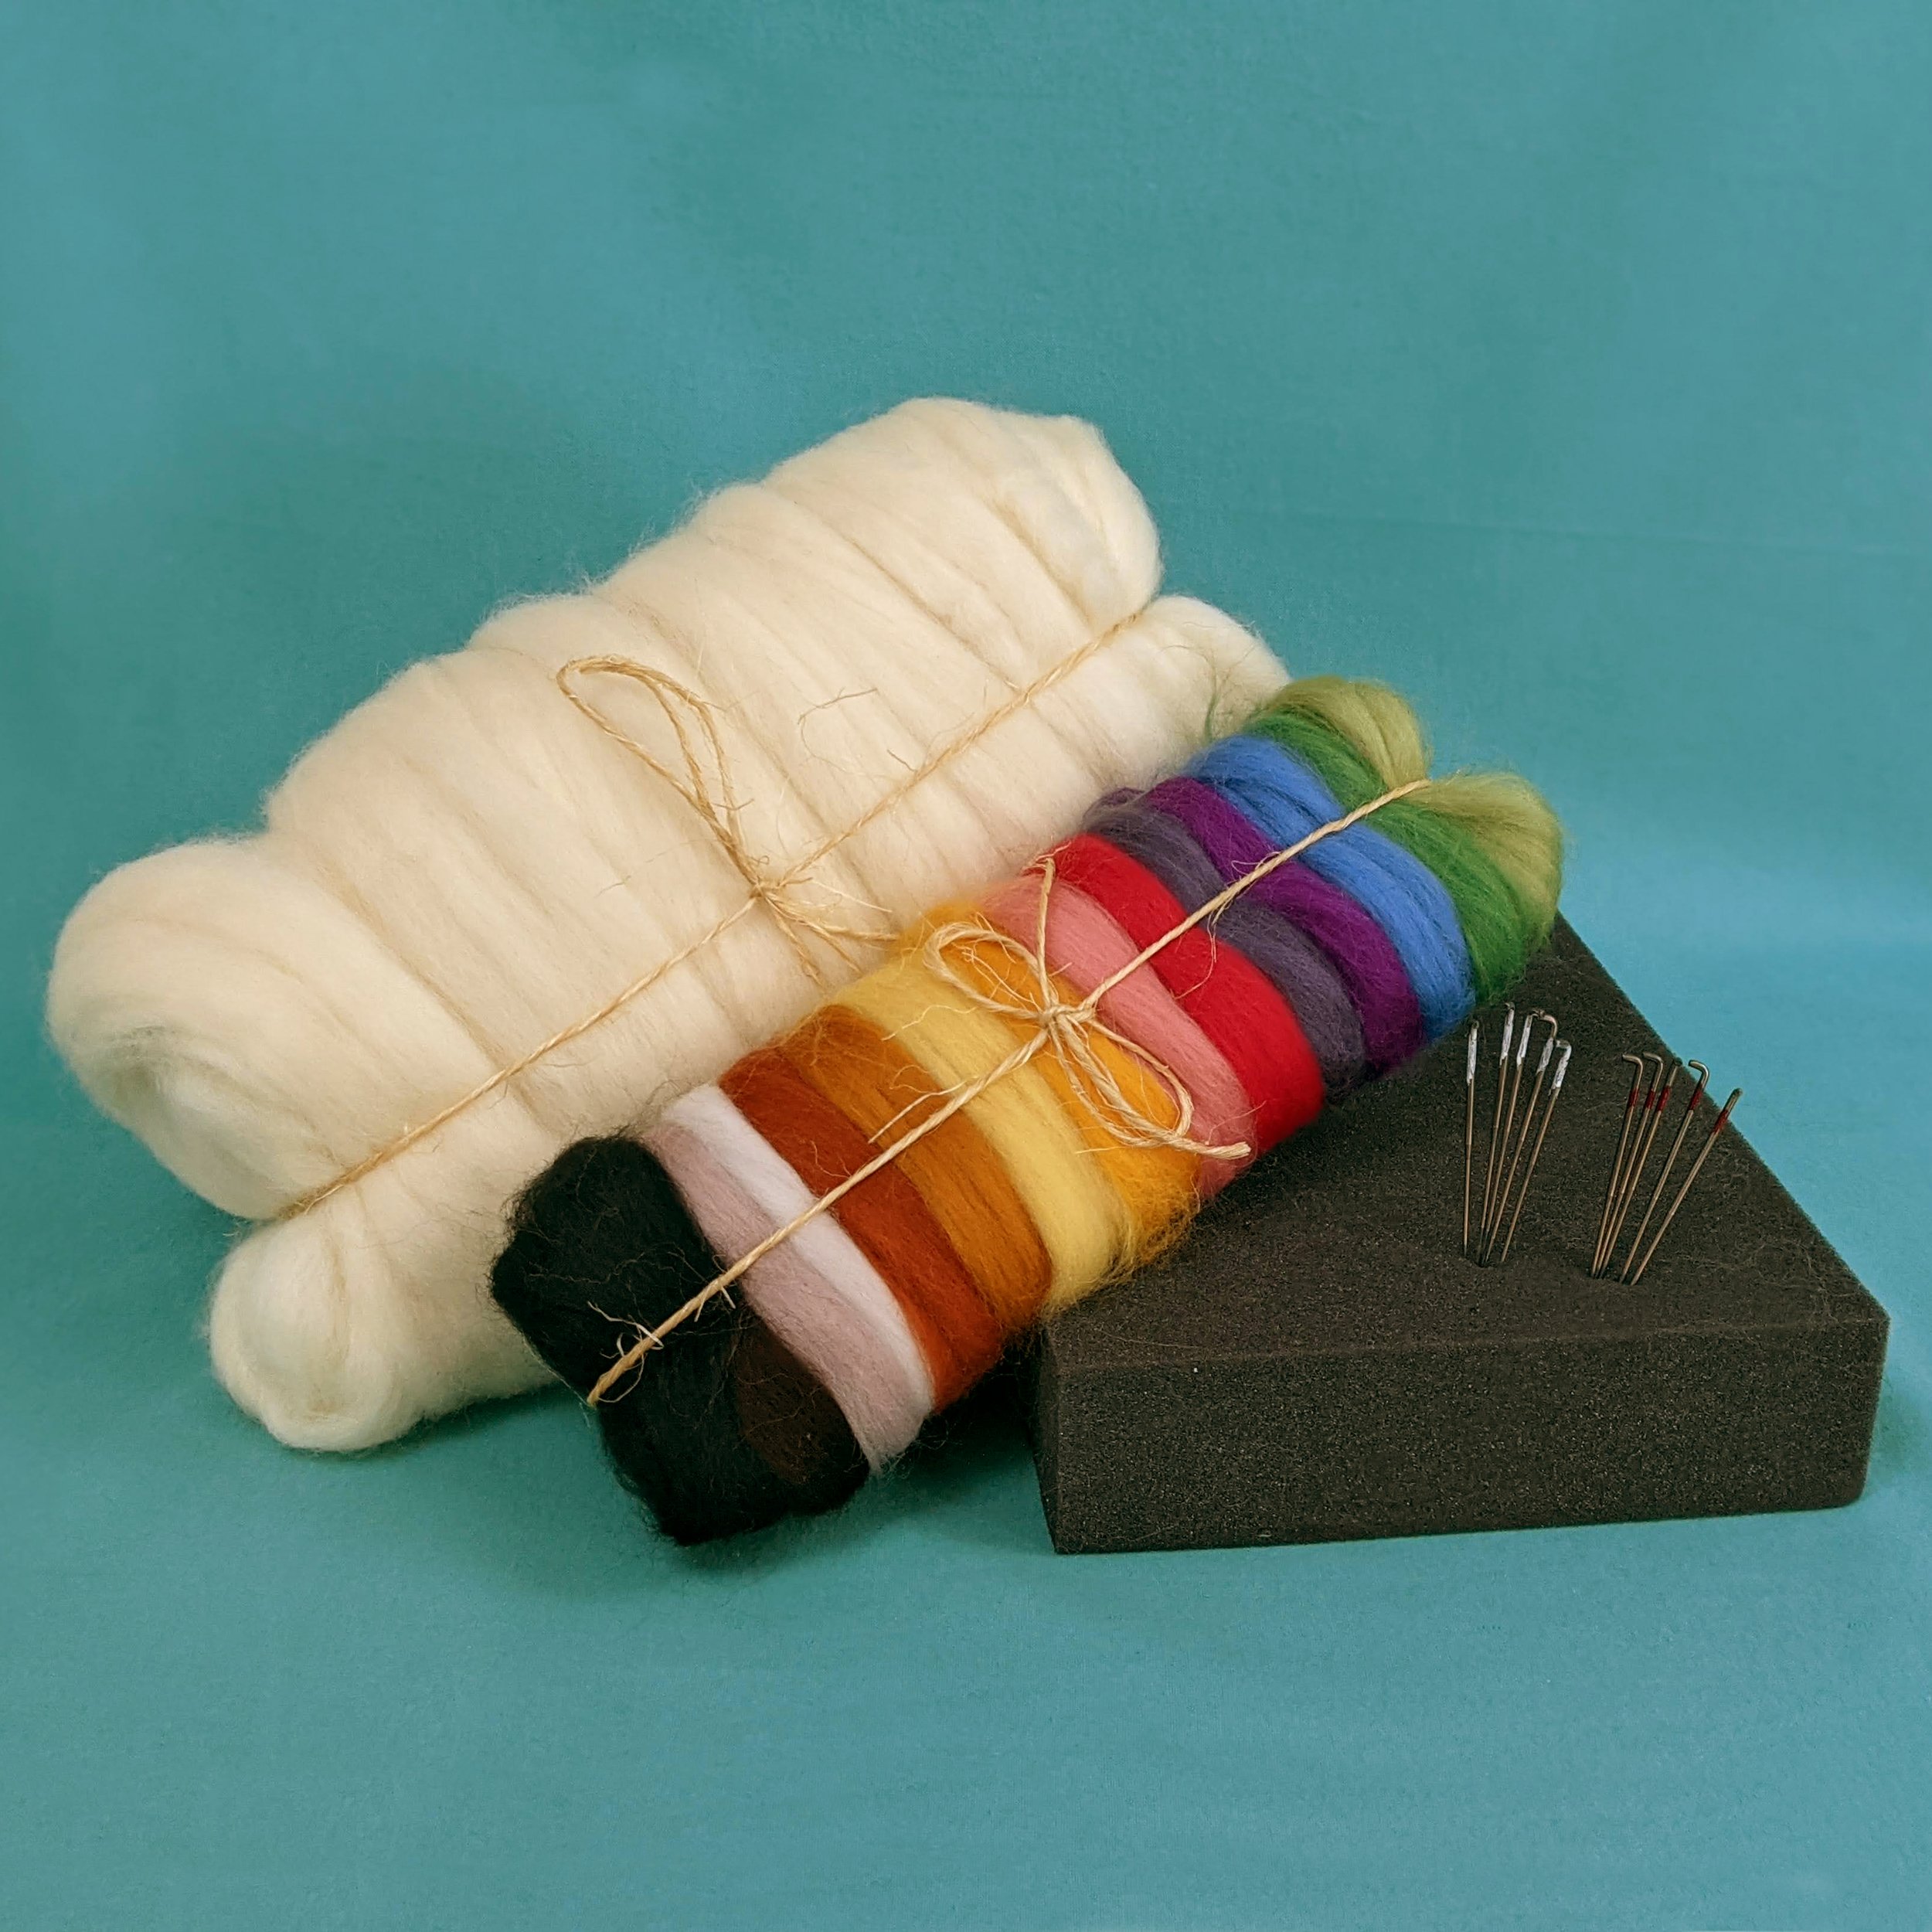
Teaching Stephanie Metz 6/30/22 Teaching Stephanie Metz 6/30/22 Sculptural Needle Felting Kits: Materials, tools, and color to get you started Read More
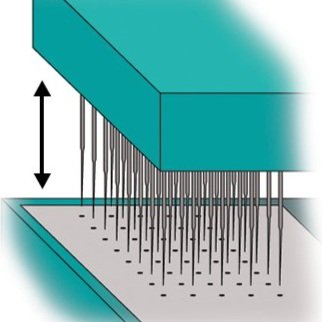
Teaching, Process Stephanie Metz 3/8/22 Teaching, Process Stephanie Metz 3/8/22 Why Do My Felting Needles Keep Breaking? Read More
Process, Teaching Stephanie Metz 1/26/22 Process, Teaching Stephanie Metz 1/26/22 Needle Felting: The ONE Thing Nobody Teaches about needle placement Read More
Teaching Stephanie Metz 5/13/21 Teaching Stephanie Metz 5/13/21 Behind the Camera- and In Front of the Camera: Making my online needle felting workshop Read More


![Words About Sculpture About Touch [Why I Keep Re-Writing My Artist Statement]](https://images.squarespace-cdn.com/content/v1/588d00312e69cf76b7519a11/1738961418785-H0B3DY1FOGSHHLCTODVU/IMG_1562.jpg)