
Why Wool Drawings Part 1: What's In It For The Artist?
Applying wool fibers to paper by anchoring them through the surface is an unusual means to make marks, to be sure. Instead of pigment I’m using different colored fibers arranged in dense or loosely concentrated areas to create a value scale and linear patterns. What’s in it for me, as the artist? Why make drawings out of wool? What’s the big deal about this process?
To begin from the making side, these kinds of drawings are incredibly satisfying to create in and of themselves, and not just due to my delight in coming up with the technique. Back in 2007 I was needle felting cream-colored wool into three dimensional shapes and had wool on the brain all the time-- so when I saw my own long dark hairs swirled into a pattern on tiles in the shower one day (don’t worry, I always clean them up!), it occurred to me that perhaps I could work with dark-colored wool in two dimensions like a drawing.
First I thought about adhering wool fibers to paper by spraying fixative, or arranging them in some liquid medium that would harden, but since I was constantly using felting needles I decided to try poking wool through paper. A felting needle has tiny notches cut along its shaft that catches fibers and pushes them to rub against and tangle with their neighbors-- that’s how wool can be matted mechanically into felt.
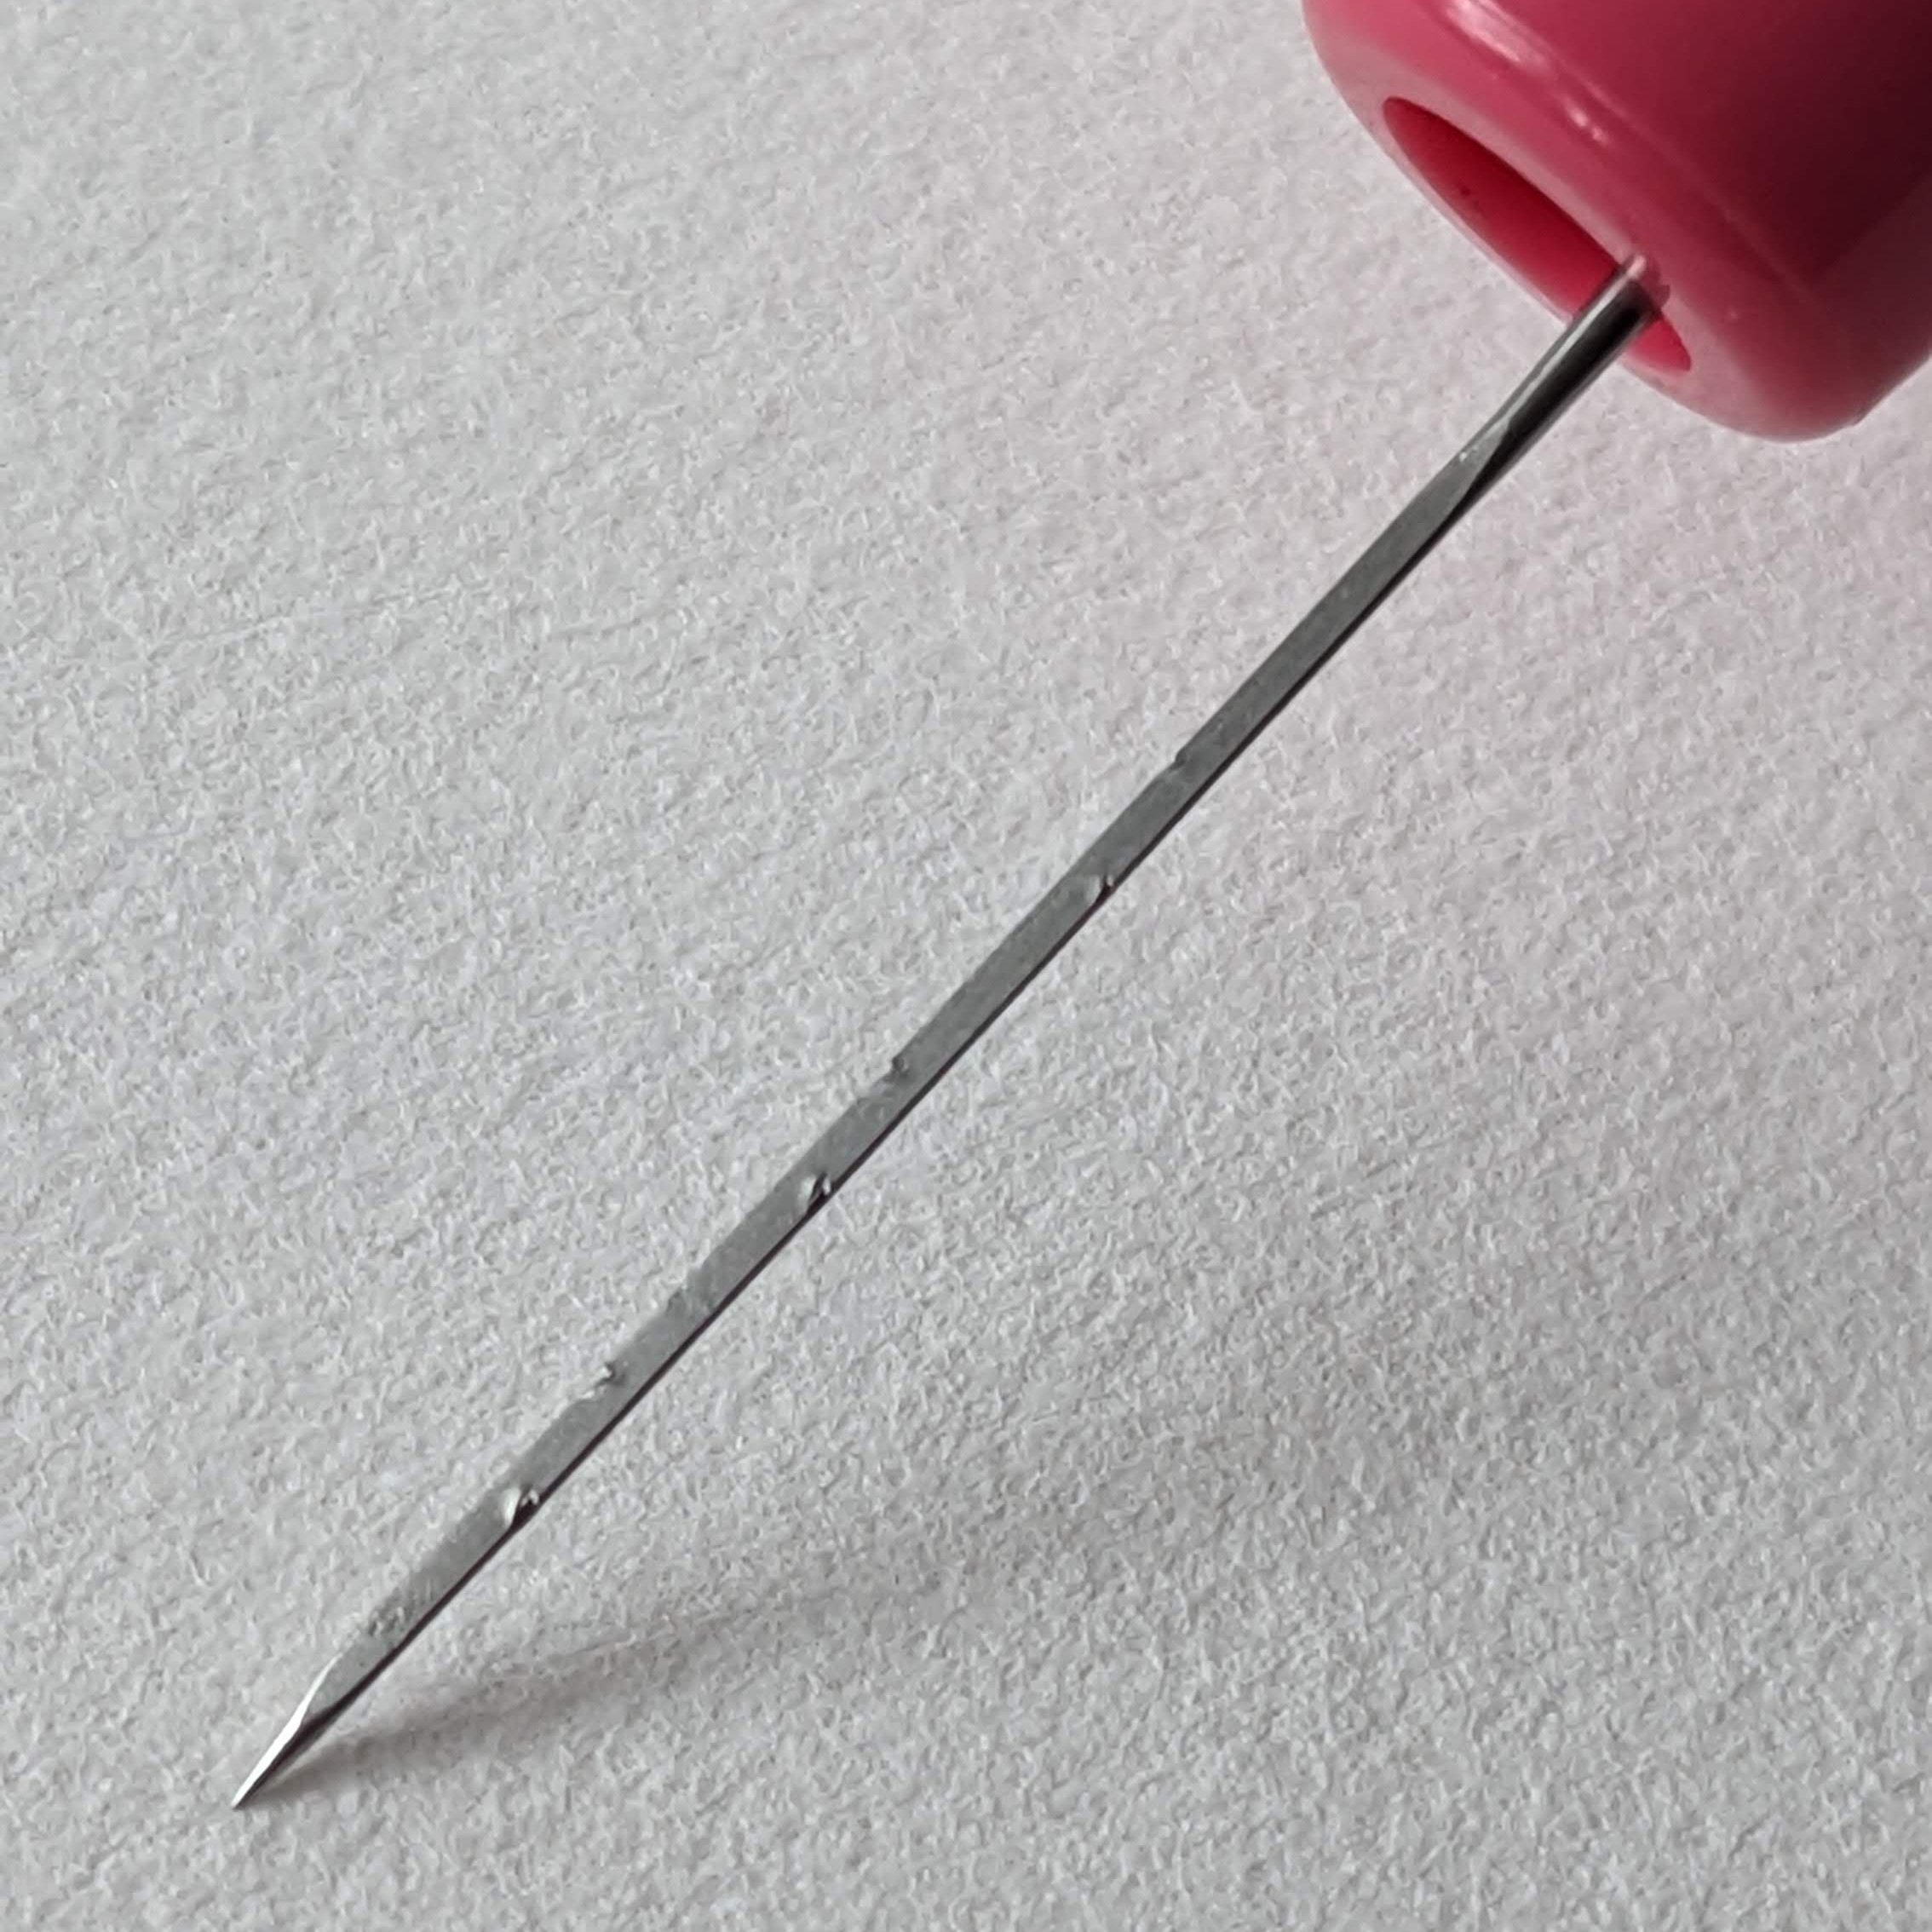
Close-up view of a felting needle, showing the notches cut along its shaft. This is why one can push fibers into and through surfaces— the fibers catch on those notches when the needle moves forwards, then they stay as the needle is pulled backwards.
I would usually have a piece of foam rubber under my felt sculpture as I worked since sometimes the needle pokes through wool and I don't like to stab myself or break a needle on a hard table. I figured I could try the same approach. I laid a piece of thick cotton-heavy printmaking paper over a foam piece and tried using a single felting needle to create an outline and then poke wool through to anchor in the foam.
Laying a piece of thick printmaking paper (I use BFK Rives) over my work surface, a foam sheet meant for packaging.
I found I could push about half of the length of fibers through the paper so some was arranged on the front of the paper, almost like stitches. I could lay out an area of fibers and poke at them to anchor some of the tangle, or make an outline of holes first, then gently drag fibers sideways towards the holes and poke them through with the needle.
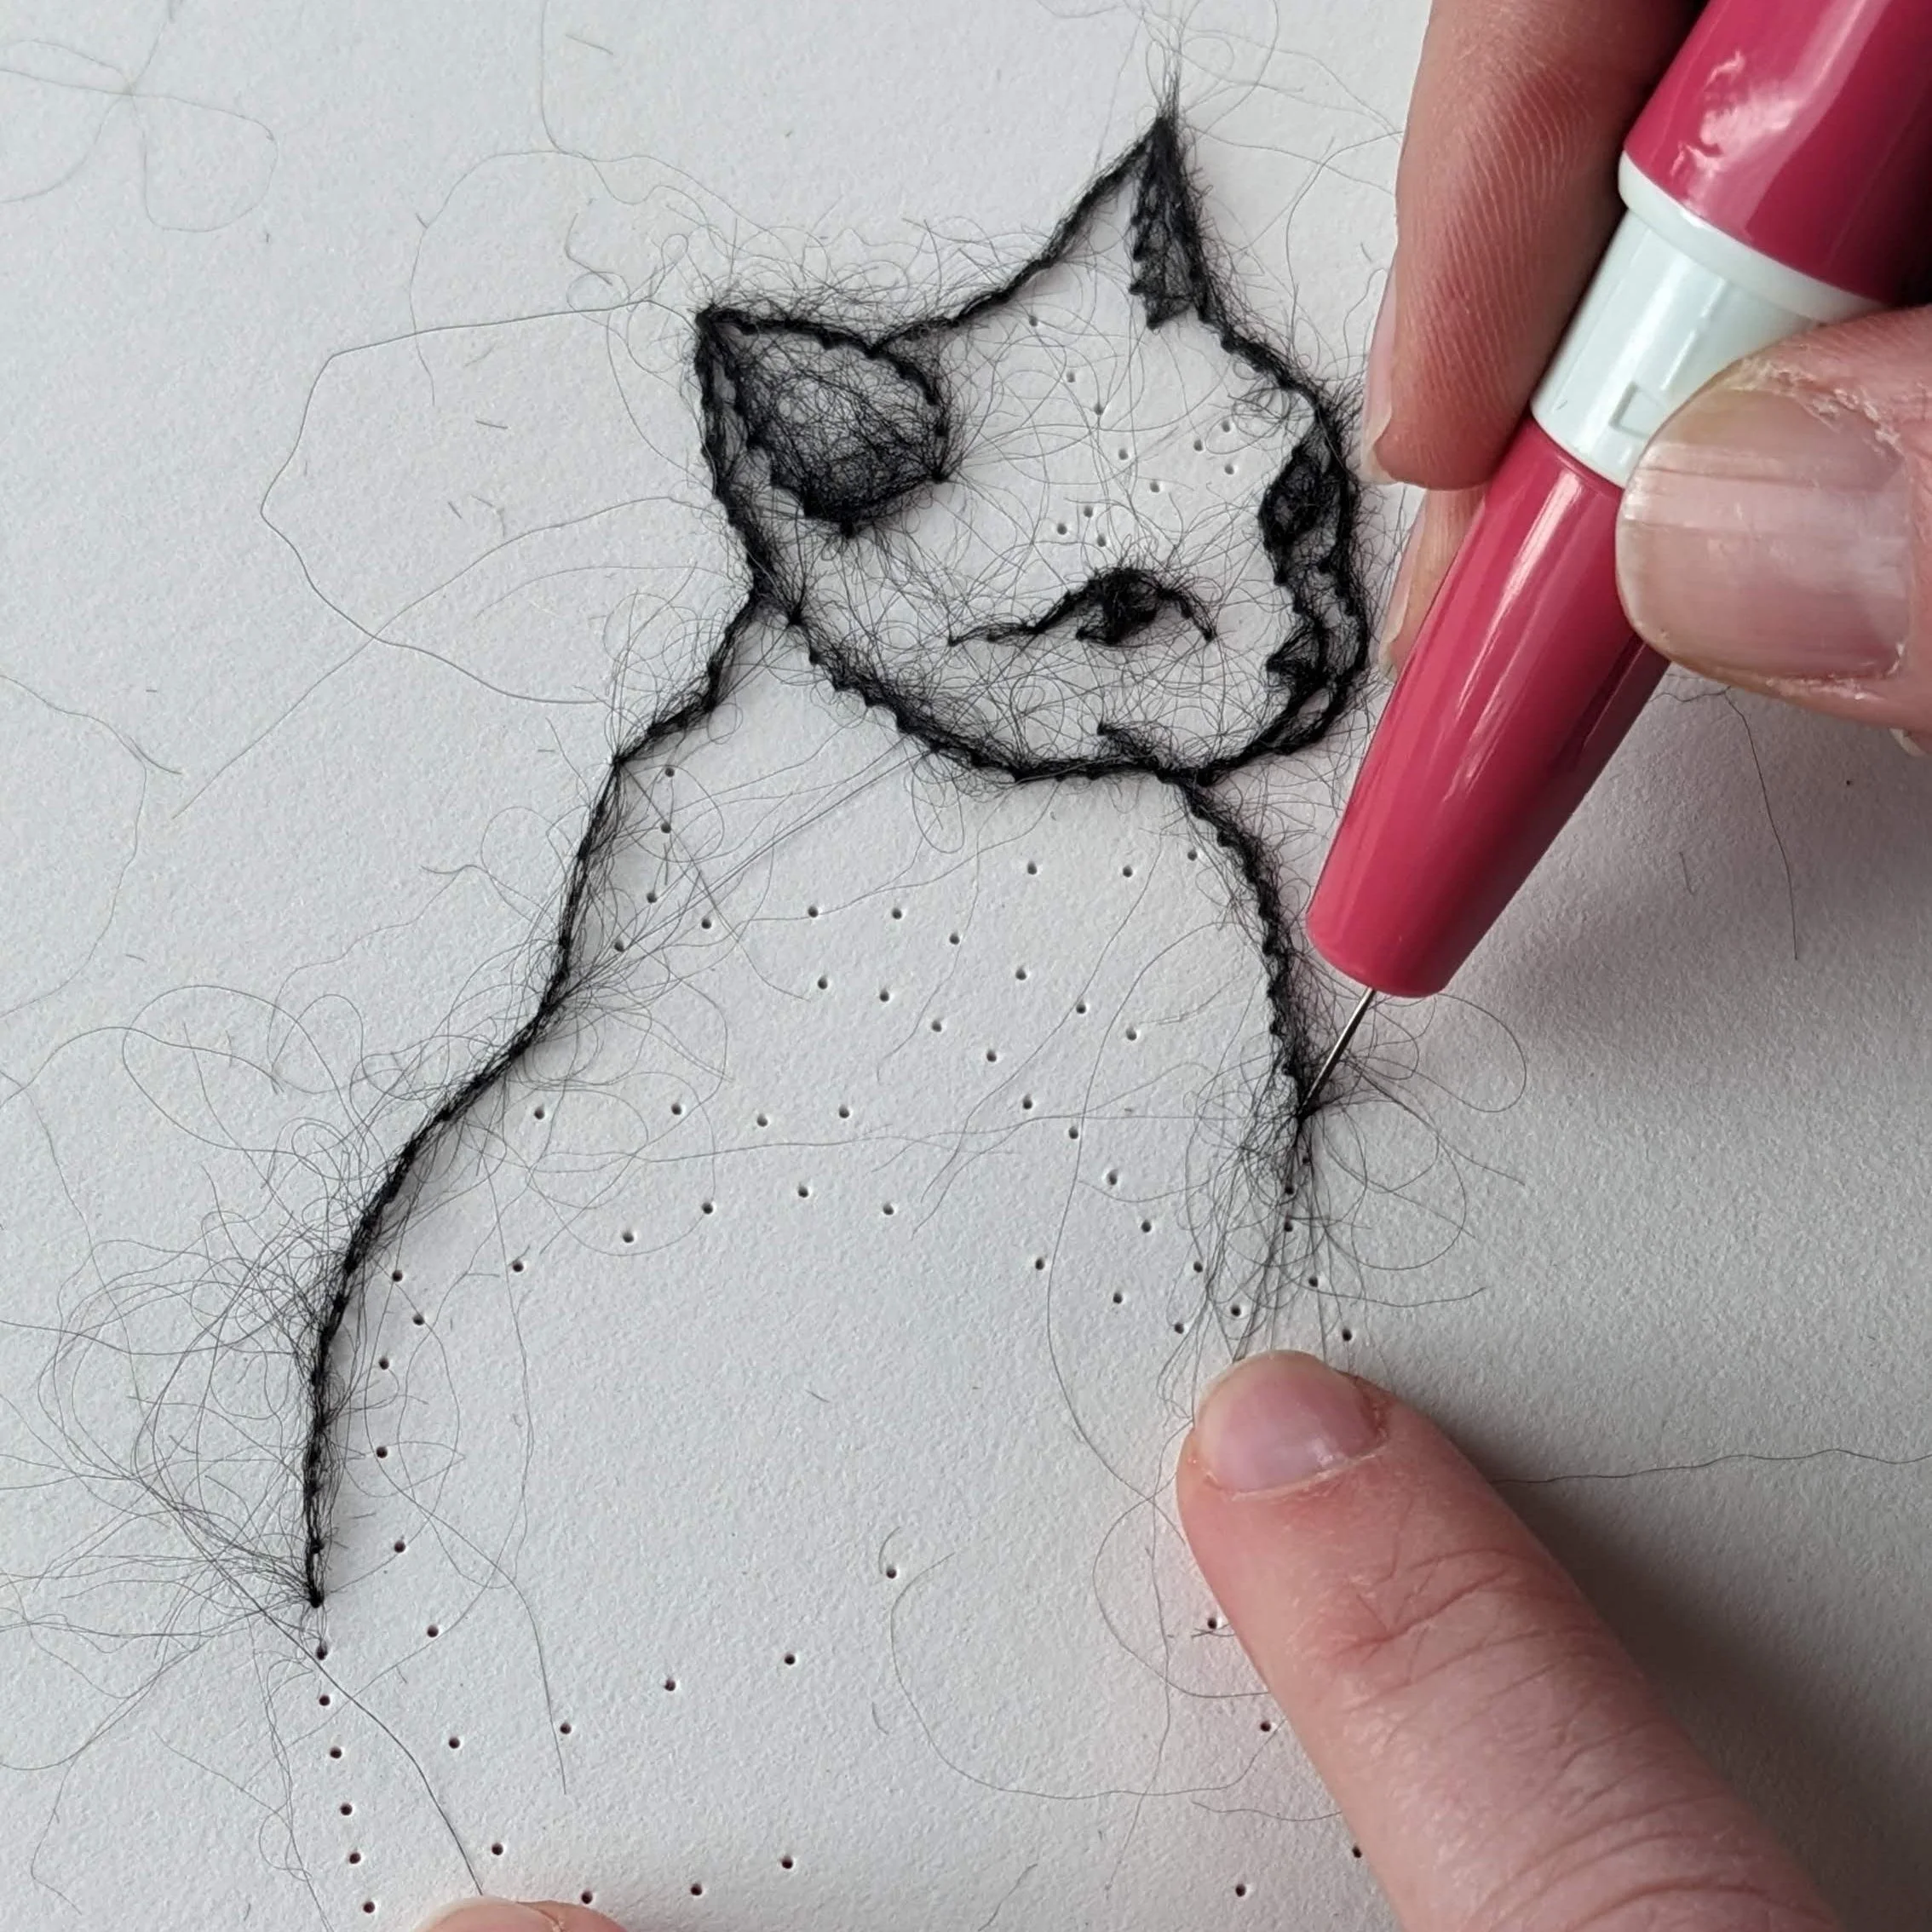
I pre-poke my outlining holes, then carefully pull the fiber across the paper until I am ready to push it down through a hole.
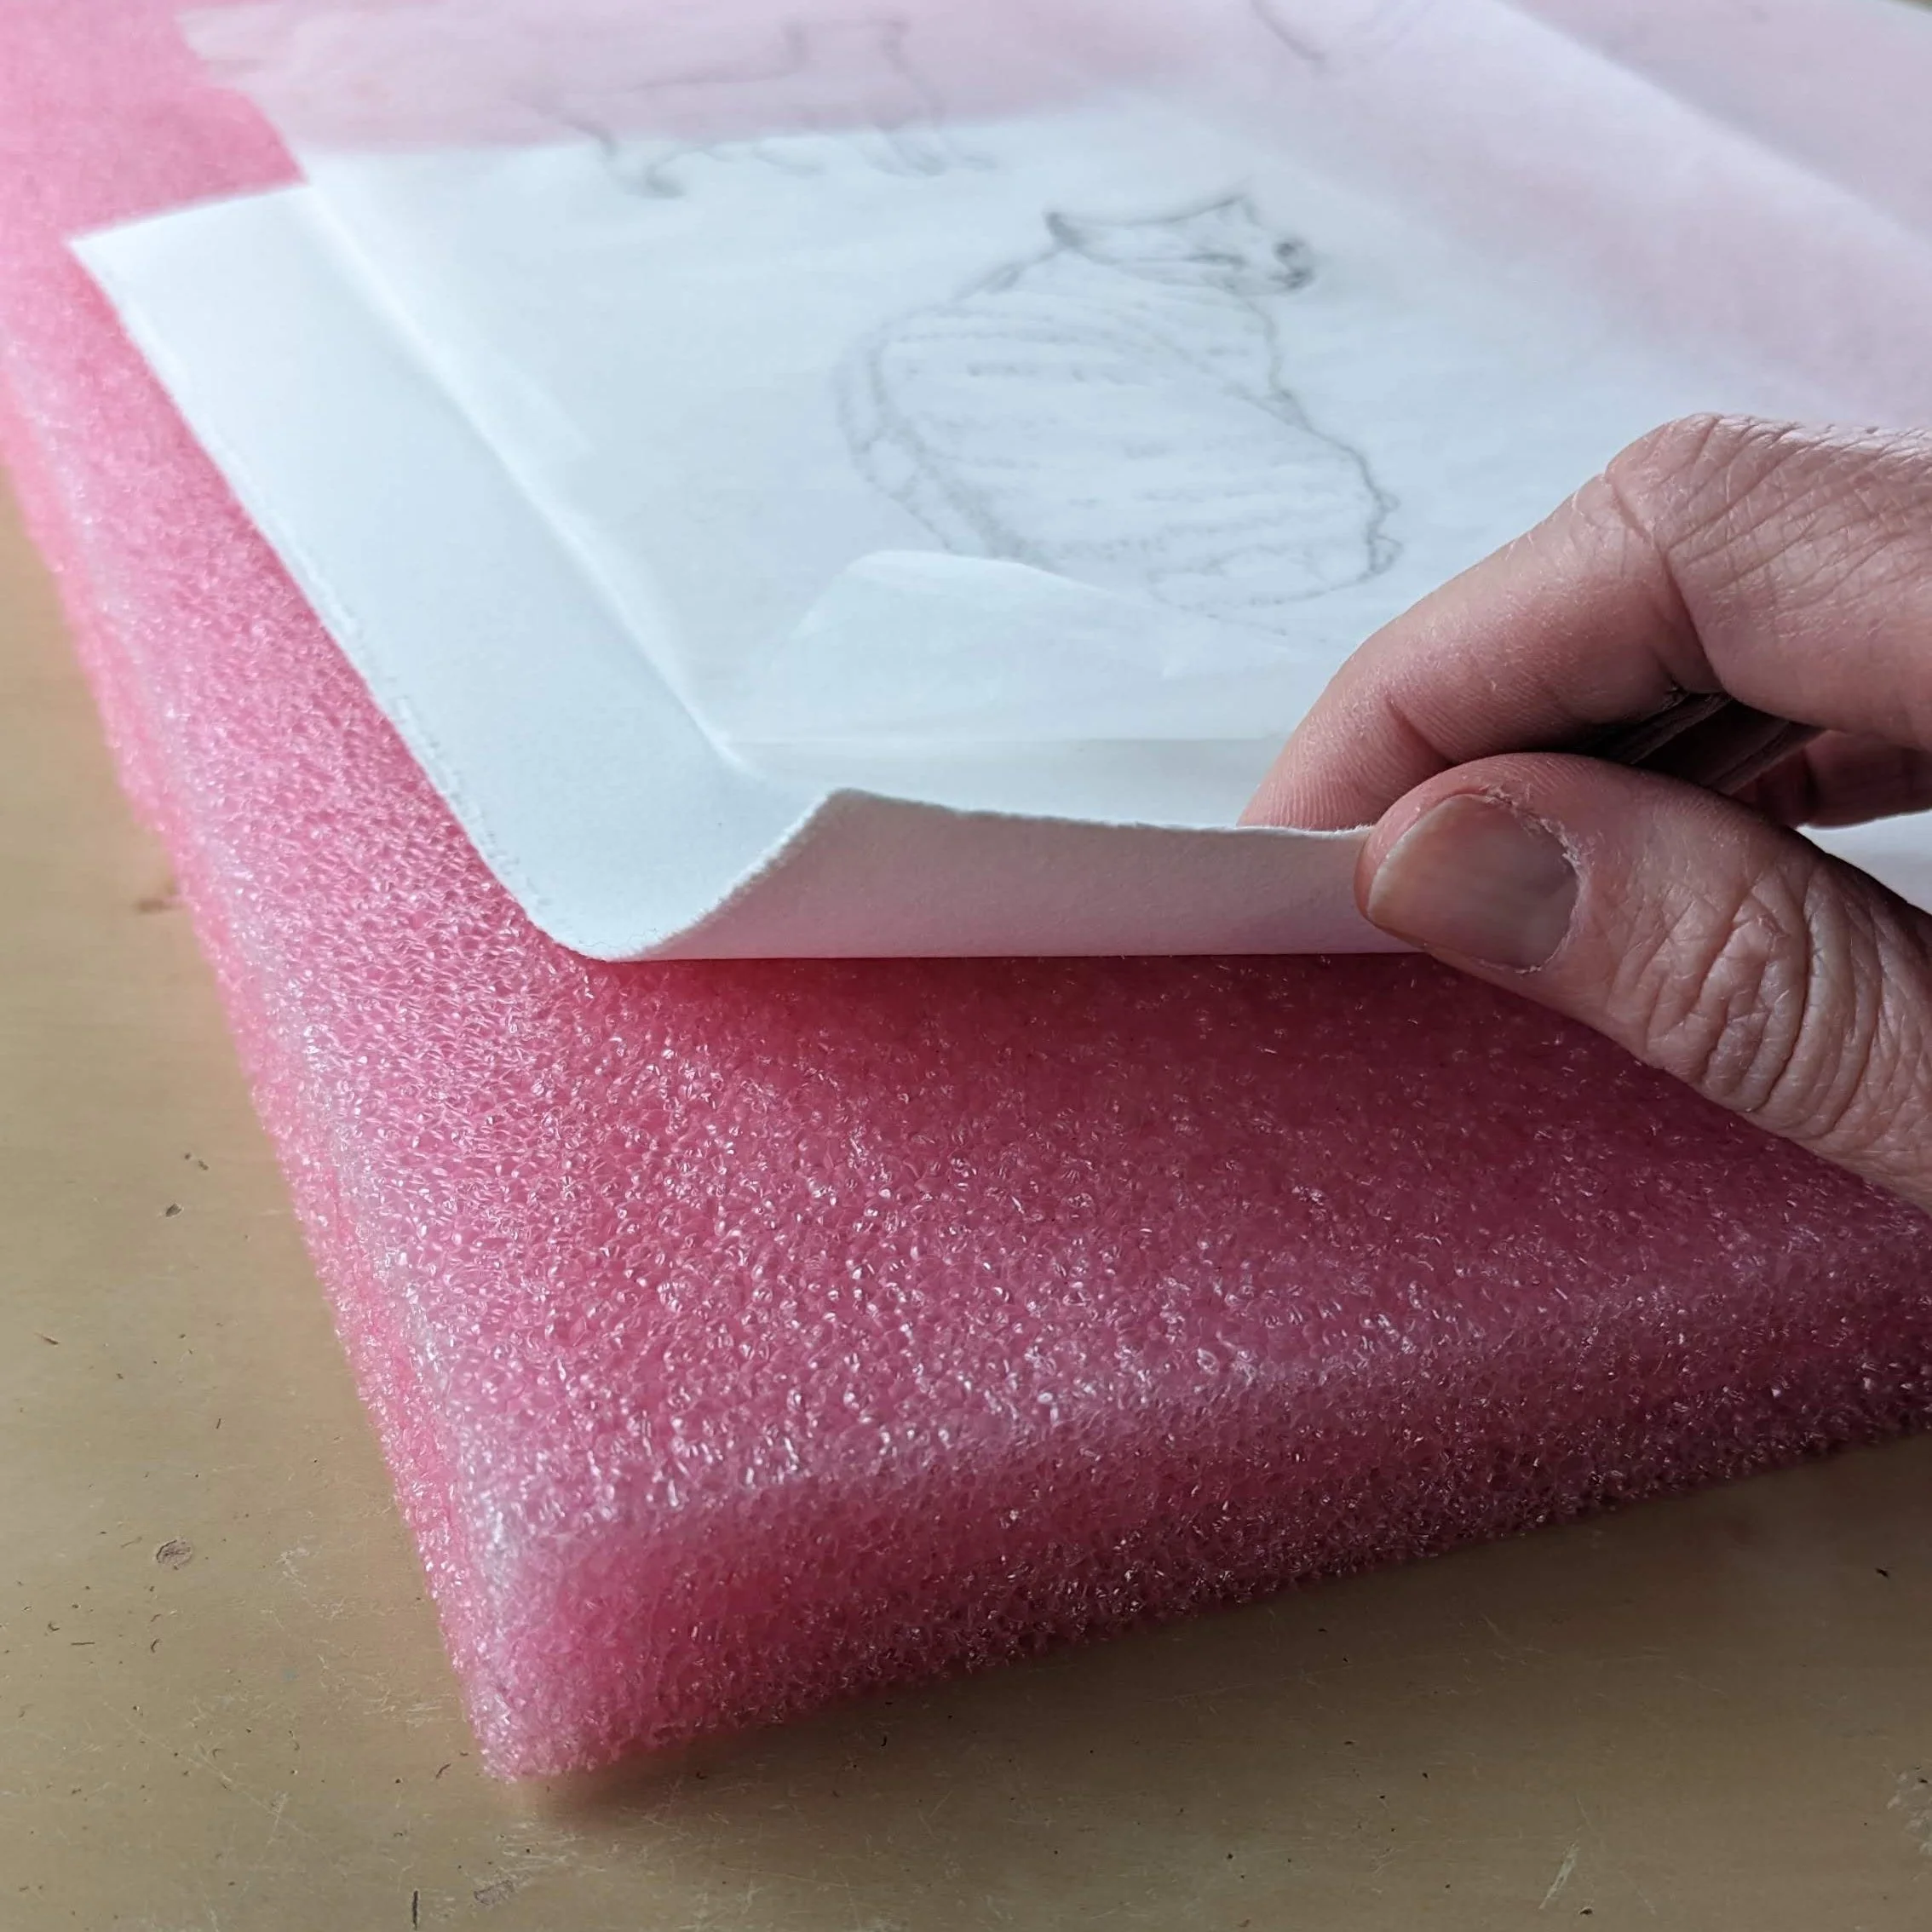
When I tried to pick the paper up when done I had to carefully peel it away from the foam pad, pulling the back half of the fibers free so they projected out the rear of the paper.
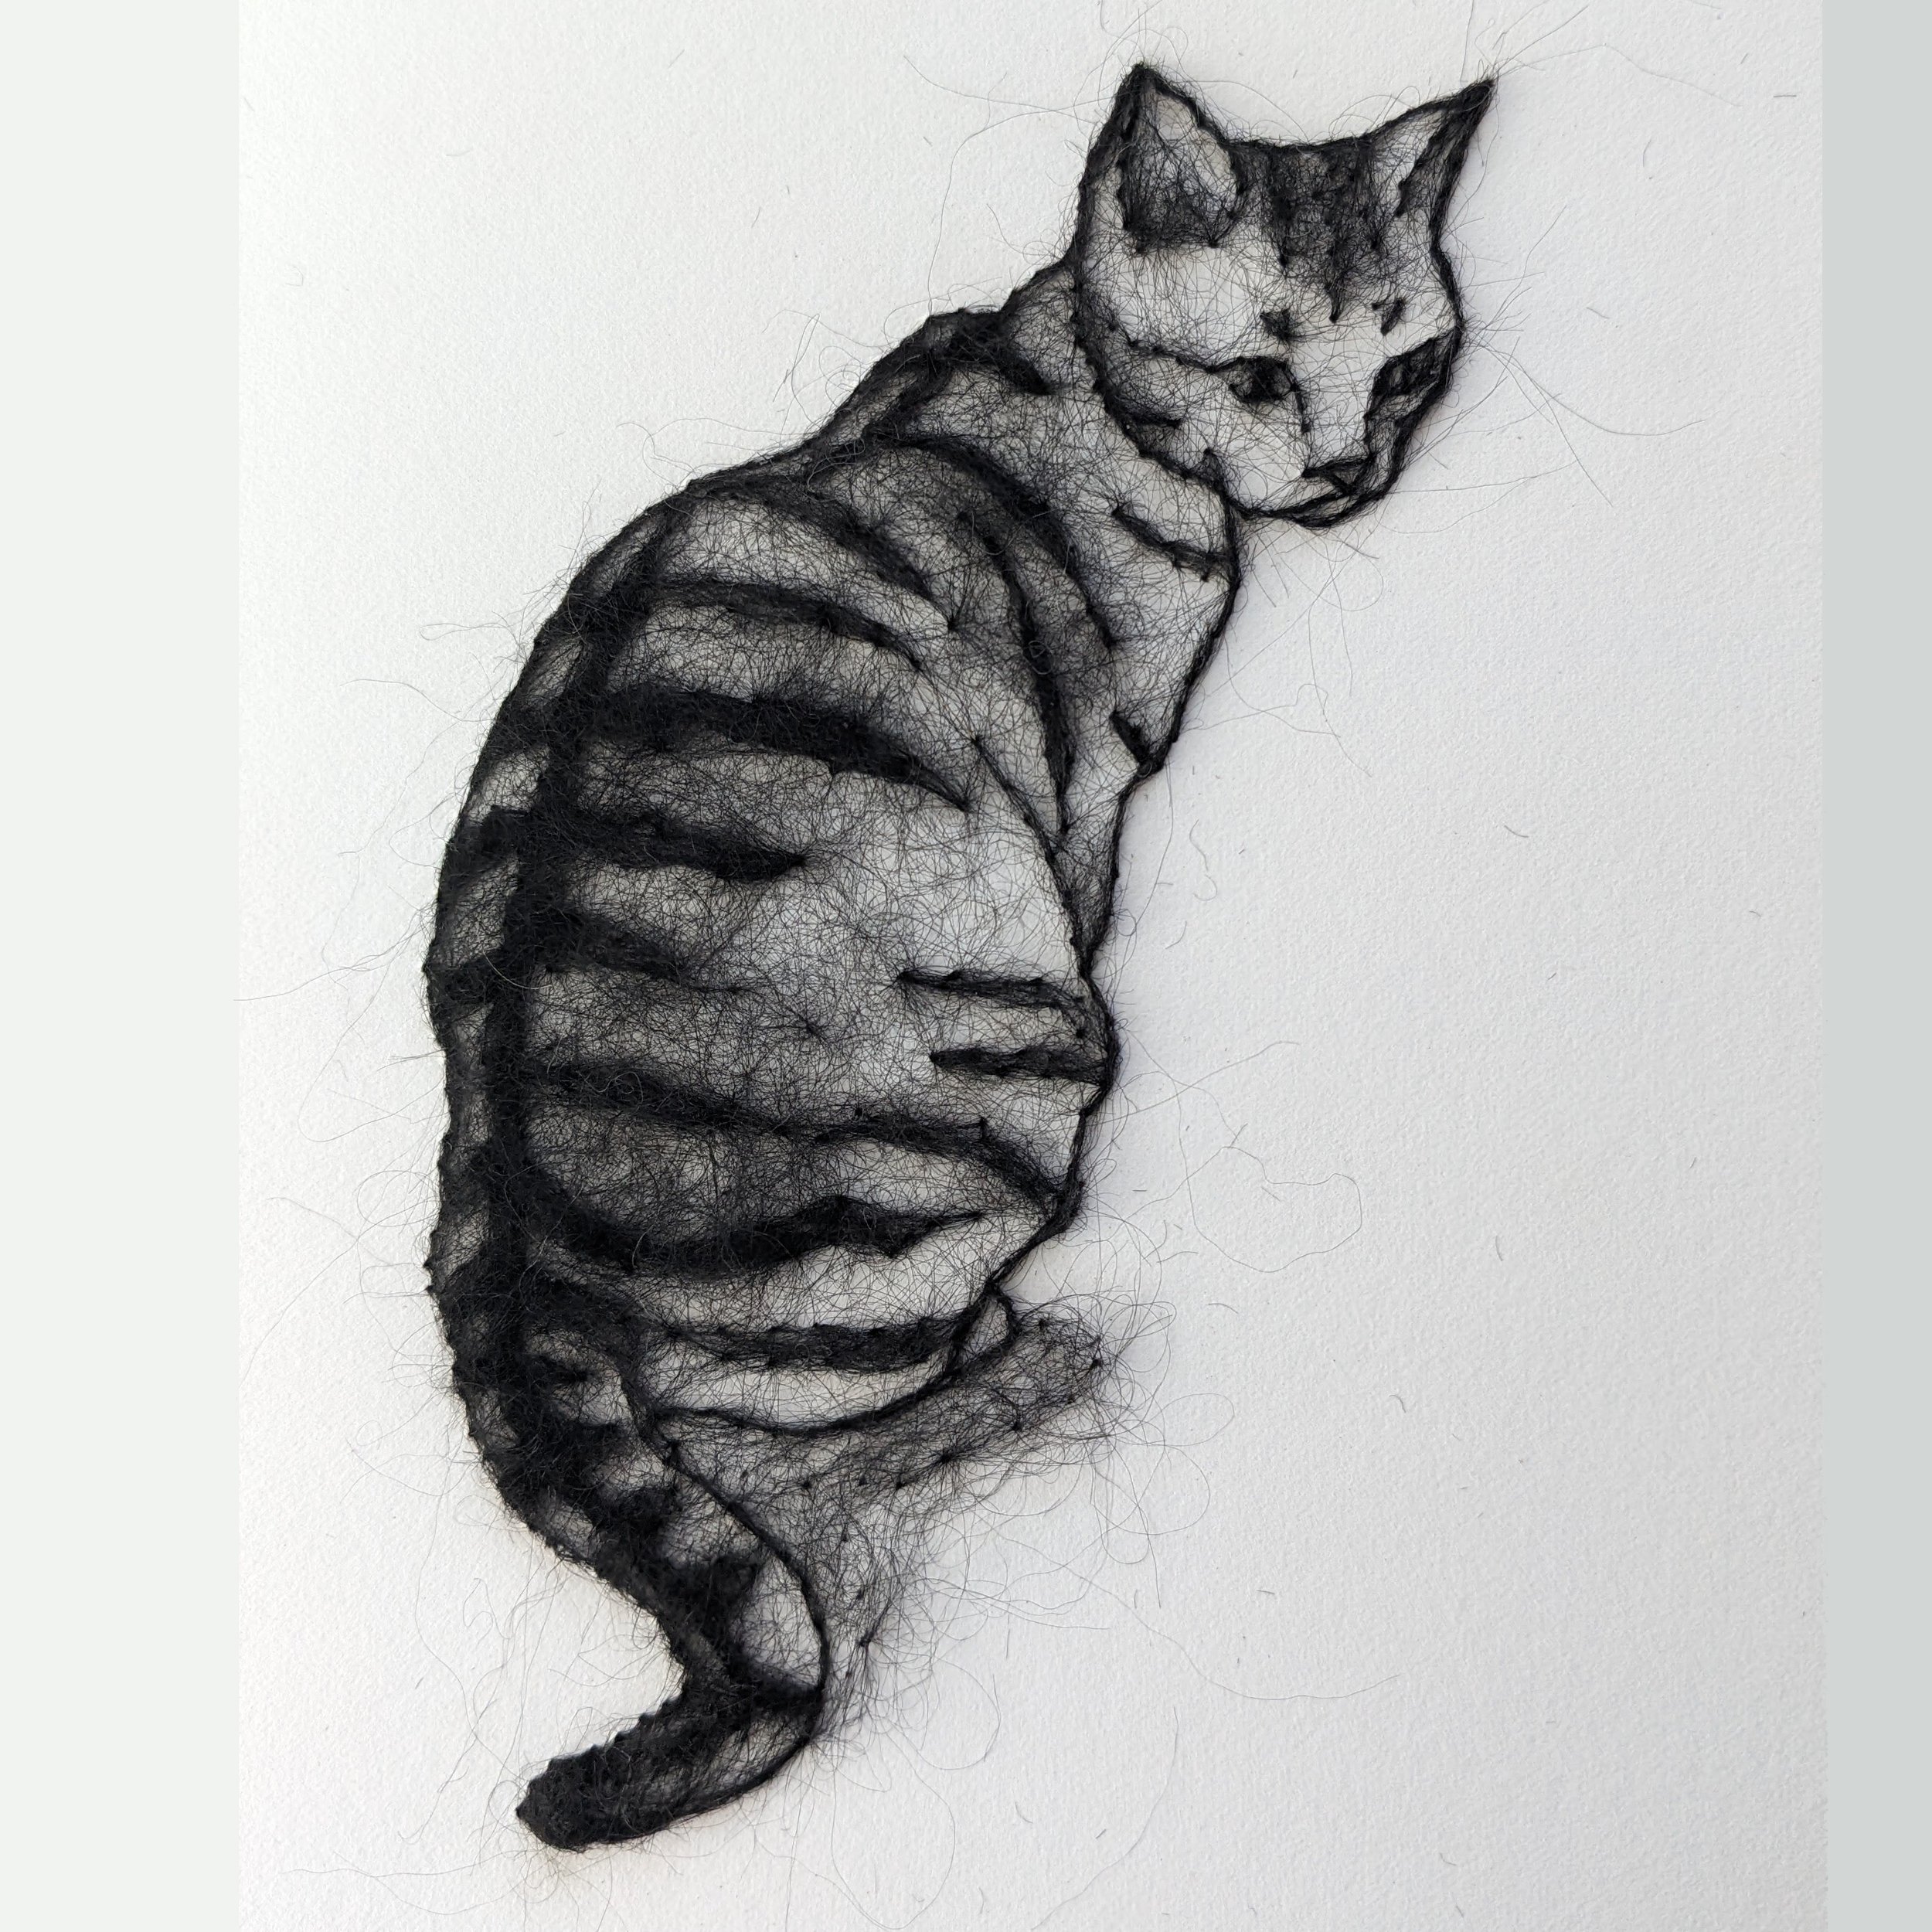
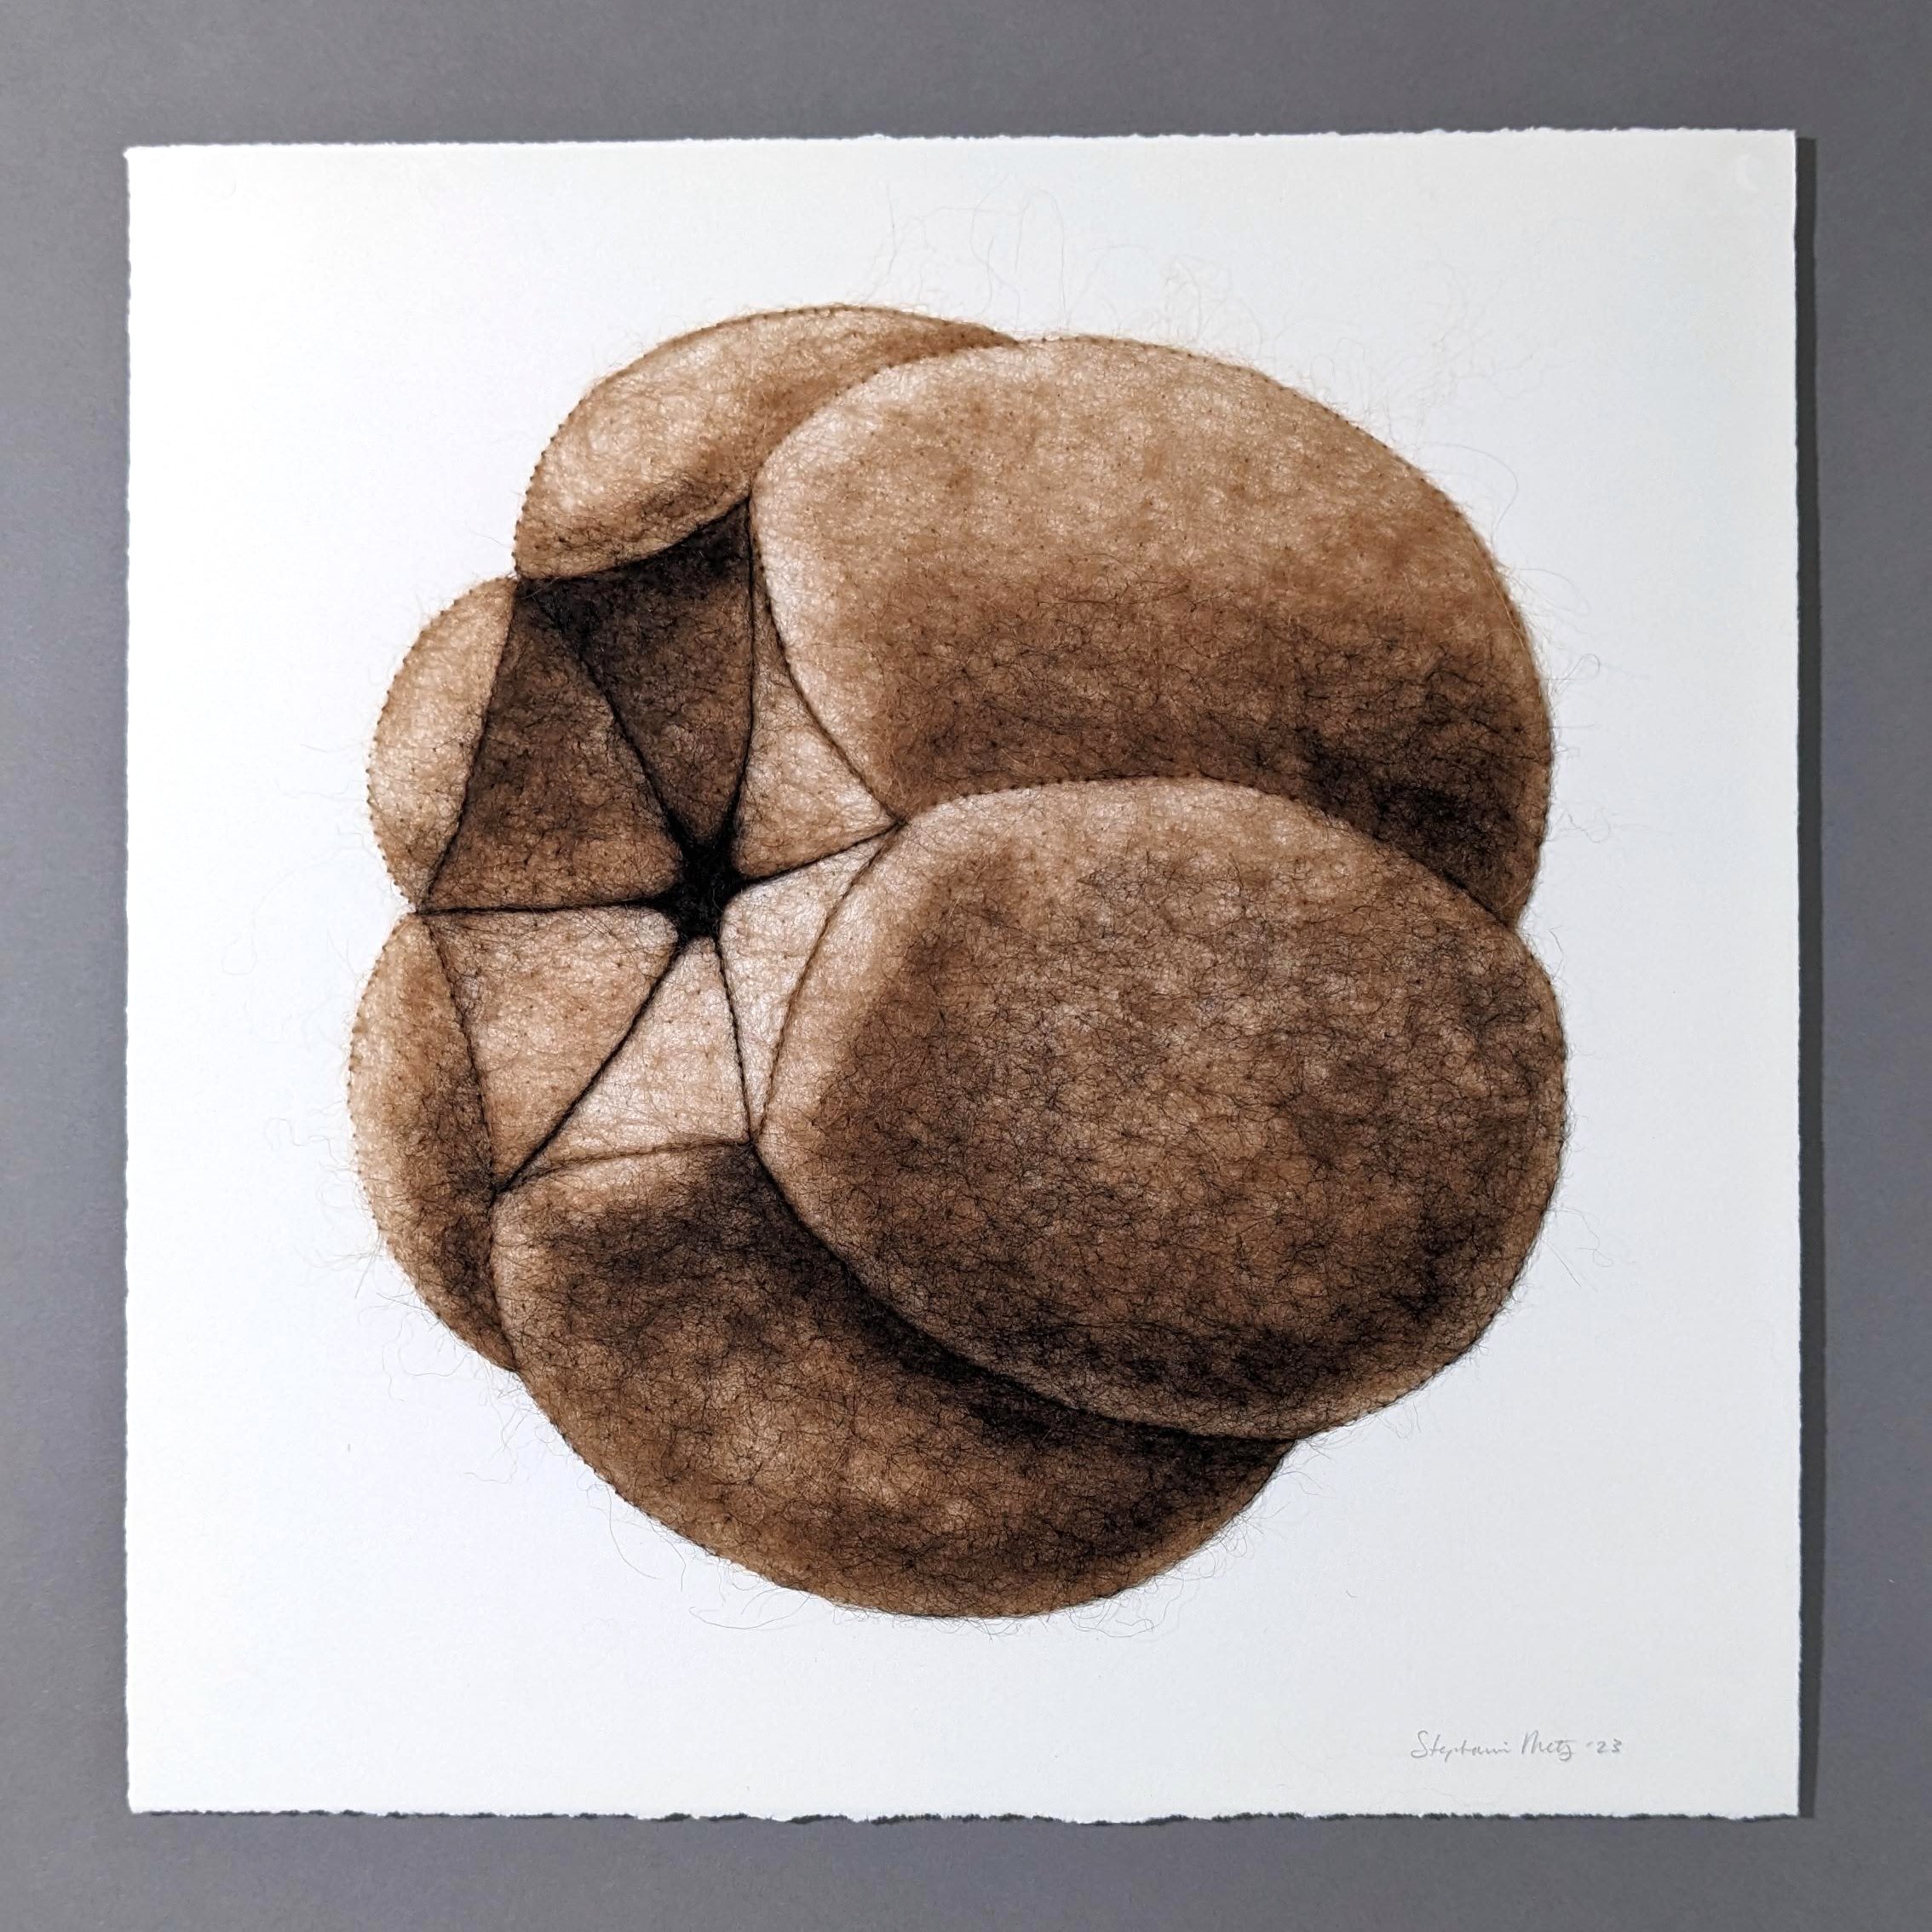
The finished cat drawing, from the front- showing the linear and shaded effects.
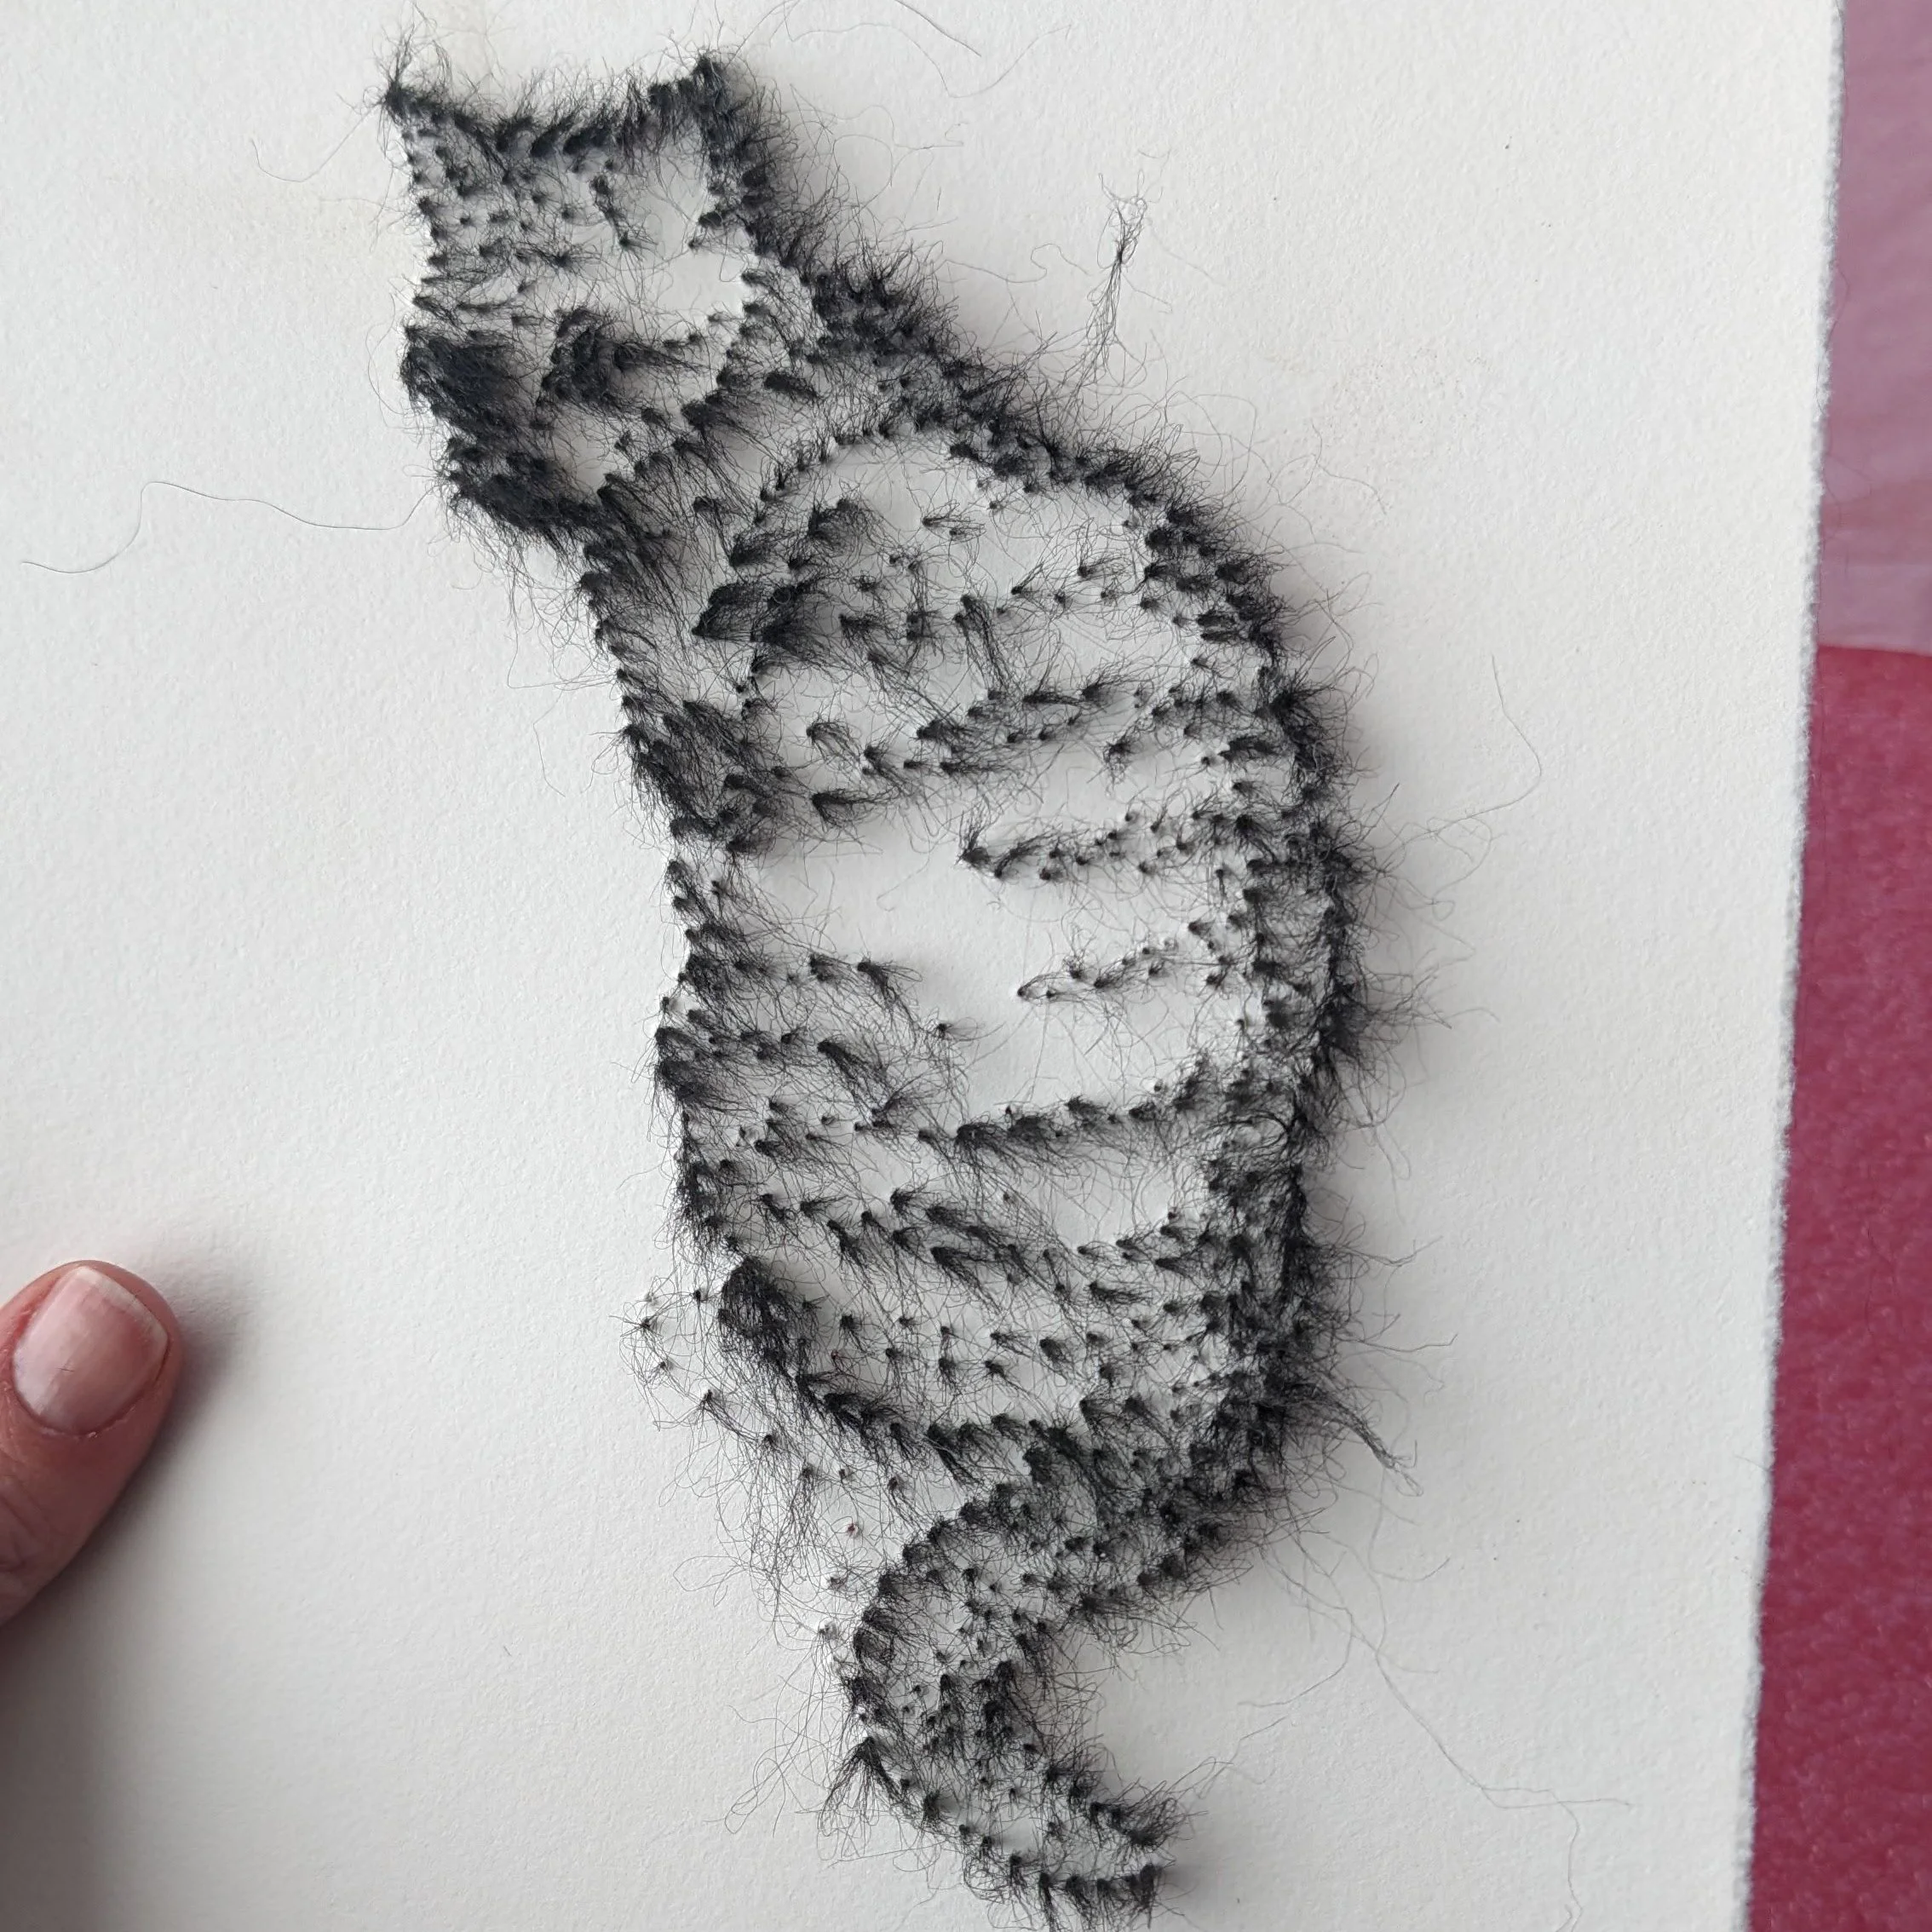
The back side of the paper shows the fibers that were anchored temporarily into the pink foam.
It took a lot of trial, error, and practice to get a feel for how to effectively needle felt through paper. I had to learn how much fiber to ‘feed out’ onto the paper and how much of it to push through-- too much and the wispy fibers would disappear entirely from the front! I learned that I could add on more fiber in multiple layers for dark areas, and that I could pull it back out as well if there was too much density. I figured out how to apply thin, spread-out tangles of fiber, anchored in only a few areas, for lighter effects where more of the white paper showed through.
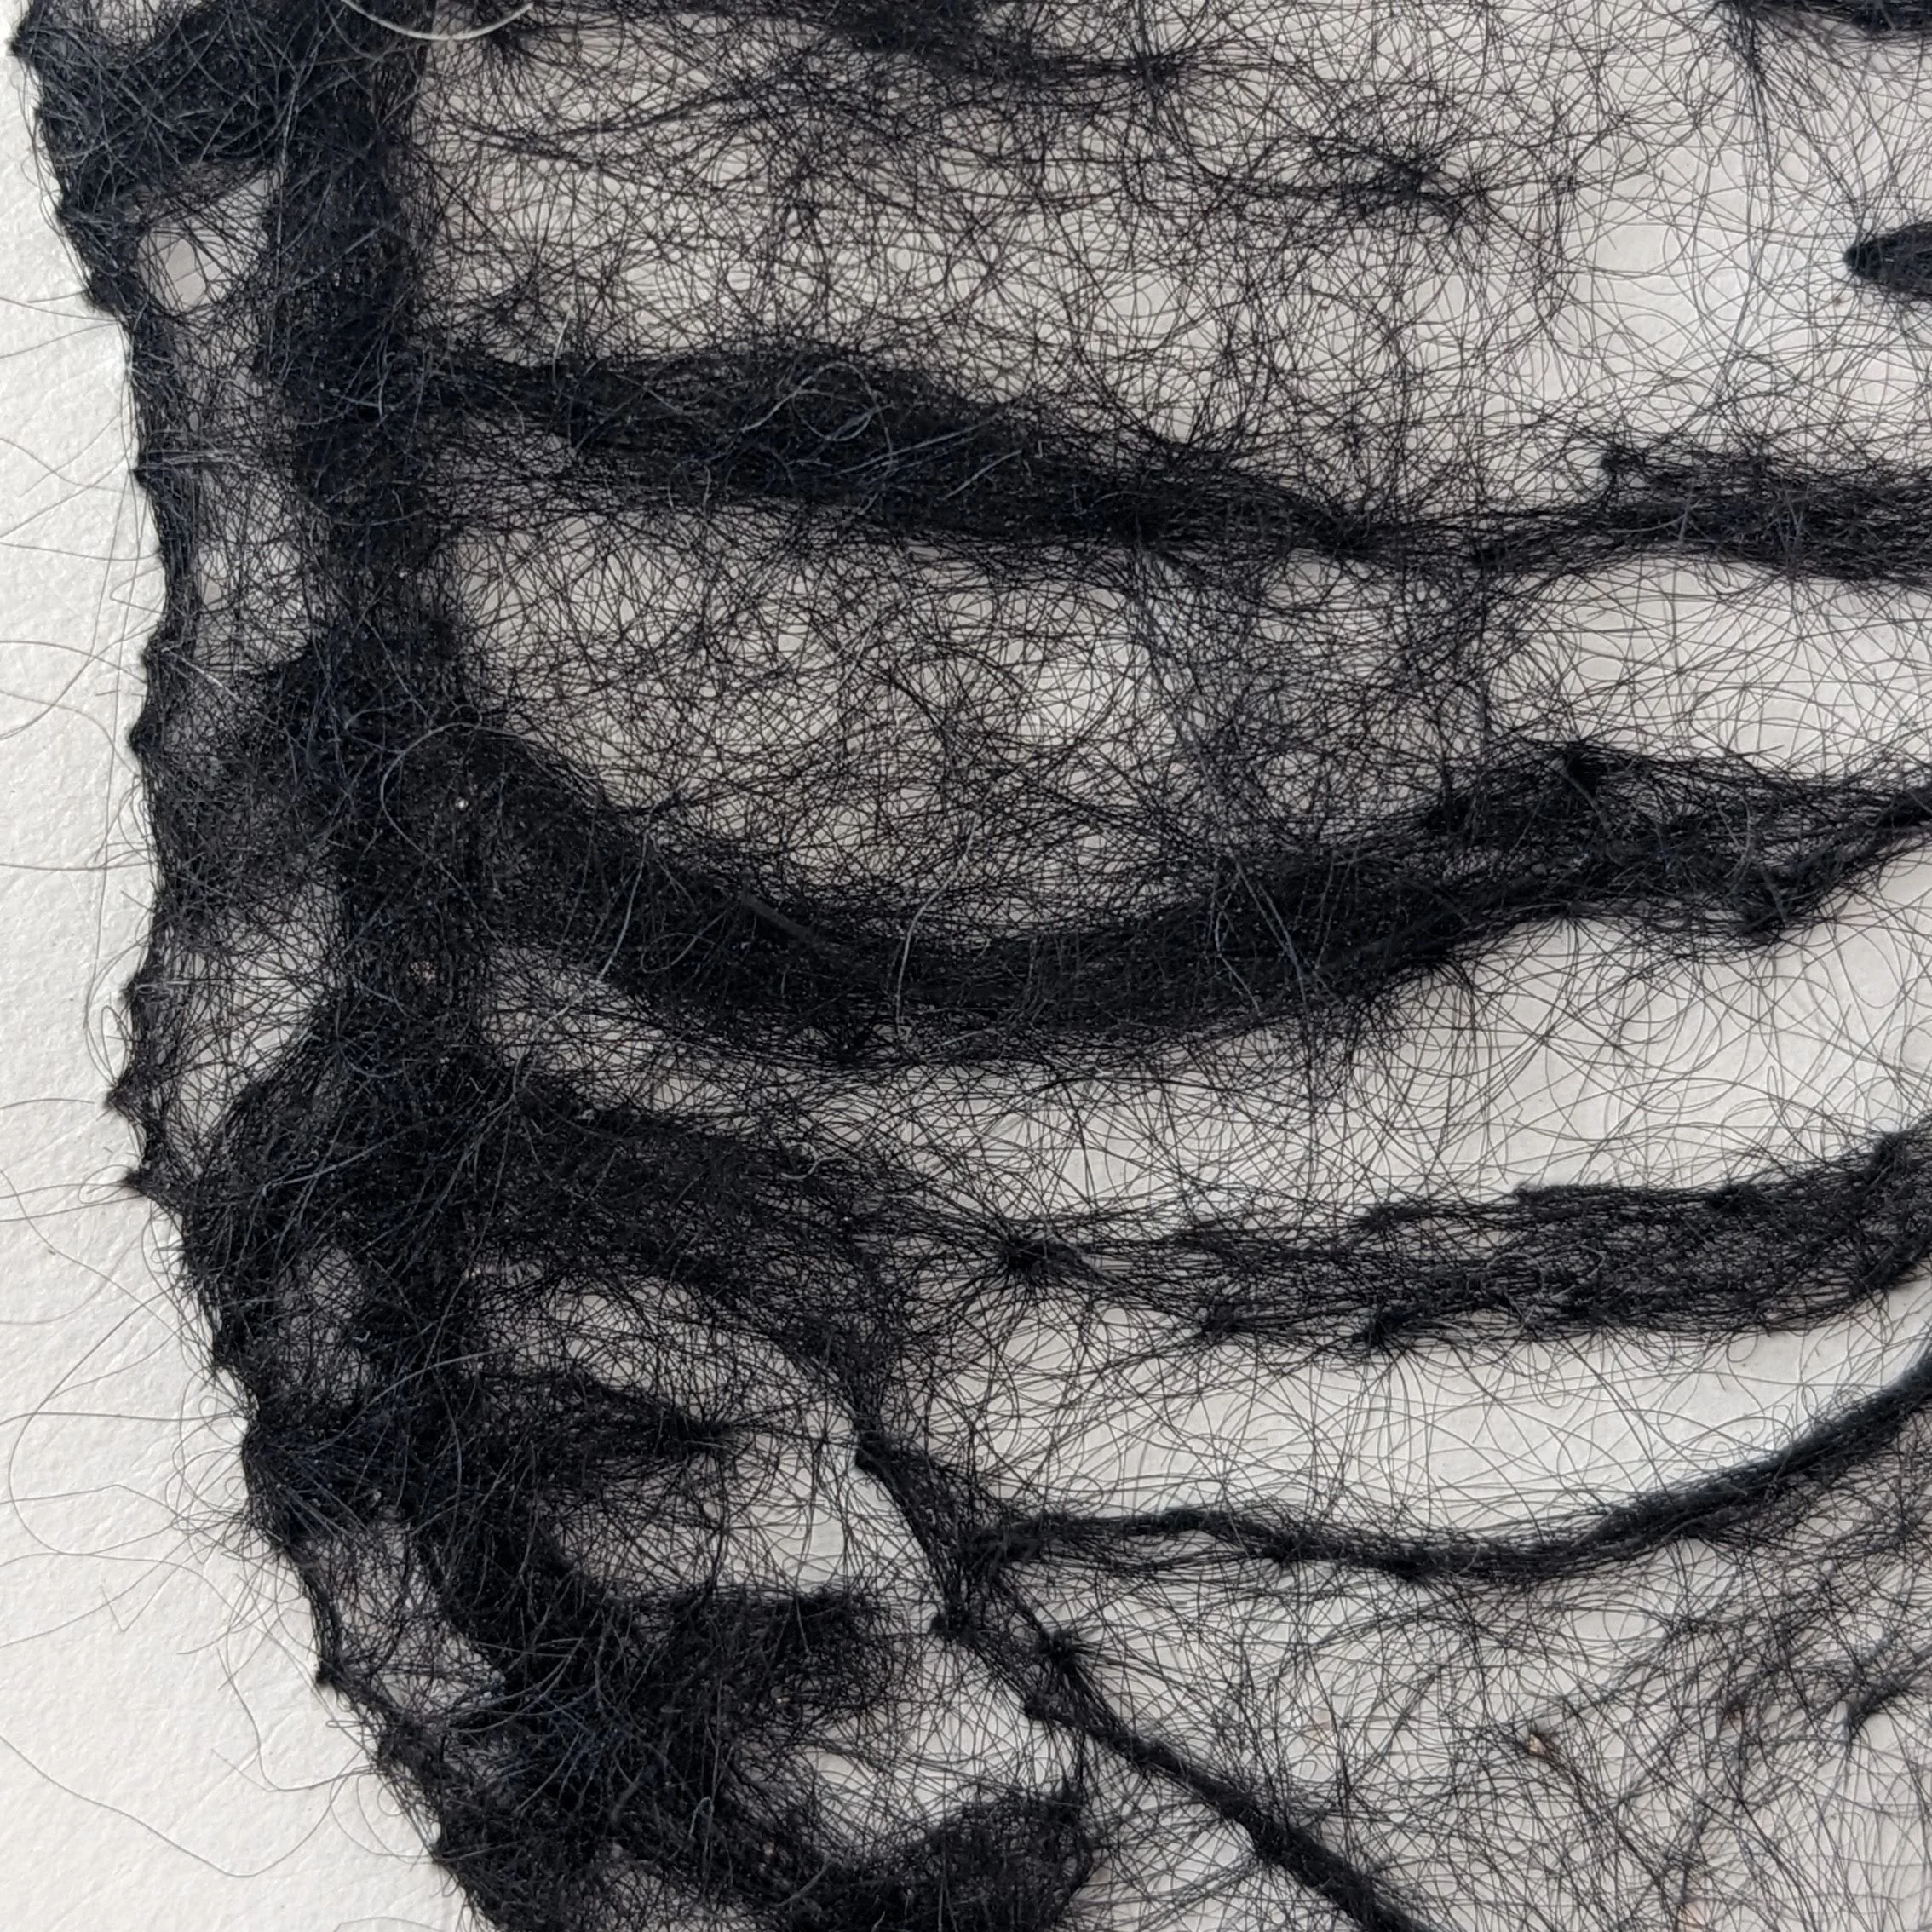
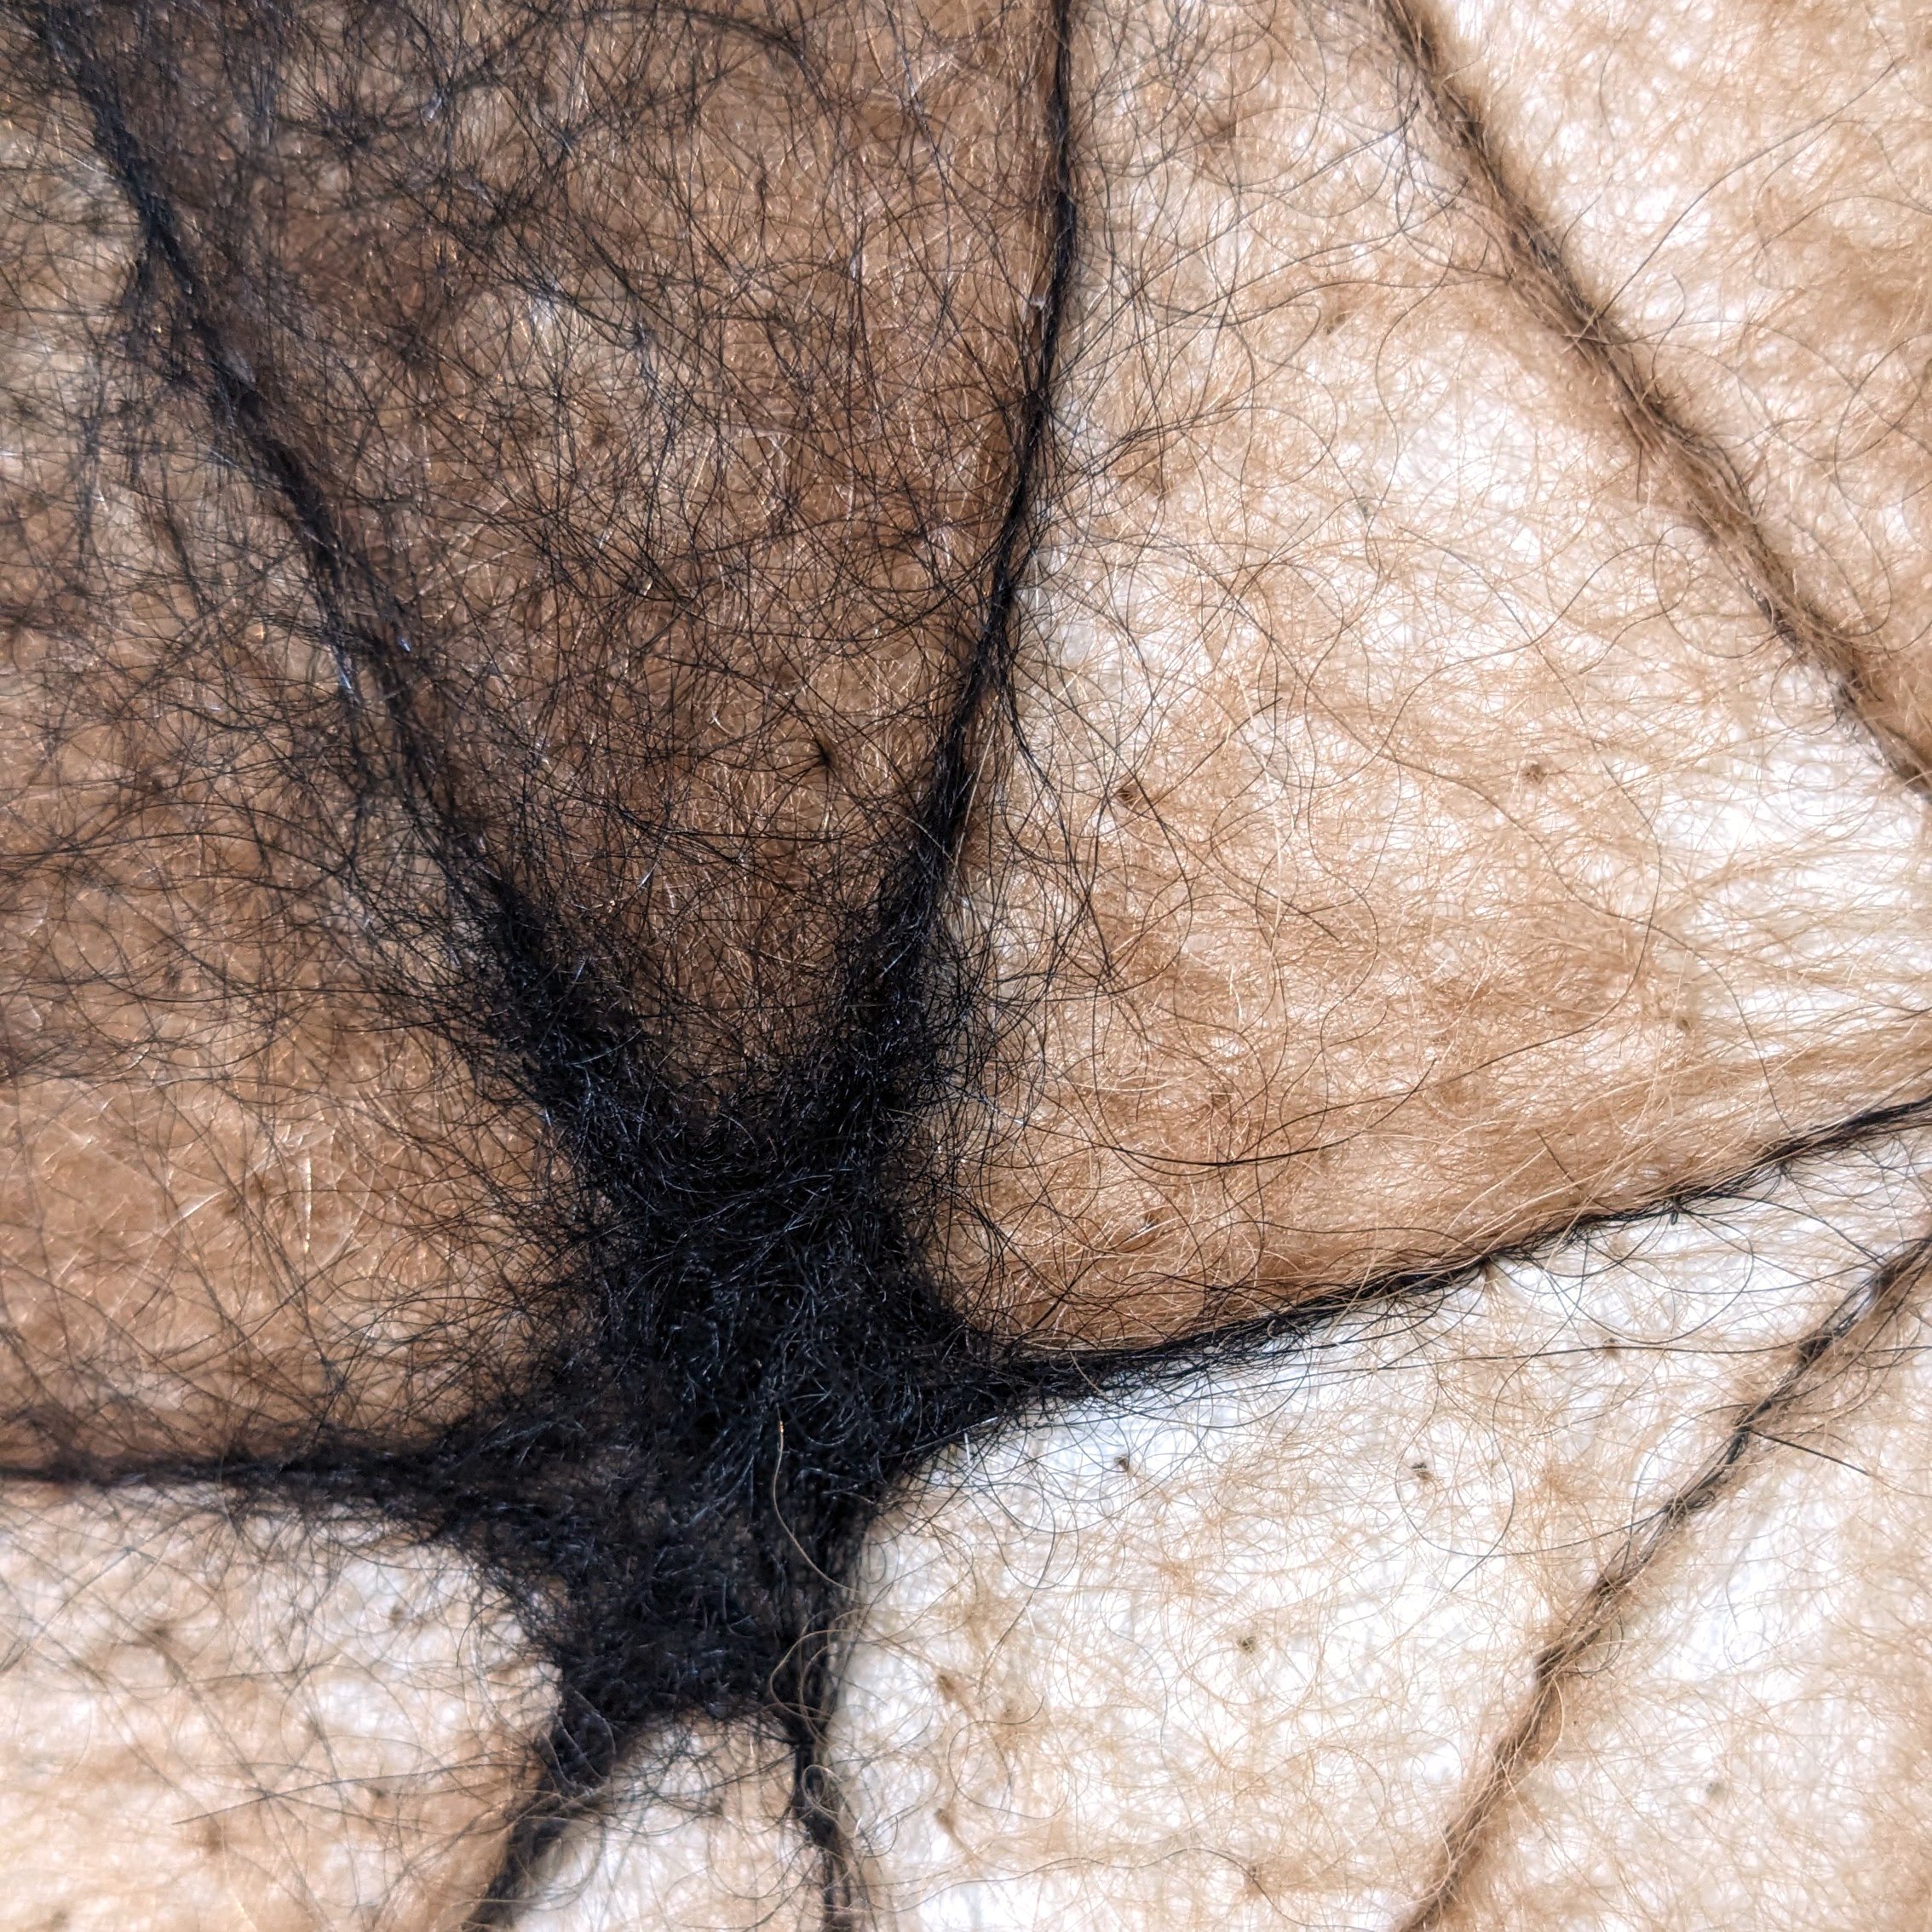
Closeup showing lines and shaded areas— made up of different concentrations of fiber across the surface. One poke too many might push too much fiber through, leaving too much white showing. It takes a careful hand and a lot of practice.
I couldn’t ‘un-poke’ a hole, of course, so I had to use care not to make too many where they’d be very visible in thinly covered areas. I learned that too many holes too close together would break apart the paper and destroy the piece.
At first I worried about the fact that the fiber could be tugged back out again, the drawing effectively removed. I tried spraying fixative on the back, on the front, on both sides… but it gave a strange sticky sheen to the fiber and stained the paper. In truth the untreated fibers didn’t just fall out on their own or with a casual touch, they had to be deliberately pulled out. So I decided not to use any gluey treatment, instead to consider it like a pencil drawing: you COULD erase it, if you really wanted to. But it wouldn’t erase itself.
The process of poking fibers through paper is gratifying. The physical sensation and sound of a light, crisp ‘crunch’ as the needle pokes through the paper into the foam, the satisfaction in aligning fibers where I want them, and way I can deftly create shadows by layering darker fiber to achieve subtle effects all make me eager to be in the studio.
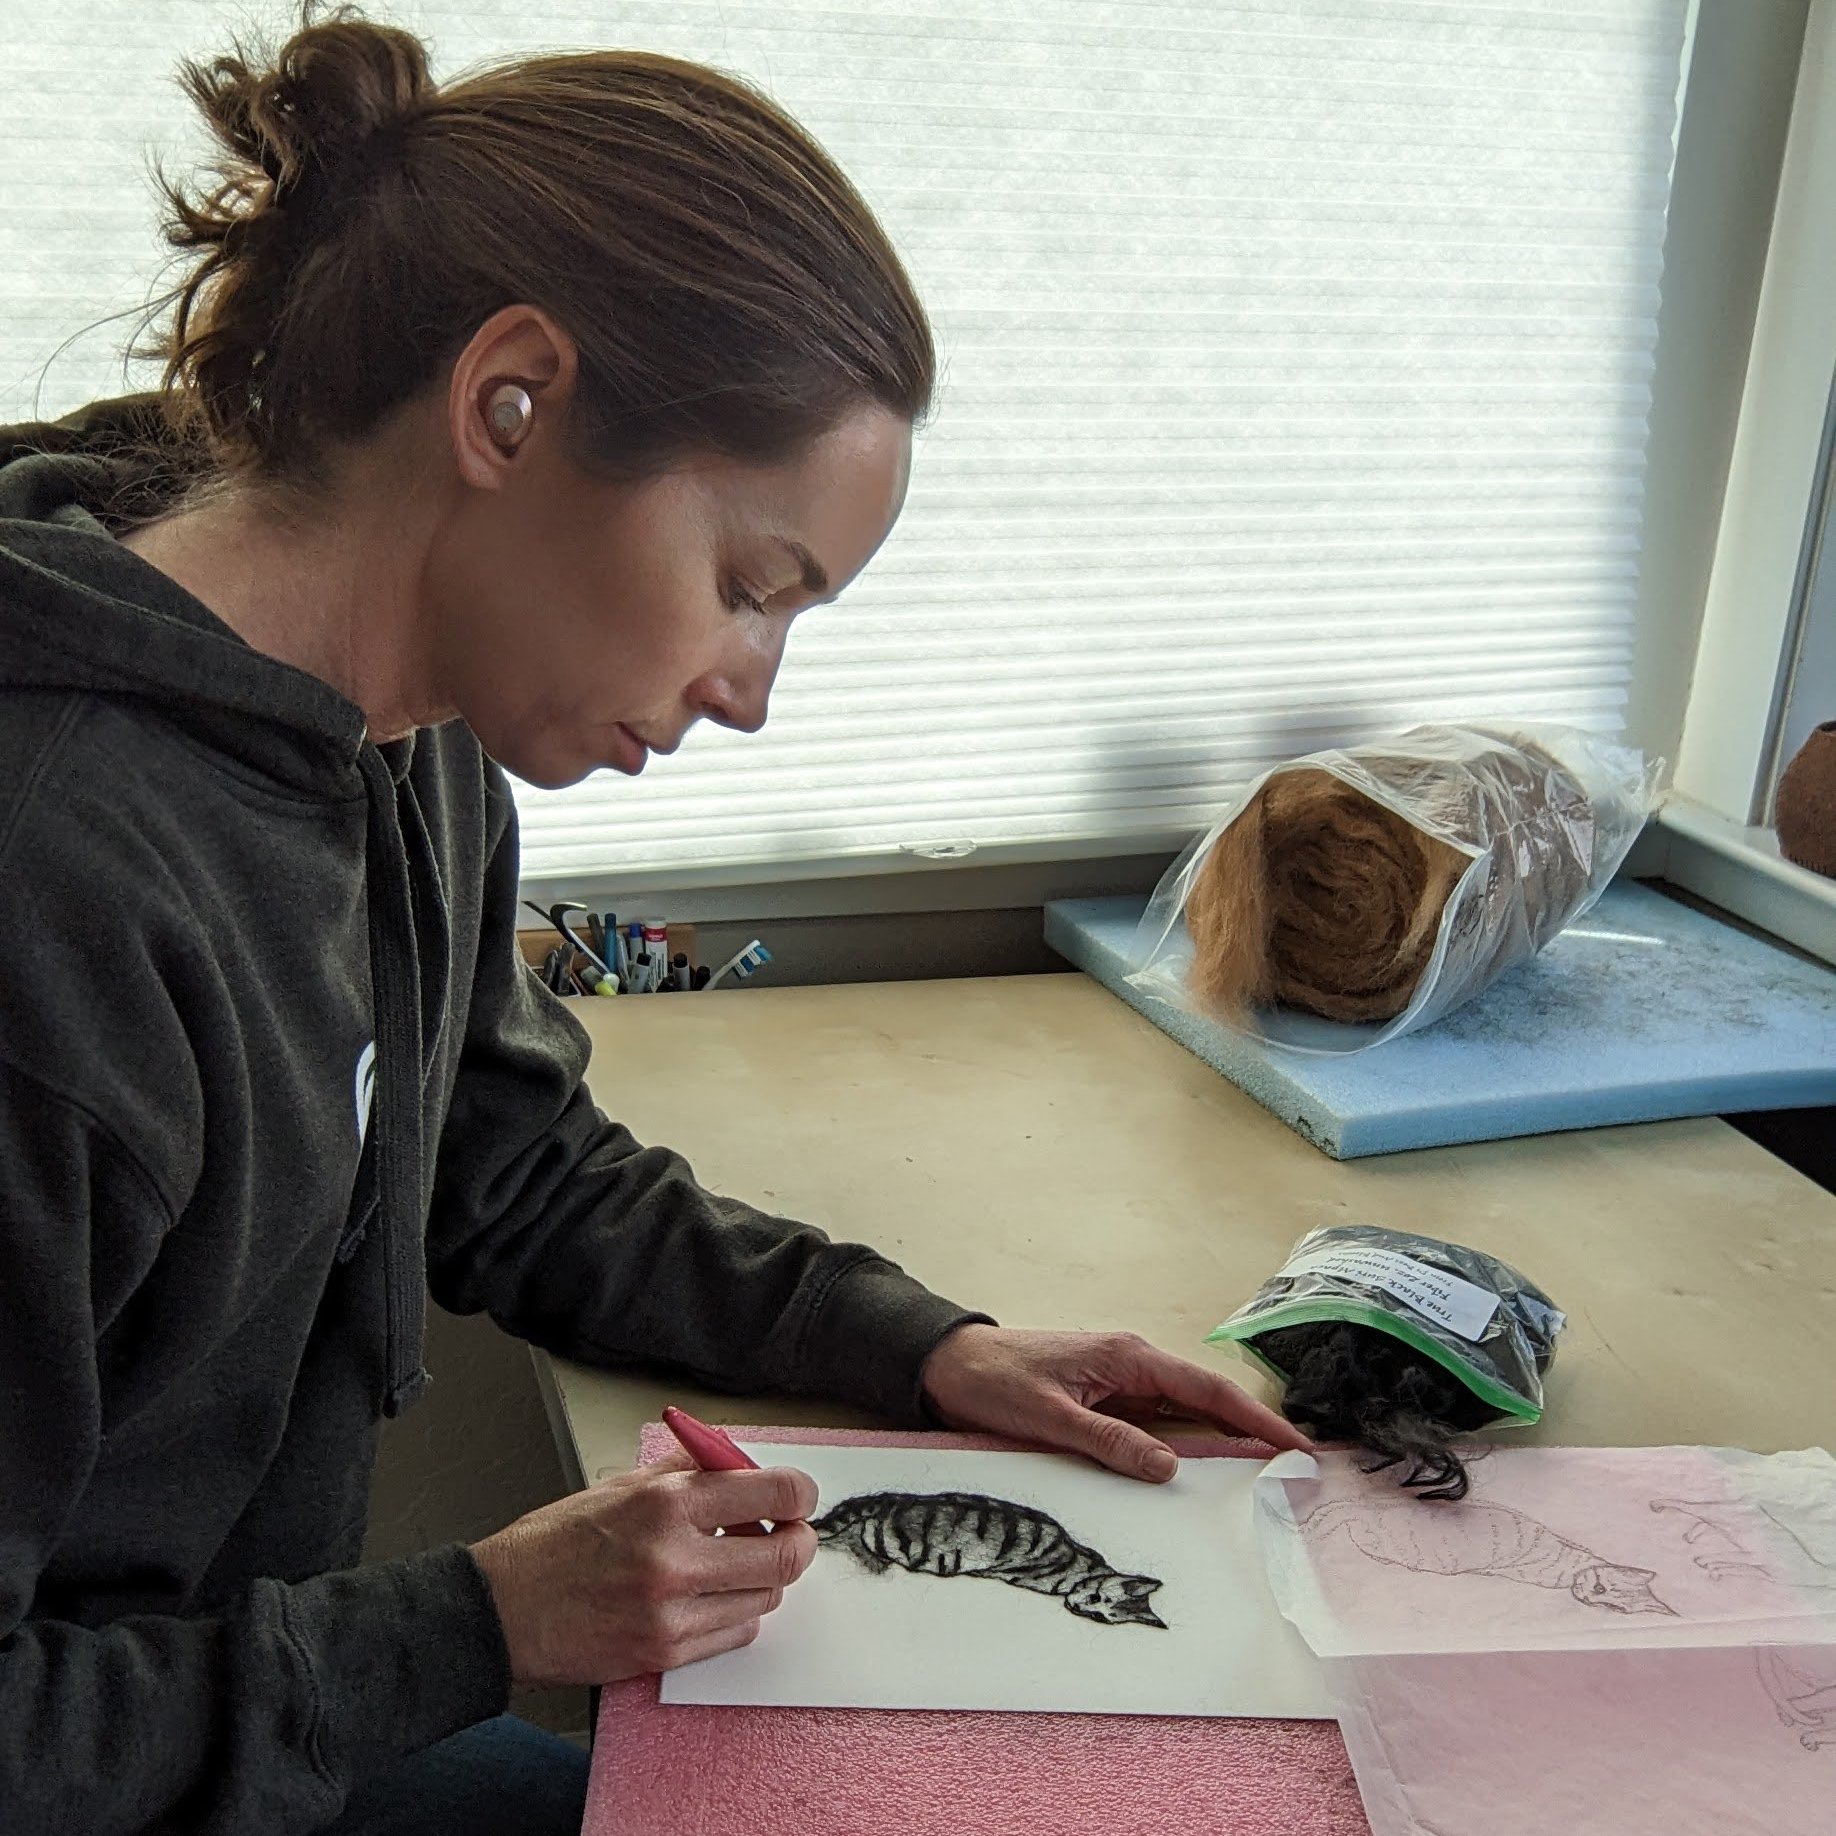
Working on a wool drawing while listening to an audiobook— a great way to spend hours of my life. Truly!
Making wool drawings requires practice, finesse, and a lot of patience-- worth it since both the process and results are rewarding to me. But what’s in it for the viewer? How could my particular process have an effect on an audience? Read on for Part 2: What’s in it for the Viewer?