Felting Needles: What Are They and How Do They Work? Explanations with photos and illustrations.
Needle felting as an art form and creative pastime is getting more and more attention lately, and yet I meet plenty of people who have no idea what it is or how (and why) it works to stab at wool until it takes different shapes. At my Open Studio events I find myself giving ongoing demonstrations to ever-changing wide-eyed audiences… who then look around my studio with renewed awe when they realize how my sculpture has come to be.
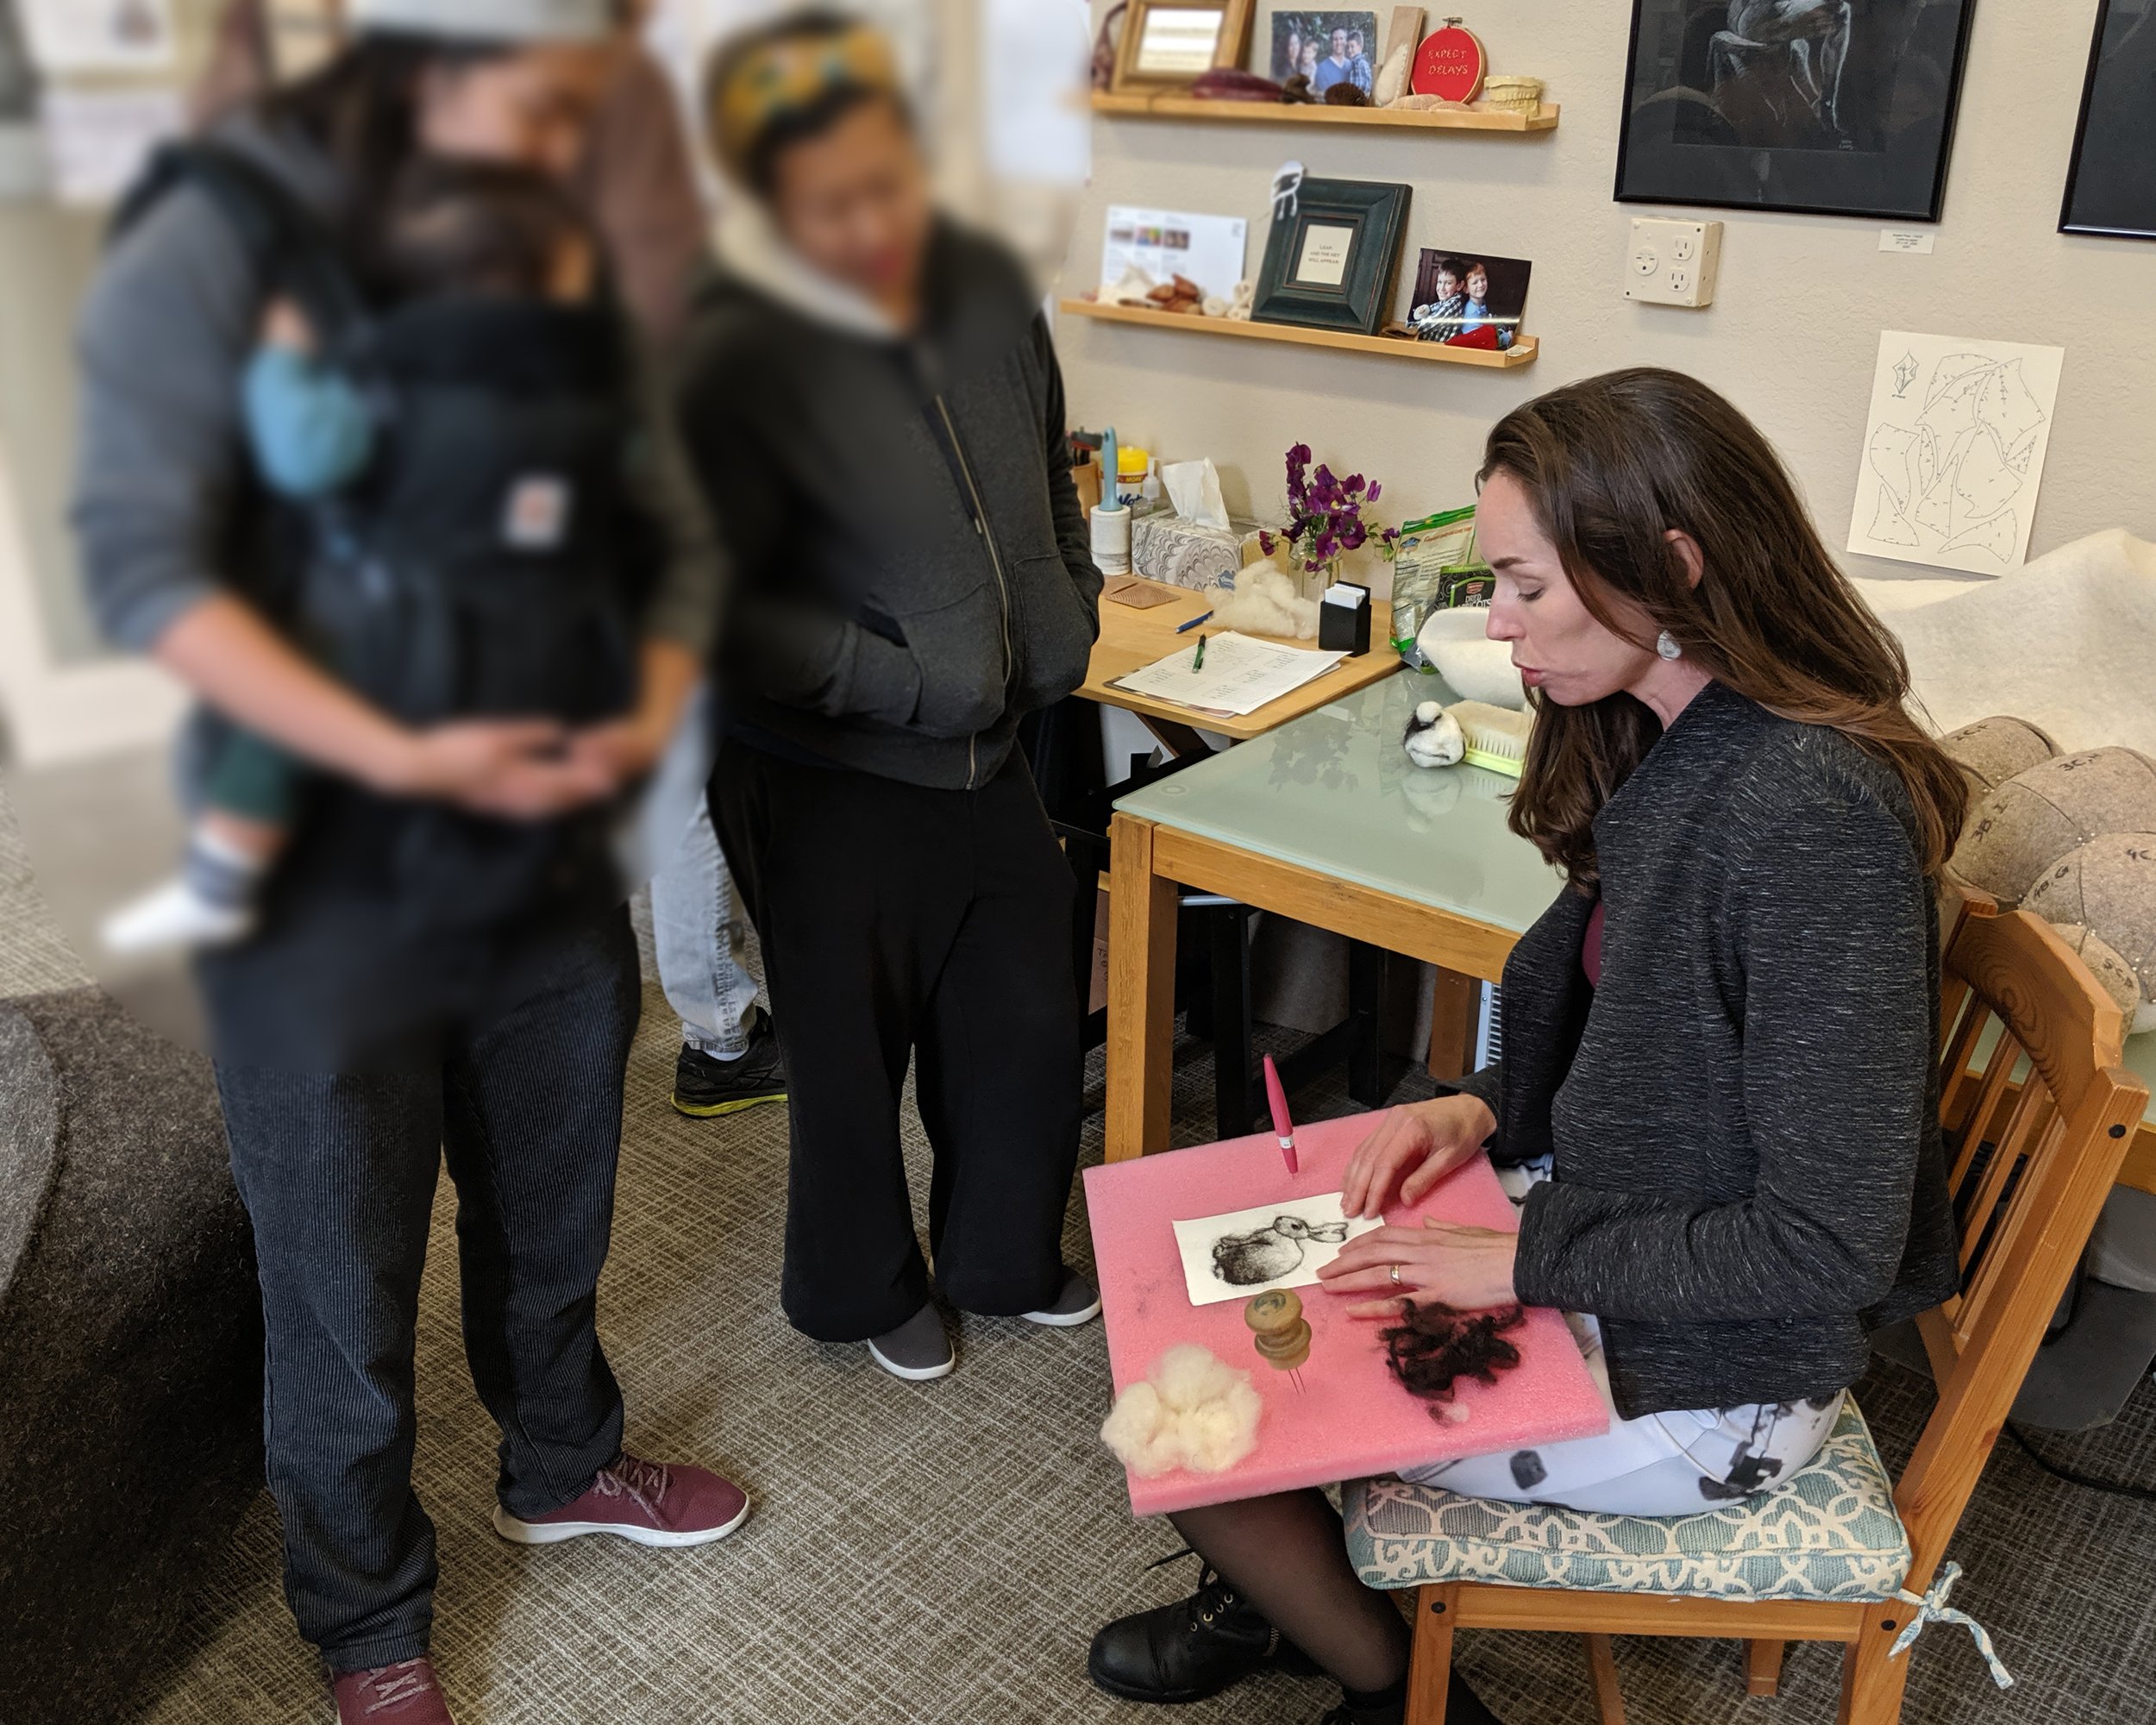
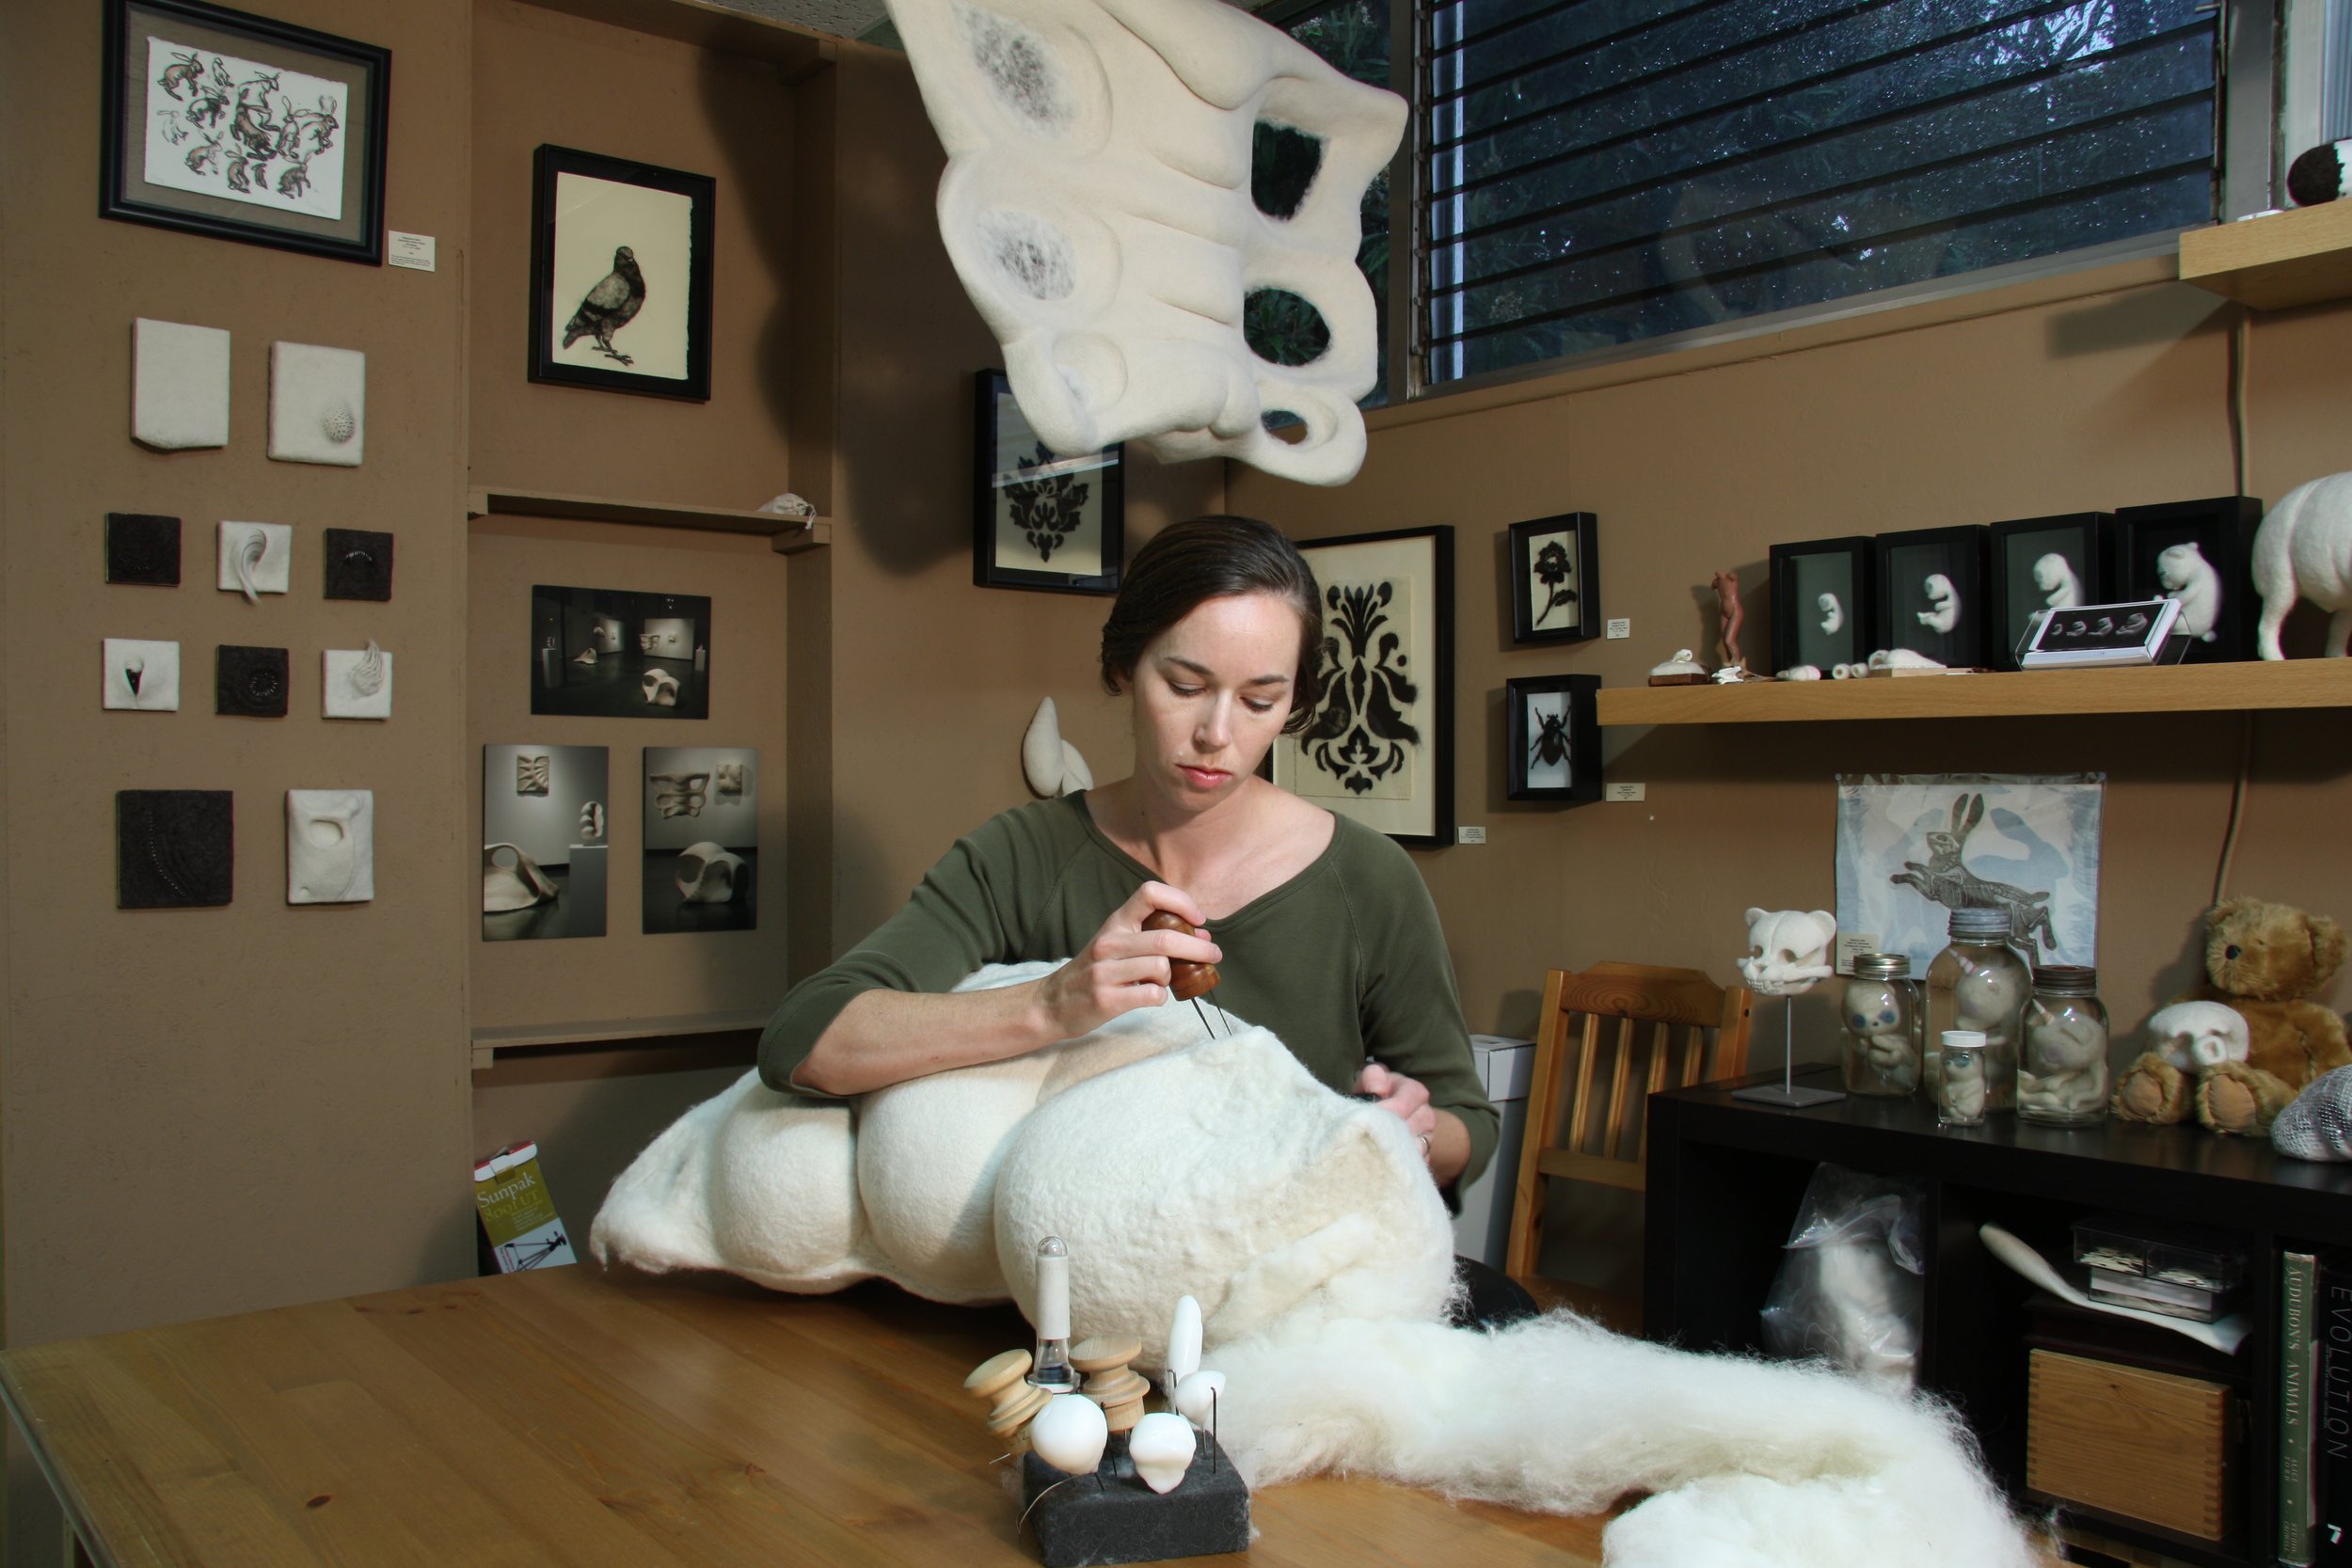
Demonstrating needle felting to Open Studios visitors. Usually not something I do on my lap for safety reasons since stabbing sharp tools downwards is a key activity.
So if you’re new to needle felting or simply curious, I’m going to give a brief overview of the tool that makes this whole thing possible- with illustrations.
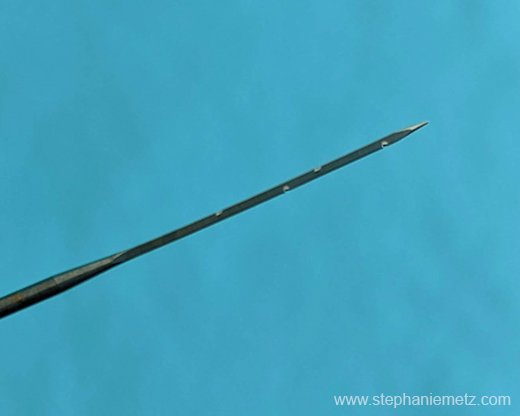
Felting needles are different from sewing needles or pins: instead of being smooth to pierce through fabric, they have notches cut along their shafts. Those rough notches snag, catch and push fibers they’re poked into, causing them to tangle with their neighbors enough to mat into a mass that has density and form: the nonwoven textile we know as ‘felt.’
The tip of a felting needle showing the nearly-invisible notches cut along the shaft.
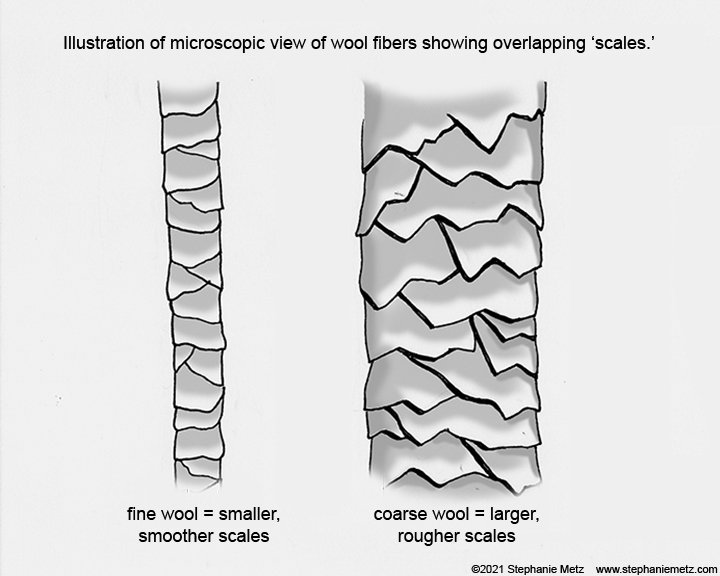
Wool fibers tangle so well because they are covered in overlapping ‘scales,’ which you can see with the help of a microscope (or a shampoo commercial, or in my illustration below).
Wool fibers can be smooth (smaller scales) or coarse (larger scales) which affects how easily they mat together as well as how they feel against the skin. That’s a topic we can go into another day. Suffice to say that the notches on felting needles make those scaly fibers grab each other, almost like hook-and-loop fasteners (aka Velcro).
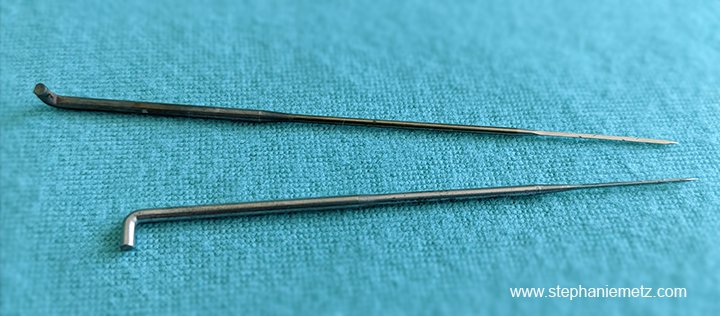
Felting needles were designed for factory machines; they are made of steel, three or four inches long, with a bent over hook at the top for fitting into said machine and a gradually thinner shaft leading down to a VERY sharp tip. The notches are cut only in the bottom inch or so.
In a factory a big machine full of hundreds of these needles works almost like a mouth ‘chewing’ on wool: each needle lines up with a hole below, so as loose, clean wool is fed into the machine the needles move together like jaws up and down to tangle the fibers into a flat sheet of felt. When you look at a piece of industrial felt you’ll see the many hole marks from the needles. The density and thickness of the batch of felt is determined by how much wool is inserted and how long and how much the needles poke into it.
Industrial needlepunch machines have been in use since the mid 1800s, and they’re very good at making flat, even sheets of felt. But what about working in three dimensions? What about using felting needles by hand? Well, that history starts with a couple creative people looking at a tool with fresh eyes. Eleanor and David Stanwood are credited with first taking felting needles in hand to work ‘in the round’ in the 1980s-- here’s an article that details the beginnings. David reached out to me by email a few years ago when I revealed that I got my start from a book by Ayala Talpai; it turns out he’s the one who handed Ayala her first felting needle when she visited the couple on Martha’s Vinyard! It’s still a fairly small world, especially when it comes to needle felting..
So to use a felting needle by hand, you need to poke in the direction that you want to shape and compress, almost like squishing clay into shape. You could make a sphere by poking inwards towards the center of the mass of wool from every direction, turning it around evenly as you go. You could make a cylinder shape by rolling the mass of wool like a log as you poke in towards the center. You can make increasingly complex shapes by making simple ones and then joining them together with more wool bridging across. If a piece isn’t dense or firm enough for your purposes you can add more wool and force it into the same amount of space, or else keep poking to compress your form into a smaller and smaller size.
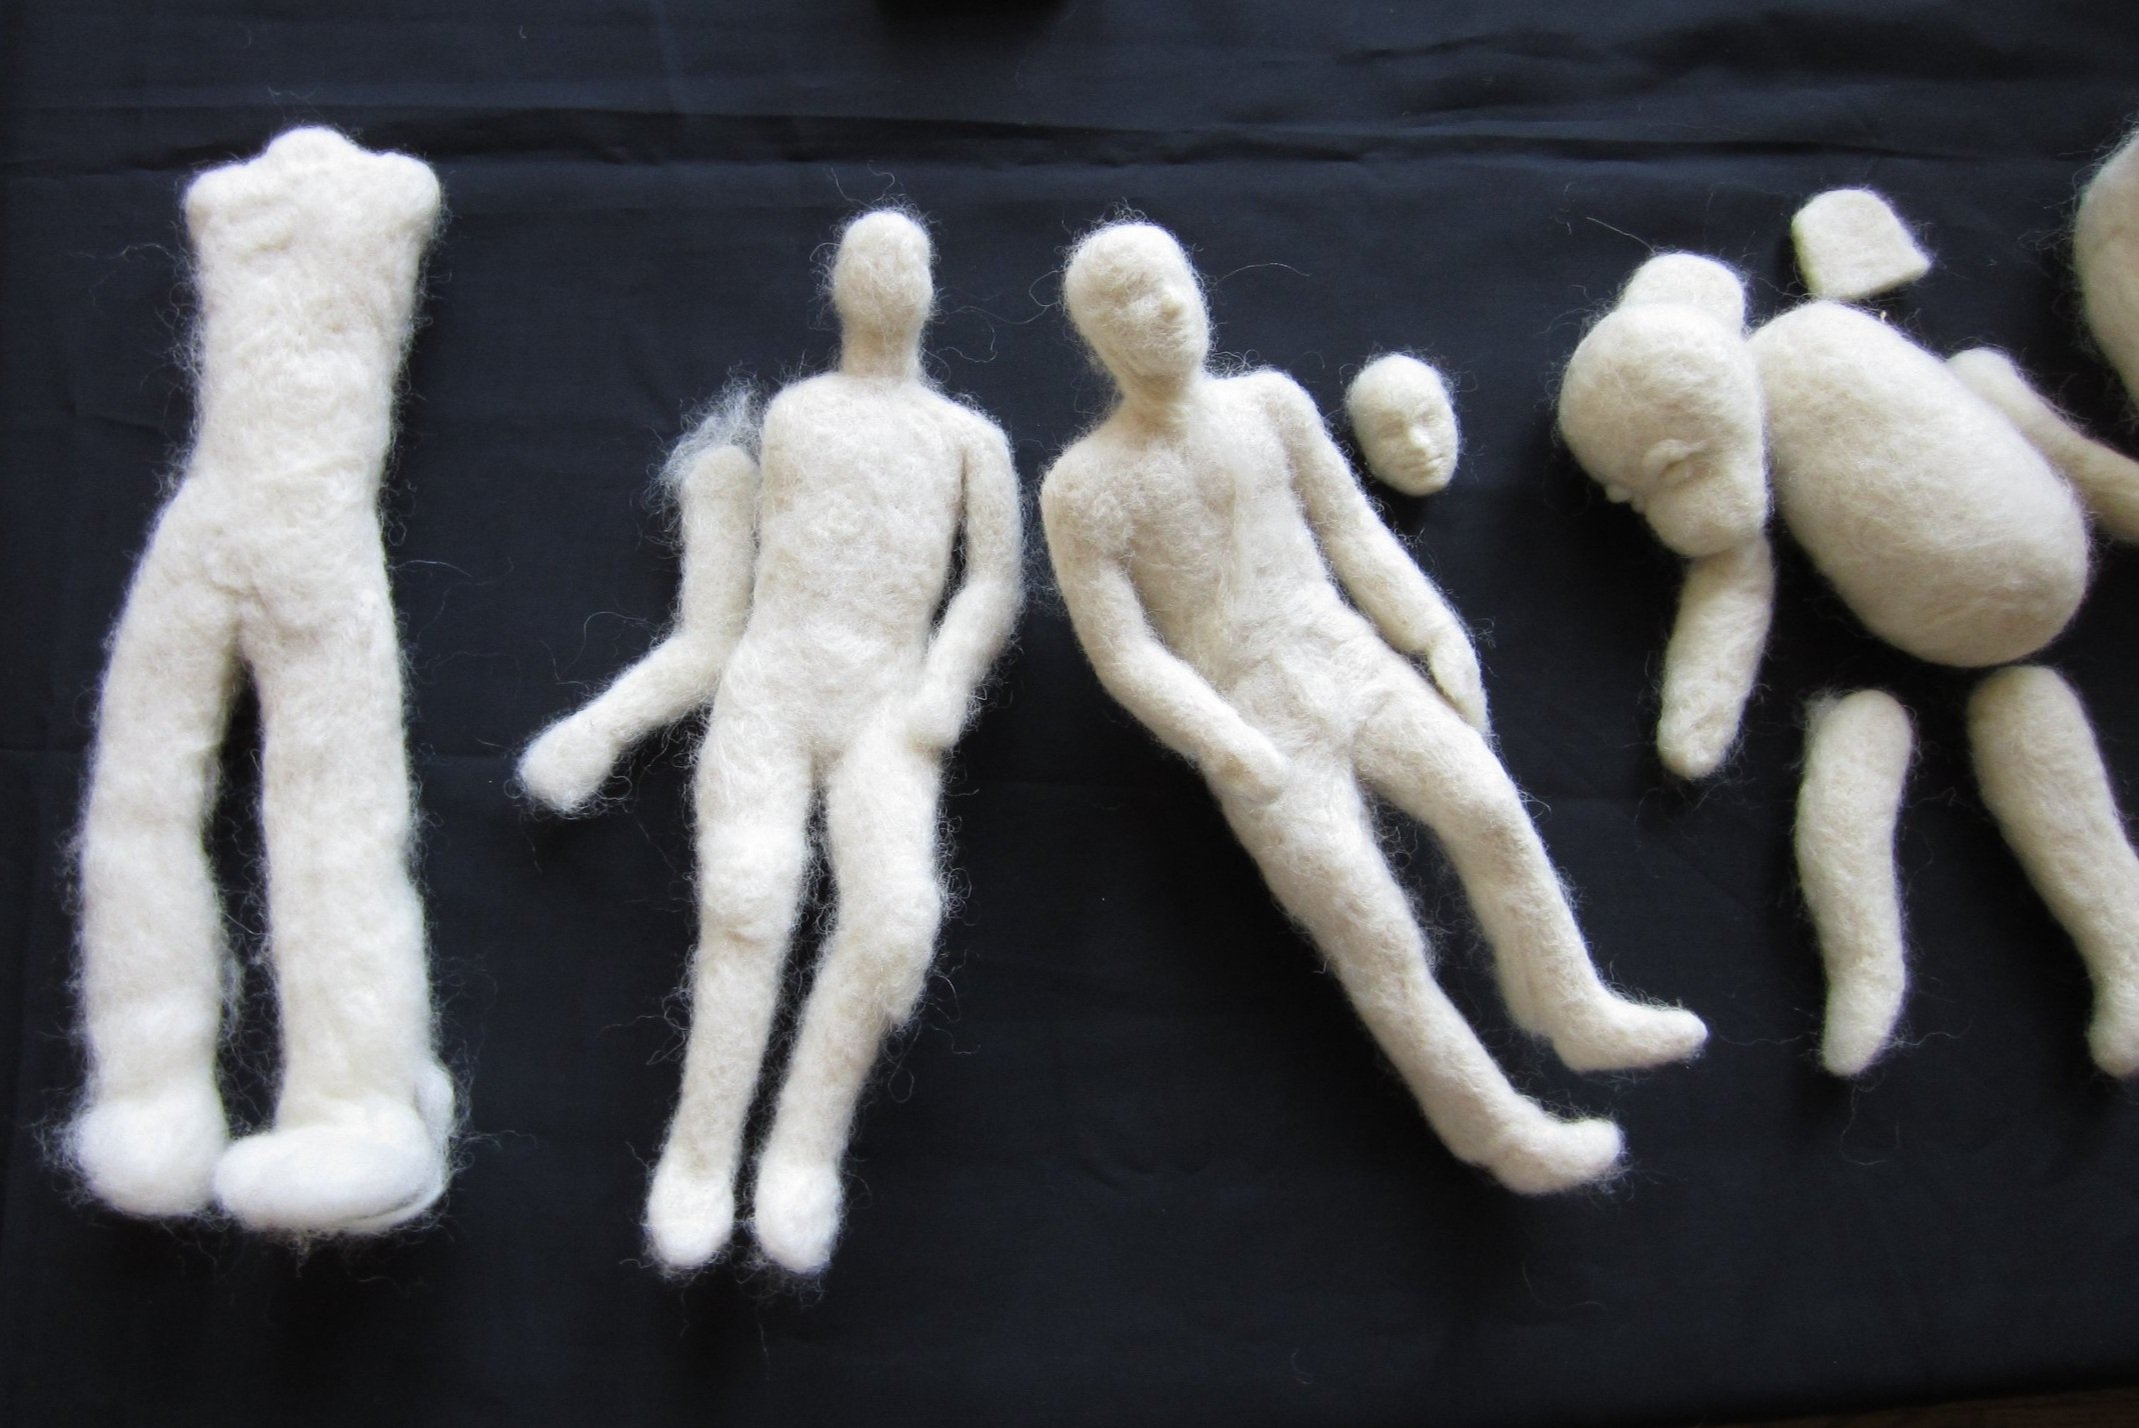
Samples showing progression from roughly humanoid shapes to increasingly detailed and realistic felt sculptures. Note that component parts have been made separately and then joined together after initial shaping.
It’s both incredibly simple in concept and brain-achingly weird at first. Needle felting has things in common with building forms in clay or riveting metal pieces together- except it’s also totally different to have the actual, physical mass of your material change depending on how much you stab at it.
To get started you can literally just start poking at some wool with a felting needle. But of course then you’ll find that there are different kinds of felting needles out there. What’s the difference between felting needles? Well, basically they differ in size and shape when you look at them in cross-section.
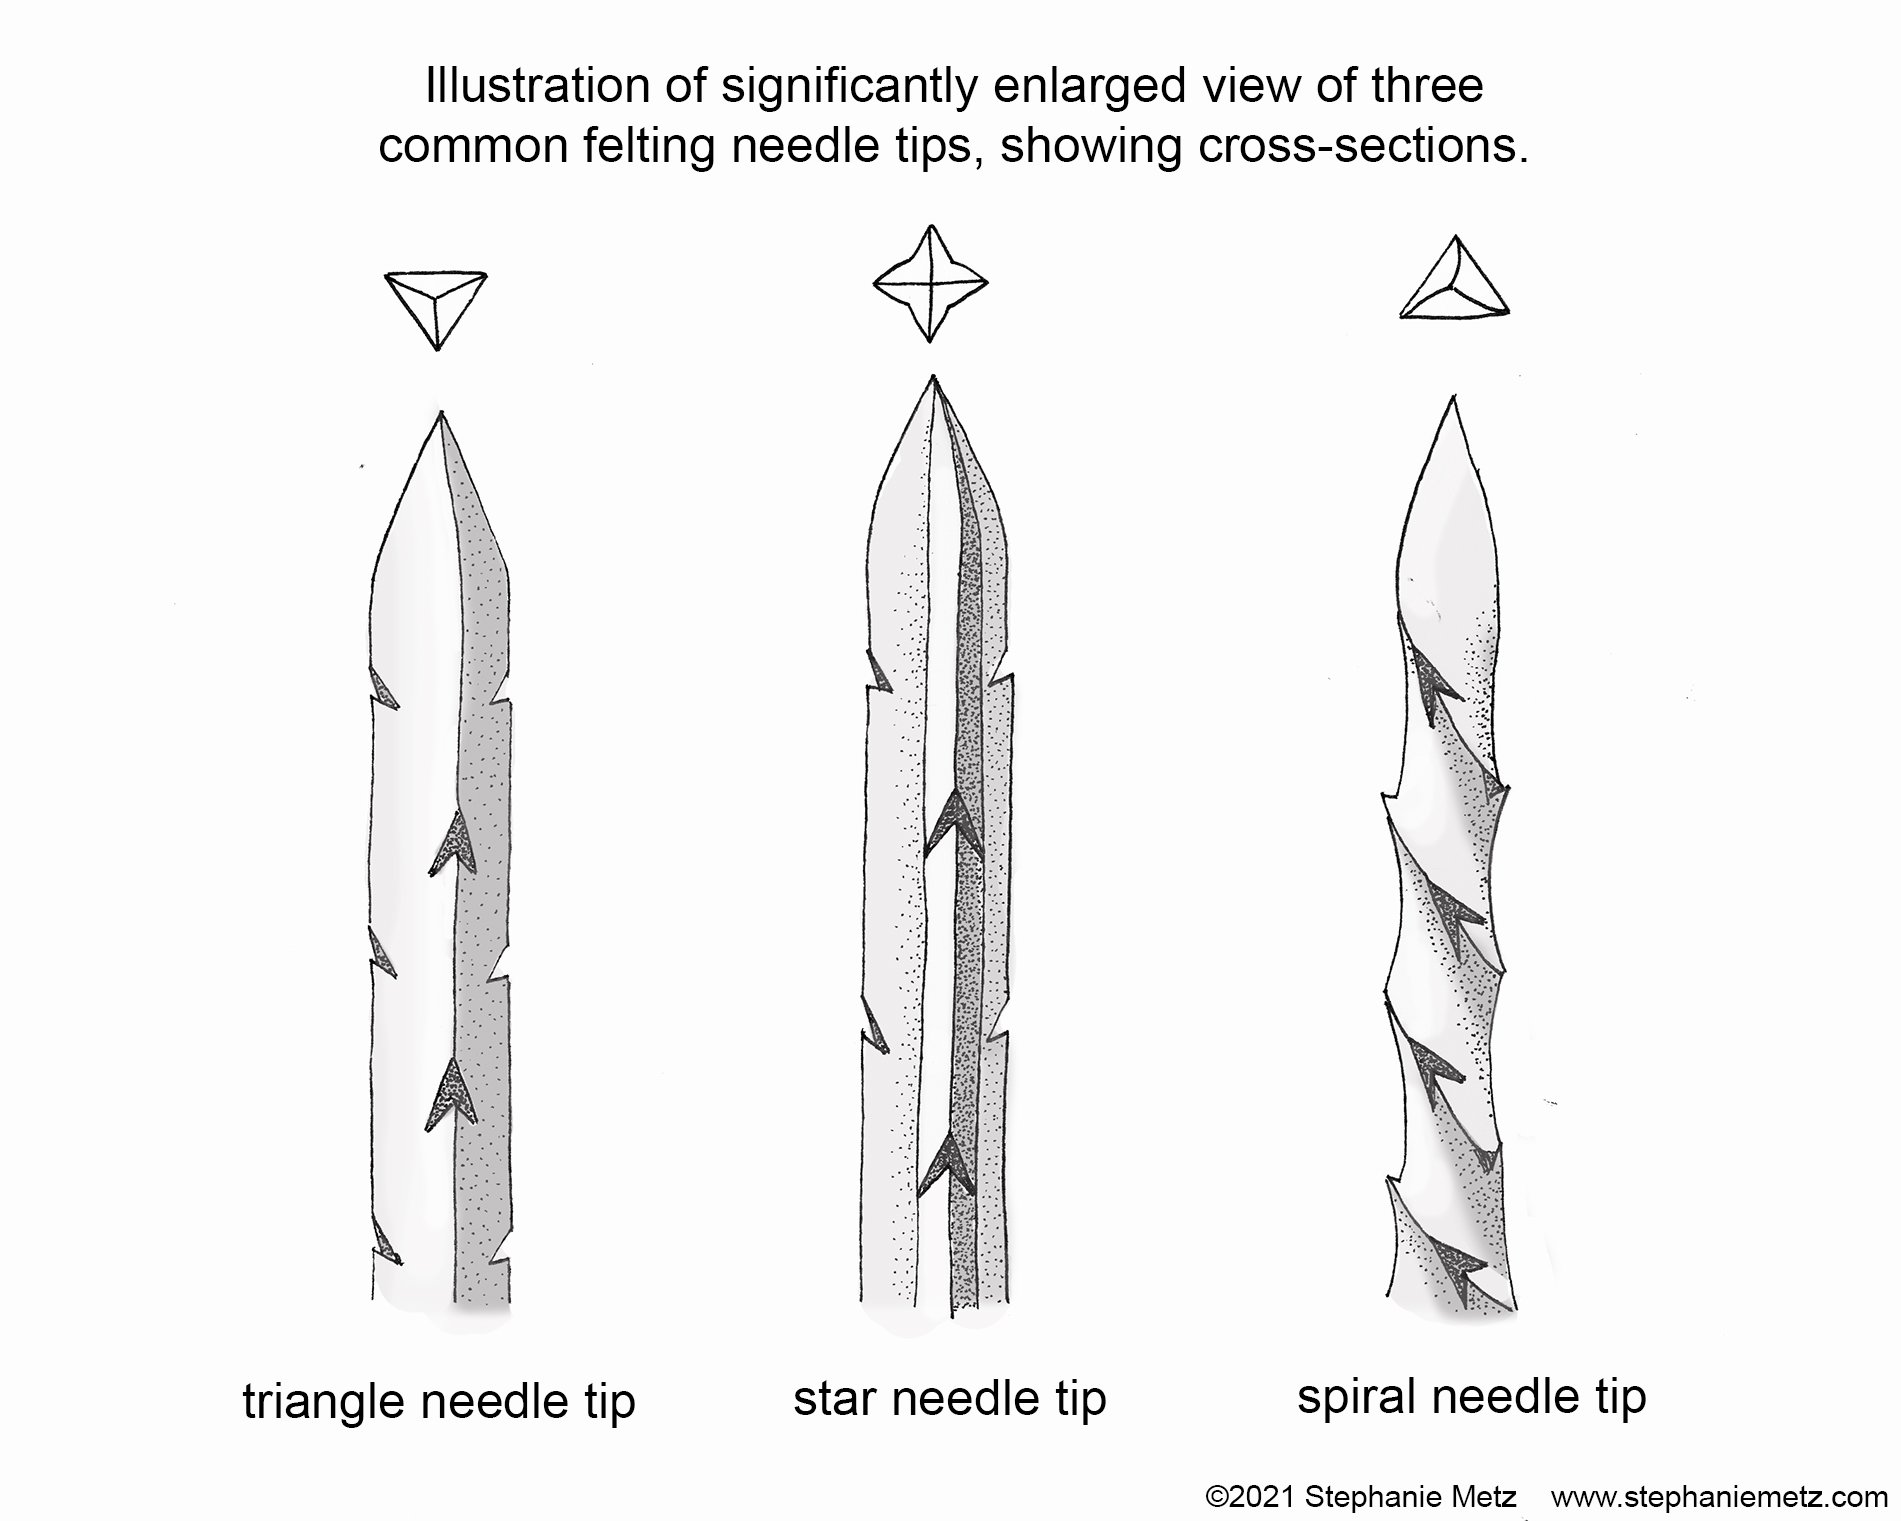
Above is a drawing showing the most common shapes of felting needles: the triangle needle has three edges that can have notches cut, while the star-shaped needle has four edges, and the spiral needle is like a triangle tip that has been twisted. Arguments can be made that the star- and spiral- shape needles do the job quicker because they have more surfaces that notches can be cut into, and more notches equals faster felting. There are people who swear by each type; I advise trying them all and seeing what feels best for you in different situations.
The size of the needle is referred to as its gauge, and the higher the number, the smaller the gauge and the diameter of the needle. 36-gauge needles are ‘coarse,’ 38-gauge is all-purpose, 40-gauge is fine, and 42-gauge is the finest. You would choose a higher gauge needle for details or tiny work, or when working with very fine fiber, and a lower gauge for ‘roughing out’ a form, or when using a coarse fiber.
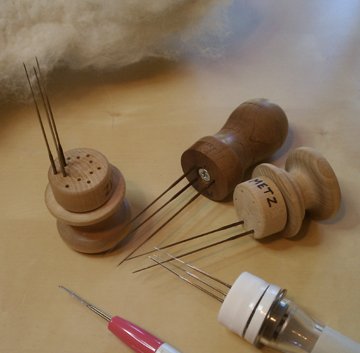
Every single needle in those multi-needle holders I use is a 38-gauge triangle needle. For the size I tend to work in, that’s all I need.
I myself am not at all a felting needle connoisseur when it comes to the needle choice. I’ll admit I use a 38-gauge triangle needle for almost everything; the exception is when I’m working on something very small, and then I use a 40-gauge ‘fine’ needle. I very often use a single needle in my work (more on why in a moment) but even then I put it in a knob-shaped multi-needle holder; I only use one of the holes. That’s because pinching a single needle in your fingers is REALLY rough on your hand and arm, over and above the repetitive arm and wrist motion needle felting requires.
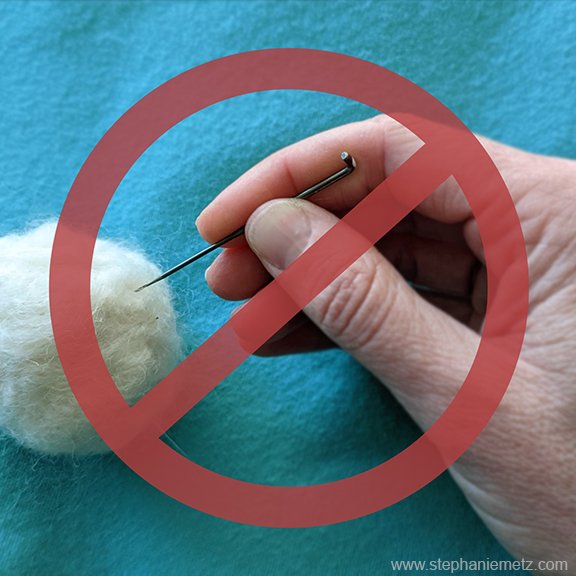
An important aside: I cringe when I see so many videos and photos online of very sophisticated and skilled needle felters working with a single needle pinched between their fingers. Don’t do it! Find a handle tool you like that fits and fills more of your hand and make it easier on your body. Safety is Sexy! Protect your body so you can do this as long as you want, without hurting yourself.
Don’t just pinch a single felting needle— it’s really hard on your hand, wrist, and arm. Use a handle— there are a wide variety of multi needle tools available (or you can make one yourself).
So there you have it: a quick introduction to felting needles. In my next post I’ll go into great depth about the ONE thing nobody seems to talk about when it comes to needle felting… I know, you can’t wait!
The variety of multi-needle holder tools I use all the time— even with a solo needle, I still want that bigger grip for the handle.
In the meantime, you can find my recommendations and links for multi-needle holders and other felting tools here.
This is just the tip of the iceberg. If you’re ready for the iceberg, you can sign up for my in-depth sculptural needle felting video-based class here.
Please comment or ask any questions below; what else do you want to know about my technique and process?

