Felting Needles: What Are They and How Do They Work? Explanations with photos and illustrations.

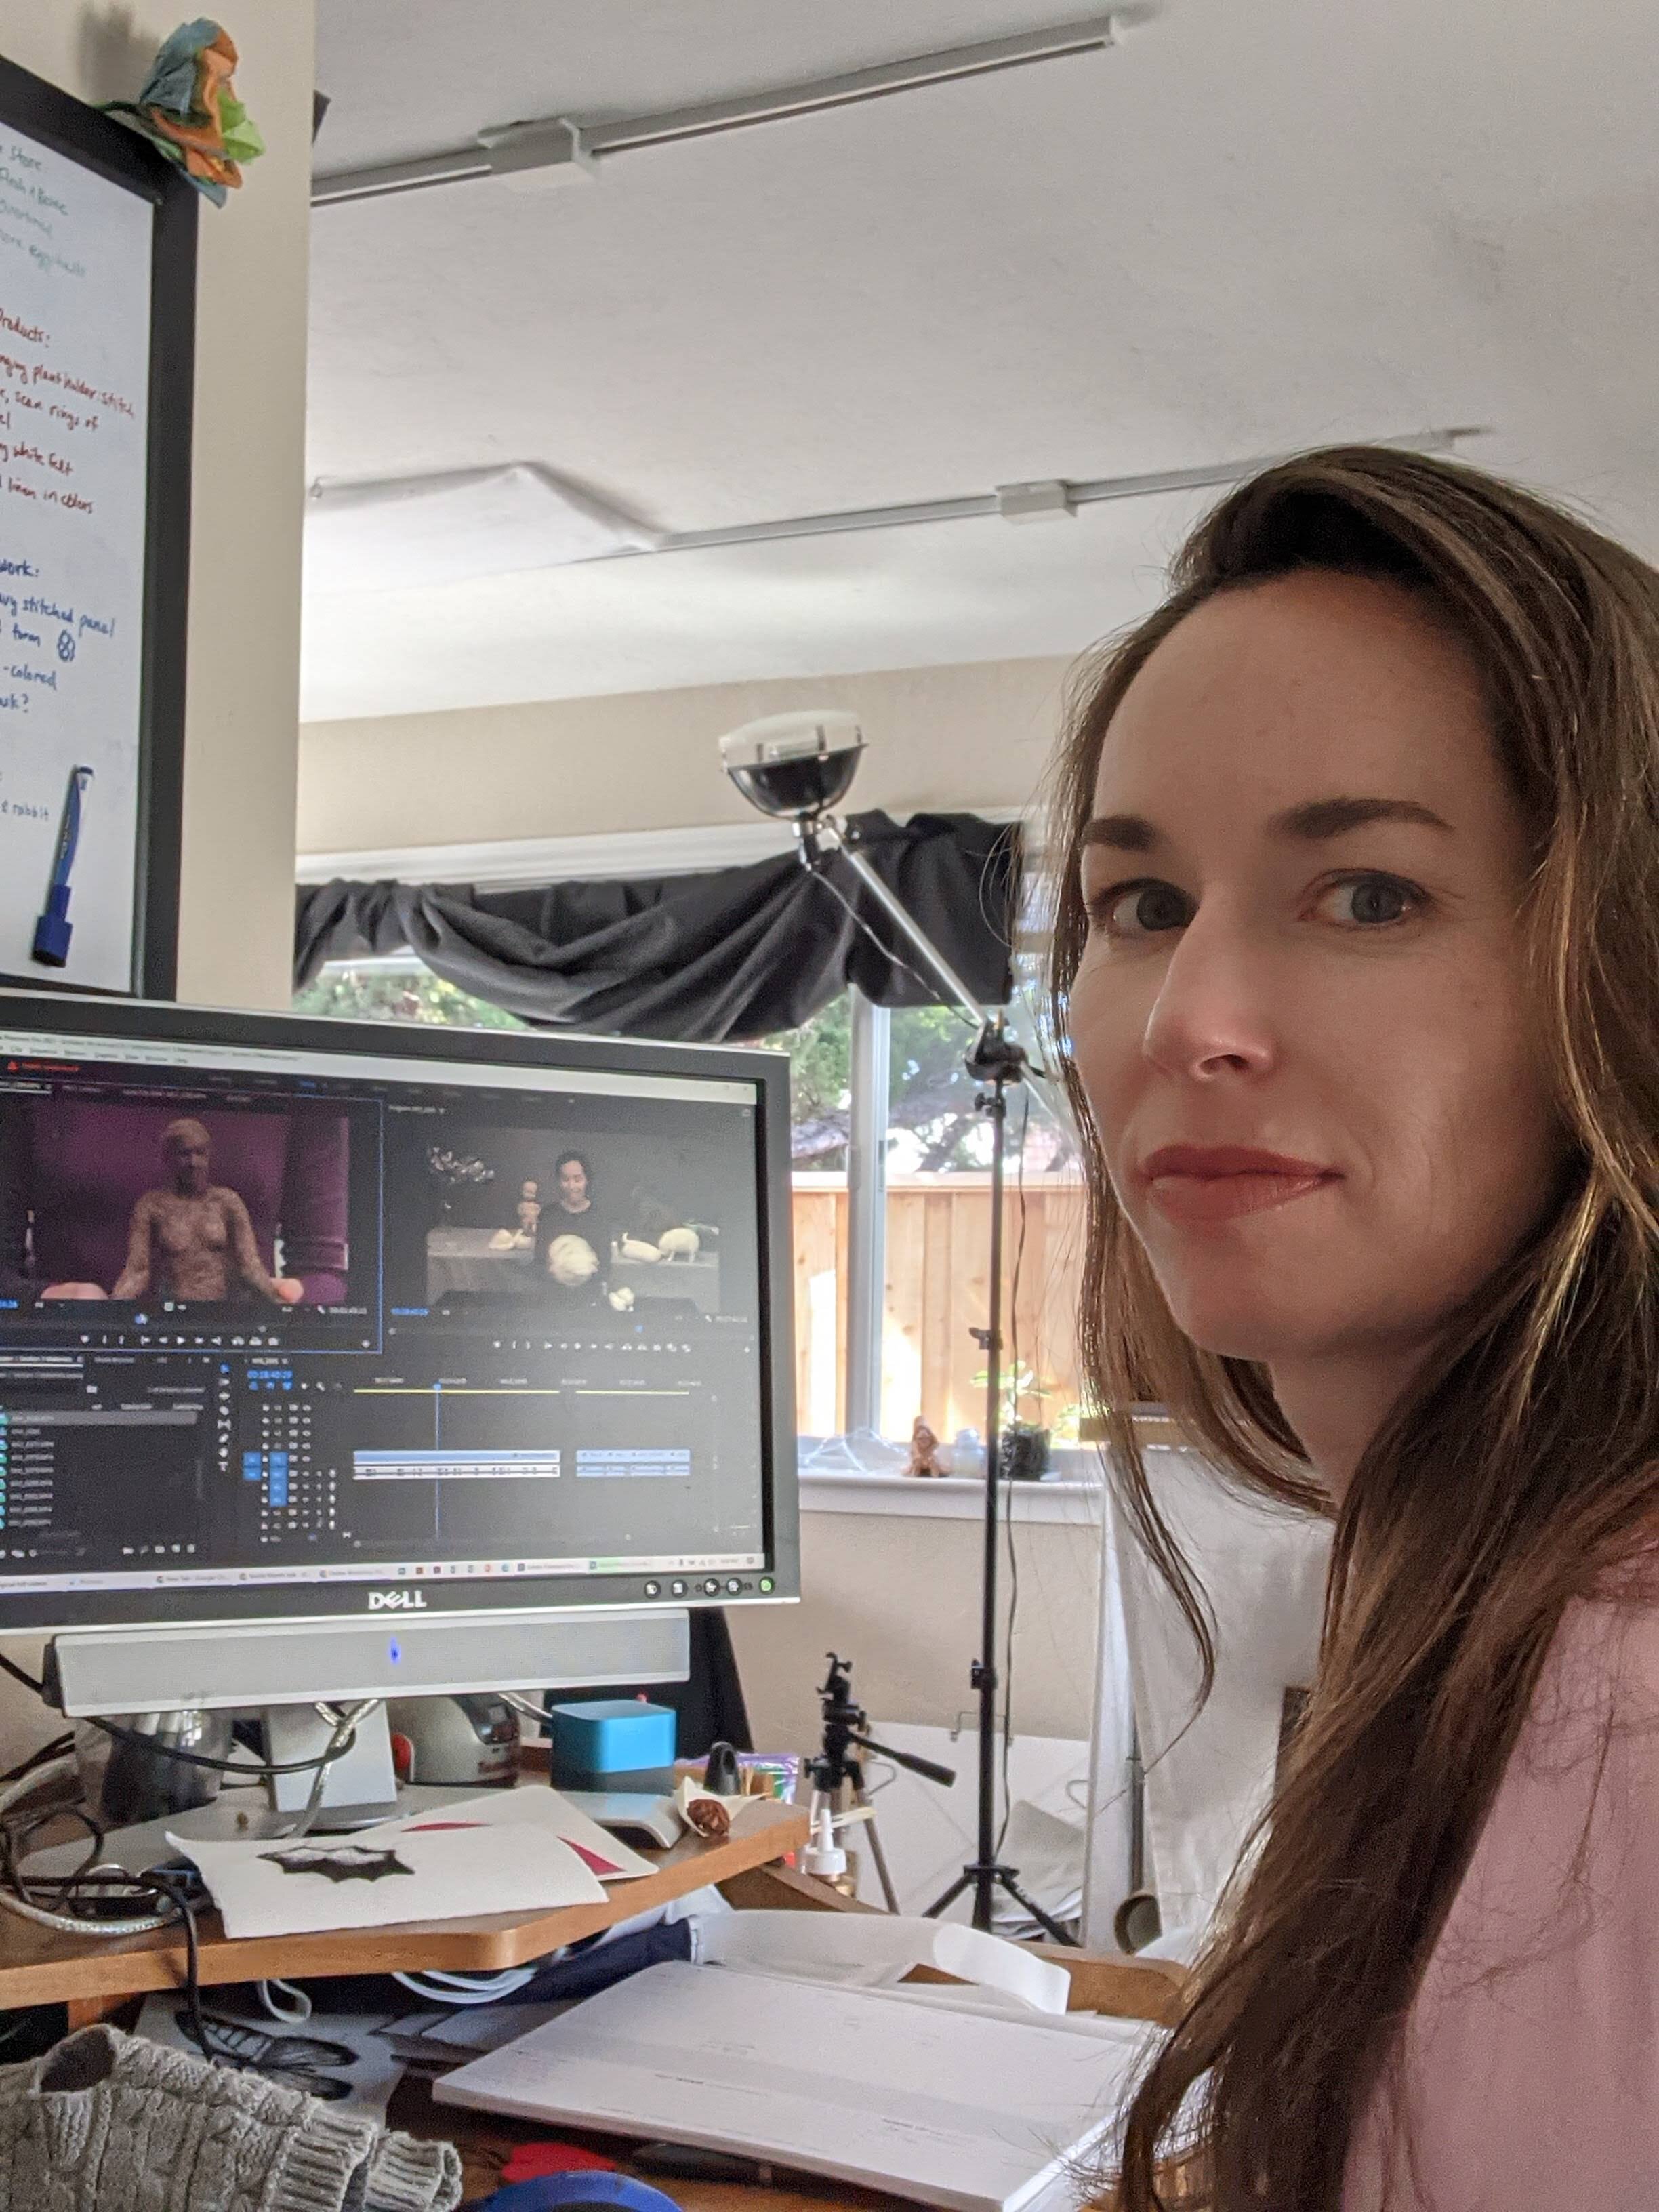
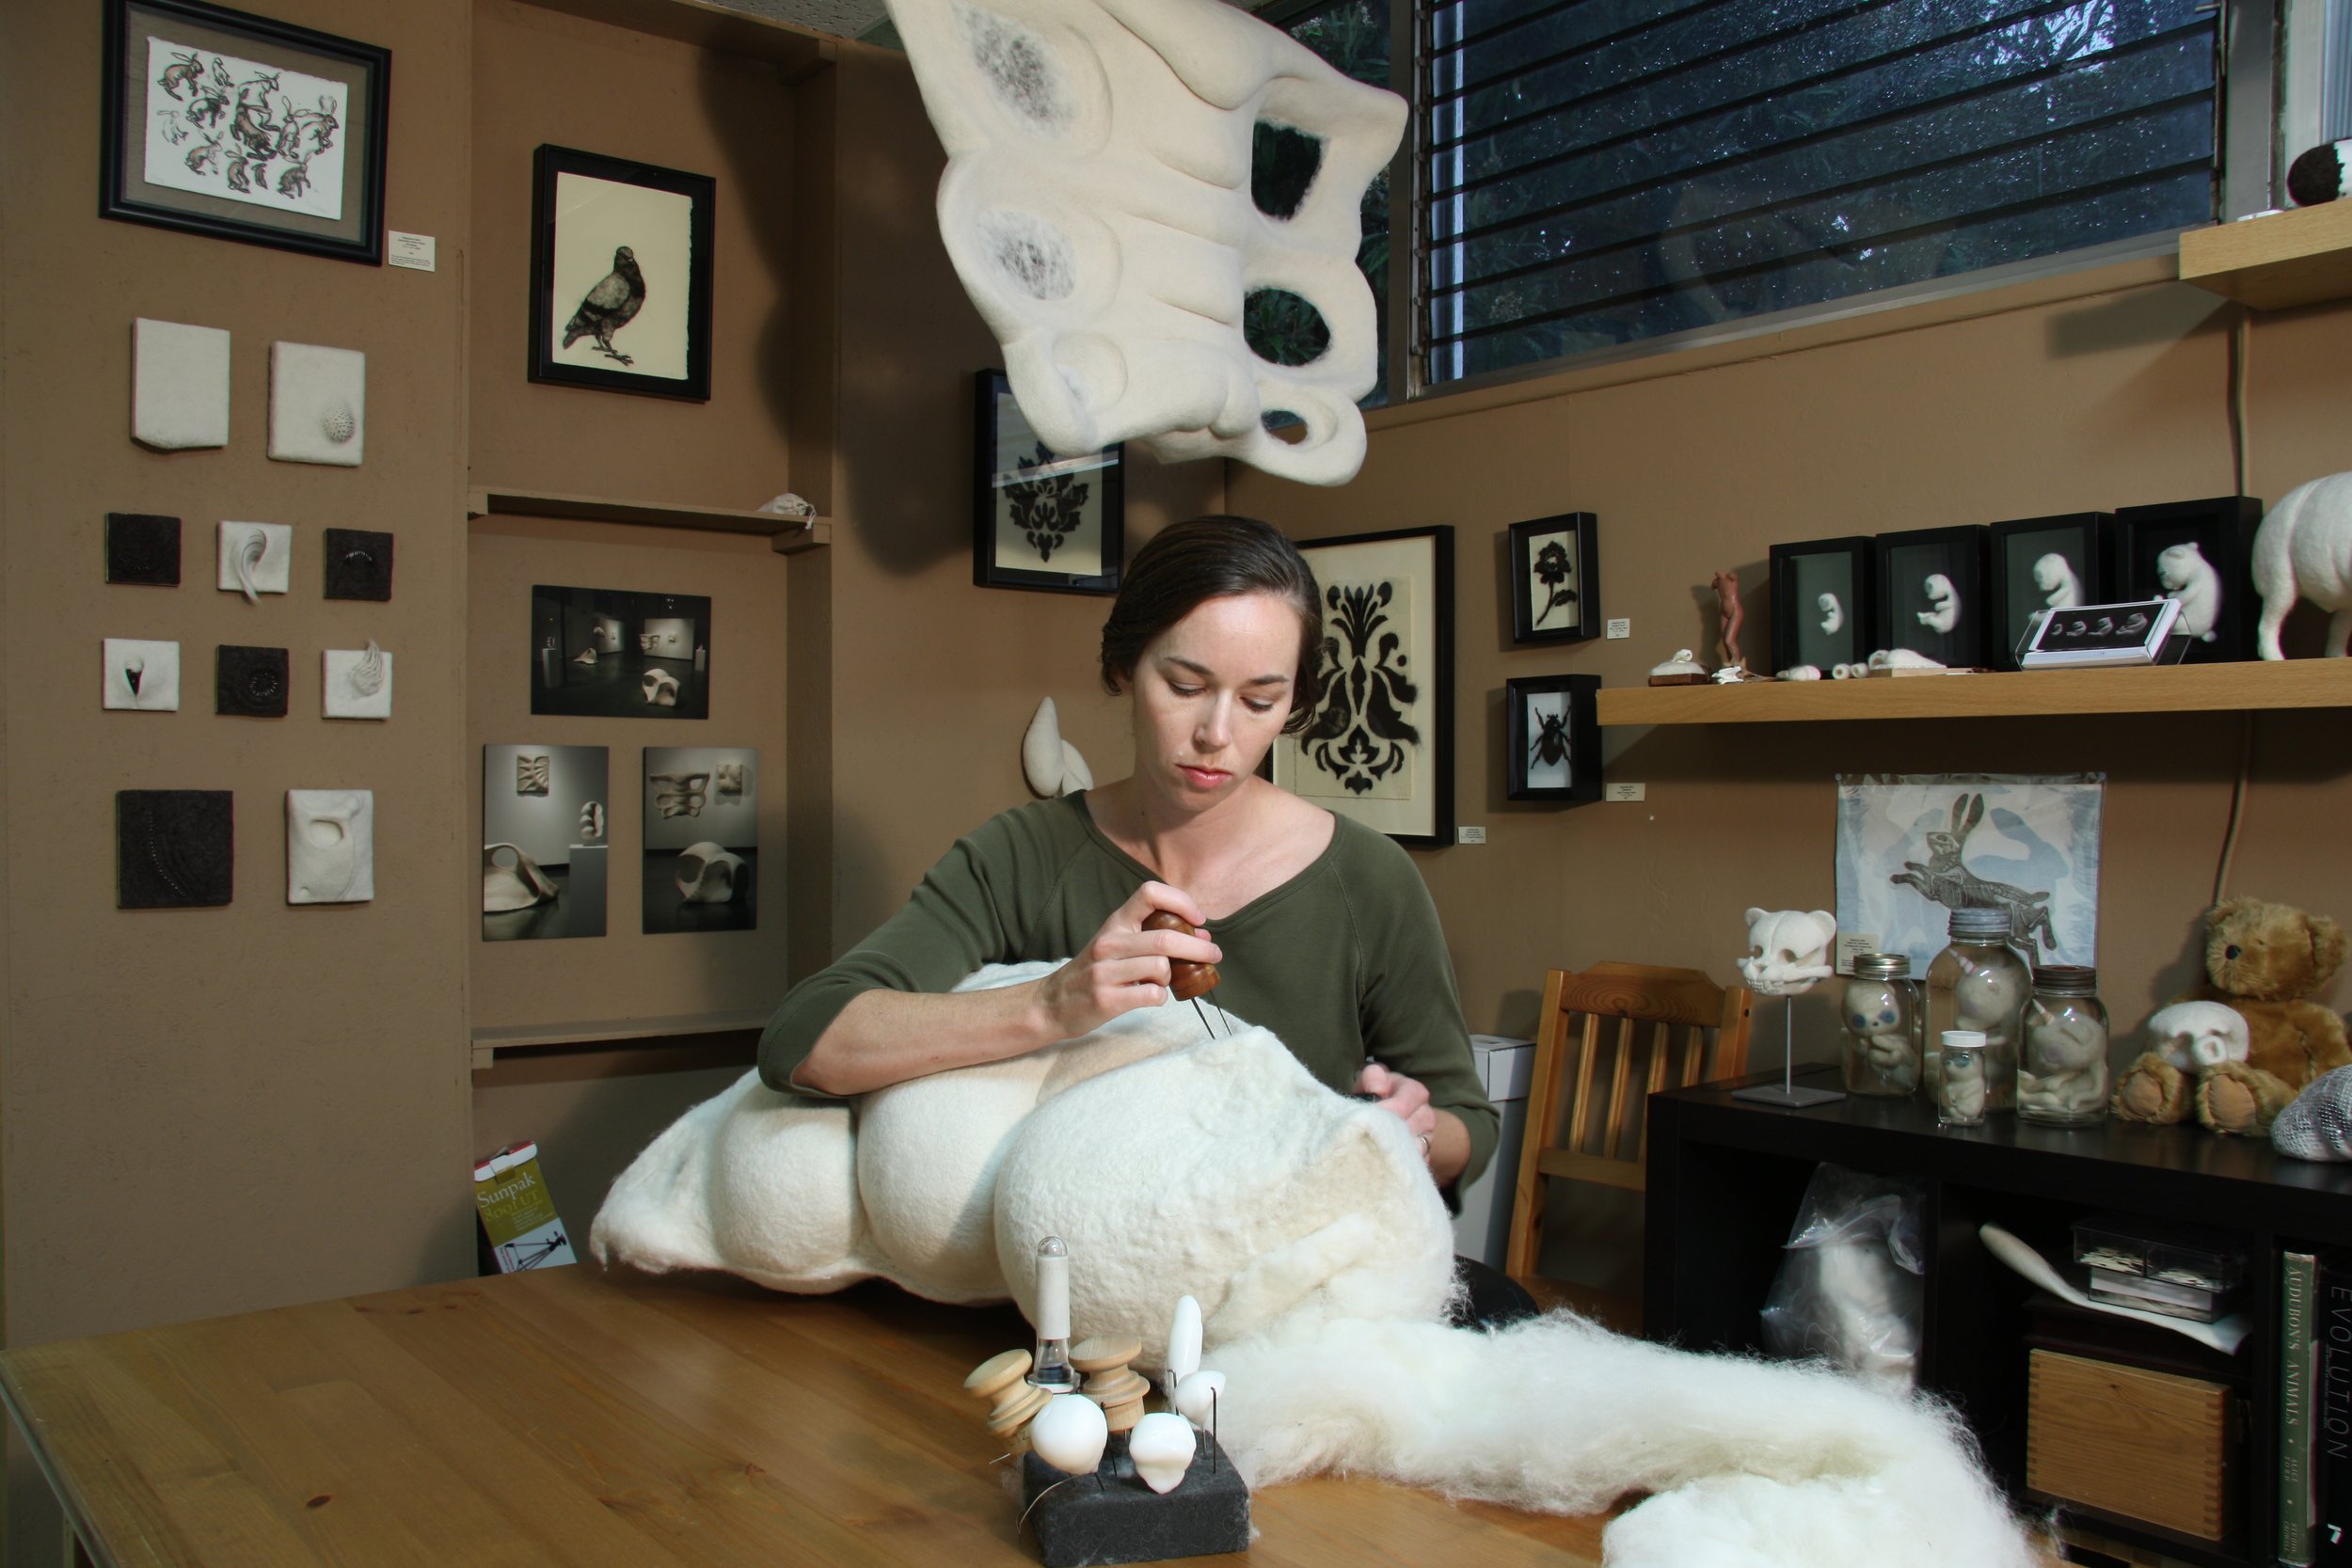
Needle felting as an art form and creative pastime is getting more and more attention lately, and yet I meet plenty of people who have no idea what it is or how (and why) it works to stab at wool until it takes different shapes. At my Open Studio events I find myself giving ongoing demonstrations to ever-changing wide-eyed audiences… who then look around my studio with renewed awe when they realize how my sculpture has come to be.

Artist demonstrating needle felting to visitors

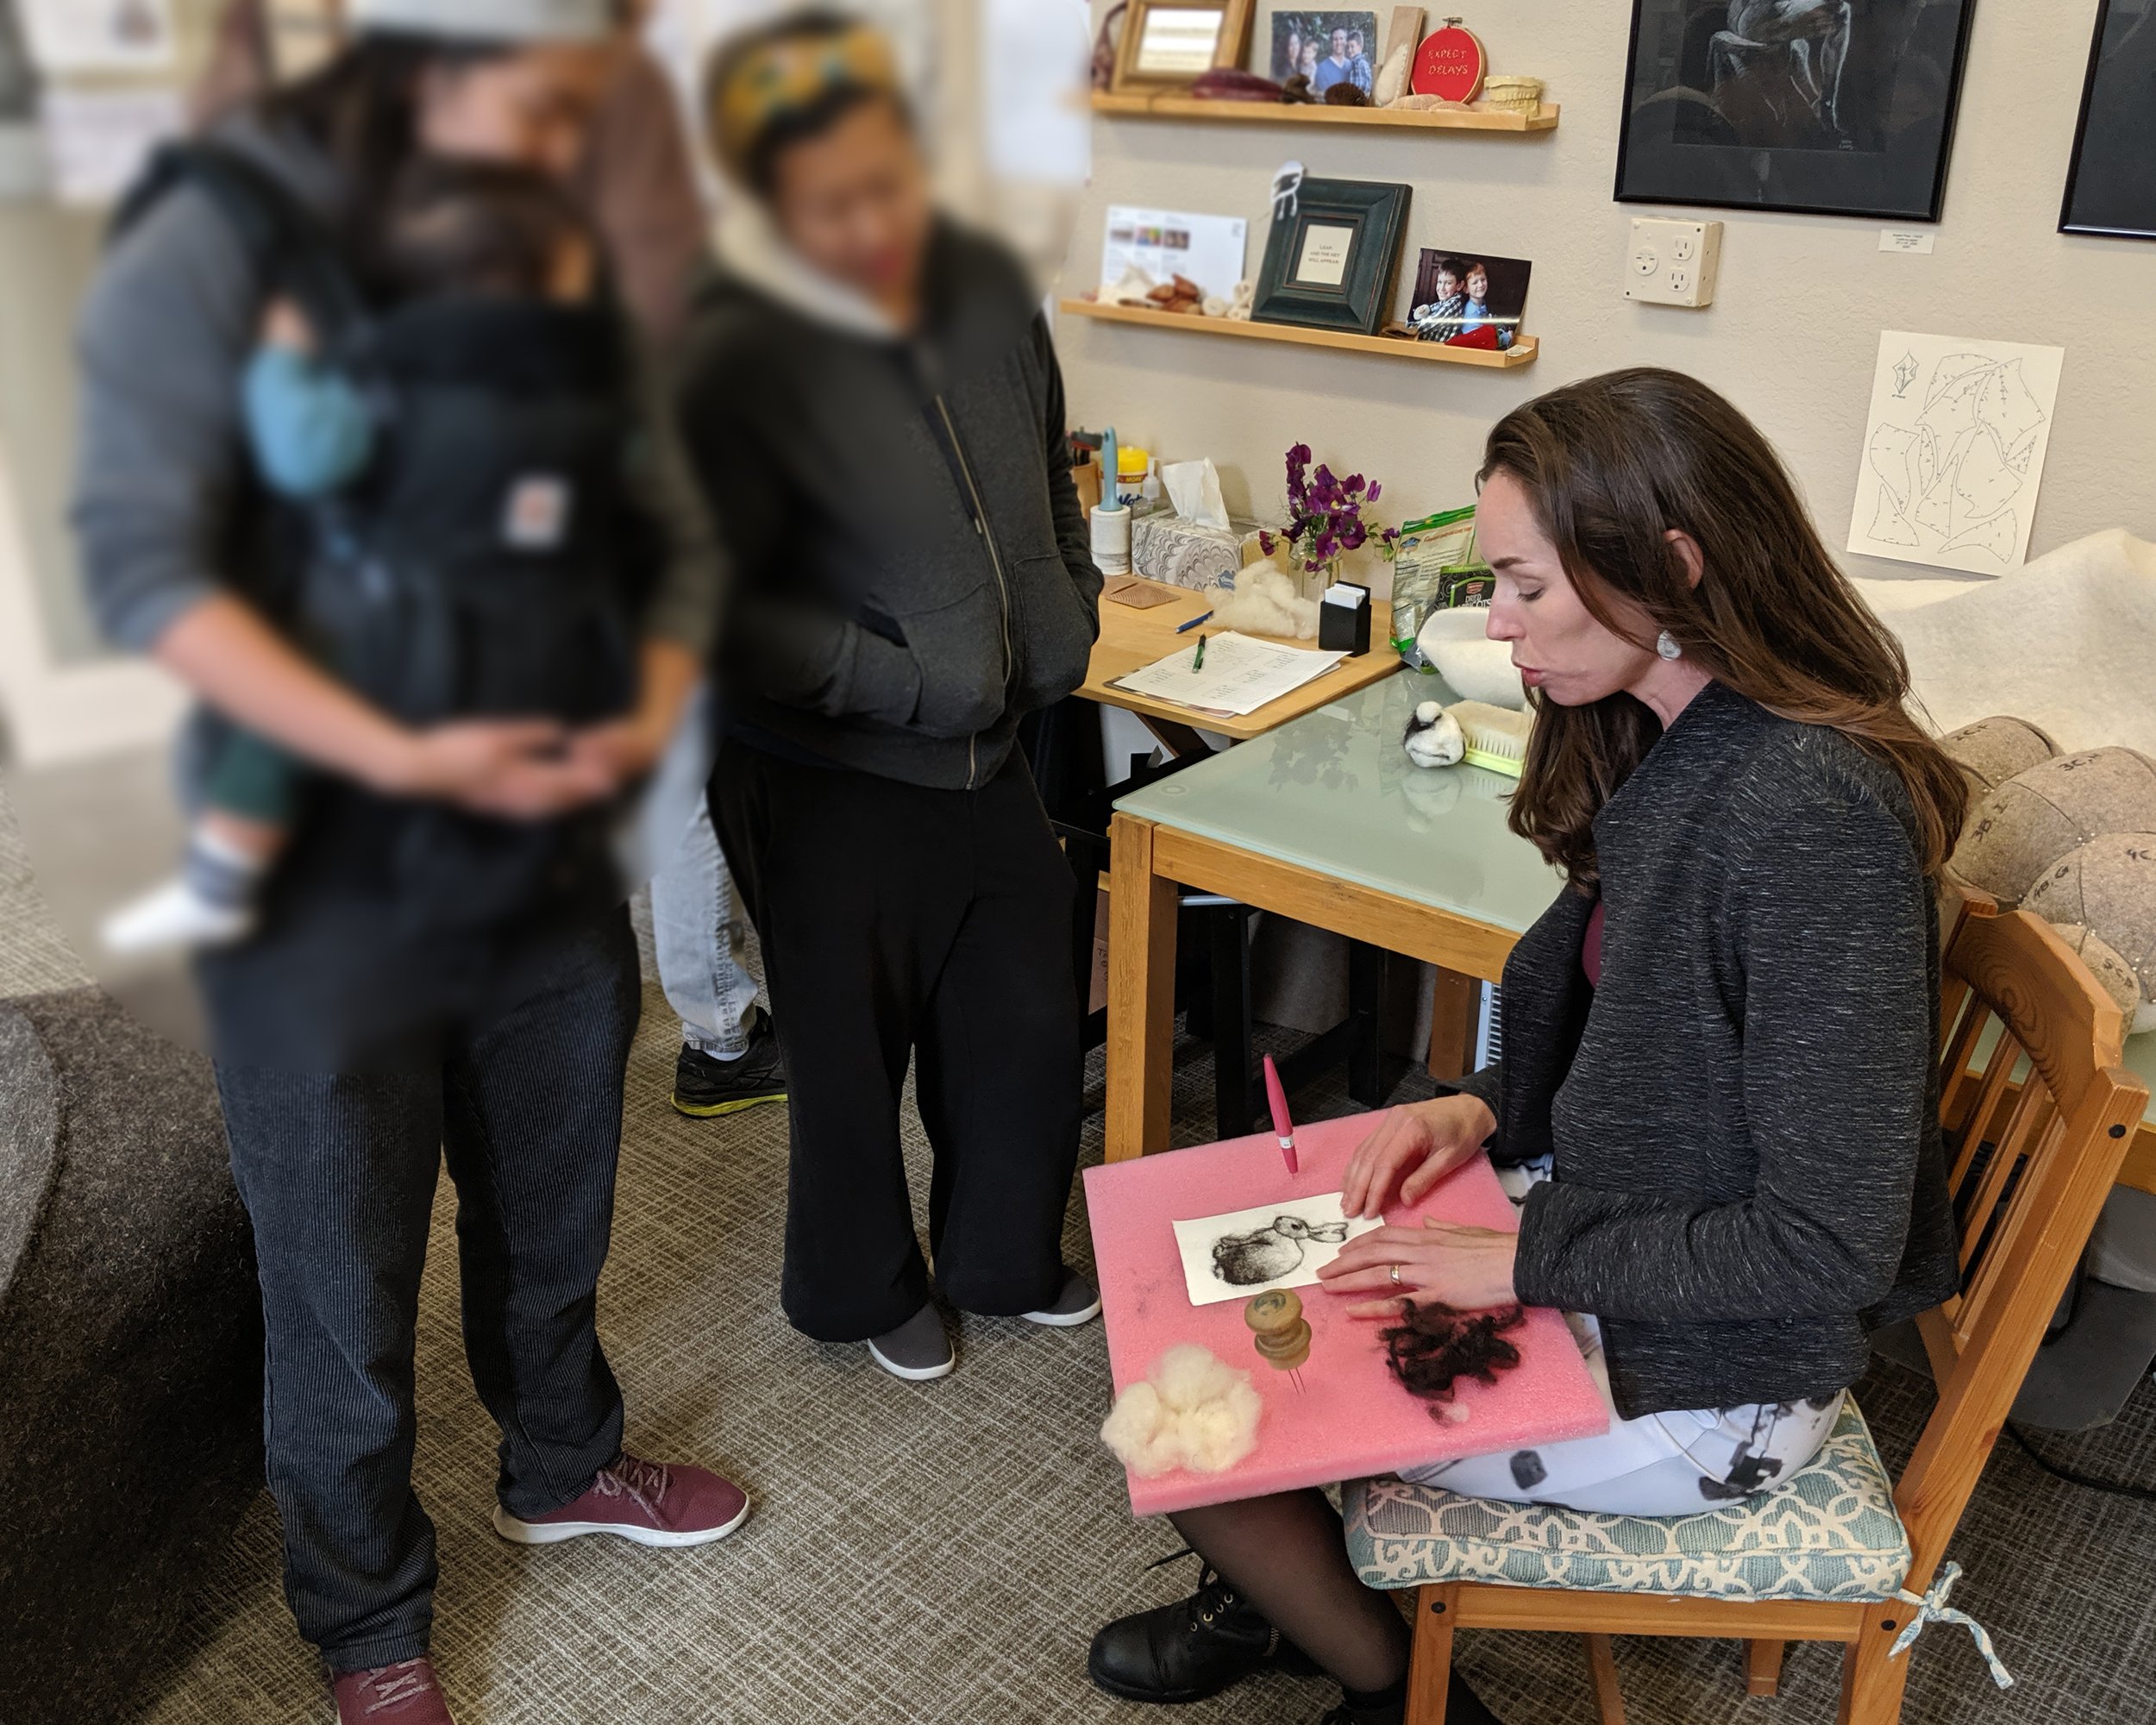
Demonstrating needle felting to Open Studios visitors. Usually not something I do on my lap for safety reasons since stabbing sharp tools downwards is a key activity.

So if you’re new to needle felting or simply curious, I’m going to give a brief overview of the tool that makes this whole thing possible- with illustrations. 

Felting needles are different from sewing needles or pins: instead of being smooth to pierce through fabric, they have notches cut along their shafts. Those rough notches snag, catch and push fibers they’re poked into, causing them to tangle with their neighbors enough to mat into a mass that has density and form: the nonwoven textile we know as ‘felt.’ 

Closeup view of notches cut in sides of sharp steel felting needle

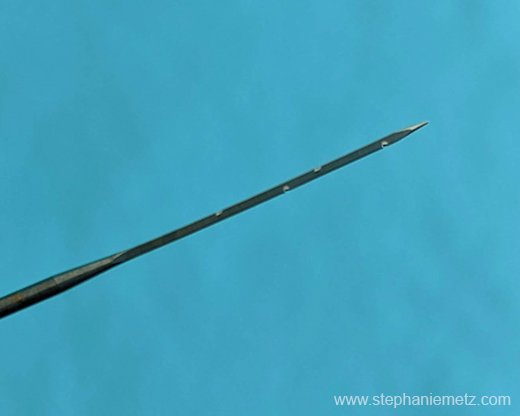
The tip of a felting needle showing the nearly-invisible notches cut along the shaft.

Wool fibers tangle so well because they are covered in overlapping ‘scales,’ which you can see with the help of a microscope (or a shampoo commercial, or in my illustration below). 

Illustration of overlapping scales on microscopic view of wool fibers

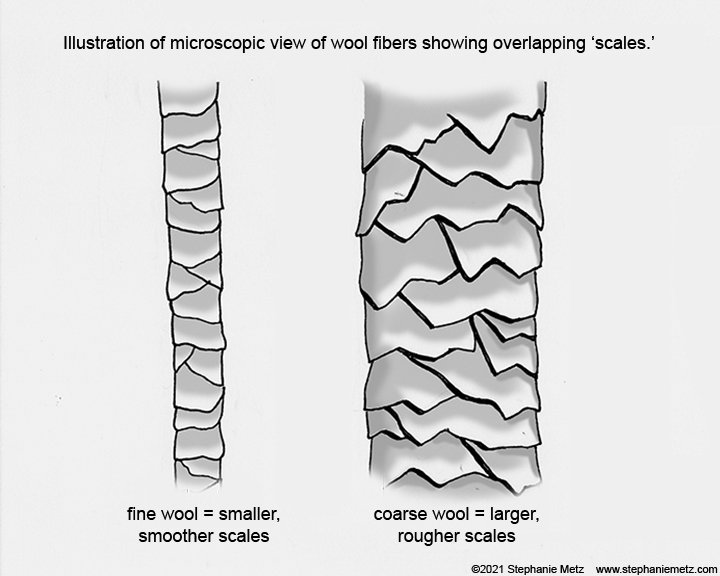
Wool fibers can be smooth (smaller scales) or coarse (larger scales) which affects how easily they mat together as well as how they feel against the skin. That’s a topic we can go into another day. Suffice to say that the notches on felting needles make those scaly fibers grab each other, almost like hook-and-loop fasteners (aka Velcro).  

Two steel felting needles of different lengths

Felting needles were designed for factory machines; they are made of steel, three or four inches long, with a bent over hook at the top for fitting into said machine and a gradually thinner shaft leading down to a VERY sharp tip. The notches are cut only in the bottom inch or so.

View of an industrial felting machine, aka a needlepunch machine: hundreds of felting needles aligned with holes below move up and down, ‘chewing’ and matting the wool fed into the machine. Photo taken at a restored wool mill called Casari Ranch in Valley Ford, California.

In a factory a big machine full of hundreds of these needles works almost like a mouth ‘chewing’ on wool: each needle lines up with a hole below, so as loose, clean wool is fed into the machine the needles move together like jaws up and down to tangle the fibers into a flat sheet of felt. When you look at a piece of industrial felt you’ll see the many hole marks from the needles. The density and thickness of the batch of felt is determined by how much wool is inserted and how long and how much the needles poke into it.

Industrial needlepunch machines have been in use since the mid 1800s, and they’re very good at making flat, even sheets of felt. But what about working in three dimensions? What about using felting needles by hand? Well, that history starts with a couple creative people looking at a tool with fresh eyes. Eleanor and David Stanwood are credited with first taking felting needles in hand to work ‘in the round’ in the 1980s-- here’s an article that details the beginnings. David reached out to me by email a few years ago when I revealed that I got my start from a book by Ayala Talpai;   it turns out he’s the one who handed Ayala her first felting needle when she visited the couple on Martha’s Vinyard! It’s still a fairly small world, especially when it comes to needle felting..

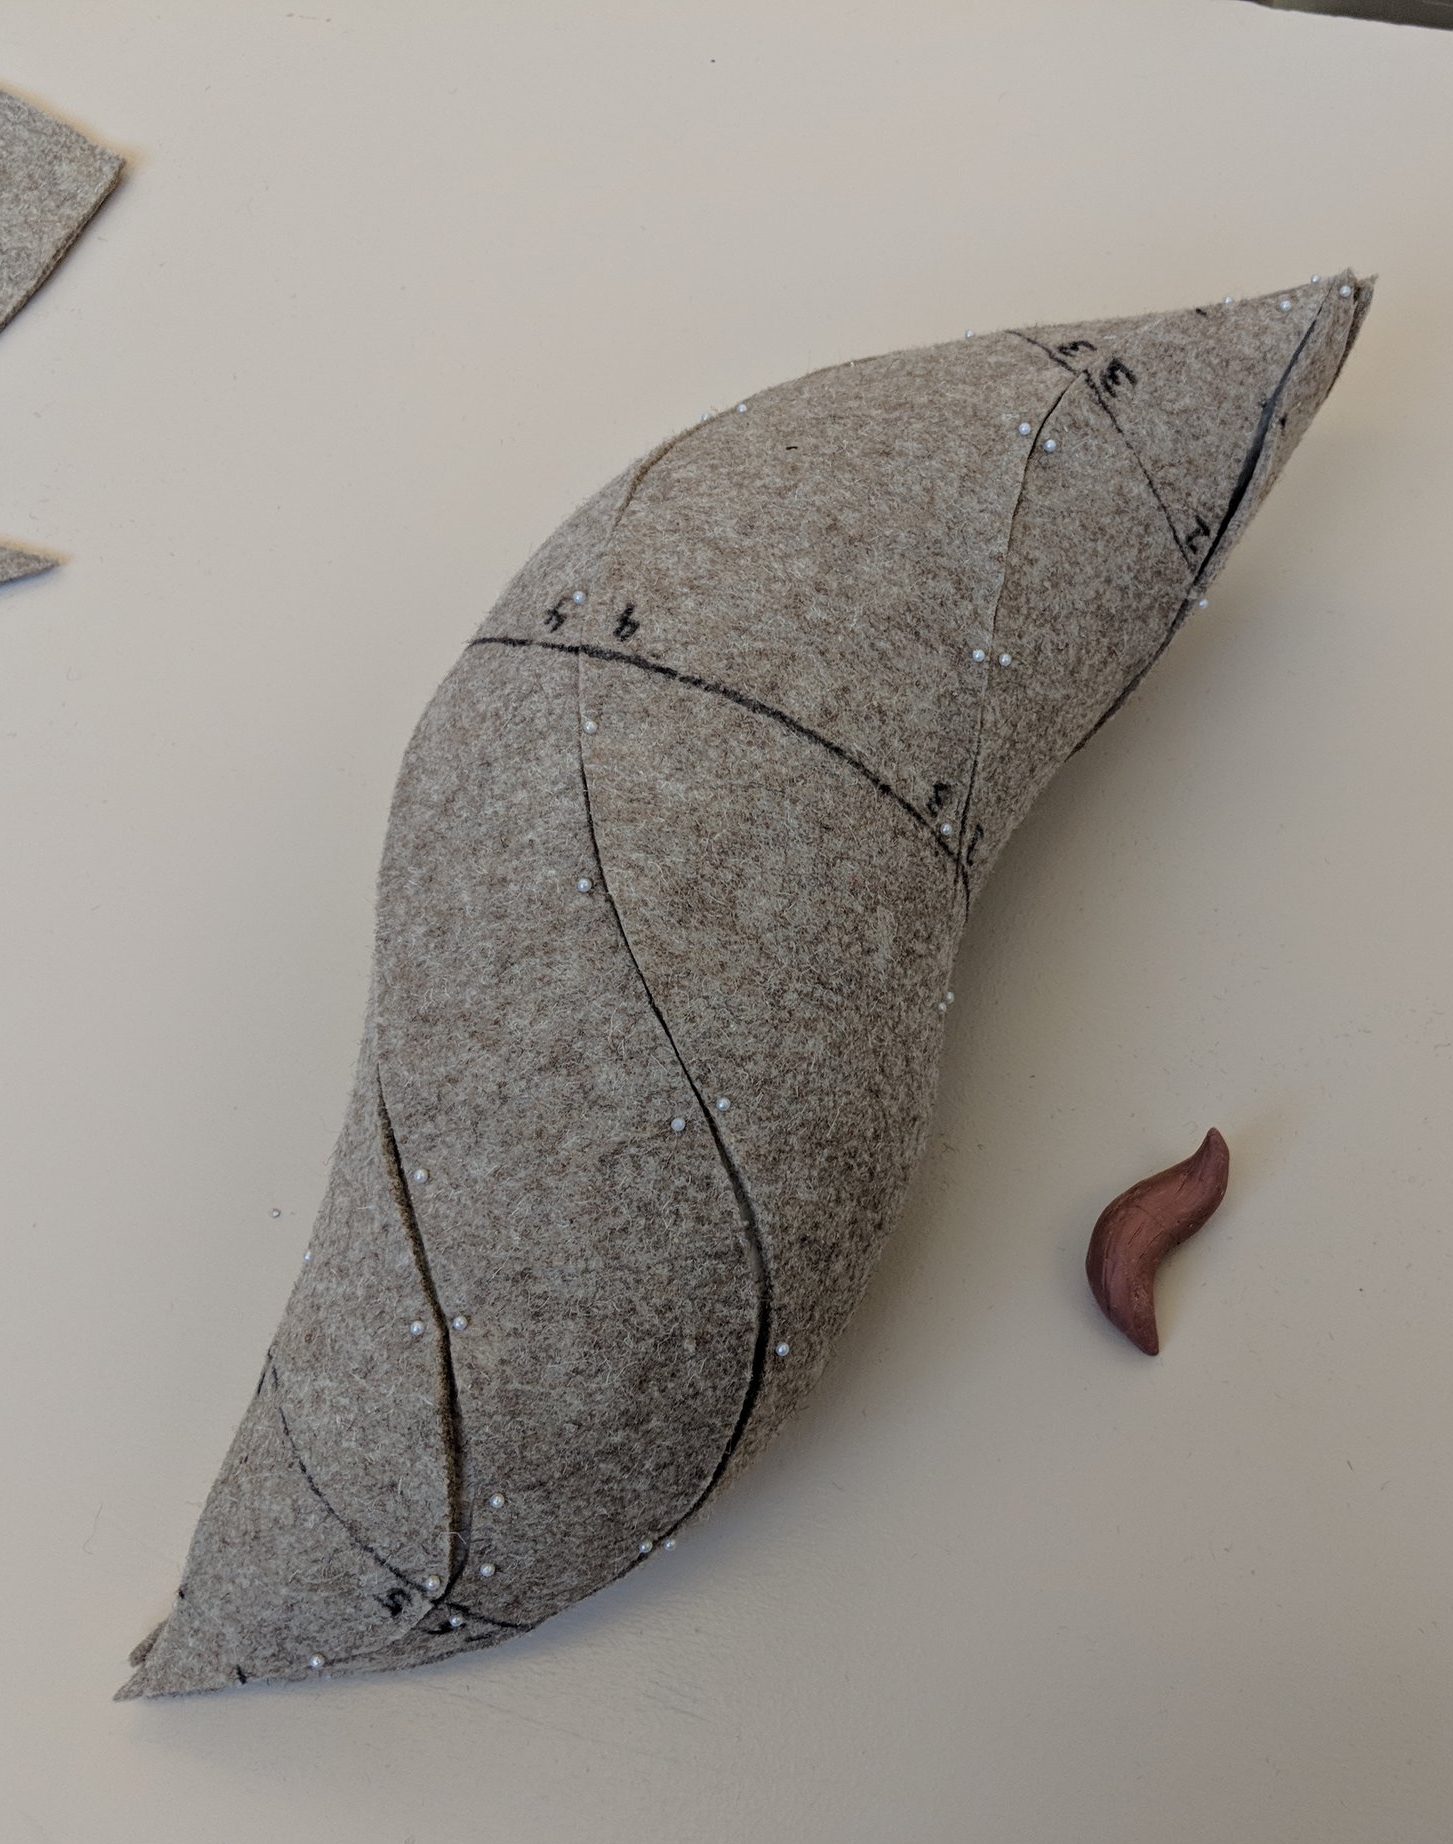
So to use a felting needle by hand, you need to poke in the direction that you want to shape and compress, almost like squishing clay into shape. You could make a sphere by poking inwards towards the center of the mass of wool from every direction, turning it around evenly as you go. You could make a cylinder shape by rolling the mass of wool like a log as you poke in towards the center. You can make increasingly complex shapes by making simple ones and then joining them together with more wool bridging across. If a piece isn’t dense or firm enough for your purposes you can add more wool and force it into the same amount of space, or else keep poking to compress your form into a smaller and smaller size.

wool human-like shapes showing progression from rough to detailed forms

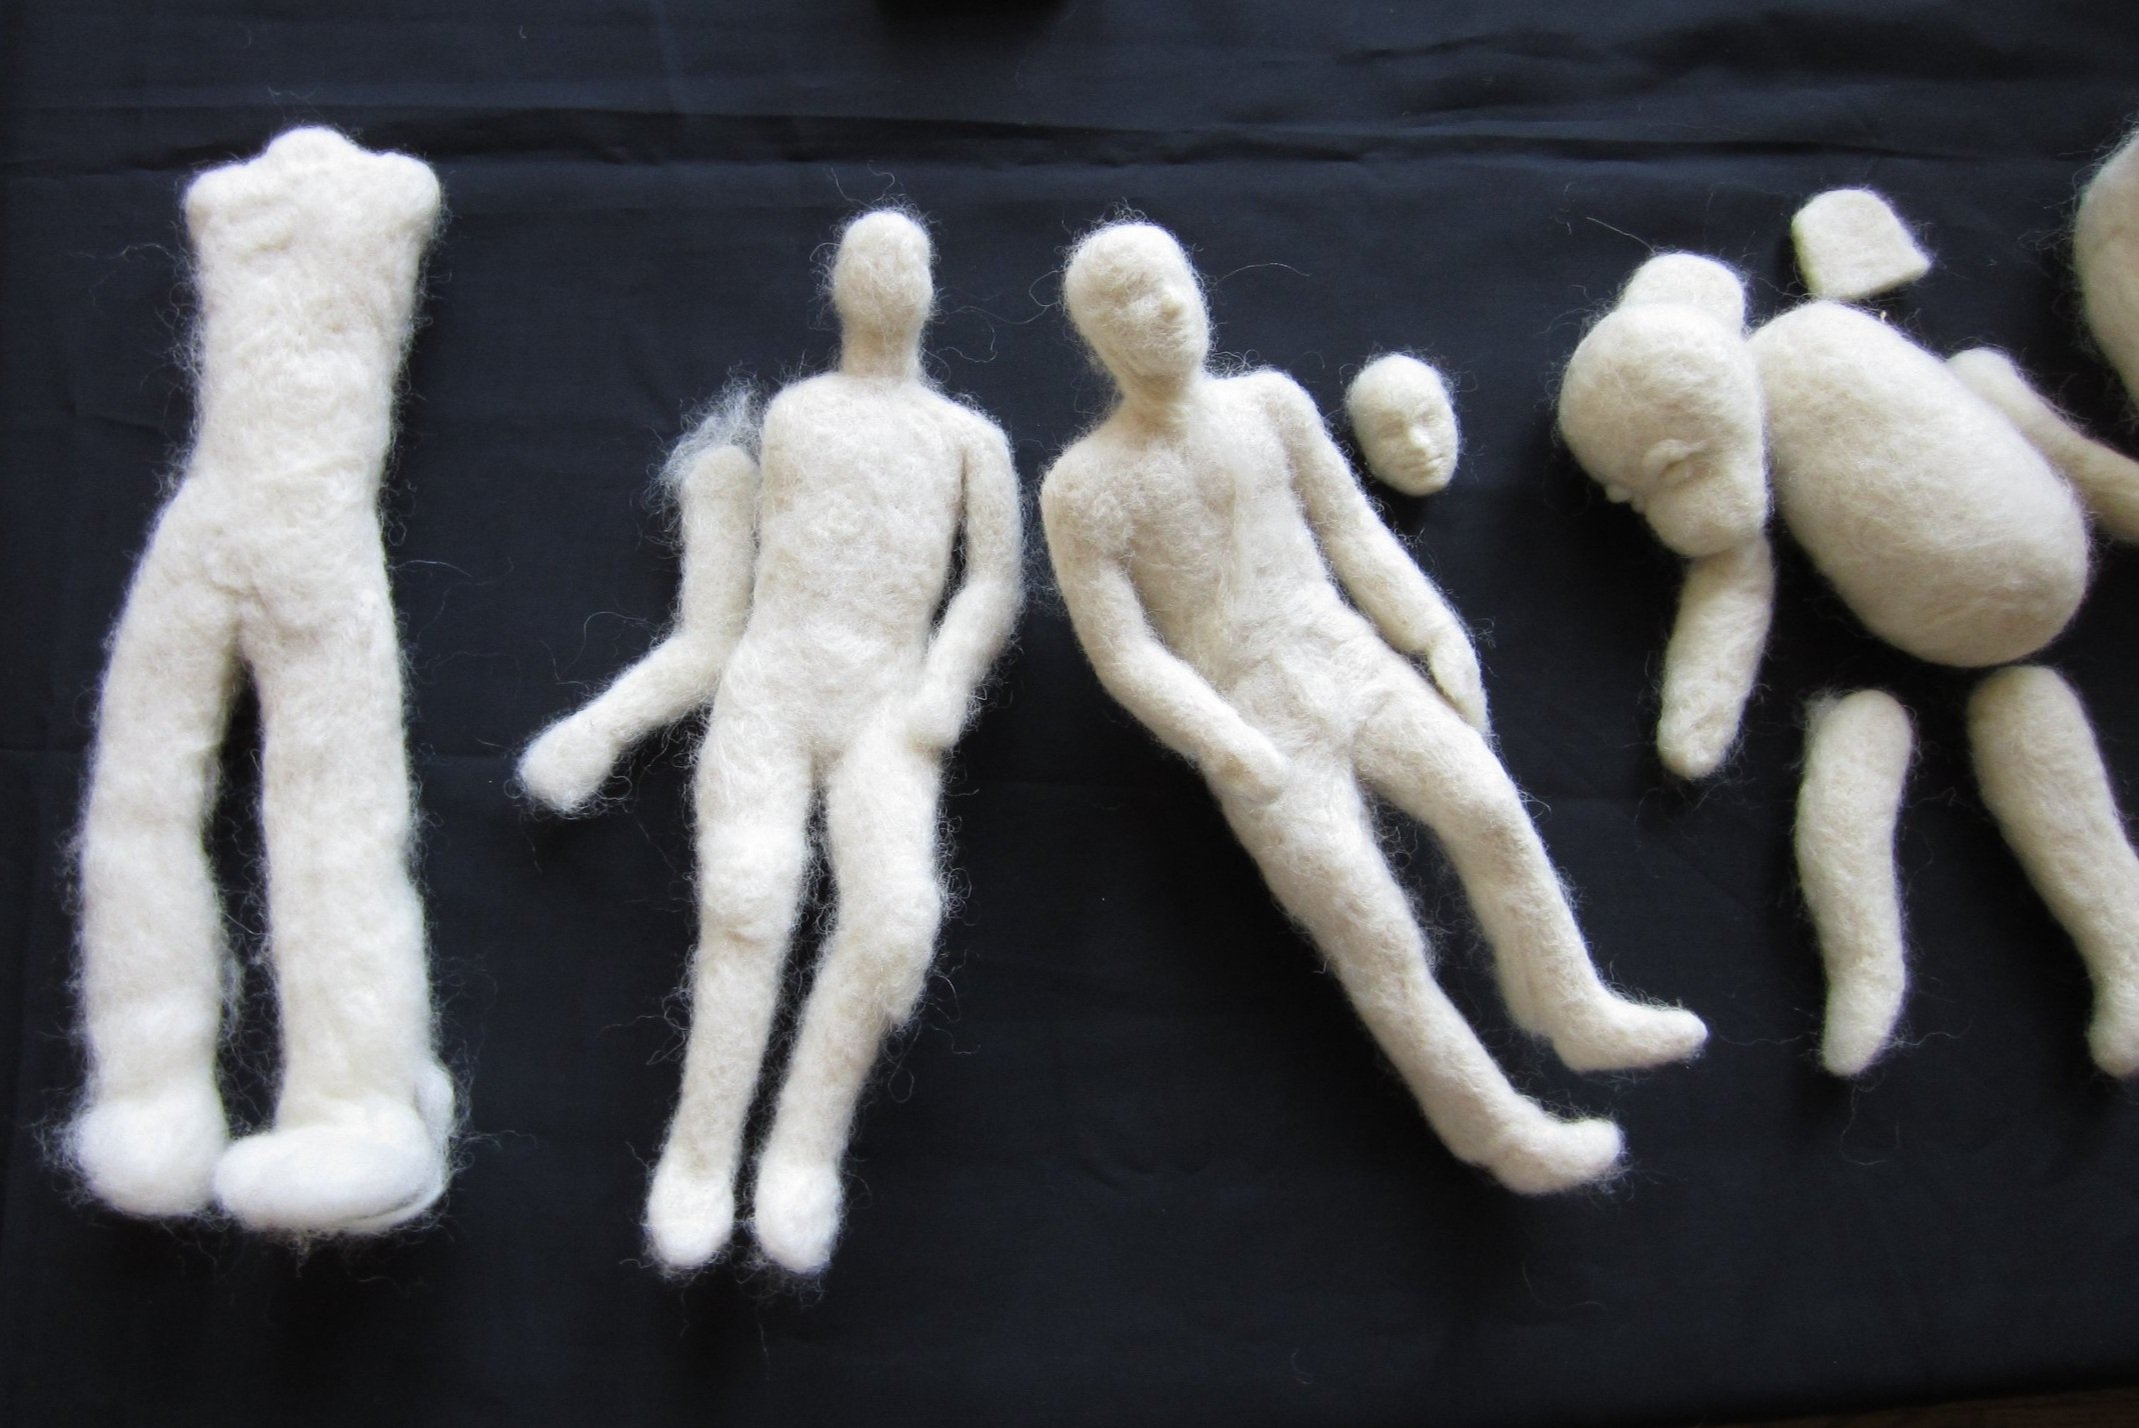
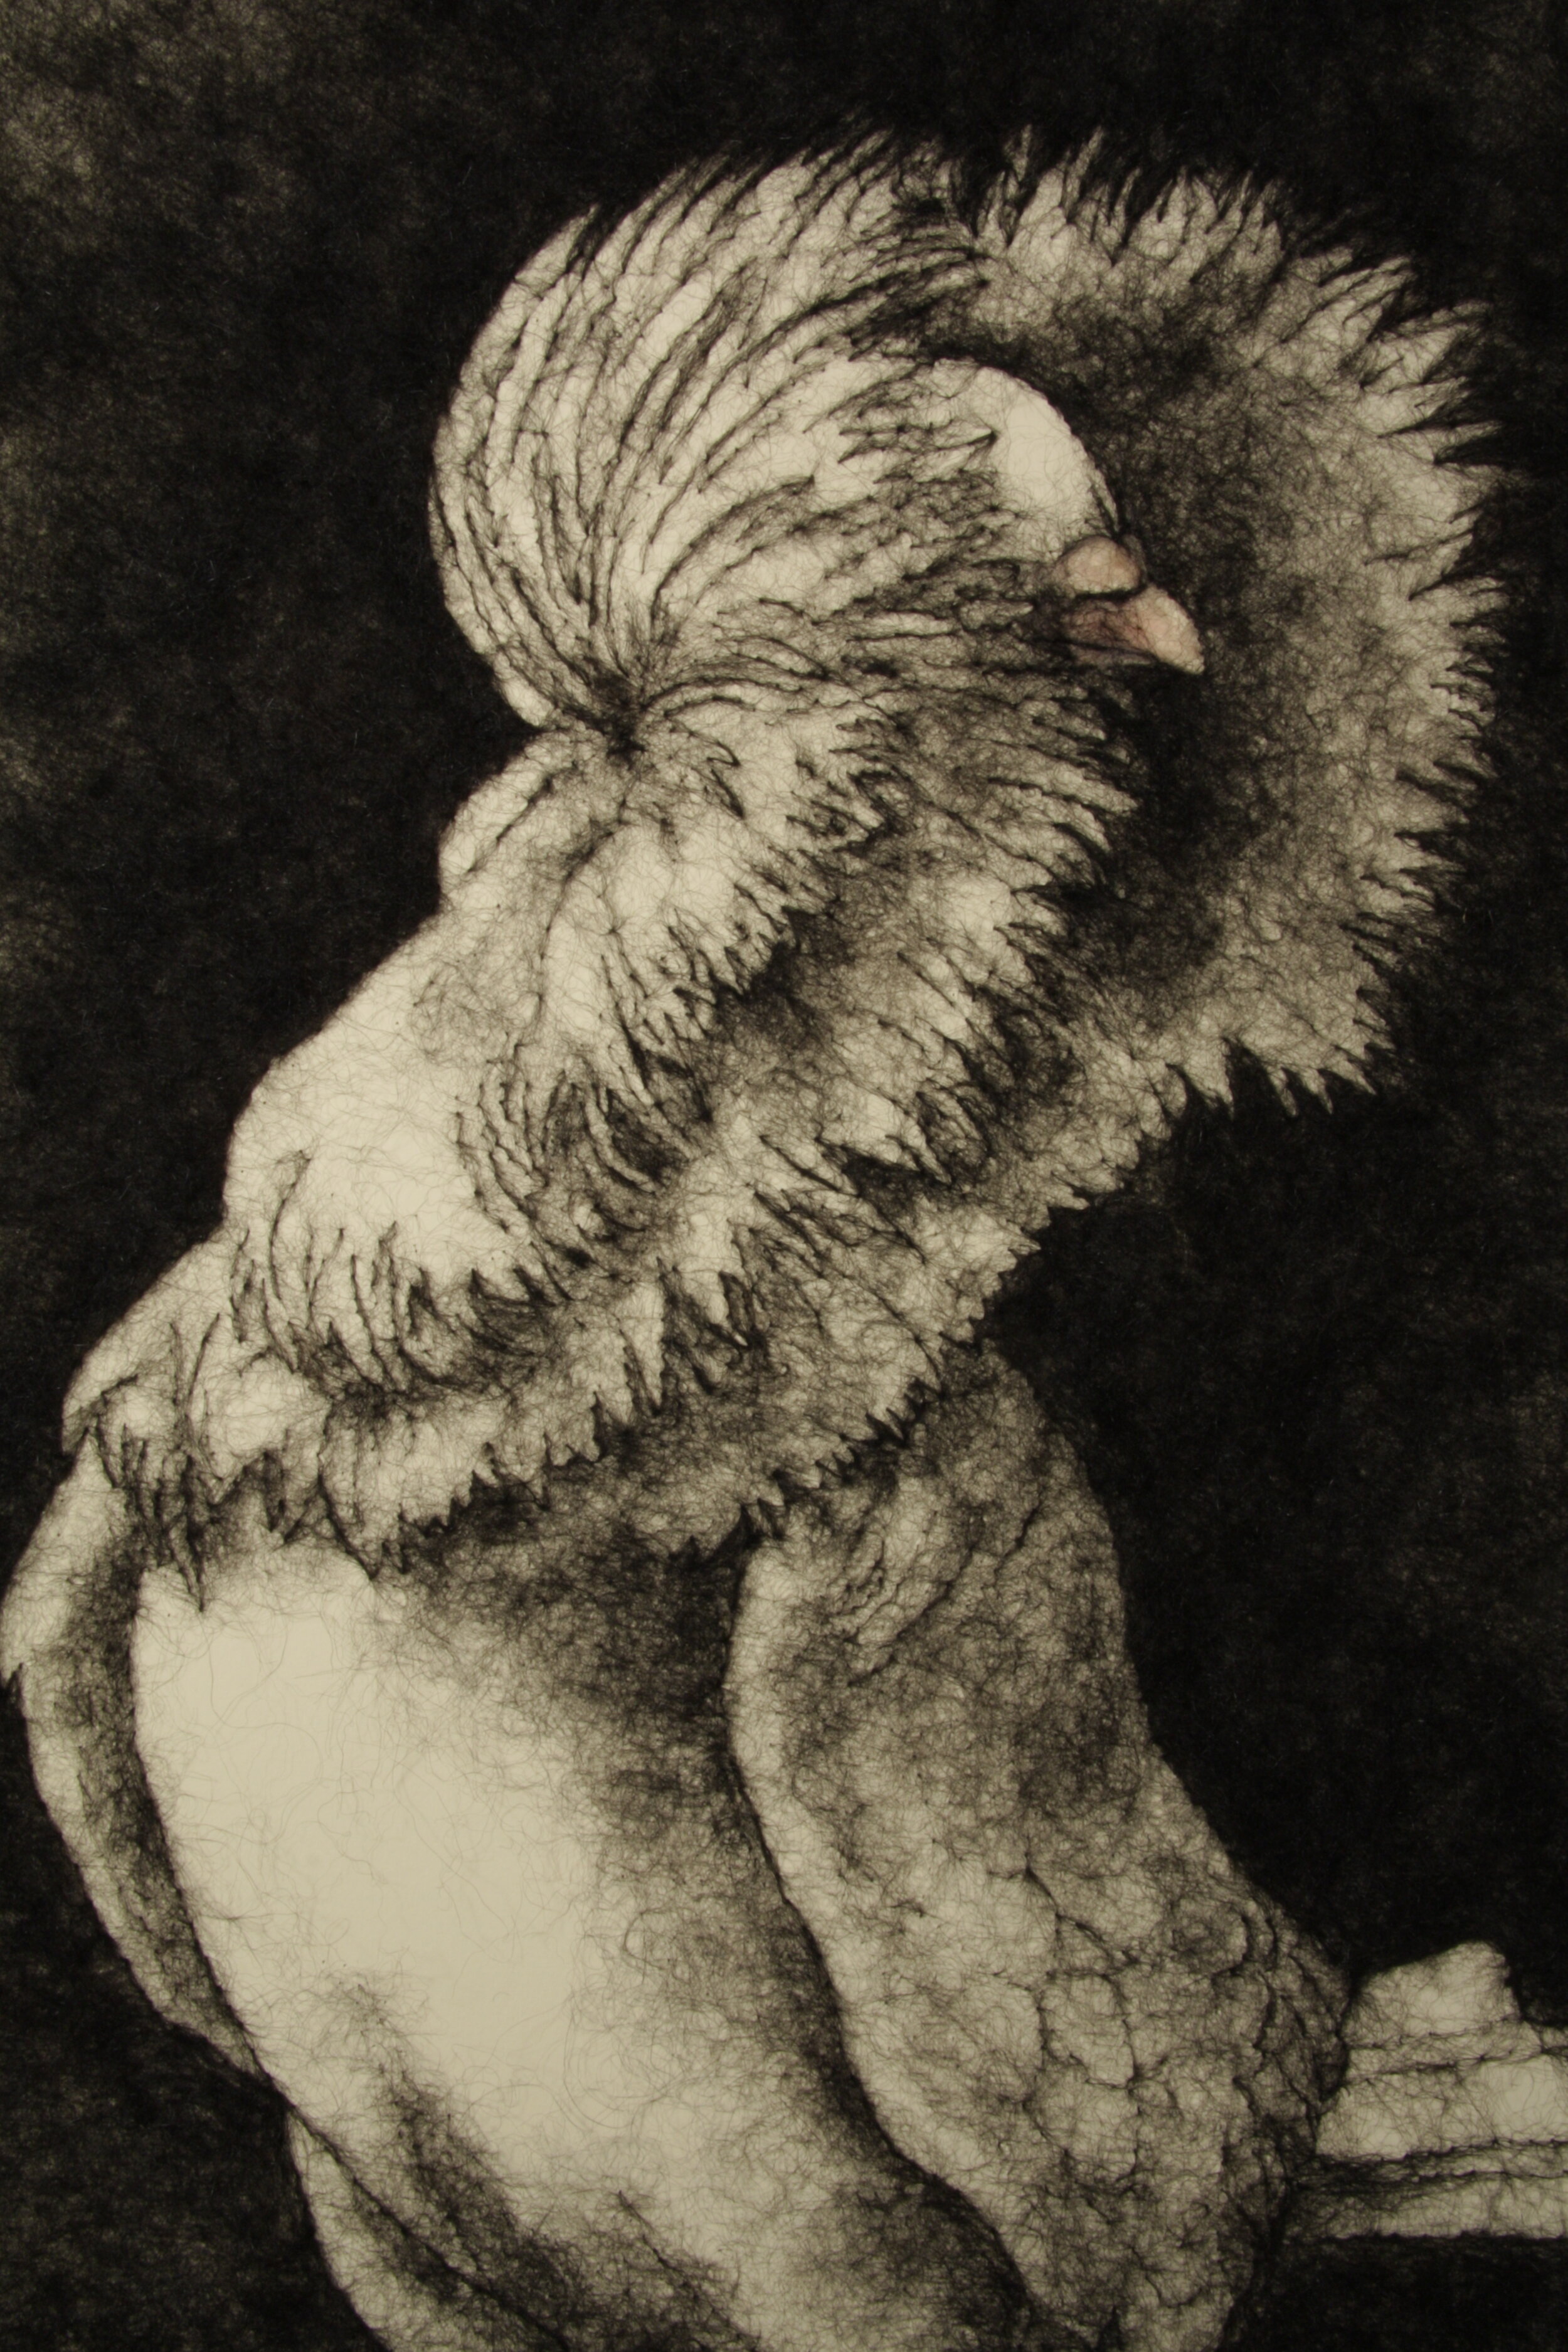
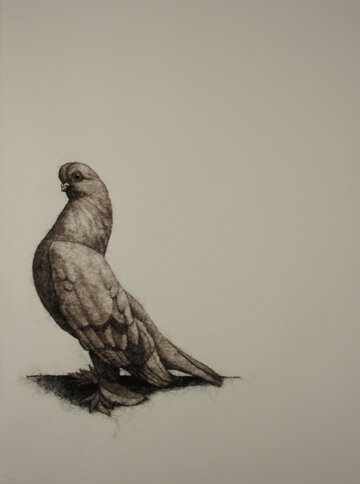
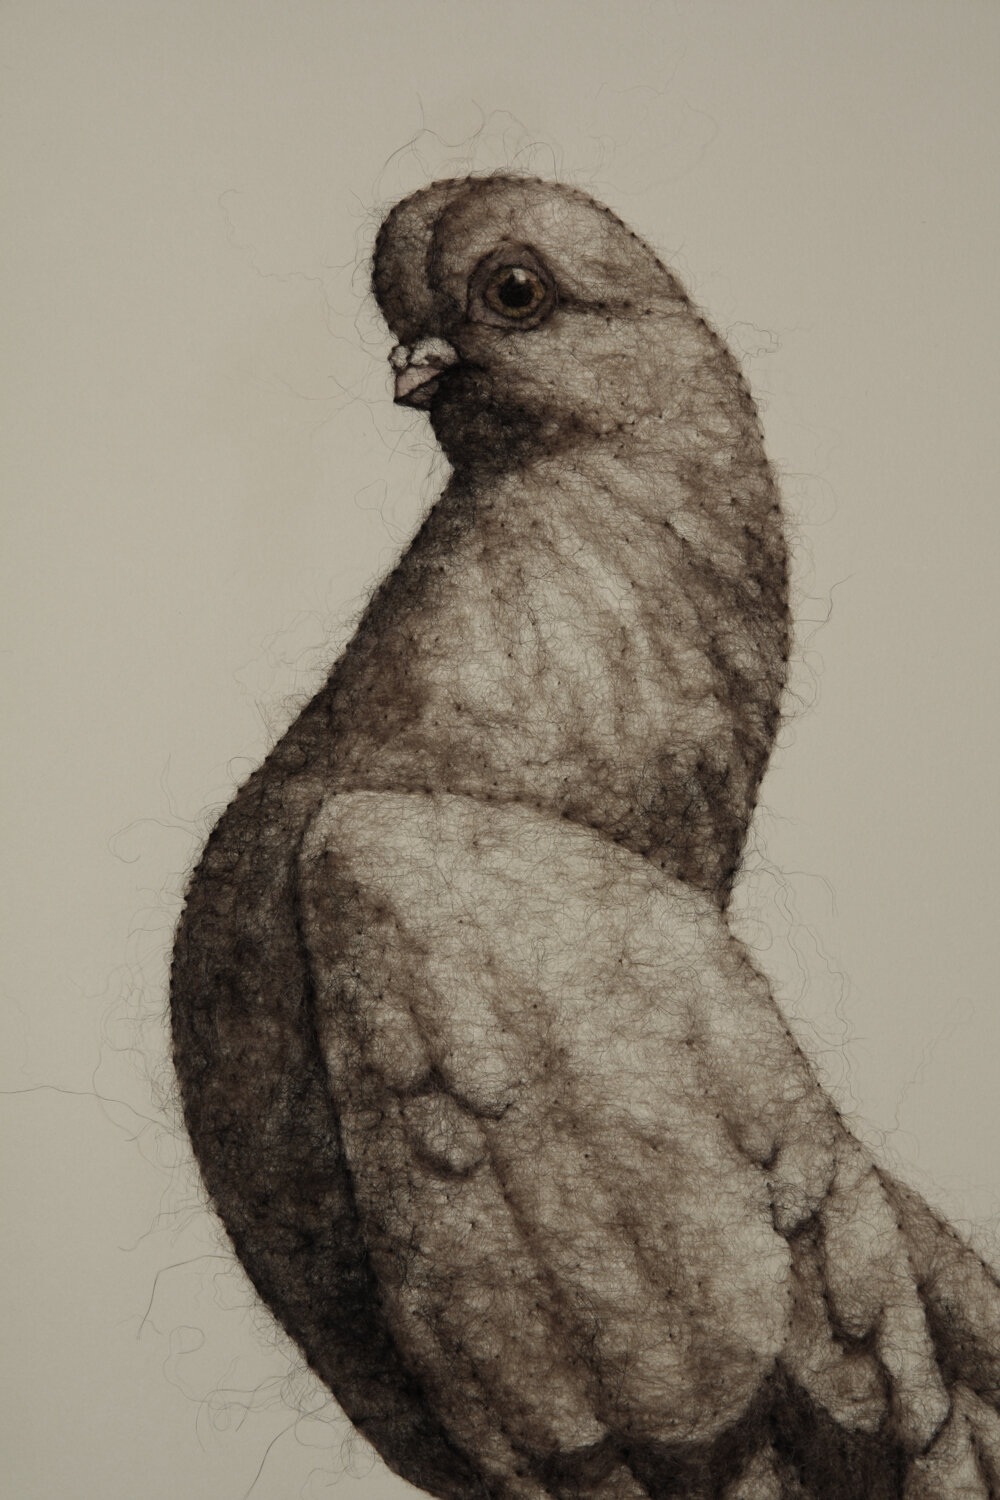
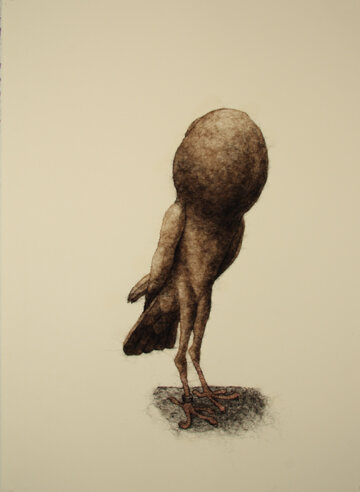
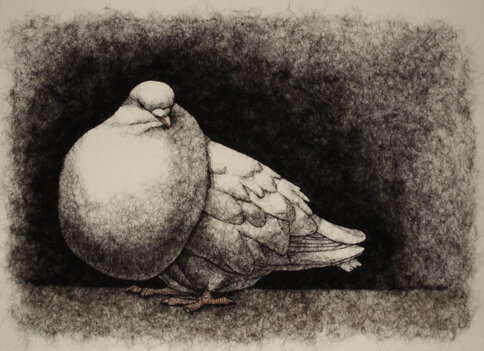
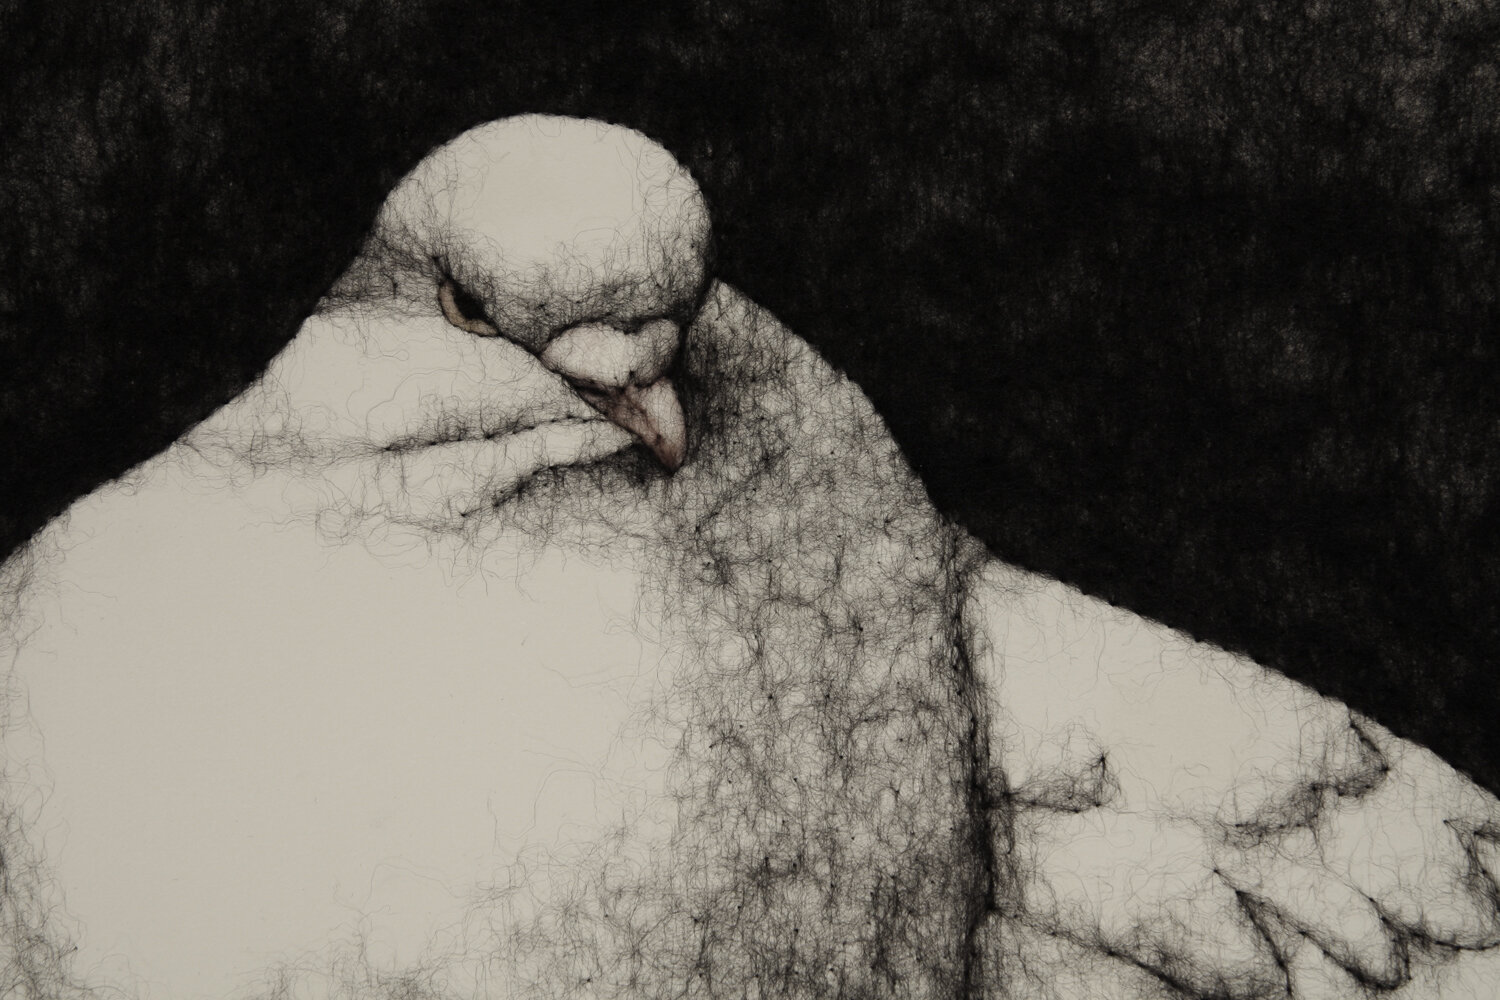
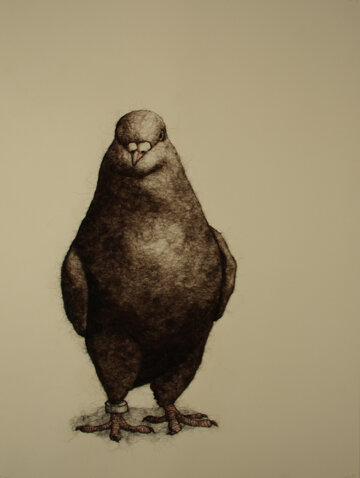
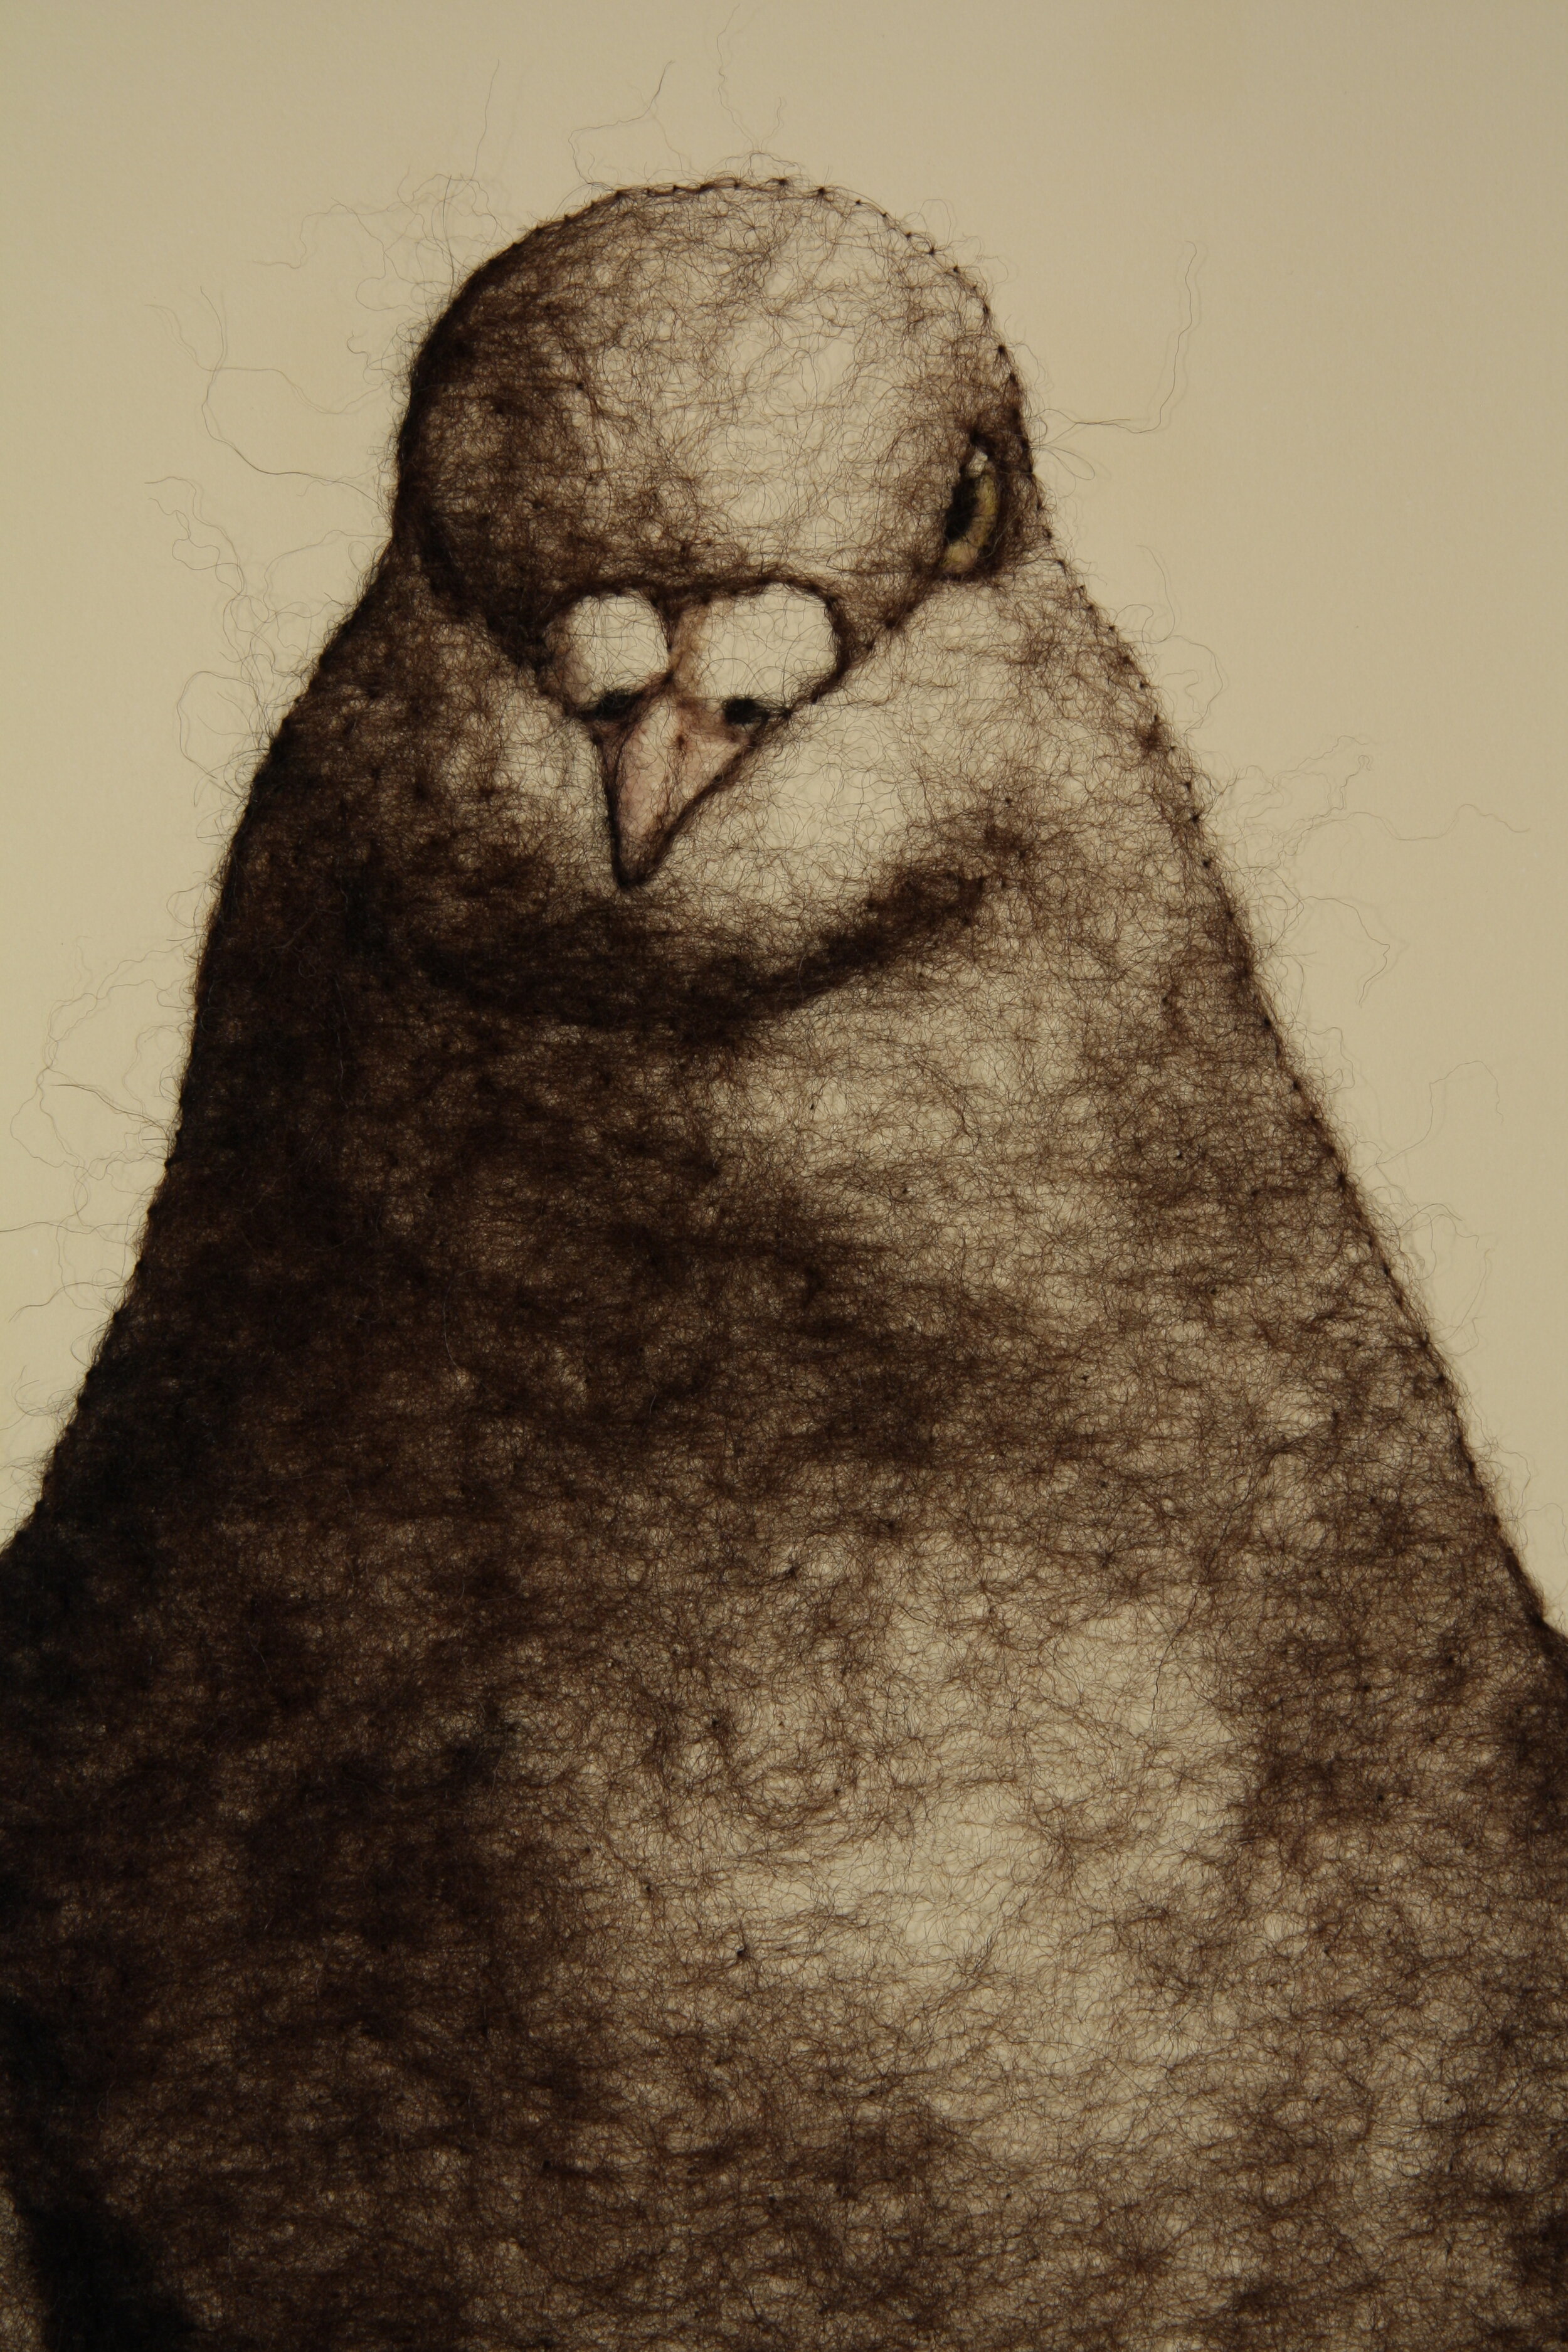
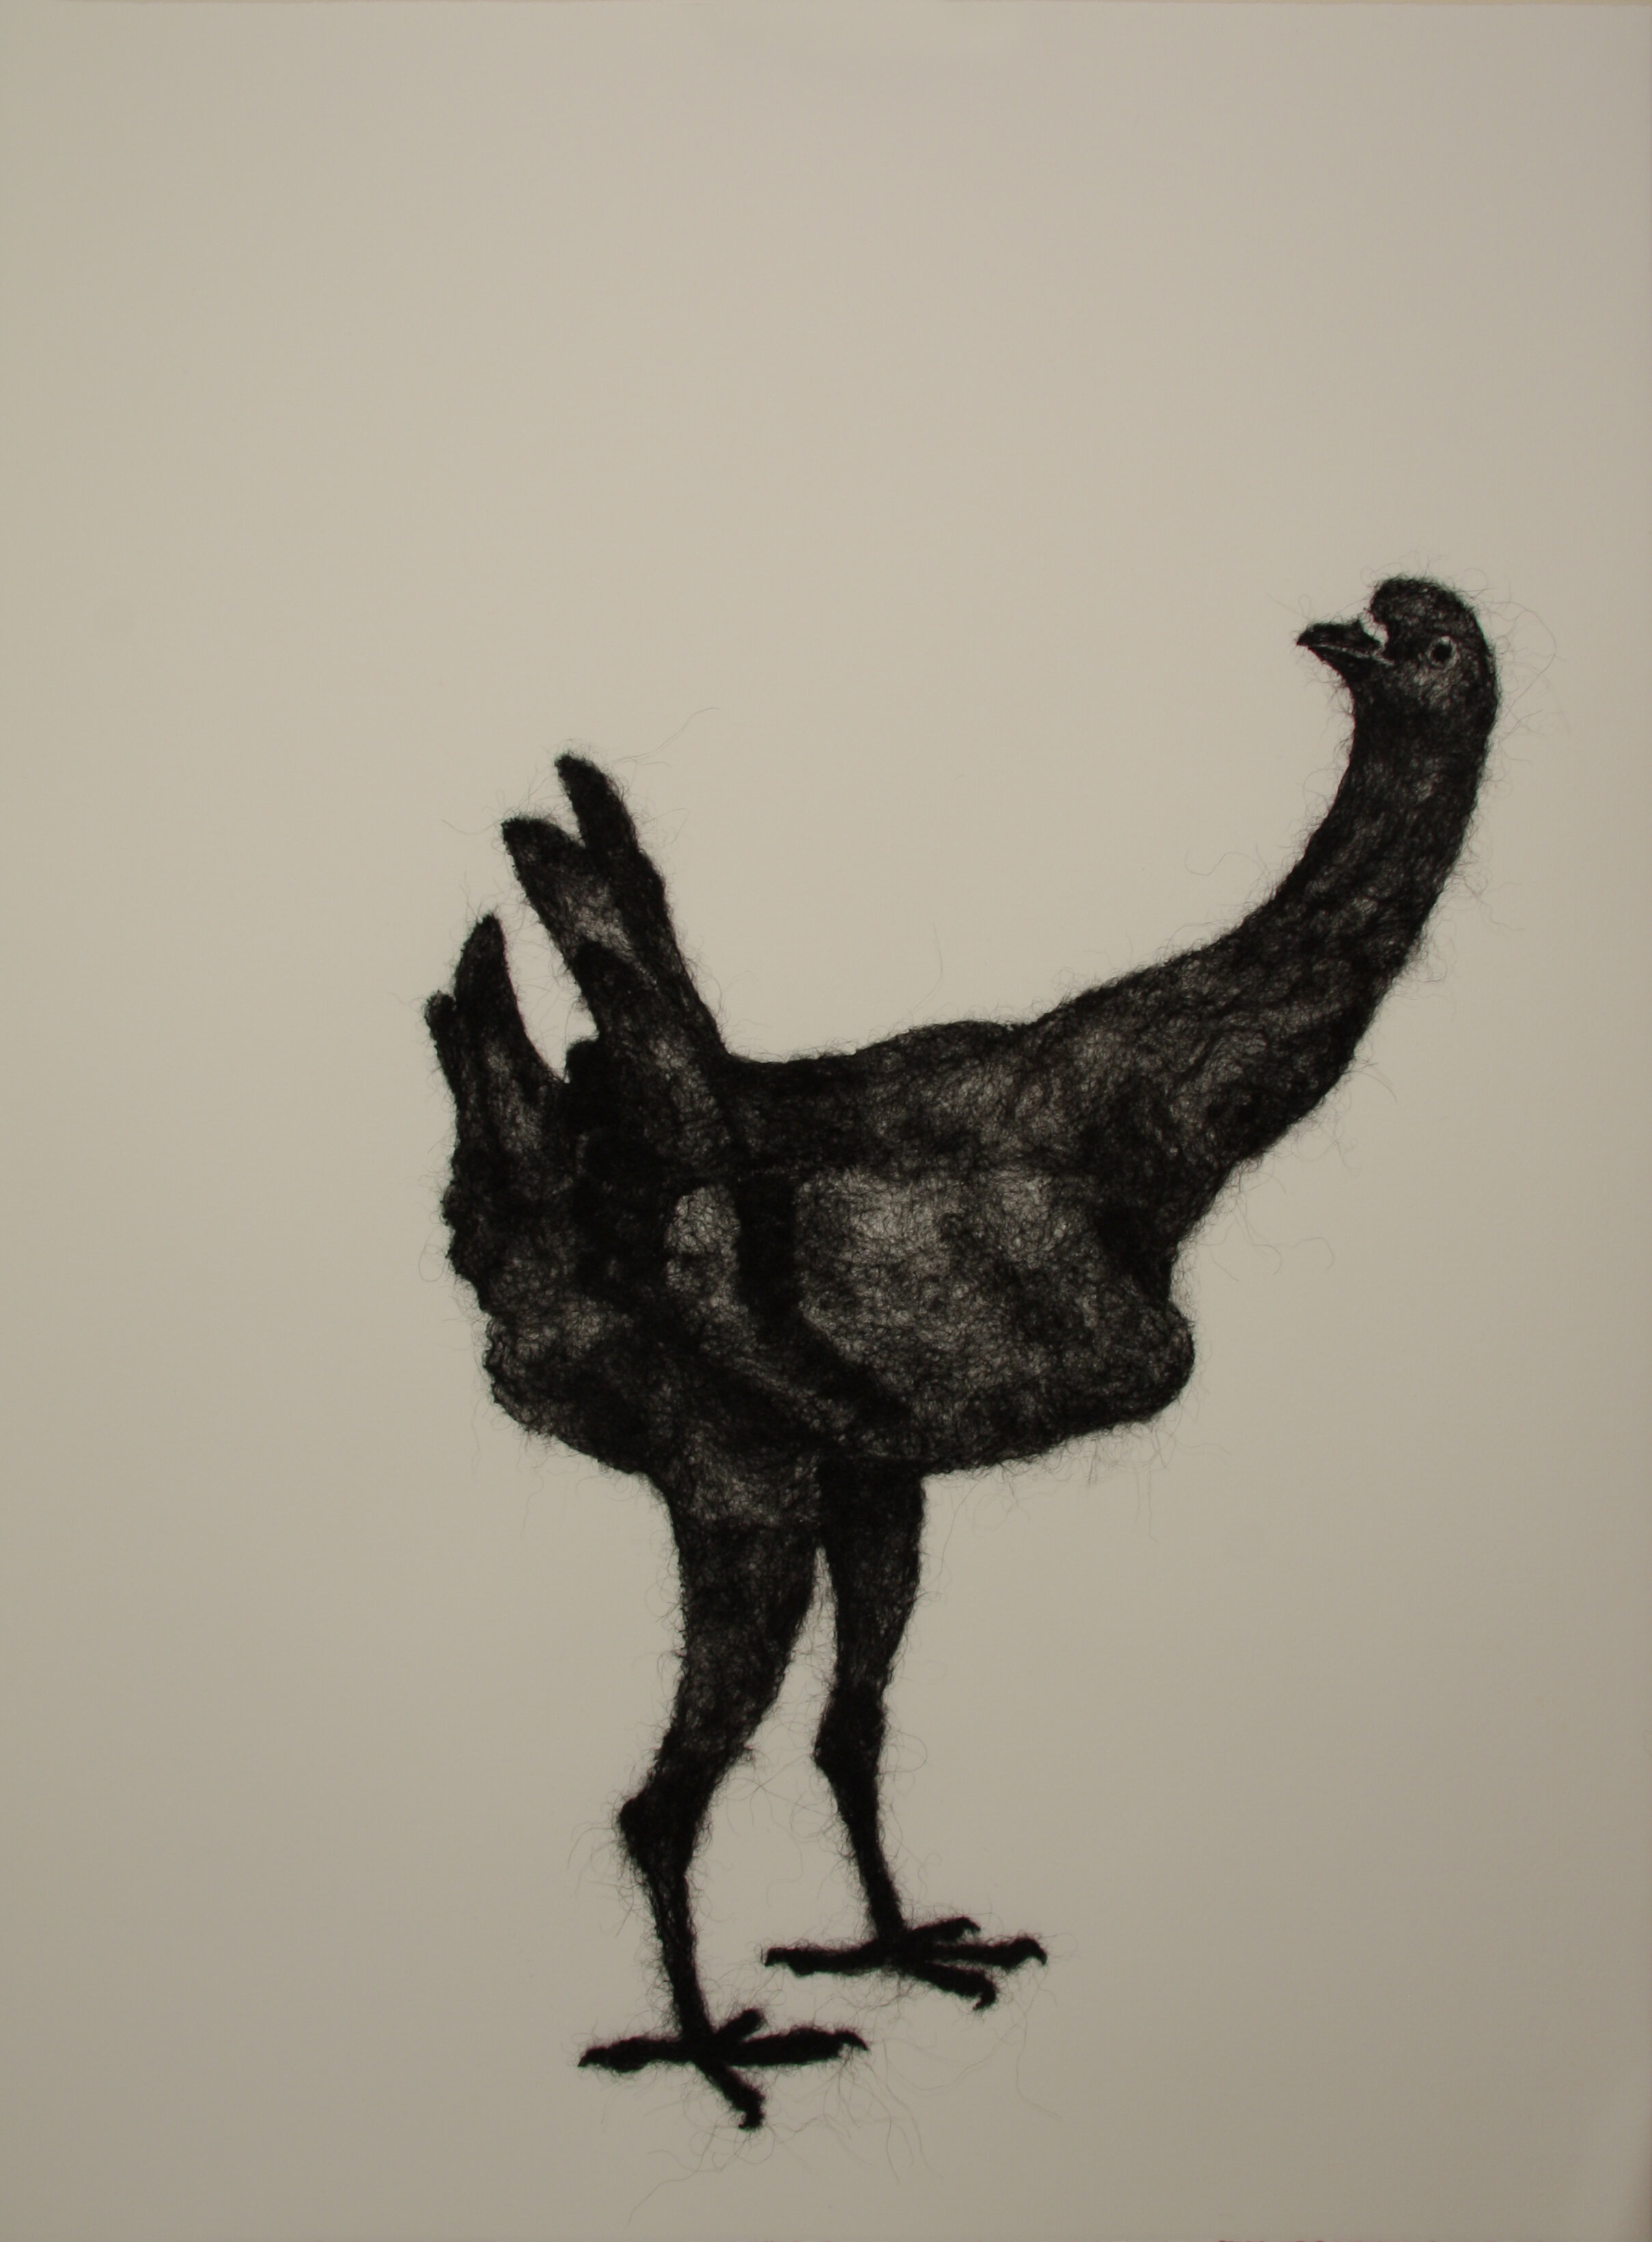
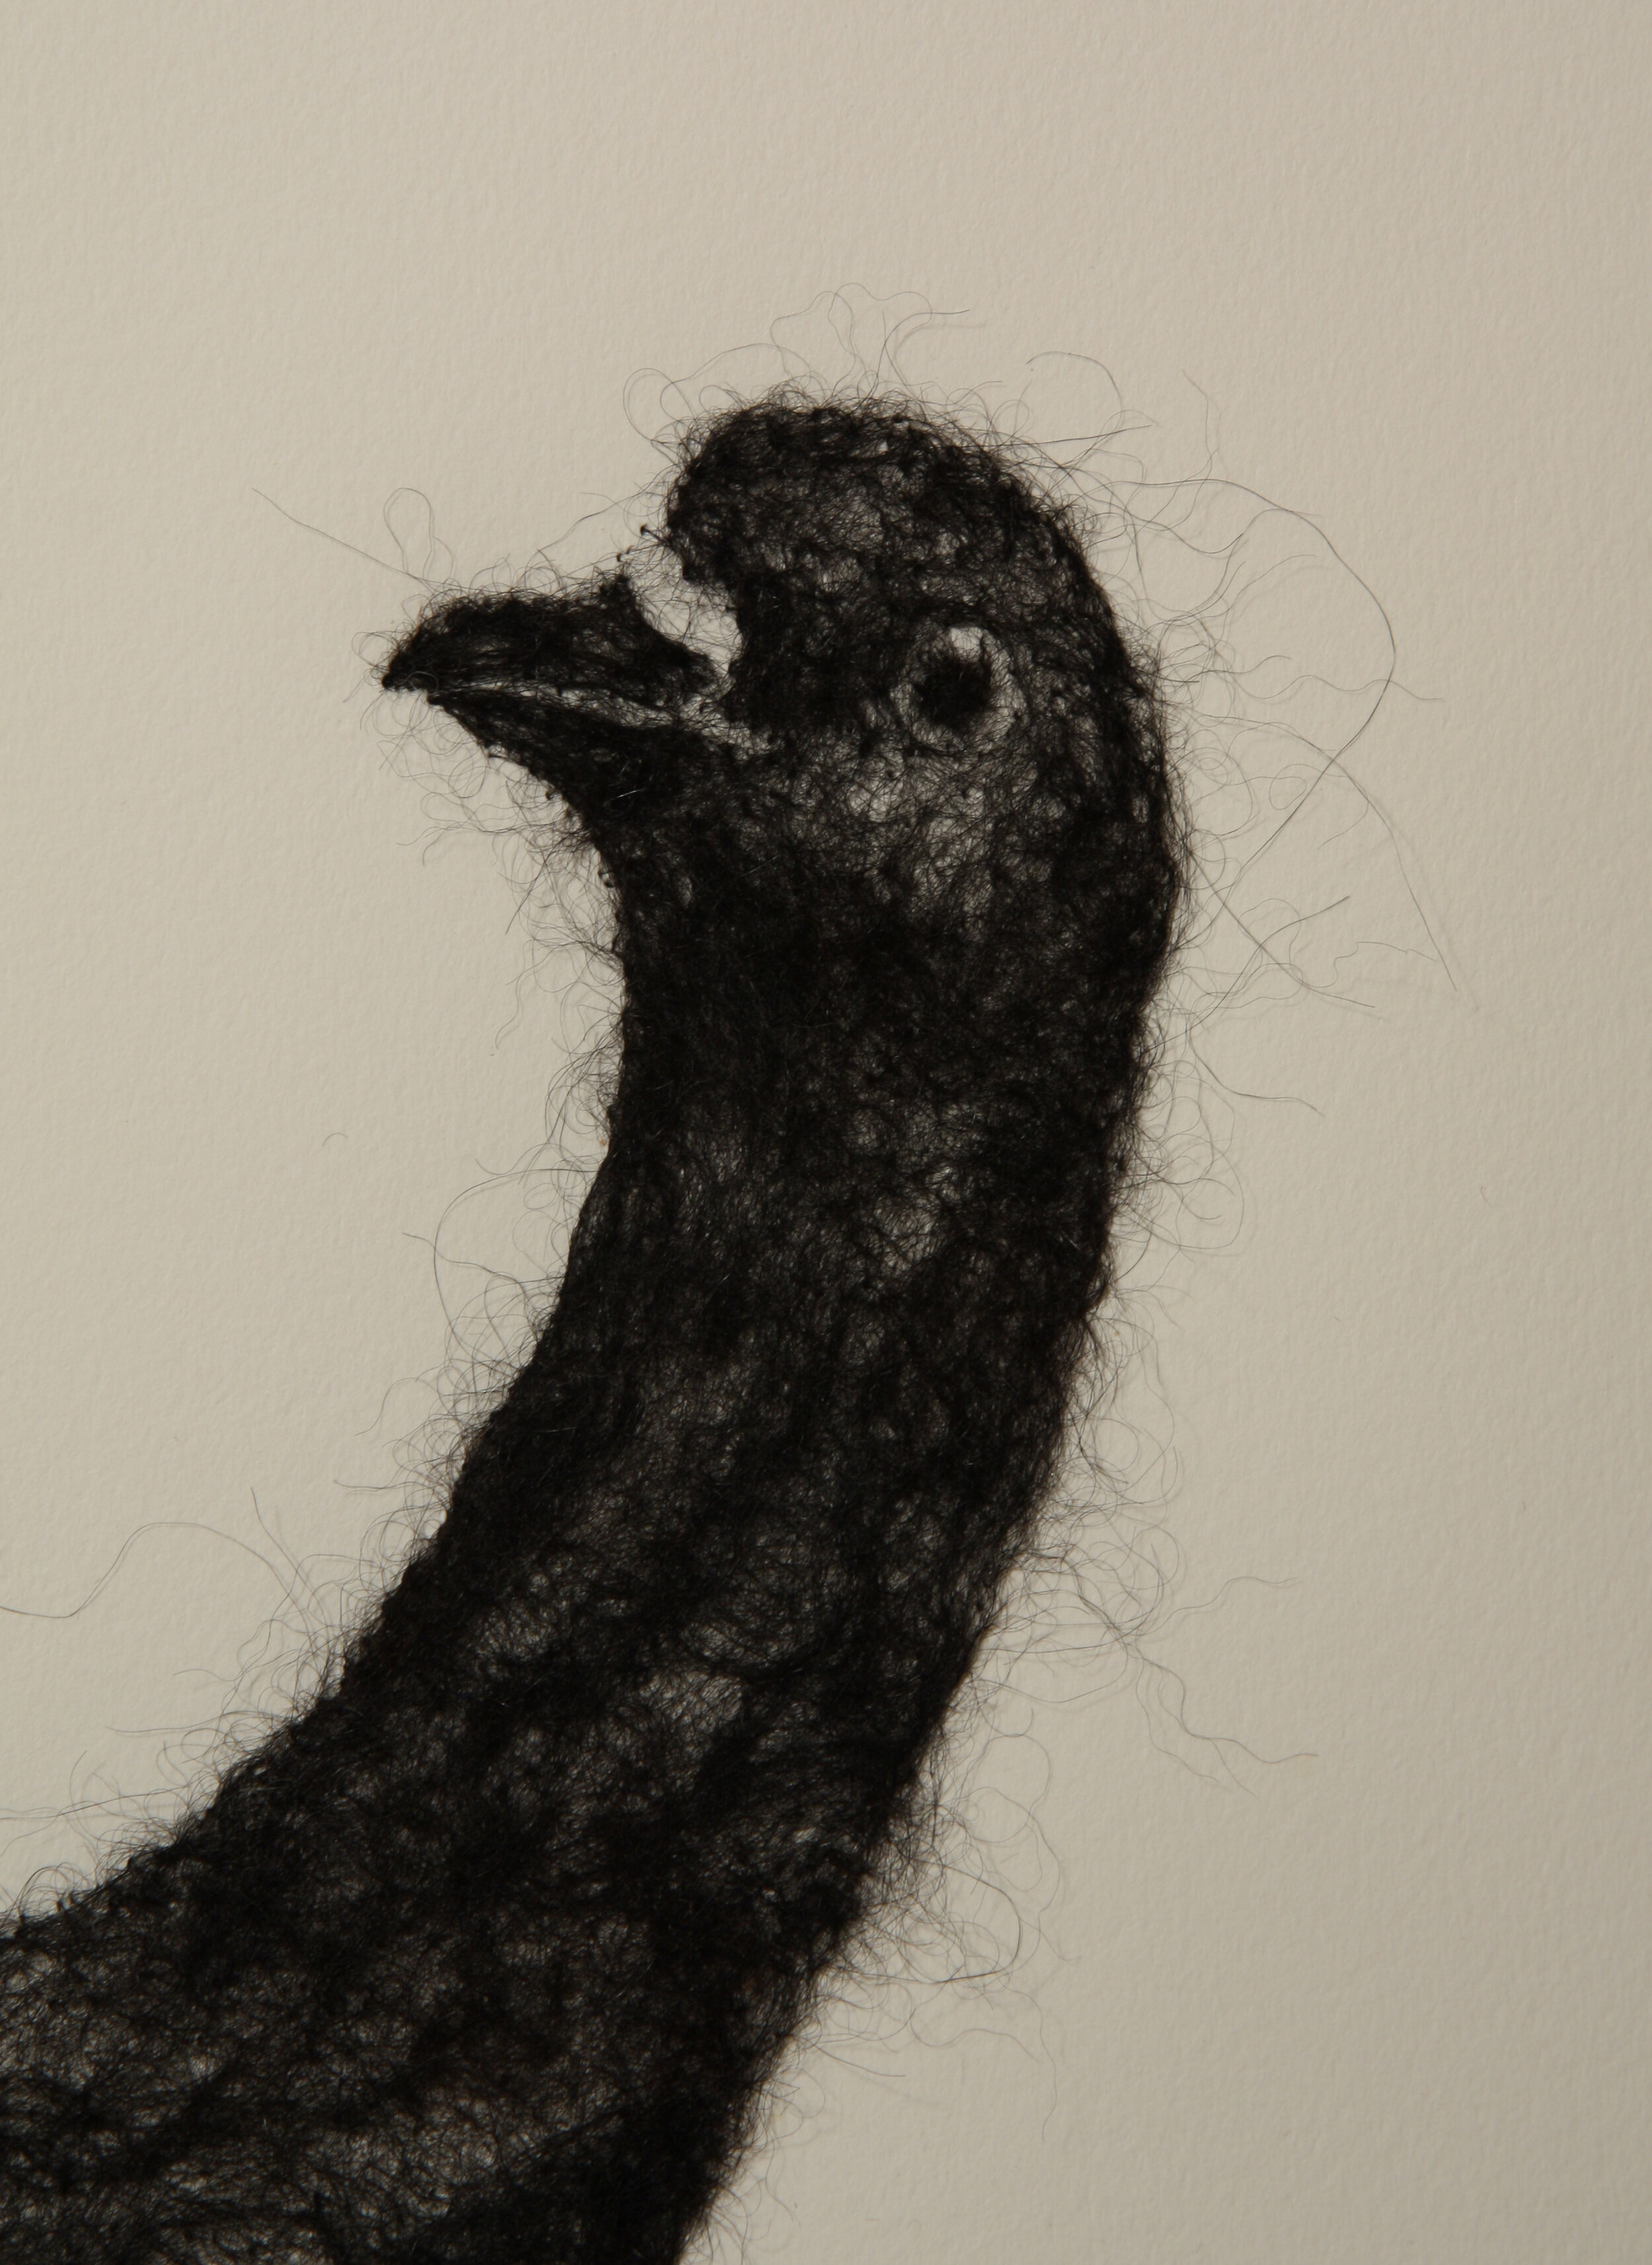
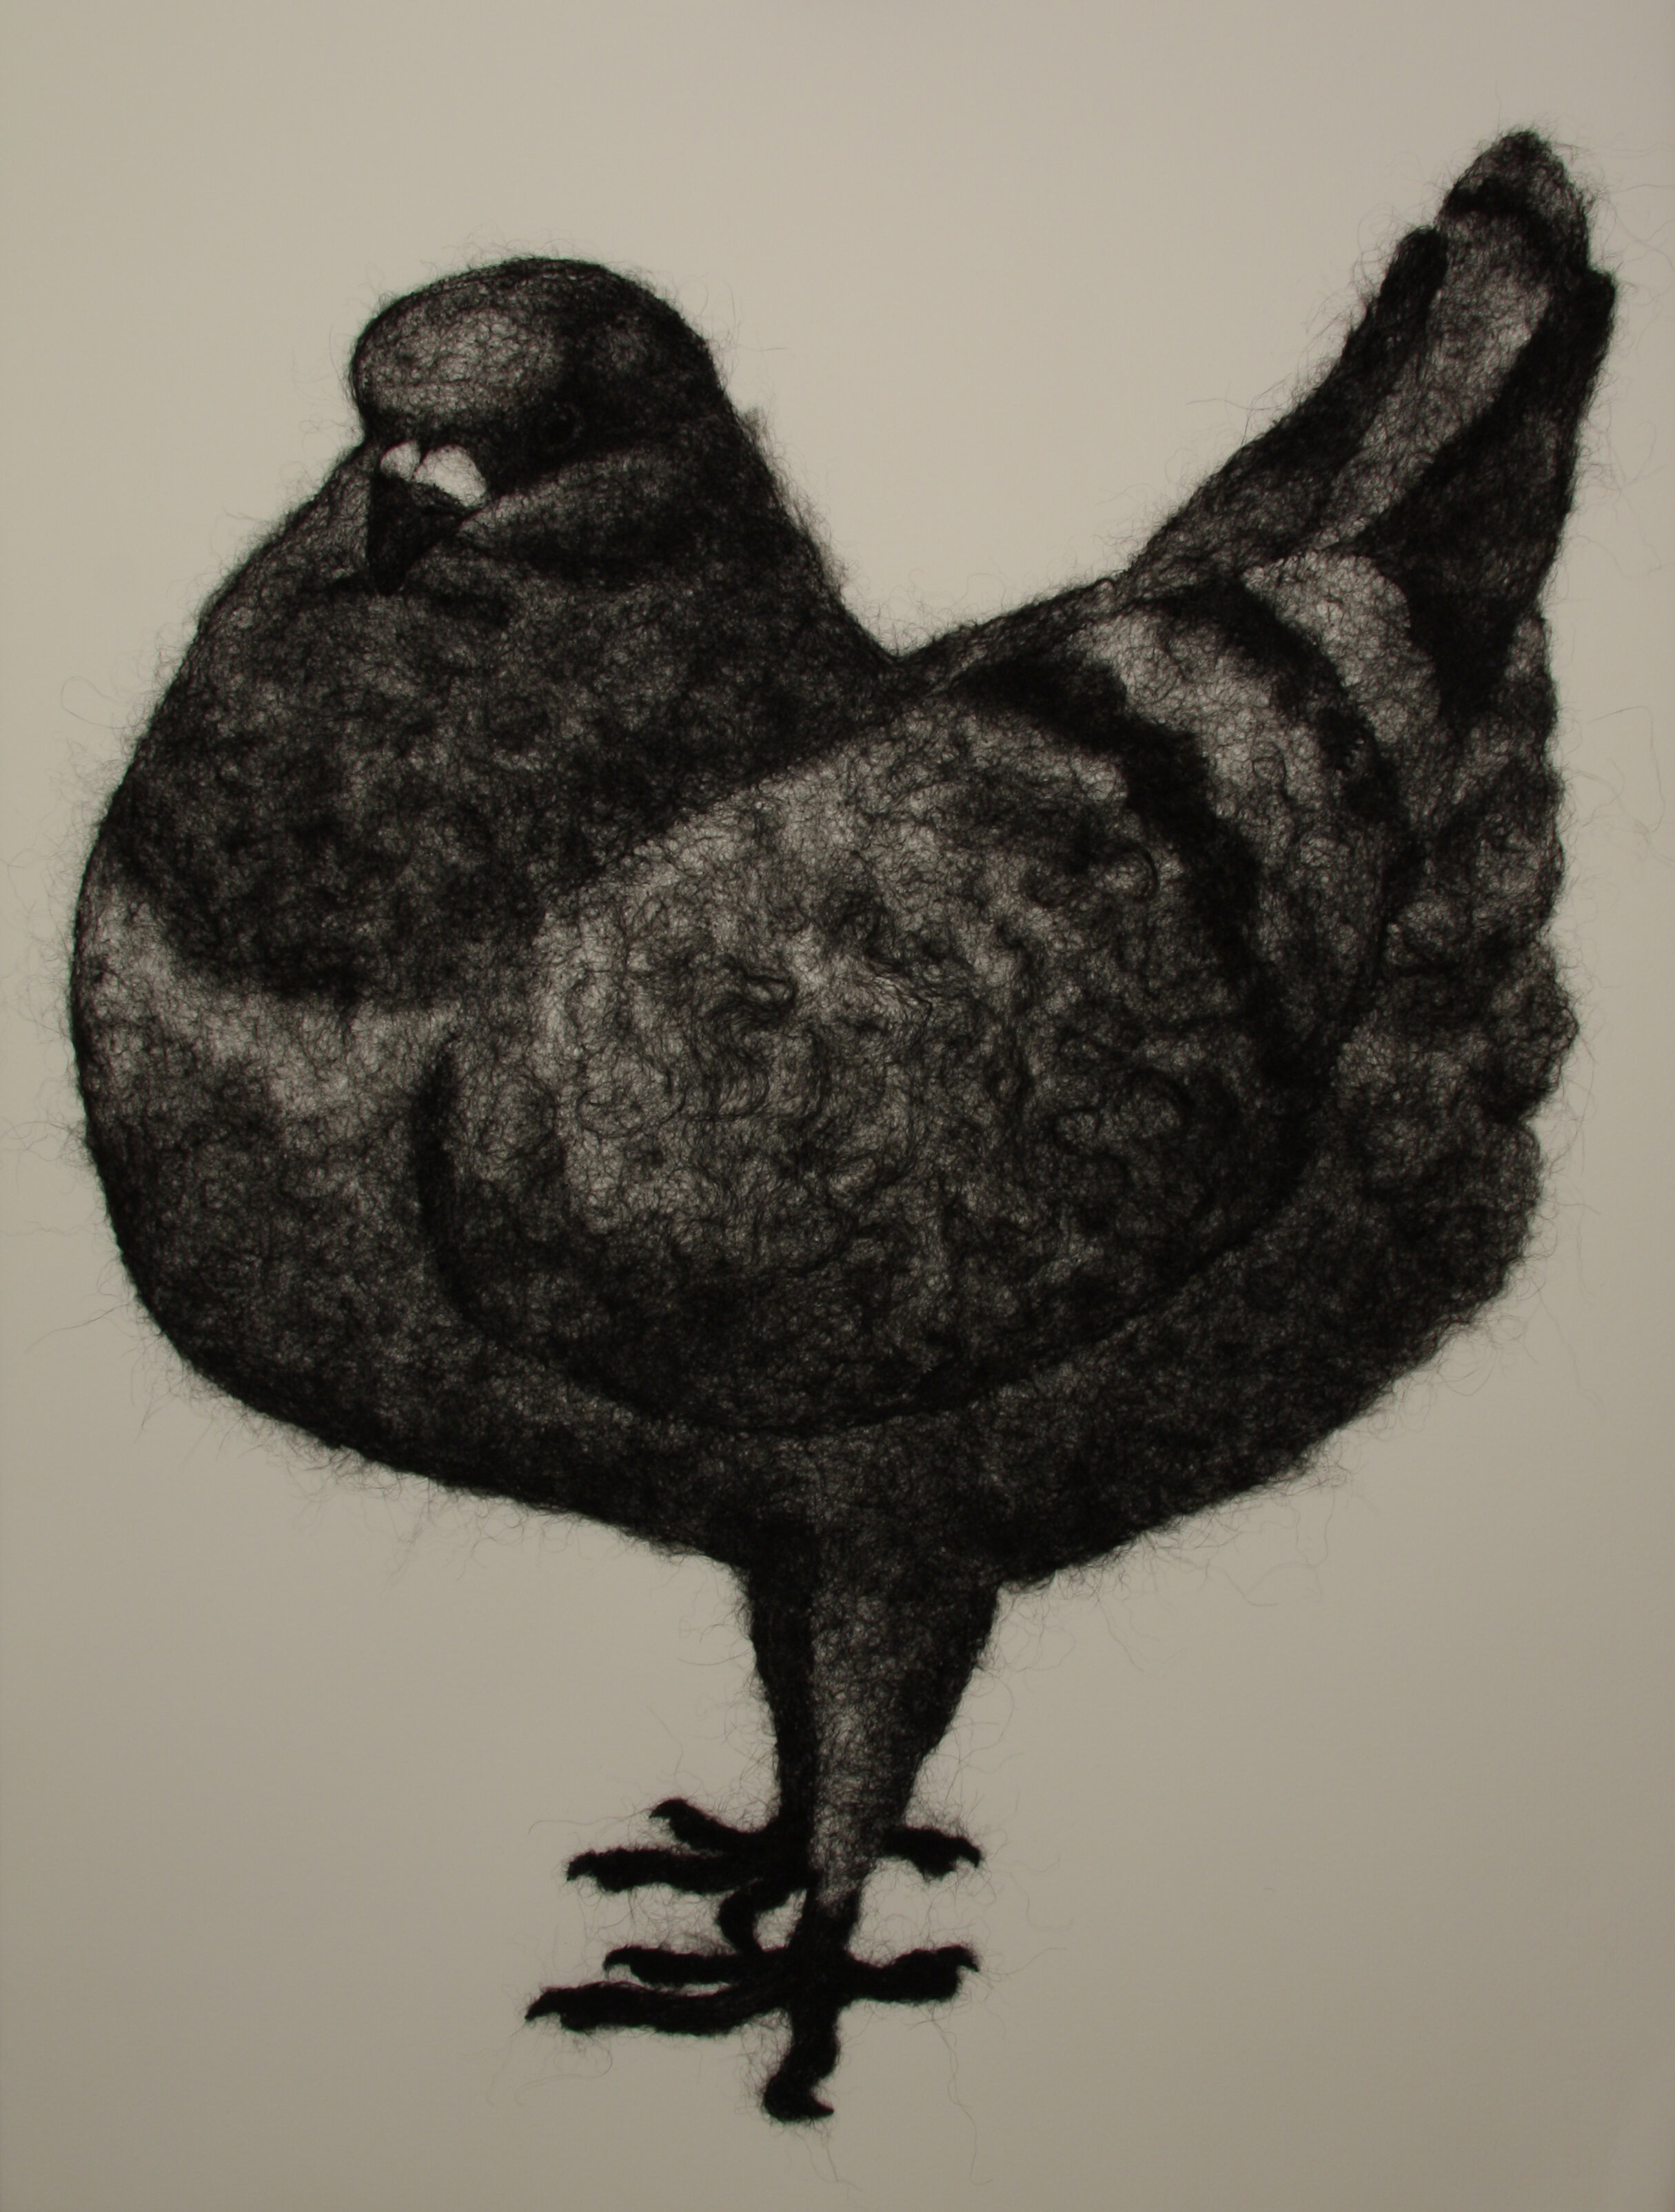
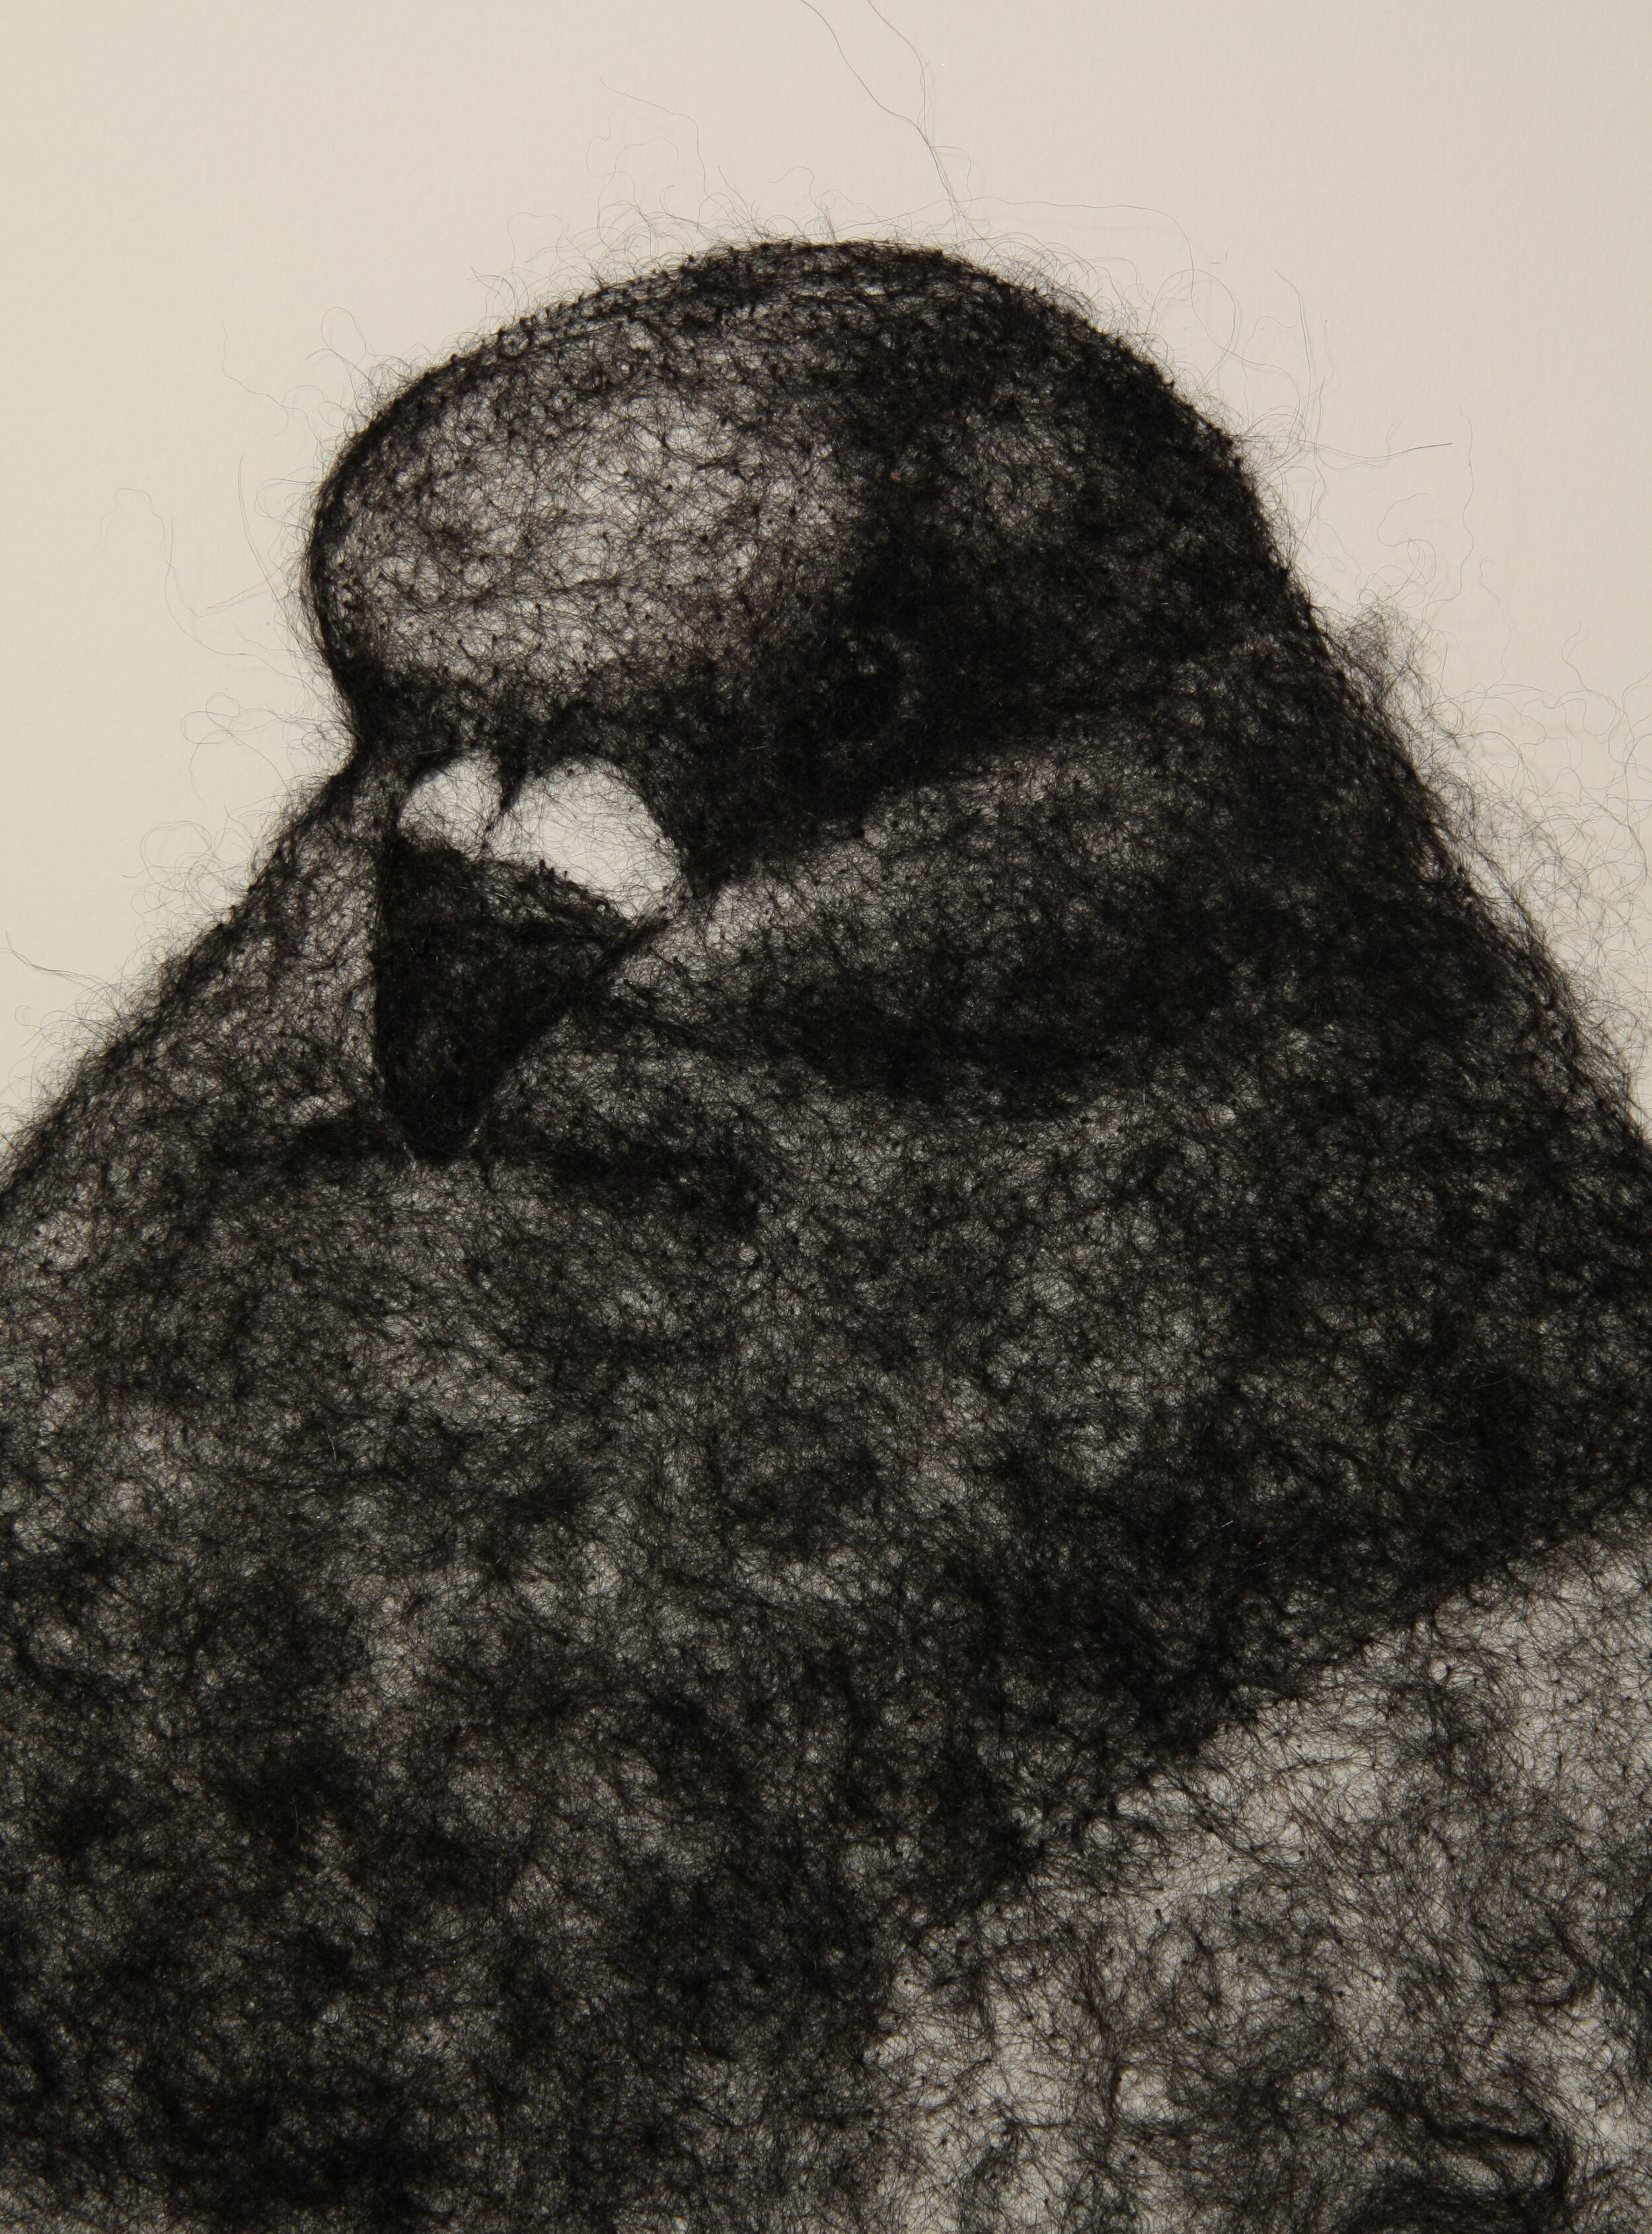
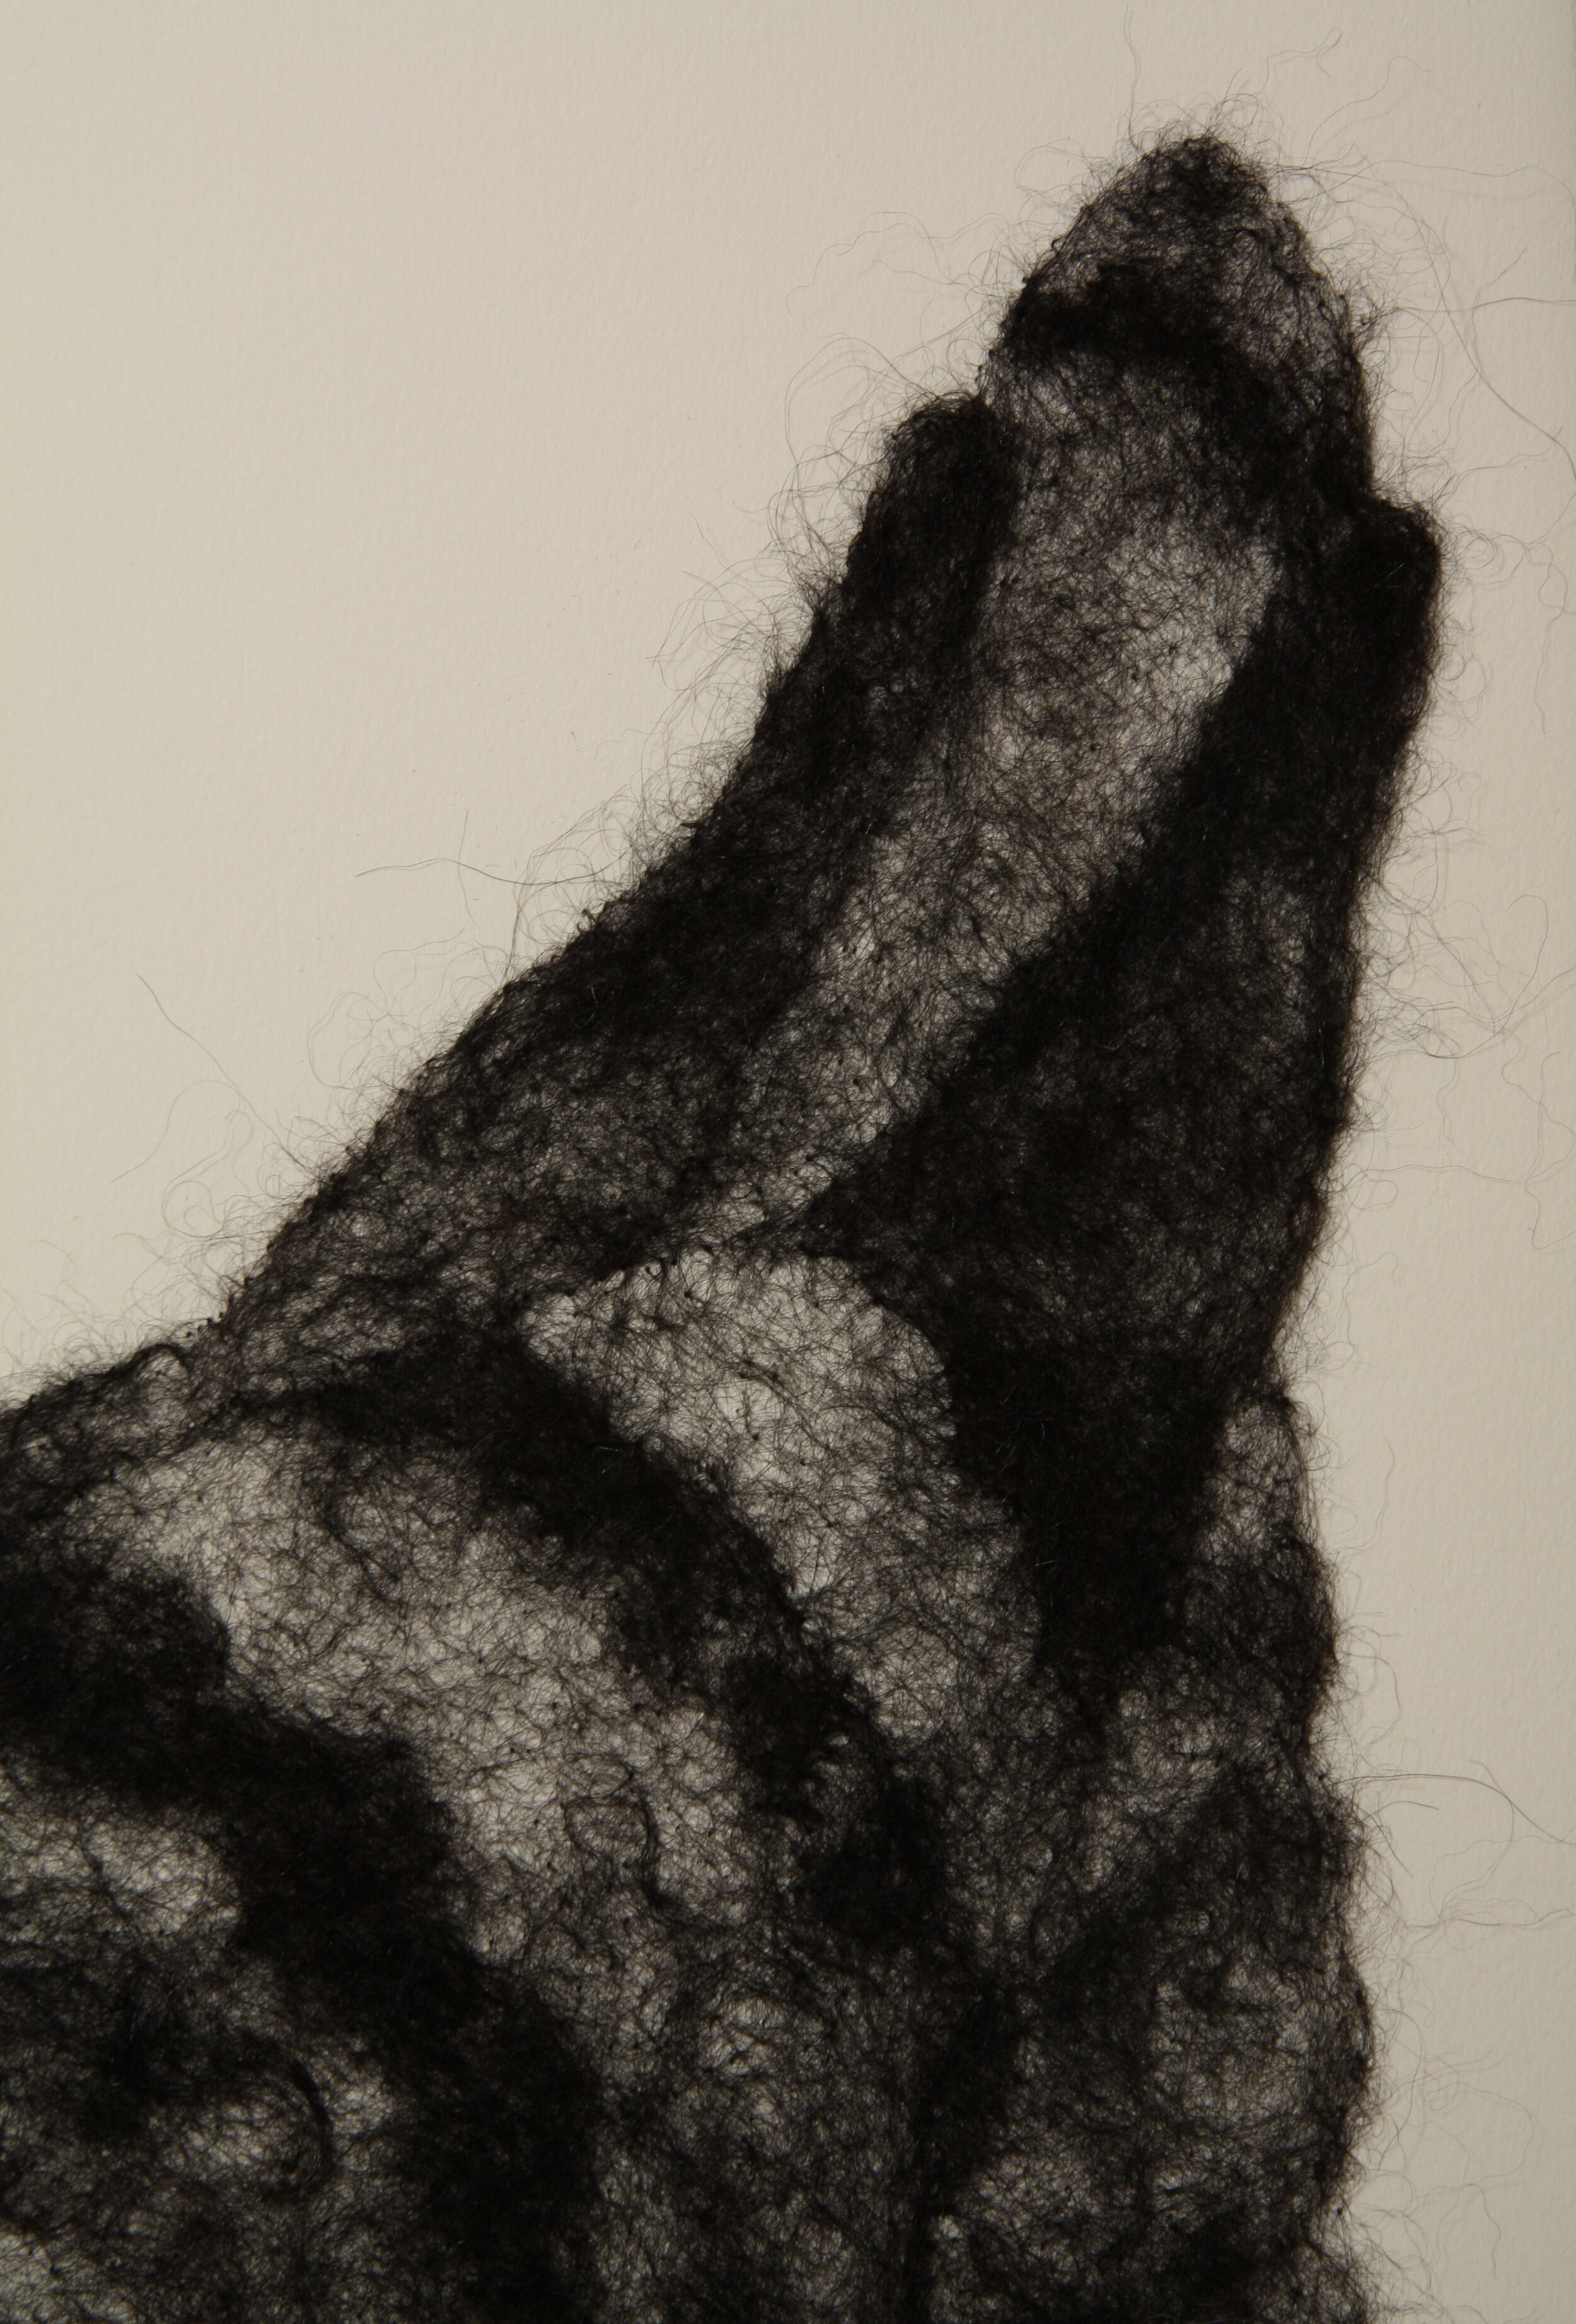
Samples showing progression from roughly humanoid shapes to increasingly detailed and realistic felt sculptures. Note that component parts have been made separately and then joined together after initial shaping.

It’s both incredibly simple in concept and brain-achingly weird at first. Needle felting has things in common with building forms in clay or riveting metal pieces together- except it’s also totally different to have the actual, physical mass of your material change depending on how much you stab at it.

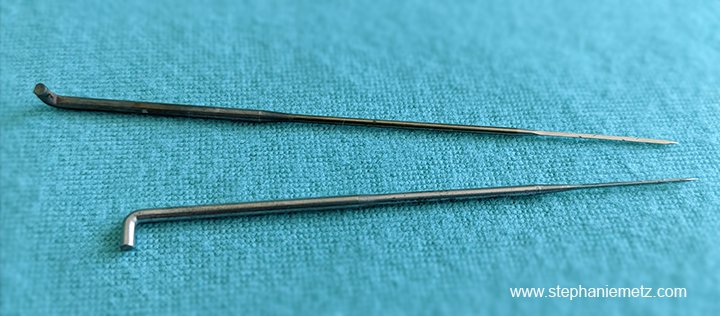
To get started you can literally just start poking at some wool with a felting needle. But of course then you’ll find that there are different kinds of felting needles out there. What’s the difference between felting needles?  Well, basically they differ in size and shape when you look at them in cross-section.

Illustration of 3 different felting needle tips showing cross section: triangle, star, and spiral.

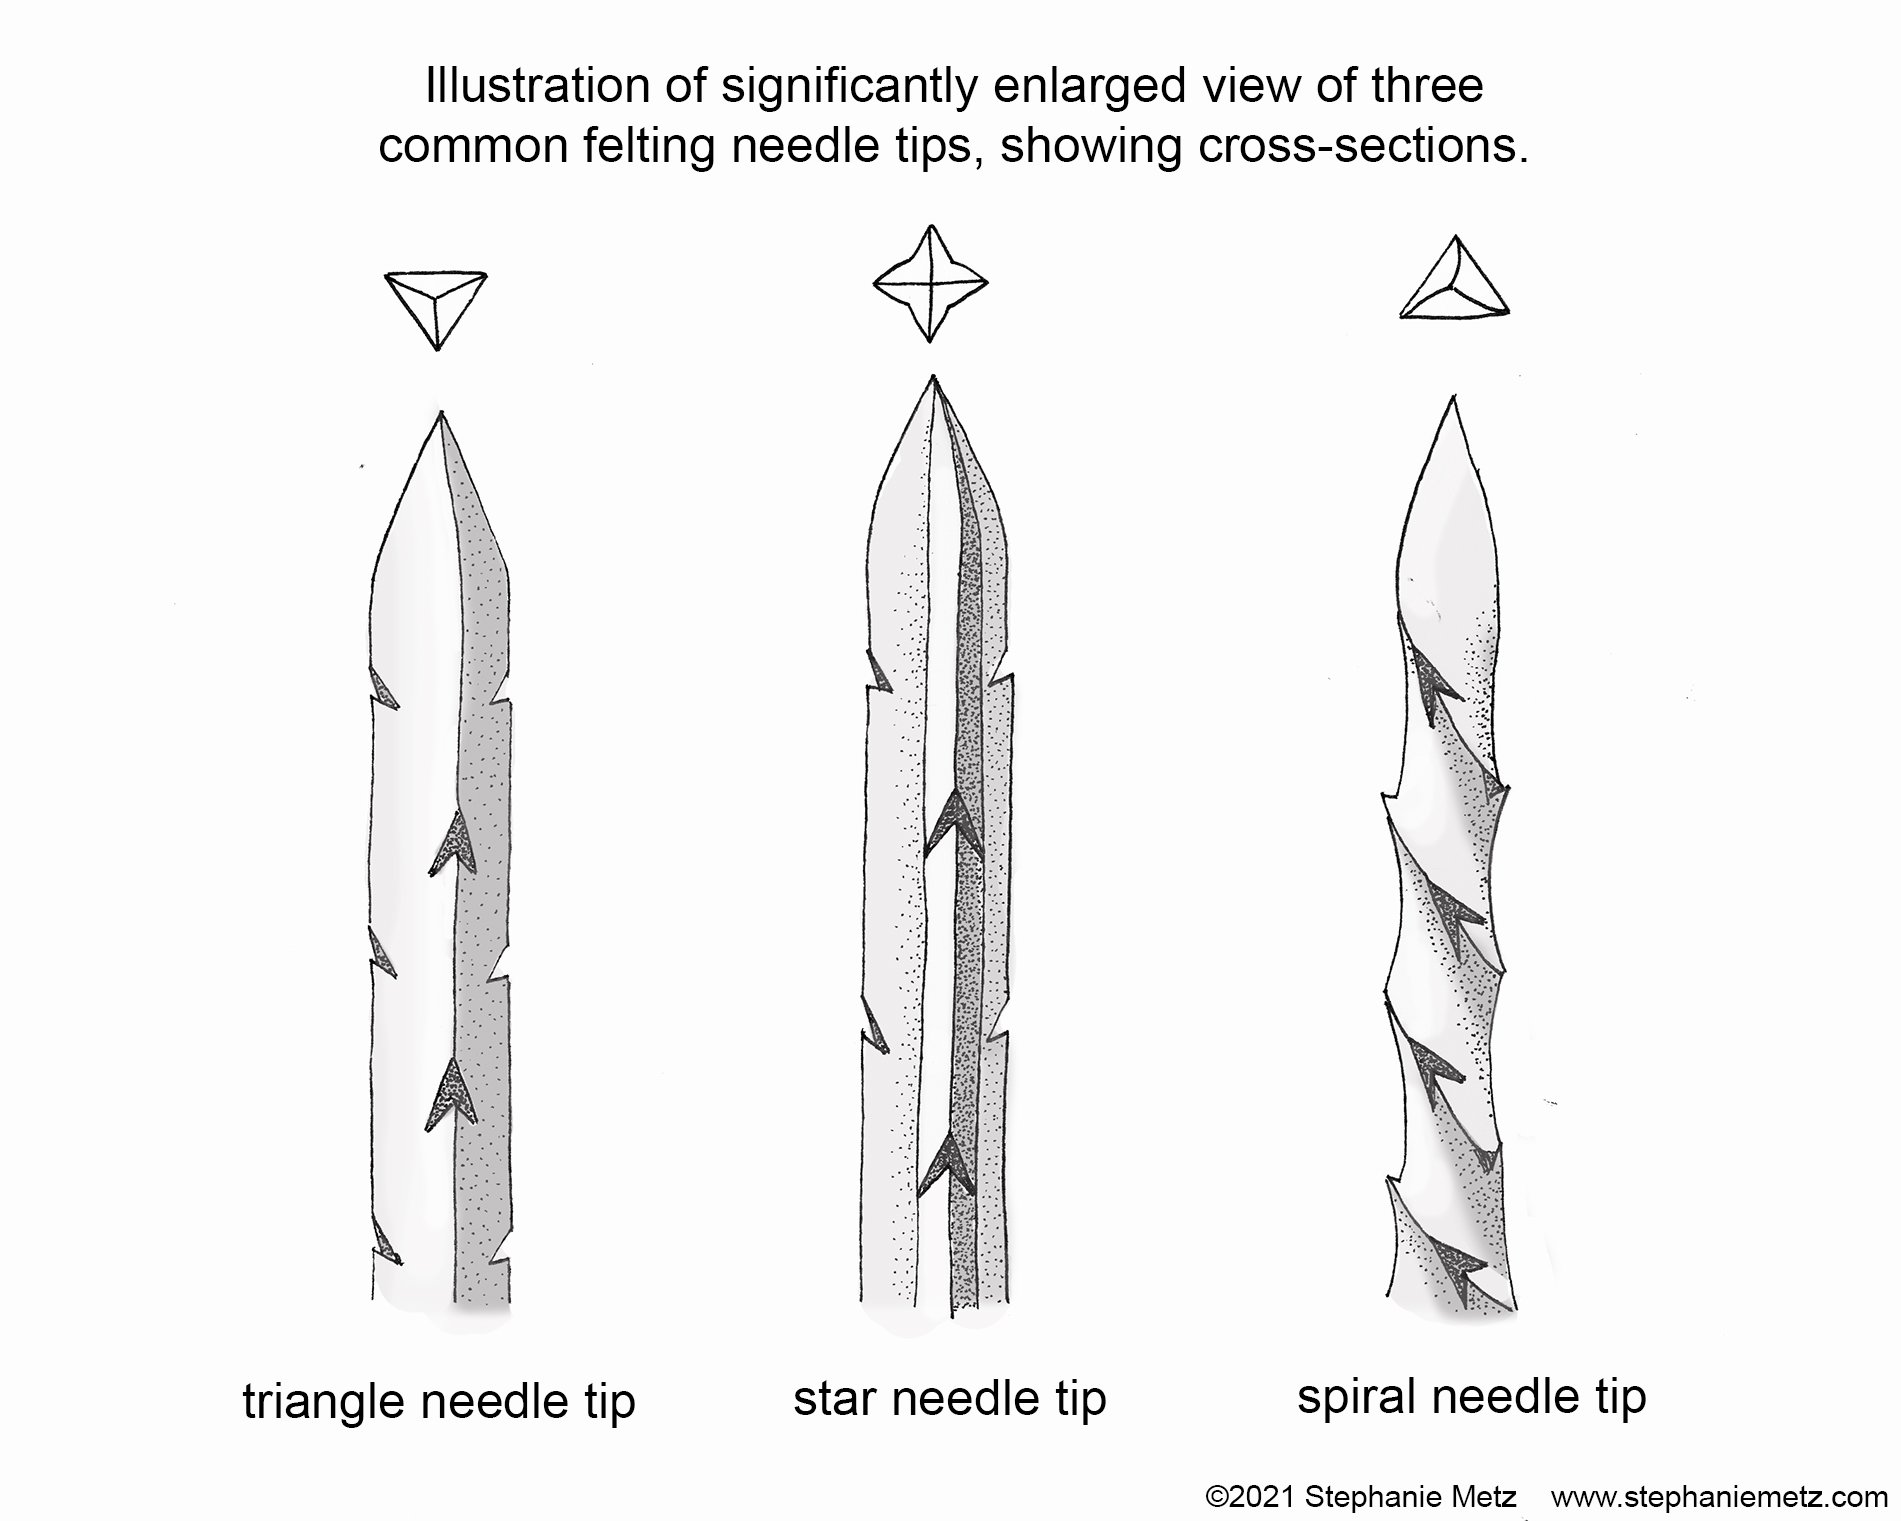
Above is a drawing showing the most common shapes of felting needles: the triangle needle has three edges that can have notches cut, while the star-shaped needle has four edges, and the spiral needle is like a triangle tip that has been twisted. Arguments can be made that the star- and spiral- shape needles do the job quicker because they have more surfaces that notches can be cut into, and more notches equals faster felting. There are people who swear by each type; I advise trying them all and seeing what feels best for you in different situations.

The size of the needle is referred to as its gauge, and the higher the number, the smaller the gauge and the diameter of the needle. 36-gauge needles are ‘coarse,’  38-gauge is all-purpose, 40-gauge is fine, and 42-gauge is the finest. You would choose a higher gauge needle for details or tiny work, or when working with very fine fiber, and a lower gauge for ‘roughing out’ a form, or when using a coarse fiber. 

Stephanie Metz poking at a human-sized wool sculpture using a wooden tool that holds multiple felting needles

Every single needle in those multi-needle holders I use is a 38-gauge triangle needle. For the size I tend to work in, that’s all I need.

I myself am not at all a felting needle connoisseur when it comes to the needle choice. I’ll admit I use a 38-gauge triangle needle for almost everything; the exception is when I’m working on something very small, and then I use a 40-gauge ‘fine’ needle. I very often use a single needle in my work (more on why in a moment) but even then I put it in a knob-shaped multi-needle holder; I only use one of the holes. That’s because pinching a single needle in your fingers is REALLY rough on your hand and arm, over and above the repetitive arm and wrist motion needle felting requires.

An important aside: I cringe when I see so many videos and photos online of very sophisticated and skilled needle felters working with a single needle pinched between their fingers. Don’t do it! Find a handle tool you like that fits and fills more of your hand and make it easier on your body. Safety is Sexy! Protect your body so you can do this as long as you want, without hurting yourself. 

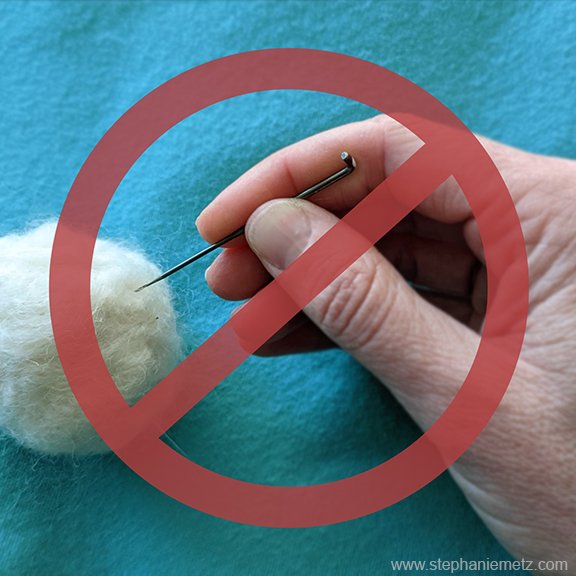
Don’t just pinch a single felting needle— it’s really hard on your hand, wrist, and arm. Use a handle— there are a wide variety of multi needle tools available (or you can make one yourself).

So there you have it: a quick introduction to felting needles. In my next post I’ll go into great depth about the ONE thing nobody seems to talk about when it comes to needle felting… I know, you can’t wait!

5 different multi-needle holders featuring wooden and plastic handles of different sizes and shapes.

The variety of multi-needle holder tools I use all the time— even with a solo needle, I still want that bigger grip for the handle.

In the meantime, you can find my recommendations and links for multi-needle holders and other felting tools here.

This is just the tip of the iceberg. If you’re ready for the iceberg, you can sign up for my in-depth sculptural needle felting video-based class here

Please comment or ask any questions below; what else do you want to know about my technique and process?

Behind the Camera- and In Front of the Camera: Making my online needle felting workshop

The bulk of my creative energy these days is going into a project that has been on my mind since the pandemic began canceling live events: an online version of my sculptural needle felting workshop. In a normal year I teach live workshops at two or three different venues, often for a weekend or a week, with occasional one-day workshops thrown in. I love teaching— the energy and enthusiasm I feel for this weird art form is echoed by my students, and we tend to have a great time together. I’m always learning more too— my students ask questions that make me think differently about what I’m doing, why, and how to communicate most effectively. I continue to find that phrasing things several different ways as I talk and demonstrate is a good way to effectively reach the whole group, since we all have different learning styles and metaphors that resonate.

So, if I love it so much, why don’t I teach more often? A lot of it comes down to time. My workshops are often week-long stints at somewhat distant venues (Penland, Arrowmont, California Sculptors Symposium) that require travel and a chunk of time away from home. It’s challenging to manage a good work/life balance with kids, husband, dog, and home when I’m totally absent for a week at a time. I’m a homebody and really love my regular life, so I do one or two week-long stints.

But that means I teach only two or three dozen students in person each year, give or take. I end up filling my workshops with attendees from all over, which is good, but then there are big waiting lists of students who don’t get to work with me. I also know that travel, time, lodging, and funds make it difficult for a lot of people to get away for a week of art camp for grown-ups.

I receive lots of emails from people who find me one way or another and want to start needle felting— but they don’t know where to begin. Or I hear from needle felters who want to know how I get the clean edges and smooth finishes on my work— and there’s only so much you can describe in words. Early in the pandemic I sent out a survey to my mailing list to ask those who might want to learn from me about what topics they’d like to learn about. I heard from beginner, intermediate, and advanced needle felters. Many were looking for more open-ended courses about varied techniques as opposed to the kind of course where you follow along to make a specific project. Many wanted to learn about making more abstract forms instead of cute small animals. Some wanted to learn about armatures and building over other materials, or integrating mixed media. Many want to learn about getting smooth finishes and building forms.

When I teach a live in-person workshop I welcome people at all levels of experience— because I think there’s a lot to learn from the way any individual artist creates her work, especially if she is good at explaining the choices and decisions and techniques she’s using. Over the years I’ve done a lot of troubleshooting and problem-solving with students to figure out what the common difficulties, frustrations, and stumbling blocks can be when it comes to sculptural needle felting. But that was my big hang-up for a long time— I’m so used to working with students one-on-one within the live workshop format, and I think that’s a really valuable aspect to teaching. I couldn’t figure out how to deal with that— because as good as I’ve gotten with Zoom, it’s still so, so hard to connect about a tangible thing when we’re not physically together. The thought of peering through my screen to try to describe how a student could turn their piece over that way and use just a single needle in that section and come at it from that angle, no, just a little closer to where that thin part joins the thick part… that seems exhausting.

So I didn’t do anything about it. For a year.

And then I realized that I still have a ton to offer when it comes to needle felting, and it doesn’t have to be all or nothing. In fact I started plotting out a class that is turning out to be a lot closer to ‘all.’ As so often happens when I get started on something exciting, it grows and develops beyond what I dreamed.

I decided to make a video-based class rather than an interactive Zoom class so I could present information in a structured way with multiple camera angles to best communicate the concepts— and students could pause, rewind, and re-watch as needed. I decided to use a combination of real-time felting with time-lapse portions so students would get a real sense of the time and work that goes in to building up and shaping felt from loose, fluffy wool— but also the satisfaction (and hope) of seeing results as they develop. I decided to build in troubleshooting to address common challenges that crop up. And at first I planned to have a class all about techniques and concepts rather than following along with specific projects. That changed as I realized that follow-along projects could really illustrate those techniques and concepts, AND be a more approachable way for beginning students to engage. So there are some cute little animals mixed in with abstract forms as separate projects within the class— and those who want to use them can, or they can be ignored. The class won’t be all things to all people, because that is truly impossible. But it will take students from the basics of form building through breaking down sculpture into its component parts, dealing with details, getting clean angles and ridges, making vessels, joining parts together, getting smooth finishes, adding color and mixed media, and an introduction to working with support in the form of armatures— building over other materials and inserting wire support.

After a lot of research I plan to release the class through Teachable, an online learning platform that offers what I want for a good user experience.

This is big. I’ve been filming and editing for four months, and I anticipate that the finished product will be ready in mid summer. I’ll have more updates and a firm date for its launch soon.

I’m really excited to share this and I can’t wait to get your feedback!

Editing workshop April 2021.jpg


Documentary as Therapy: making a movie about creating touchable, interactive sculpture in a time of no touching

After the early closure of my InTouch exhibit due to campus-wide COVID-19 precautions and County Shelter in Place Orders I was at a loss. What was meant to be a six-month-long exhibition was closed after 8 weeks— after over two years of work, truly countless hours, and the help of community members. At first there was some hope that the Artist Talk would still happen in April, or that the show could reopen before its planned closure in June… but this pandemic and its effects continue. After feeling pretty down and stuck for a while, I started putting together some footage of the show… and that made a real difference.

I had been taking photos and recording video throughout the making process, and when I started reviewing, organizing, and editing together the footage it reminded me of how much good came of the process, not just the exhibition results. I love making. I love the problem-solving of using a new material, or using an old material in a new way. I love the hands-on labor of making something tangible. I learned through InTouch that I love having people help and collaborate. InTouch was a daunting and exciting challenge, and reviewing all that went into it made me proud.

I am very grateful that I was able to take photos and videos of the finished show while it was on view, and I’m also grateful to the many friends who generously shared their footage for my use. What started off as a small project grew into a 40-minute-long video documenting the whole project, from the idea through making to the finished work. I tried to make it as short as possible while still communicating what I considered essential. I also edited together virtual walk-throughs of the two galleries of work, with my son Alex as a helpful model.

I put a lot of hours into editing, had to learn (or in some cases re-learn) software, and upgrade my poor little computer’s memory— but the making of the documentary was therapeutic. It was so good to be reminded of all the positives that came of InTouch, and continue to come of it.

If you’d like to see the results, you can visit my YouTube channel (youtube.com/c/StephanieMetzSculpture) to see the Artist Talk (offered as one long video or in 3 parts) as well as the two video tours through the Hanging Pods and the Holdables to get a visual sense of the experience.

Enjoy, and share it if you like it!

'Cat in the Sun' Wool Drawing: a video showing how I complete a drawing made by poking wool through paper

I’ve been working on some small side projects in service to the crowdfunding campaign I’m getting ready to launch. This will be my first such campaign, and I’ve been doing a lot of research on best practices. Often people use crowdfunding to launch new products, so your pledge is a pre-order of that product. I’m seeking funding to finish my InTouch public art exhibition (to pay for the steel hanging structure for the Hanging Pods, and paying studio assistants and studio rent) so I’m offering small thank you gifts. The tricky part is making sure that fulfilling those pledge gifts doesn’t take too much time and energy away from the big project they are meant to make possible.

My solution is to offer cards and prints made from scans of my wool drawings, as well as some experiential thank yous— more on that later. Below is a video of one of the drawings I’m having made into an archival 9x12-inch print. I’m calling it ‘Cat in the Sun’. I only recently learned about ‘ASMR’, and think this may fit right in.

Funding: how I'm raising money to make my touchable, interactive art installation

This past summer brought a ton of progress thanks to all the help I had from paid studio assistants and volunteers. It was a big leap forward for my studio practice to have others assist in fabricating my sculpture-- a leap that required me to get my head around the idea of not doing everything myself, and to up my funding game so that I could afford to make it happen.

One ingredient that made a lot of this possible was an Audience Engagement Grant from SV Creates, a Silicon Valley nonprofit that seeks to raise the value and visibility of the creative sector and increase access to arts and creativity. My InTouch project worked out to be a good fit with their goal to support special projects that strategically broaden or deepen connections and relationships with audiences. With InTouch I’m trying to create connections between people through my unique form of touchable art-- both in the making phase and when it is ultimately on display. But, of course, that takes money-- there are definitely costs associated with creating big museum shows-- go figure!

No one ever wants to talk about funding, and there are so many complicated and unhealthy beliefs out there about artmaking and money. You know, the idea of the Starving Artist who lives off passion (and lovers/handouts), the "I'll benevolently trade your original art/writing/music for 'Exposure' because we don't actually pay for content" racket, and so many 'pay to play' gallery situations both online and brick-and-mortar. Plus, there's the sense that if you do sell your work you’re ‘selling out’. Well, I’m going to go out on a limb and guess that most people realize that materials, tools, and workspace cost money. So, how am I funding this whole thing?

To make InTouch happen, I’ve been raising funds in several ways. Grants are just a piece of the puzzle. There are very few grants available for individual artists, and they are extremely competitive. Most of my support so far has come from individual donors and sales of my artwork. Over the past two years I’ve put over 200 hours into raising half of the budget for this project; I’m looking for some help to raise the remaining $25K so I can be working in the studio as much as I need. Would you or someone in your network be great at connecting this project with individuals, companies, and foundations that would love to support it? I’m all ears…

Explaining Myself... how I create patterns for 3D shapes using felt and styrofoam

As an artist I've always been intrigued to learn HOW other people make and do things, so of course I assume there are others like me out there. As I create this new body of work for my InTouch project I'm trying a lot of new processes (or at least scaling up and increasing quantities of known processes) and I want to share some behind-the-scenes parts of that so people can better understand what I'm doing, and perhaps why. To that end I decided to film some short bits here and there to explain what I'm doing, and this marks the first installment. This first video shows a little about the way I am figuring out patterns: starting with a model so I can determine the flat shapes that go together to cover that model in a 'skin'. If you want to see past videos and sign up to get notifications about new ones as I create them, go to my YouTube channel: http://www.youtube.com/c/StephanieMetzSculpture 

The felt pattern I created over an enlarged foam model; the small clay form on the right was a guide for carving the foam. Note the marks across the pieces so I can realign them later. 

The felt pattern I created over an enlarged foam model; the small clay form on the right was a guide for carving the foam. Note the marks across the pieces so I can realign them later. 

The flattened-out pattern pieces once they have been removed from the foam model.

The flattened-out pattern pieces once they have been removed from the foam model.